Caution: Federal Law restricts this device to sale by or on the order of a properly licensed practitioner.
Integra™
Ultrasonic Tooth Scaler
Model D680
Device Description:
The Integra is an autotune ultrasonic tooth
scaler that operates at either 25KHz or
30KHz. The Integra automatically detects
whether the handpiece contains a 25KHz
or 30KHz insert, and switches operating
frequency to match. A dramatically
expanded low-power range improves
comfort during debridement.
Intended use/indications:
For removal of calculus and plaque during
dental prophylaxis.
Contraindications:
Not for use if the patient or operator is
wearing a pacemaker, or any other internal
electronic device.
Precautions:
Caution: Water fl ow during use must be
suffi cient to cool handpiece and insert.
Do not run this device dry.
IMPORTANT: The water supply line to
the scaler should always be turned off
whenever the device is being connected,
disconnected, or when not in use.
Caution: Do not allow prolonged contact
of tip with lips, cheeks, tongue or other
soft tissues.
Caution: Take precautions to prevent
transmission of contagious diseases from
ultrasonic aerosols.
Caution: Use the sides of the tip to remove
deposits from the tooth. Do not gouge the
tooth with the point.
Caution: Precautions should be taken to
guard against entrance of water from any
source into the transformer. The
transformer should be located away
from any source of water.
Individualization of treatment:
• If patient or operator is pregnant, consult
physician concerning advisability of using
ultrasonic scalers.
• Like all scalers of this type, the handpiece
produces a small magnetic fi eld. It has
been reported that this can cause some
sensitive patient monitoring devices such
as pulse oximeters to give inconsistent or
inaccurate readings.
Conformance to Standards:
The Parkell Integra conforms to
IEC60601-1 and CAN/CSA C22.2
No. 601.1. The device is CE marked—
certifi ed to European Medical Device
Directive (93/42/EEC). Parkell’s quality
system is certifi ed to ISO9001/13485.
Included in your unit are:
• 1-Scaler Unit with an attached handpiece,
and 2-autoclavable handpiece sheaths
• 2-fl uid bottles, 1-water line with male
quick-connect coupler, and 1-detachable
foot controller
• 2-In-line Water Filters (Stock No. D419)
• 1-Transformer with cable
(Stock No. D408-120V, D403-230V)
• Instructions and Warranty registration card.
1) Disconnect the scaler from the
water supply.
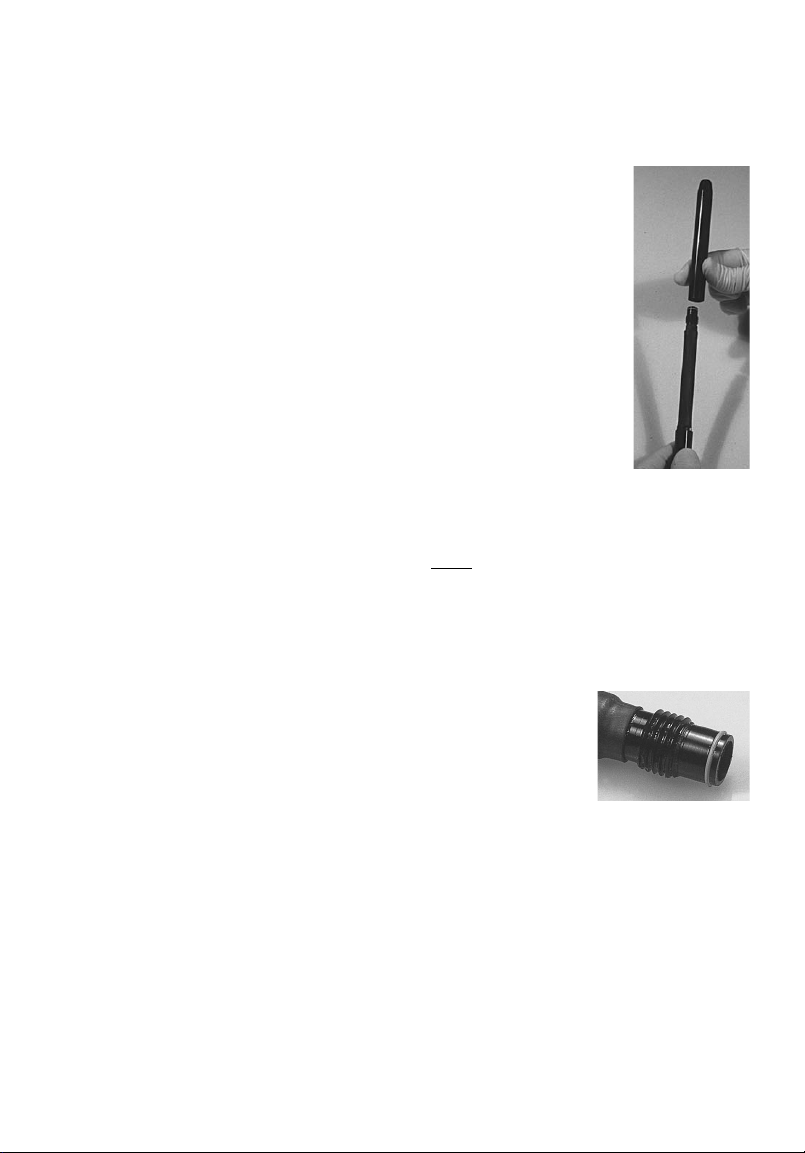
2) Remove the old fi lter disk by holding it
in one hand and twisting off the hose
connectors on either side. (They rotate in
opposite directions.)
3) Install the replacement fi lter disk, and
fi rmly tighten the connectors using
hand pressure.
4) Reconnect the scaler to the water supply
and check for leaks.
(Note: If the fi lter becomes clogged
and you do not have a replacement disk,
the hose connectors can be locked
together without the fi lter disk to allow
emergency operation.)
If you have any questions, please contact
Parkell Service Dept. at (1-800-243-7446).
Replacement Filters (10 per package):
Stock No. D419
General comments on scaling:
■Ultrasonic scalers should be used only by
trained, licensed professionals.
■Inserts and the handpiece sheath should be
sterilized before each use.
■ Do not operate unit without water fl owing.
■Use of face mask is recommended when
operating this device, to avoid inhalation
of contaminated aerosol by the operator.
High-volume suction to remove this
aerosol from the dental environment (as
close to the source as possible) is also
recommended.
■Use the lowest effective scaling power
for the case at hand. This keeps heat
generation to a minimum.
■Before using the insert in the oral cavity,
adjust the water spray over sink or
cuspidor until desired mist is obtained. For
maximum patient comfort, use a good fl ow
of water which acts as coolant, lubricant
and lavage to fl ush out debris.
■If patient is new to ultrasonic scaling,
tell him/her what to expect. If procedure
becomes uncomfortable, adjust power and
water controls accordingly.
■Grasp handpiece in a comfortable manner,
like holding a pen. To remove deposits
from teeth, always use a light brushing
stroke with the side of the insert tip in
contact with the tooth surface. Excess
pressure will not improve scaling action,
but may cause heating and pain to the
patient. Keep the scaler insert in motion at
all times and use repeated gentle strokes to
remove all tenacious deposits.
■Exercise caution near porcelain and resin
restorations as they can fracture.
■ Occasionally turn unit off to evaluate
deposit removal with an explorer.
■ If you test any scaler tip on your fi ngers
while operating, it will feel uncomfortably
hot. This is not a true test of how it feels
on a tooth. To operate, adjust the power
control to the minimum setting for the case
at hand (start at zero). With a good water
fl ow, the patient will not experience any
uncomfortable heat.
Common operator errors:
■Failure to keep insert tip parallel with the
long axis of the tooth surface.
■Excessive use of hand pressure.
■Failure to use the lowest effective power
setting for the case at hand.
■ Insuffi cient water fl ow.
■Scaling with the point of the insert instead
of the side.
These failures in procedure can result in
ineffective or incomplete removal of
deposits and possible damage to the pulp or
tooth structure.
TROUBLESHOOTING
Unit does not operate (‘power on’ indicator
does not light)
■Transformer cable disconnected from wall
outlet or scaler
■ Wall outlet not live
■Unit fuse has failed (Contact Parkell)
Insert does not vibrate properly
■Faulty, damaged or worn insert
■Insert not correctly seated in handpiece
■Power control not correctly adjusted
Excess heat at handpiece or tip of insert
■Faulty, damaged or worn insert
■ Too little water fl ow (insert blocked)
■Power too high for the amount of water
■Excessive hand pressure applied
No water spray
■ Water line blocked or kinked
■ Water fi lter clogged
■ Water canal in insert blocked
■ No water supply
■ Water bottles empty
Insert does not go into handpiece
■ Lubricate ‘O’ ring with water and use
twisting motion to seat insert
Insert falls out of handpiece or water leaks
from front of handpiece
■ ‘O’ ring damaged or worn. Replace ‘O’
ring on insert.
Additional Specifi cations:
■ Protection Against Electric Shock—Class
1, Type B applied part
■ Equipment not suitable for use in the
presence of a fl ammable anesthetic mixture
(when used with air or with oxygen).
■ Protection Against Ingress of Liquids—
Foot Switch & Scaler - IPX1 (drip-proof),
Power Supply - IPX0 (Ordinary)
■ Mode of Operation of Equipment—
Intermittent: 66% duty cycle, 10 minutes
on, 5 minutes off.
■ Operating conditions: 15-35°C, 10-80%
RH (non-condensing)
■ Transport and Storage conditions: 10-
40°C, 10-80% RH (non-condensing)
■ As an additional safety feature, the
microprocessor will reduce the output
power in the unlikely event the device is
left running, other than in normal usage.
This equipment produces electromagnetic
energy and may cause interference with
other electronic devices. Should this occur,
changing the positioning or location of the
device may be necessary.
The power supply line cord is the AC power
disconnect device for the scaler.
The symbol on the scaler indicates the
Protective Earth connection.
The symbol or is intended to
alert the user to the presence of important
operating and maintenance (servicing)
instructions in the literature accompanying
the scaler.
Service:
The handpiece sheath, power supply, foot
pedal, water fi lter, dip tubes, bottles and
ultrasonic inserts are all detachable and may
be replaced by the user. Contact Parkell for
a list of authorized inserts. Otherwise, there
are No User Serviceable Items in this scaler,
including the foot controller.
For service, return the unit freight prepaid
and carefully packed to Parkell Repair Dept.,
300 Executive Drive, Edgewood, NY 11717,
with an explanation of problem. During the
warranty period, the unit will be repaired and
returned to you. After the warranty period,
we will call with an estimate and request
approval.
If you have any questions or a problem with
the installation or use of your scaler, please
call our Toll-Free Technical Support Service
at 1-800-243-7446 from 9am to 5:30pm
Eastern time (outside USA and Canada,
call 631-249-1134).
European Authorized Representative (Not a dealer/distributor): EMERGO EUROPE
Molenstraat 15, 2513 BH, The Hague, The Netherlands • Tel: +31 (0)70 345 8570 • Fax: +31 (0)70 346 7299
300 Executive Drive, Edgewood, NY 11717
Toll-Free: 1-800-243-7446 • Phone: 631-249-1134 • Fax: 631-249-1242
E-mail: info@parkell.com • www.parkell.com • Made in U.S.A. A00545revB0313