parkell TurboSensor + User manual

ULTRASONIC SCALER
hD660
MD Rx ONLY
This manual, in whole or in part, should not be considered a substitute for formal
training in ultrasonic scaling. Appropriate dental professional education is strongly
recommended prior to using this device clinically.
A01156revA0722
English
Instructions for Use
Parkell Technical Support Service
(800) 243-7446
M-F from 8:30 AM to 5:00 PM EST

2 Parkell.com | Questions? Contact Parkell Technical Support at (800) 243-7446
Table of Contents
Device Description.................................................3
Indications for Use..................................................3
Contraindications to Use........................................3
Warnings.................................................................3
Clinical Precautions............................................... 4
Inserts..................................................................... 4
Installing Your Scaler............................................. 4
Water Connection................................................. 4
Controlling the Water Flow................................... 4
Electrical Connection............................................ 4
Use of 30KHz Detachable Handpiece...................5
Turning on the Scaler and
Controlling the Power Output...............................5
Purging....................................................................5
Priming the Handpiece.......................................... 6
Clinical Suggestions on Tooth Scaling................. 6
Common Operator Errors that
May Result in Poor Clinical Performance............. 6
Cleaning and Infection Control............................. 6
How to Replace the Filter Disk..............................7
Troubleshooting......................................................7
User Maintenance and Authorized Service......... 8
Warranty and Terms of Use.................................. 8
Conformance to Standards................................... 8
Explanation of Symbols Used............................... 8
Specifications
Power: Input: 100-240 VAC, 1.0-2.0 A, 50/60 Hz;
Output: 24 VDC, 3.0 A, 2.5mm, Center Positive
Weight: 0.73 Kg / 1.60 lbs.
Size: 1 ½” H x 5 ½” W x 7 ½” D
Weight of Transformer: 0.6 lbs. (270g)
Length of
Handpiece Cable: 7’ (215cm)
Length of
Foot Pedal Cable: 7’ (215cm)
Length of Water Hose: 7’6” (230cm)
Length of Power Cord: 110V: 12’6” (380cm); 220/230V: 7’6” (230cm)
Handpiece Operating
Frequency: 30 KHz (hD722)
Protection Against
Electric Shock: Class 1, Type B applied part
Protection Against
Ingress of Liquids:
Foot Switch & Scaler: IPX1 (drip proof);
Power Supply: IPX0 (Ordinary)
Mode of Operation
of Equipment: Intermittent – 10 minutes on, 5 minutes o
Operating Conditions: 15 – 30°C, 20 – 70% RH (non-condensing)
Transport and
Storage Conditions: -17°– 40°C, 20 – 70% RH (non-condensing)
What’s Included
• (1) Magnetostrictive Scaler Control Unit with
attached handpiece cable, foot controller and
water line (with male quick-connect coupler);
(hD660)
• (1) Detachable, autoclavable 30K handpiece
(hD722)
• (1) Universal Power Adapter with attached cable
(4 ft / 2.5 mm jack) (hD723).
• (1) Power Adapter Line Cord (6 ft) (hD7579-G).
• (1) Water line with standard chrome male
quick-connect coupler.
• (2) Inline water filters (1) attached to water line).
(10-pack Replacement hD419).
• (1) Operator’s Manual / Instructions for Use
This precision dental device was designed, manufactured and is
serviced in the United States of America by:
Parkell, Inc.,
300 Executive Drive, Edgewood, NY 11717
Toll-Free: (800) 243-7446 • Phone: (631) 249-1134
UKRP: Topdental (Products) Ltd.,
12 Ryefield Way,
Silsden,
West Yorkshire BD20, 0EF England UK

Questions? Contact Parkell Technical Support at (800) 243-7446 | Parkell.com 3
Device Description
The TurboSensor®+ is a magnetostrictive ultrasonic scaler (D660)
that operates at a frequency of 30KHz, which translates to the
insert tip vibrating 30,000 times per second during active scaling.
The TurboSensor+ features a fully detachable and autoclavable
handpiece for enhanced reprocessing and infection control
between patients (D722). It also features an IntelliSense™ processor
for ensuring top-level, consistent performance with all Parkell and
market-leading 30k inserts. For more information about usage with
non-Parkell inserts, please see Parkell’s warranty information.
The TurboSensor+ also features: a tap-on “purge” mode for
waterline cleansing; a “priming” mode for preparing the handpiece
to begin scaling with the first compression of the foot pedal; a
“press and hold” turbo feature for assistance in removing
challenging deposits if required; and a more precise water flow
system for heightened aerosol control.
Indications for Use
For removal of calculus, plaque, and oral debris from teeth during
dental prophylaxis/scaling.
Contraindications to Use
Because of the potential for electromagnetic interference, this
device should not be used on patients or by clinicians with cardiac
pacemakers, internal defibrillators, intracorporeal fluid pumps or
any other implantable electronic devices, or in close proximity to
sensitive patient monitoring devices such as pulse oximeters.
If patient or operator is pregnant or has any medical condition
which might be aected by this device during treatment, consult a
physician prior to use.
In case of an adverse event, discontinue the scaling procedure.
Warnings
• Close manual shut-o valve on the dental oce water supply
every night before leaving the oce.
• The water / fluid supply line to the scaler should always be
turned o whenever the device is being connected,
disconnected, or when not in use.
• Turn the scaler power o every night before leaving the oce
with the rocker switch on the back. When power is o, the green
LED on the front panel will turn o.
• Locate the scaler and power adapter above and away from
sources of fluid that may enter them. Always ensure that the
electrical connections on the handpiece cable and the handpiece
are clean and dry before assembling them for use.
• As with all electrical devices, the unit should not be immersed in
fluids, and fluids should not be allowed to enter the unit through
front or rear panel slots. Do not reach for the device if it has
fallen into liquid until power is disconnected and do not use the
device. Return it to Parkell for servicing. Modifying device
violates safety codes, endangers patients and operators, and
voids the warranty.
• Use of this equipment adjacent to or stacked with other
equipment should be avoided.
• Only use the provided power supply by the manufacturer along
with the unit.
• This equipment produces electromagnetic energy and may cause
interference with other electronic devices. Should this occur,
changing the position or location of the unit may be necessary.
• Use of accessories other than those specified / provided by the
manufacturer of this equipment could result in increased
electromagnetic emissions, decreased electromagnetic
immunity or improper operation.
• The system is portable but must be handled with care when
moving. Do not place the system on or next to a radiator or
other heat source. Excessive heat may damage the system’s
electronics. Place the system where air is free to circulate on all
sides and beneath it.
• Failure to follow properly validated sterilization processes and
approved aseptic techniques for Parkell inserts or handpieces
may result in cross contamination.
• Insucient water flow could result in elevated water and the tip as
well as insert stack temperature. When operated with sucient
water flow, the water and tip temperature should not exceed 50°C
(122°F). Failure to follow recommendations could result in injury to
patients or users. If temperature is elevated, increase water flow. If
temperature remains elevated, discontinue use and contact Parkell.
• Portable RF communications equipment (including peripherals
such as antenna cables and external antennas) should be used
no closer than 30 cm (12 inches) to any part of the [ME
EQUIPMENT or ME SYSTEM], including cables specified by the
Detachable
Autoclavable Handpiece.
Frequency: 30KHz
Water Control
Knob
Purge Light—lights ON when
PURGE mode is initiated.
Power Control
Knob
ON Indicator Light—Lights
ON when unit is turned on.
TURBO Light— Indicates the device is operating on
high-power TURBO mode (footswitch fully depressed)
Power Adapter Connection
Main Power Control
Rocker Switch
Water Connection

4 Parkell.com | Questions? Contact Parkell Technical Support at (800) 243-7446
manufacturer. Otherwise, degradation of the performance of
this equipment could result.
•This equipment is not suitable for use in the presence of a
flammable anesthetic gas mixture (when used along with air
or oxygen).
Clinical Precautions
• Although the following precautions may be common sense to the
experienced user of ultrasonic scalers, they bear repeating in the
interest of safety, and the management of unnecessary risk.
•Ultrasonic scalers should only be used by trained, dental
professionals.
• Use of appropriate personal protection equipment and high-
volume intraoral suction is strongly recommended when operating
this device, to avoid exposure to contaminated aerosols.
•DO NOT OPERATE UNIT WITHOUT WATER FLOWING. Water
flow through tip during use must always be enough to cool
handpiece and insert.
• Do not allow prolonged contact of insert tip with lips, cheek,
tongue, or other soft tissues. Insert tips are sharp and should be
used carefully.
•Handpiece and inserts supplied along with the unit are not
sterile and needs to cleaned and sterilized in autoclave by the
user prior to the first use and before each use, as specified on
the insert package instructions and in Infection Control
procedure specified in this instruction manual.
• To keep heat generation to minimum, use the lowest scaling
power that is eective.
•Before using the insert in the oral cavity, adjust water mist by
varying the POWER & WATER settings.
• For patient comfort, use a generous flow of water as a coolant,
lubricant, and debris flush.
•If patient is new to ultrasonic scaling, explain to them what to
expect. When done properly, the patient should not experience
any uncomfortable heat. If patient experiences excessive heat,
adjust POWER and WATER controls accordingly, or examine
inserts for wear or damage.
• Do not test a scaler tip on your fingers while operating, as this is
not a valid test of how scaling feels to the patient. If you touch
the tip, it will feel uncomfortably hot to your fingers.
•Hold the handpiece in a comfortable pen-grasp. Elevated heat
may be felt if the lighted handpiece is gripped where the insert
meets the handpiece.
• Keep the long axis of the insert tip parallel to the long axis of the
tooth to wipe deposits from the tooth with a light, brushing
stroke with the side of the insert. Do not gouge the tooth with
the point of the tip.
•Excess pressure will not improve scaling eciency and may
cause overheating of the tooth and pain to the patient. Keep the
scaler insert in motion always, using repeated gentle strokes to
remove all tenacious deposits.
• Occasionally pause during scaling by removing foot from pedal
to evaluate deposit removal. Exercise caution near ceramic or
resin restorations, as they can fracture if stressed.
Inserts
Magnetostrictive Inserts for the TurboSensor+ scaler are available
separately and are not included with the basic scaler unit. The unit
is designed to work with all Parkell and other market-leading 30KHz
inserts. Brand new inserts may fit very tightly in the handpiece
initially and may be inserted and removed more easily by using a
slight twisting motion, and by lubricating the insert “O” ring with
water. Old, worn, or blunt inserts will perform poorly, generate
excess heat, and should be replaced when necessary.
Installing Your Scaler
• Parkell TurboSensor+ System is designed to rest on a level
surface. Be sure the unit is stable. This will assure that an
accidental pull on the handpiece or corded foot pedal does not
cause the unit to fall onto the floor.
•The scaler requires access to a source of drinking-quality water
and a grounded electrical outlet.
• Locate the control unit such that it can be easily disconnected
form the mains power line in case it needs to be disconnected
for any reasons. Disconnection form the mains power line can
be accomplished by removing the power cord from the wall
plug, removing the power cord from the in-line “power supply
adapter” or by removing the 2.5 mm metal plug connector from
the back of the scaler.
•Install the scaler where control panel and foot pedal will be easy
to reach during scaling procedures.
• The rear of the unit requires access so the water filter may be
changed periodically without diculty.
•The device and its separate power adapter generate a minimal
amount of heat. Avoid covering them to allow normal cooling.
Water Connection
Before plugging in the device, connect the scaler’s water line to a
drinking-quality water supply (15-35 psi optimal), free of sediment.
An external, oce-wide water filter is recommended to minimize
frequent changes of the device’s in-line water filter.
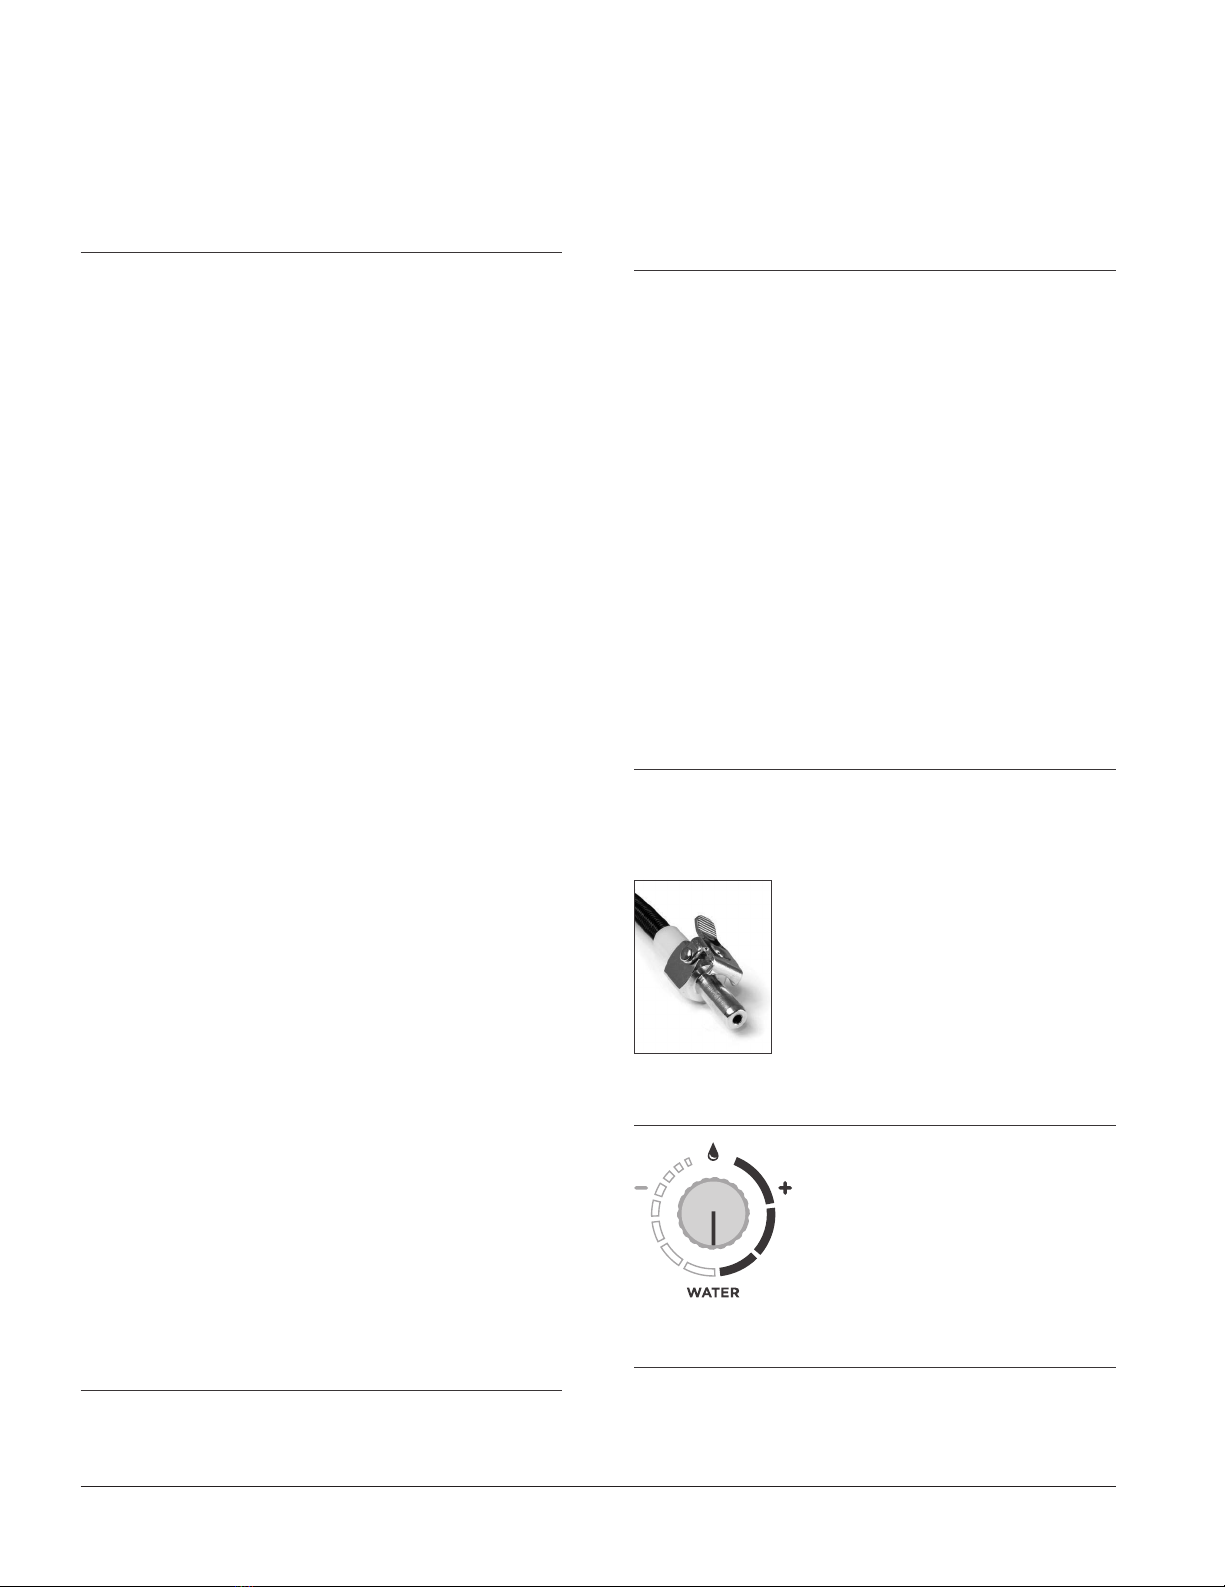
The male quick-connect that comes on the
end of the water hose is the standard fitting
presently used in the dental industry. If you
are replacing a scaler that uses an Adec-
type or other type of connection, remove
the old fitting from the unit hose and attach
it to the new water line. Check for leaks at all
hose and filter connections before use, and
tighten if necessary.
Controlling the Water Flow
Observing the arrow printed on the
control panel, turn the water control
counter- clockwise to increase the flow,
or clockwise to decrease water flow. If
water does not flow through the insert
when the foot pedal is depressed, the
water passage in the scaling insert may
be clogged.
Electrical Connection
The scaler must only be powered via the power supply assembly
that is supplied with the device by Parkell. Power supply provided
by Parkell is a Medical-Grade, IEC 60601 compliant, TUV approved

Questions? Contact Parkell Technical Support at (800) 243-7446 | Parkell.com 5
switching power supply adapter with Input being 100-240 VAC,
1.0-2.0 Amp, 50/60 Hz and Output being 24 VDC, 3.0 Amp.
• Insert the 2.5 mm metal plug from the Power Adapter into the
back of the scaler.
• Insert the supplied AC cord female plug into the Power Adapter.
• Plug the male AC power cord into any grounded electrical outlet.
Use of 30KHz
Detachable Handpiece
The TurboSensor® + is provided with a 30KHz detachable handpiece.
The handpieces do not come sterilized and must be autoclaved
prior to initial use.
To attach the cable to the handpiece, align the small groove in the plug
with the mating groove in the jack and push the connector gently until
it “clicks”. Removal is accomplished by rotating the hose collar and
gently withdrawing the connector from the handpiece.
Turning on the Scaler and
Controlling the Power Output
The unit provides a rocker switch on the rear panel for Main Power
Control. UP position of the switch turns the device ON. Green LED
on the front panel would illuminate indicating powered ON status
of the device. DOWN position of the switch on the rear panel would
turn the device and Green LED indicator OFF.
Scaling will be activated upon pressing the foot switch once the
device is turned ON. The pedal should be placed where it will not
accidentally be pressed when the device is not in use.
The TurboSensor+ gives you two ways to adjust the scaling power,
by using the Power Control Knob for normal operation, or by
depressing the Foot Pedal to enter the “Turbo Mode”.
POWER
Use the Power Control Knob to set the initial
scaling power. Rotate the knob in a
clockwise direction to increase the power,
or counterclockwise to decrease the power.
When starting a procedure, use the Power
Control Knob to set the power to “Medium”.
When the foot pedal is slightly depressed to
the first position, the insert will begin
vibrating at medium power. Then adjust the power up or down based
the specific needs for the case being treated
Use the “Turbo Mode” for short-term increases in power during
scaling. Using increased foot pressure, fully depress the foot pedal
to the floor to enter “Turbo” mode. A yellow indicator light will
illuminate on the front panel to confirm the scaler is operating at
“Turbo” power. Scaling power to a point midway between the
current setting and the scaler’s maximum power.
Engaging the Turbo feature at a low power setting causes a
significant boost in power.
Engaging the Turbo feature at high power will produce very
little change.
Since water flow is not aected by “Turbo Mode”, extended
procedures may require a water adjustment.
Partially lifting your foot o the pedal will return the scaler to
normal, “non- Turbo” mode. Releasing your foot completely o the
pedal will deactivate scaling. Green LED indicator will NOT turn
OFF, as it indicates device ON status.
Purging
Per CDC recommendations, waterlines should be purged based on
the following schedules:
• Two minutes at the start and end of each day.
• 20 seconds between patients.
The TurboSensor+ offers the following
exclusive Purge features:
• Purging ONLY with the handpiece detached from the cable to
prevent contamination of an autoclaved handpiece.
• Convenience of a foot controlled “Tap-On” Purge.
How to Purge
1. Confirm the unit is ON and that the green LED on the front
panel is illuminated.
2. Disconnect the detachable-autoclavable handpiece from
the cable.
3. Adjust the water control to Maximum flow.
4. Hold the cable end over a sink or drain.
5. Depress the foot pedal for more than 2 seconds to activate
purge mode.
a. When initial pressure is applied to the foot pedal, a short
burst of water will be expelled from the cable to confirm
purge mode is being activated.
b. After two seconds, a steady stream of water will flow, and
the Purge LED will begin to pulse.
c. Once water flow is continuous, and the Purge indicator
LED pulses, foot pedal pressure can be released without
interruption of the purge cycle.
6. The Purge light will pulse for the first 20 seconds of the purge
cycle after which it will stay constantly on for an additional 1
minute 40 seconds. (2 minutes of total purge time).
7. When the Purge light changes from pulse to constant the 20
second purge cycle for between patient waterline purging is
complete. Depress the foot pedal to stop purging.
8. The beginning and end of day purge cycle will automatically
shut o after 2 minutes.
Safety Feature: Deactivation of the purge cycle can be manually
accomplished at any time by tapping the foot pedal.

6 Parkell.com | Questions? Contact Parkell Technical Support at (800) 243-7446
Priming the Handpiece
1. Confirm the unit is ON and that the green LED on the front
panel is illuminated.
2.
Attach an autoclaved handpiece to the handpiece cable that has
already been purged. Make sure there is no insert connected into
the handpiece. (Purging the waterlines can only be accomplished
when the handpiece is not connected to the cable.)
3. Hold the handpiece in an upright position.
4. Depress the foot pedal.
5. Water will begin to flow and fill the handpiece. Priming of the
handpiece should be done with a water setting between
medium and maximum flow. (The lower the setting the
longer it will take to prime and fill the handpiece with water.)
6. To stop water flow into the handpiece, remove foot from
foot pedal.
7. An insert may now be placed into the handpiece for scaling.
Clinical Suggestions
on Tooth Scaling
• To prevent any potential injury to the patient, ultrasonic scalers
should be used by trained, dental professionals only.
• Protect patient’s eyes, lips, cheek, tongue or other vulnerable
soft tissues when using this device. Inadvertent contact with
Insert tip may cause a slight burn.
• Inserts and detachable handpiece must be sterilized before
each use.
• Use of a face mask by the clinician, and high-volume intraoral
suction, is strongly recommended when operating this device to
avoid inhalation of contaminated aerosols.
• To prevent a possible slight burn to the patient or clinician,
NEVER OPERATE UNIT WITHOUT WATER FLOWING.
• Use the lowest eective scaling power for the case at hand. This
keeps heat generation to a minimum.
• Before using the insert in the oral cavity, adjust the water spray
following the graphics on the faceplate of the scaler over a sink
or cuspidor until desired mist is obtained. Good water flow will
act as a coolant and aid in flushing out debris to maximize
patient comfort.
• If patient is new to ultrasonic scaling, explain to them what to
expect. Usually, the patient should not experience discomfort. If
patient experiences uncomfortable heat, adjust power and
water controls accordingly.
• Do not test a scaler tip for vibration on your fingers while the
unit is operating. This is not a valid test of how scaling feels to
the patient.
•Hold the handpiece in a comfortable pen-grasp. To remove
deposits from teeth, always use a light brushing stroke with the
side of the insert tip, in contact with and parallel to the root surface.
Excess pressure will not improve scaling action but may cause
heating and pain to the patient. Keep the scaler insert in motion,
using repeated gentle strokes to remove all tenacious deposits.
• If the patient experiences discomfort due to the sound and
vibration from the Scaling procedure, provide ear protection.
•Do not use the point of the insert on the tooth surface. You may
gouge the tooth.
•Pause occasionally during scaling by removing foot from pedal
to evaluate deposit removal.
• Exercise caution near ceramic restorations, as they can discolor
or fracture if stressed.
Common Operator Errors that May
Result in Poor Clinical Performance
• Failure to keep insert tip parallel to the long axis of the tooth.
• Excessive use of hand pressure.
• Failure to use the lowest eective power setting for the case
at hand.
• Insucient water flow.
• Scaling with the point of the insert instead of the side.
• Inserts that are damaged, bent or worn out.
Cleaning and Infection Control
• Consult www.CDC.gov for the “Guidelines for Infection Control in
Dental Health - Care Settings” and “Statement on Reprocessing
Dental Handpieces”.
• DO NOT AUTOCLAVE the TurboSensor+ control unit, as
autoclave heat will destroy it. The control unit should be cleaned
of debris with a water-damp paper towel, disinfected by wiping
with a paper towel that has been saturated with an EPA-
registered low-level (HIV/HBV claim) to intermediate-level
(tuberculocidal claim) hospital disinfectant, wiped of chemical
residue with a water- damp paper towel, and dried. Utilize the
surface disinfecting protocol of the disinfectant manufacturer.
• Autoclaving does not remove debris that has accumulated on
the handpiece or the insert. Failure to adequately remove debris
will result in inadequate sterilization. Rinse the handpiece, and
the insert under warm running water for 30 seconds to remove
any external or internal soil or debris. Using a soft soapy cleaning
brush to assist in the cleaning, if necessary. Use non-ammoniated
detergent or dishwashing soap. Do not use ammoniated
cleansers or disinfectants. Rinse the devices again under warm
running water for 30 seconds to remove any residual soap and
blot dry with a dry lint-free towel. Wipe Insert with a lint free
towel that has been saturated in an EPA-approved, hospital-
grade intermediate or high-level disinfectant (minimum 2.5%
Glutaraldehyde solution), following the instructions for use
provided by the disinfectant manufacturer. Dry the devices with
a dry lint-free towel.
• The handpiece and inserts may be sterilized in any conventional
steam autoclave following manufacturer’s instructions. A
typical steam sterilization cycle is 132 +/- 2°C for 4 mins.
(Vacuum) or 132 +/- 2°C for 15 mins. (Gravity), followed by a
15-minute minimum cool-down period. Use a steam sterilization
pouch that is compliant with ISO 1140-1 Type 4 and 11607
standards. Once items are sterilized, adhere to the shelf-life
specified by the pouch manufacturer. After sterilization, inspect
the device in the autoclave bag for integrity. If suspicion about
the item exists, discard it and order a replacement from Parkell
or your dealer.
• DO NOT USE DRY HEAT OR CHEMCLAVE on the handpiece or
the insert.
•The handpieces are designed to withstand a minimum of 1,000
autoclaving cycles when reprocessed.
•The ultrasonic inserts from Parkell are designed to withstand a
minimum of 500 autoclaving cycles when reprocessed.

Questions? Contact Parkell Technical Support at (800) 243-7446 | Parkell.com 7
How to Replace the Filter Disk
The water filter disk coming o the rear hose of the unit should be
replaced when it becomes dark or clogged with debris so that water
flow is not blocked (1-3 months).
Replacement Filters are available from Parkell (package of 10
filters— hD419).
1. Close any water valves and bleed all water lines of residual
water pressure.
2. Disconnect the scaler water supply hose from the water
supply at the quick-connect.
3. Remove the old filter disk by holding it in one hand and
loosening it by twisting it o the hose connectors on either
side. They rotate in opposite directions.
4. Install the new filter disk in the same position as the old one
and tighten the connectors in reverse.
5. Reconnect the scaler water supply hose to the water supply
via the quick-connect and check for leaks.
6. Engage PURGE mode to allow water to flow out the end of
the handpiece into a sink.
Note: If the filter becomes clogged and you do not have a
replacement disk, the hose connectors may be locked together
TEMPORARILY without the filter disk to allow emergency operation
only. Water Filter is a single use part. Once replaced, the old water
filter should be properly disposed in trash and must not be reused.
Troubleshooting
Unit does not operate
(“power on” indicator does not light)
• Main ON/OFF switch is not set to on; Check that switch on
rear panel is in up position.
• Power Adapter cable is disconnected from wall outlet or
scaler. Reconnect properly.
• Wall outlet is not powered. Use dierent wall outlet.
• Unit fuse has failed. Contact Parkell.
Insert does not vibrate properly
• Faulty, damaged, or worn insert. Replace.
• Insert not correctly seated in handpiece. Reinsert properly.
• Use a new Parkell® brand insert.
• Power control not correctly adjusted. Readjust.
Excess heat at handle or tip of insert
• Faulty, damaged, or worn insert. Replace.
• Too little water flow. Insert may be blocked. Inspect & clear
blockage or replace insert.
• Power too high for water. Increase water flow.
• Excessive hand pressure applied. Correct technique.
No water spray when foot pedal is depressed
• Water line blocked or kinked. Correct.
• Water passage in the scaling insert clogged. Inspect and
clear blockage or replace insert.
• Water filter clogged. Replace.
• No water supply connected. Correct.
Insert does not go into handpiece
• Insert stack is bent. Straighten plates carefully by hand and
reinsert.
• O-ring is too tight. Lubricate O-ring with water and use
twisting motion to seat insert.
• Detachable 30K Handpiece (hD722) can only accept 30K
insert. Make sure that it is not a 25KHz insert, as it will not
fit inside the handpiece.
Insert falls out of handpiece or water leaks from front
of handpiece
• O-ring damaged or worn. Replace O-ring on the insert.
Water leaks at base of handpiece
• Orange O-ring at end of handpiece missing or damaged.
Insert comes out of handpiece when pedal is depressed
• Water pressure is too high. Adjust water pressure to 15-35
psi at dental unit connection or in floor junction box or
replace insert O-ring.
Purge Mode does not activate
• Make sure to disconnect detachable handpiece from the cable.
• Activate the unit by pressing the foot pedal. Purge LED
should start blinking.
• Contact Parkell for support if problem is not resolved.
Scaling Power has reduced to minimum automatically
• Foot switch remained pressed continuously for more than 3
minutes. To avoid any accidental damage, scaling power was
reduced to minimum after 3 minutes of continuous foot switch
press. Scaling and water flow will be disabled completely after
10 minutes of continuous usage. This is normal.
• Release foot switch and press again. Contact Parkell for
additional assistance.
• Upon activation, TurboSensor+ detects if handpiece is
detached from the cable / if there is no insert connected into
the handpiece. TurboSensor+ then disables output oscillator
reducing power consumption and heat generation.
• To improve safety, Turbo+ disables water flow after 2 minutes
of pre-determined purge duration. In the event of accidental
– unattended continuous foot switch activation, this feature
prevents water damage in the dental oce and prevents
handpiece overheating, if external valve is closed.
• TurboSensor+ detects insert stall and instantly recovers upon
release of the tip preventing damage to the teeth / gum line /
other anatomical structure during a clinical procedure by
momentarily shutting down the oscillator and reducing power
output significantly.
• Always Awake. Without a “Sleep” mode, TurboSensor+ always
remains ready for activation while powered on. Position the
foot pedal to avoid accidental activation.

8 Parkell.com | Questions? Contact Parkell Technical Support at (800) 243-7446
User Maintenance and
Authorized Service
The Parkell TurboSensor+ requires very little maintenance for years
of trouble-free operation. There are no user-serviceable parts
inside the control unit or the foot pedal. Opening the cases will void
all warranties. Authorized Parkell personnel must make all internal
repairs. Parkell urges all scaler users to monitor the condition of the
water filter periodically and change the filter whenever noticeable
darkening of the disk occurs, or when water flow decreases. The
most common reason for service for ultrasonic scalers is failure by
the user to periodically change the water filter. This will result in
contamination and clogging of the internal water components.
The ultrasonic inserts, autoclavable handpiece, power supply, water
filter and water hose are all detachable and may be replaced by the
user. Contact Parkell for a list of authorized inserts and available
replacement parts.
Within the US, all repairs must be made by Parkell. We maintain a
complete service and parts facility in our factory at 300 Executive
Drive, Edgewood, NY 11717. Equipment needing service in the US
should be returned, freight pre-paid, via approved common carrier
(e.g., USPS, UPS, FedEx), and adequately insured. Return all
accessories with the unit and include an explanation of the problem.
Pack in the original box, add plenty of cushioning material, and over
box the unit during shipping. Transit should maintain a dry
temperature of 0°F-110°F. You will be contacted for your approval
of the repair, along with any associated costs, prior to any work. The
unit will be repaired and returned to you.
Outside the US, repairs must be made by a Parkell-authorized facility.
If you have any questions or problems with the installation or use of
your TurboSensor+, call Technical Support Service at 800-243-7446,
M-F from 8:30 AM to 5:00 PM EST.
Warranty and Terms of Use
For full Warranty and Terms of Use information, please
seewww.parkell.com. Parkell’s Quality System is certified to
ISO 13485.
Conformance to Standards
The Parkell TurboSensor+ is TUV listed and conforms to IEC 60601-1,
60601-1-2 (Electromagnetic Compatibility of Medical Devices) and
CAN/ CSA C22.2 No. 601.1. Parkell’s quality system is certified to
ISO13485.
Explanation of Symbols Used
Follow instructions for use
Package contents
Manufacturer
Qualified User Symbol
Medical Safety Classification Symbol
Temperature limitations
Do not use if package is damaged
Keep dry
Catalogue / stock number
Unique Device Identifier
Medical Device
Protective Earth Connection
Do not dispose this product into the ordinary
municipal waste or garbage system
Single use only
Sterilizable in a steam sterilizer (autoclave) at the
temperature specified
Footswitch Connection
AC Power Connection
Water Connection
This manual suits for next models
1
Table of contents
Other parkell Dental Equipment manuals
Popular Dental Equipment manuals by other brands

Komet
Komet ER Denin Post X Series Instructions for use

Morita
Morita TorqTech ST-DH Series operating instructions

Dentsply Maillefer
Dentsply Maillefer CALAMUS DUAL Directions for use

Durr Dental
Durr Dental VistaScan Mini View Installation and configuration instructions

EVIDSUN
EVIDSUN TPS-2M user manual

Dentsply Sirona
Dentsply Sirona CEREC MC operating instructions