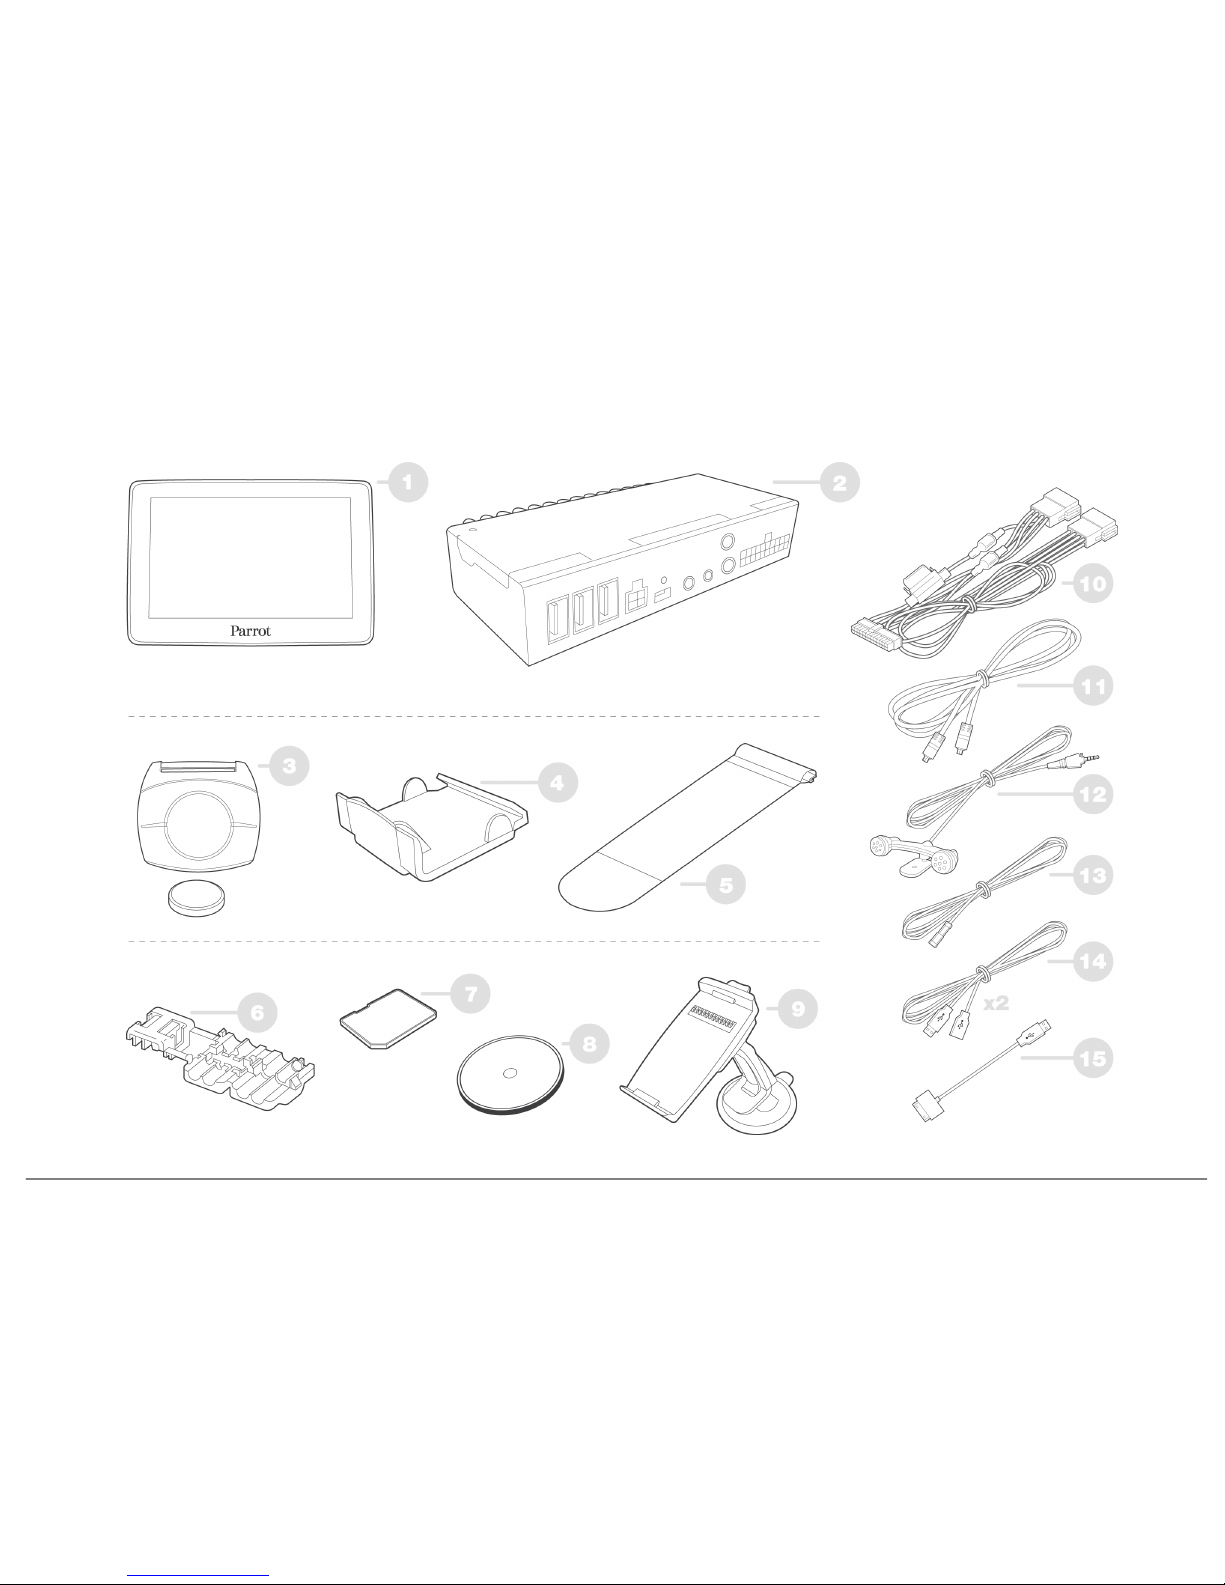
5
Ecran
Screen
Pantalla
Display
Display
Ecrã
Scherm
Boîtier électronique
Electronic box
Caja electrónica
Elektronikgehäuse
Centralina elettronica
Caixa electrónica
Elektronicakastje
Télécommande (pile 3 V - CR2032)
Remote control (3 V - CR2032 battery )
Mando a distancia (pila 3 V - CR2032)
Fernbedienung (Batterie 3 V - CR2032)
Telecomando (Pila 3V – CR2032)
Telecomando (Pilha de 3V – CR2032)
Afstandsbediening (Batterij 3V – CR2032)
Support télécommande - tableau de bord
Remote control support - dashboard
Soporte mando a distancia - salpicadero
Halterung Fernbedienung - Armaturenbrett
Supporto telecomando – quadro comandi
Suporte do telecomando - Painel de bordo
Steun v oor af standsbediening - dashboard
Support télécommande – v olant
Remote control support - steering wheel
Soporte mando a distancia - v olante
Halterung Fernbedienung - Lenkrad
Supporto telecomando – volante
Suporte do telecomando - Volante
Steun v oor af standsbediening - stuur
Raccord câble f rein à main
Parking brake cable crimp connector
Unión cable de f reno de mano
Kabelanschluss Handbremse
Raccordo cav o f reno a mano
Ligação do cabo do trav ão-de-mão
Aansluiting handremkabel
Carte SD
SD Card
Tarjeta SD
SD-Karte
Scheda SD
Cartão SD
SD-kaart
Câble ISO
ISO cable
Cable ISO
ISO-Kabel
Cav o ISO
Cabo ISO
ISO-kabel
Rallonge câble f rein à main
Parking brake cable extension lead
Alargador cable de f reno de mano
Verlängerungskabel Handbremse
Prolunga cav o f reno a mano
Extensão do cabo do trav ão-de-mão
Verlengkabel v oor handrem
Microphone
Microphone
Micróf ono
Mikrof on
Microf ono
Microf one
Microf oon
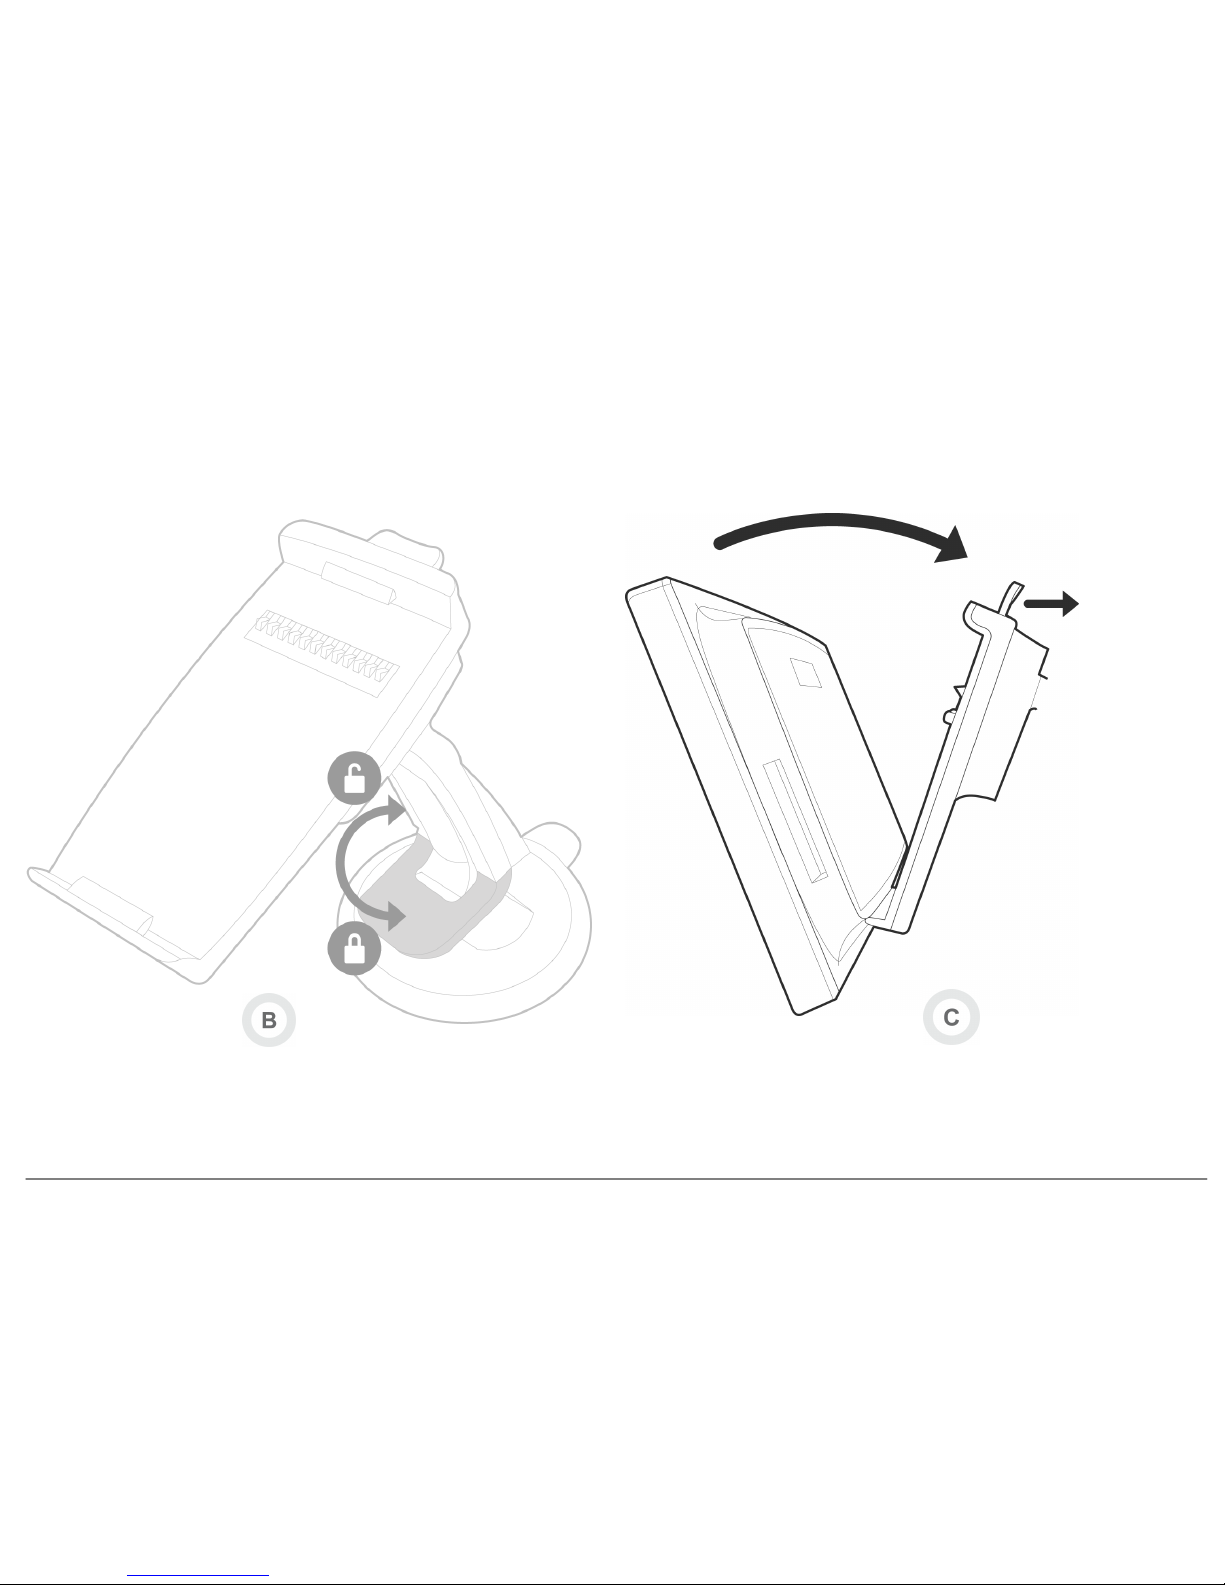
Support v entouse
Suction cup support
Soporte v entosa
Halterung Saugv orrichtung
Supporto v entosa
Suporte de v entosa
Zuignapsteun
Support de f ixation de l’écran
Craddle
Soporte de f ijación de la pantalla
Bildschirmhalterung
Supporto di f issaggio display
Suporte de f ixação do ecrã
Schermsteun
Câble écran
Screen cable
Cable pantalla
Display kabel
Cav o display
Cabo do ecrã
Schermkabel
Câble USB
USB cable
Cable USB
USB-Kabel
Cav o USB
Cabo USB
USB-kabel
Rallonge USB / iPod
USB / iPod cable extension
Alargador cable USB / iPod
Verlängerungskabel USB / iPod
Prolunga USB/iPod
Extensão USB / iPod
Verlengkabel USB / iPod