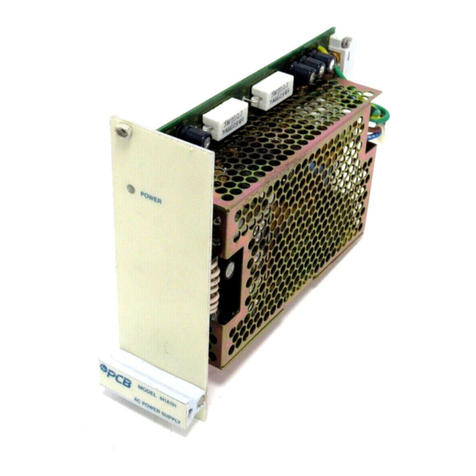
PCB Piezotronics 8120-110A User manual

Model 8120-110A
POWER SUPPLY
Installation and Operating Manual
For assistance with the operation of this product,
contact PCB Piezotronics, Inc.
Toll-free: 800-828-8840
24-hour SensorLine: 716-684-0001
Fax: 716-684-0987
E-mail: [email protected]
Web: www.pcb.com

Manual 21354 Rev E
ECN 50523
Repair and Maintenance
PCB guarantees Total Customer Satisfaction through its
“Lifetime Warranty Plus” on all Platinum Stock Products
sold by PCB and through its limited warranties on all other
PCB Stock, Standard and Special products. Due to the
sophisticated nature of our sensors and associated
instrumentation, field servicing and repair is not
recommended and, if attempted, will void the factory
warranty.
Beyond routine calibration and battery replacements
where applicable, our products require no user
maintenance. Clean electrical connectors, housings, and
mounting surfaces with solutions and techniques that will
not harm the material of construction. Observe caution
when using liquids near devices that are not hermetically
sealed. Such devices should only be wiped with a
dampened cloth—never saturated or submerged.
In the event that equipment becomes damaged or ceases
to operate, our Application Engineers are here to support
your troubleshooting efforts 24 hours a day, 7 days a
week. Call or email with model and serial number as well
as a brief description of the problem.
Calibration
Routine calibration of sensors and associated
instrumentation is necessary to maintain measurement
accuracy. We recommend calibrating on an annual basis,
after exposure to any extreme environmental influence,
or prior to any critical test.
PCB Piezotronics is an ISO-9001 certified company whose
calibration services are accredited by A2LA to ISO/IEC
17025, with full traceability to SI through N.I.S.T. In
addition to our standard calibration services, we also offer
specialized tests, including: sensitivity at elevated or
cryogenic temperatures, phase response, extended high
or low frequency response, extended range, leak testing,
hydrostatic pressure testing, and others. For more
information, contact your local PCB Piezotronics
distributor, sales representative, or factory customer
service representative.
Returning Equipment
If factory repair is required, our representatives will
provide you with a Return Material Authorization (RMA)
number, which we use to reference any information you
have already provided and expedite the repair process.
This number should be clearly marked on the outside of
all returned package(s) and on any packing list(s)
accompanying the shipment.
Contact Information
PCB Piezotronics, Inc.
3425 Walden Ave.
Depew, NY14043 USA
Toll-free: (800) 828-8840
24-hour SensorLine: (716) 684-0001
Repair inquiries: rma@pcb.com
For a complete list of distributors, global offices and sales
representatives, visit our website, www.pcb.com.
Safety Considerations
This product is intended for use by qualified personnel
who recognize shock hazards and are familiar with the
precautions required to avoid injury. While our equipment
is designed with user safety in mind, the protection
provided by the equipment may be impaired if equipment
is used in a manner not specified by this manual.
Discontinue use and contact our 24-Hour Sensorline if:
Assistance is needed to safely operate equipment
Damage is visible or suspected
Equipment fails or malfunctions
For complete equipment ratings, refer to the enclosed
specification sheet for your product.
Definition of Terms and Symbols
The following symbols may be used in this manual:
DANGER
Indicates an immediate hazardous
situation, which, if not avoided, may
result in death or serious injury.

Manual 21354 Rev E
ECN 50523
CAUTION
Refers to hazards that could damage
the instrument.
NOTE
Indicates tips, recommendations and
important information. The notes
simplify processes and contain
additional information on particular
operating steps.
The following symbols may be found on the equipment
described in this manual:
This symbol on the unit indicates that
high voltage may be present. Use
standard safety precautions to avoid
personal contact with this voltage.
This symbol on the unit indicates that
the user should refer to the operating
instructions located in the manual.
This symbol indicates safety, earth
ground.

Manual 21354 Rev E
ECN 50523
PCB工业监视和测量设备 - 中国RoHS2公布表
PCB Industrial Monitoring and Measuring Equipment - China RoHS 2 Disclosure Table
部件名称
有害物质
铅(Pb)
汞
(Hg)
镉
(Cd)
六价铬(Cr(VI))
多溴联苯 (PBB)
多溴二苯醚(PBDE)
住房
O
O
O
O
O
O
PCB板
X
O
O
O
O
O
电气连接器
O
O
O
O
O
O
压电晶体
X
O
O
O
O
O
环氧
O
O
O
O
O
O
铁氟龙
O
O
O
O
O
O
电子
O
O
O
O
O
O
厚膜基板
O
O
X
O
O
O
电线
O
O
O
O
O
O
电缆
X
O
O
O
O
O
塑料
O
O
O
O
O
O
焊接
X
O
O
O
O
O
铜合金/黄铜
X
O
O
O
O
O
本表格依据 SJ/T 11364 的规定编制。
O:表示该有害物质在该部件所有均质材料中的含量均在 GB/T 26572 规定的限量要求以下。
X:表示该有害物质至少在该部件的某一均质材料中的含量超出 GB/T 26572 规定的限量要求。
铅是欧洲RoHS指令2011/65/ EU附件三和附件四目前由于允许的豁免。
CHINA RoHS COMPLIANCE

Manual 21354 Rev E
ECN 50523
Component Name
Hazardous Substances
Lead (Pb)
Mercury (Hg)
Cadmium (Cd)
Chromium VI
Compounds
(Cr(VI))
Polybrominated
Biphenyls (PBB)
Polybrominated
Diphenyl Ethers
(PBDE)
Housing
O
O
O
O
O
O
PCB Board
X
O
O
O
O
O
Electrical Connectors
O
O
O
O
O
O
Piezoelectric Crystals
X
O
O
O
O
O
Epoxy
O
O
O
O
O
O
Teflon
O
O
O
O
O
O
Electronics
O
O
O
O
O
O
Thick Film Substrate
O
O
X
O
O
O
Wires
O
O
O
O
O
O
Cables
X
O
O
O
O
O
Plastic
O
O
O
O
O
O
Solder
X
O
O
O
O
O
Copper Alloy/Brass
X
O
O
O
O
O
This table is prepared in accordance with the provisions of SJ/T 11364.
O: Indicates that said hazardous substance contained in all of the homogeneous materials for this part is below the limit
requirement of GB/T 26572.
X: Indicates that said hazardous substance contained in at least one of the homogeneous materials for this part is above the limit
requirement of GB/T 26572.
Lead is present due to allowed exemption in Annex III or Annex IV of the European RoHS Directive 2011/65/EU.

MODEL 8120 DIGITAL INDICATOR OPTION OPERATION MANUAL
1
TABLE OF CONTENTS
Sections Page
1.0 DESCRIPTION 2
2.0 INSTALLATION 3
3.0 OPERATION 4
4.0 BLOCK DIAGRAM DESCRIPTION 5
5.0 VERIFICATION OF NORMAL OPERATION 7
Figures
1 - 8120 SERIES INSTRUMENT WITH DIGITAL INDICATOR 2
2 - FULL-SCALE DISPLAYS FOR THREE RANGES 4
3 - SCALE, DECIMAL POINT, DUMMY ZERO SWITCHES 4
4 - A/D CONVERTER TIMING DIAGRAM 8
5 - BLOCK DIAGRAM DESCRIPTION 9
Tables
1 - 8120 SERIES MODEL NUMBERING 2
2 - SPECIFICATIONS 3
If you need information regarding specific Model 8120 components and circuitry, please contact the
MANUAL NUMBER: 27259
REVISION: NR
ECN:

MODEL 8120 DIGITAL INDICATOR OPTION OPERATION MANUAL
2
1.0 DESCRIPTION
The 8120 Instrument Series is a family of premium
signal conditioning instruments that includes
models to accommodate virtually all types of
transducers and signal sources commonly
encountered in electro-mechanical testing and
control operations. The 8120 Instruments are
available in three forms: Signal Conditioner only;
Signal Conditioner with Digital Indicator; and
Signal Conditioner with Digital Indicator and Hi-Lo
Limits. The Model numbering system used with the
8120 Series identifies the form and the type of
signal source. This numbering system is further
explained in Table 1. From Table 1, it can be seen
that all models having a Digital Indicator are
identified by a -_10A or -_30A suffix, with the first
digit identifying the type of signal source.
The 8120 Series instruction manual system is
designed to provide the user with the following
documentation: (1) a separate instruction manual for
each type of Signal Conditioner purchased; (2) an
instruction manual covering only the Digital
Indicator section of a 8120 Series instrument, but
applicable to any -110A or –130A instrument; and
(3) an instruction manual covering only the Hi-Lo
Limit section 2 of a 8120 Series instrument, but
applicable to any –130A instrument. It is the
purpose of this manual to cover the Digital Indicator
section of all -_10A or -_30A instruments.
The Digital Indicator section of any -_10A or -_30A
instrument consists of a printed circuit board on
which are mounted the required circuit components
for digitizing the analog output of the Signal
Conditioner and the light-emitting-diode (LED)
display. This board is mounted above the circuit
board that contains the components for the Signal
Conditioner. The digits that comprise the display
are mounted on a small board, which is affixed to
the digitizer board with a right-angle printed-circuit
board header. The -_30A instruments contain an
additional printed-circuit board for the Hi-Lo Limit
circuitry.
The LED display is comprised of six orange digits
with polarity sign. The 0.4-inch height of the digits,
combined with the inherent brilliance of an LED
type of display, make the display easily discernible
in normal room lighting. The display is viewed
through the red plastic front panel of the instrument
to provide filtering of external light and enhance the
display brilliance. The front panel is opaque except
for that portion through which the display is
viewed. A typical 8120 Instrument with Digital
Indicator is shown in Figure 1.
Table 1 – 8120 Model Numbering System
8120-_ _0A
First di
g
it after the dash identifies t
y
pe o
f
signal source:
1= Strain Gages (DC excited)
4= Strain Gages (AC excited)
7= Pulse Pick-ups (Frequency)
Second digit after the dash identifies form:
0= signal conditioner only
1= signal conditioner with digital indicator
3 = signal conditioner with digital indicator
and Hi-Lo Limits
Figure 1 - Model 8120-110A
The Digital Indicator scaling is selected with rear-
panel pushbutton switches. Full-scale values of
±5000 counted by 1 ' s , ± 10000 counted by 2's, or
±20000 counted by 5's can be selected. The most

MODEL 8120 DIGITAL INDICATOR OPTION OPERATION MANUAL
3
significant digit (MSD) of the display contains the
polarity sign and is either unlit or lights as a 1 for
displays of 10000 or greater. The least significant
digit (LSD) is a dummy zero which can be turned
ON or left unlit as desired. In addition, decimal-
point position can be selected to give display
readings as follows: 1.XXXX, lX.XXX, 1XX.XX,
1XXX.X, or 1XXXX (no decimal point). Decimal-
point location and dummy zero selection are also
accomplished with rear-panel switches (miniature
slide-switch bank). When the 20000 scale is
selected, the display is digitally limited to read a
maximum number of 19995 since the MSD is either
unlit or reads a "1" for displays of 10000 or greater.
The 5000 and 10000 scales are analog limited to an
overrange of approximately 5600 and 11200,
respectively. An overrange condition on any range
is indicated by a flashing display. The sampling
rate of the display is 3 samples per second. The
Digital Indicator specifications are summarized in
Table 2.
Table 2 - Specifications
Display: Orange LED’s, six digits with polarity sign, 0.4 inch
height. MDS is either unlit or reads a 1 and contains the
polarity sign. LSD is a dummy zero which can be programmed
to be lit or unlit (rear-panel switch).
Scaling: Selectable at rear panel; full-scale values of ±5000
counted by 1's, ± 10000 counted by 2's, or ±20000 counted by
5's.
Decimal Point: Decimal-point location can be selected with
rear panel switches as follows: 1.XXXX, 1X.XXX, 1XX.XX,
1XXX.X, or 1XXXX (no decimal point).
Sampling Rate: 3 samples per second.
Legends: Each instrument supplied with an appropriate
assortment of user-installable rub-on engineering unit legends.
2.0 INSTALLATION
The 8120 Series Instruments can be operated as
bench-top instruments or they can be rack- or panel-
mounted. Dimensions for all three types of
mounting and corresponding mounting instructions
are given in the accompanying Signal Conditioner
Instruction Manual. The following paragraphs
provide the instructions for legend installation, scale
selection, decimal point/dummy zero selection, and
ac power connection.
Legend Installation
A sheet of dry-transfer lettering is supplied with
each instrument to provide the user with a means of
affixing an engineering-unit legend to the front
panel. The sheet contains the common engineering
units encountered in making electro-mechanical
measurements and additional alphanumeric
characters. Space is supplied on the front panel to
affix the desired legend to the right of the display.
To affix the legend to the front panel, press the dry-
transfer sheet firmly against the panel with the
desired legend or character situated in place.
Rubbing the legend or character with a ballpoint
pen will cause the legend to be transferred onto the
panel. The legend can be protected from scratches,
which may occur during calibration/operation of the
instrument by lightly spraying it with Krylon #1306
Workable Fixative.
If it is desired to change a legend, remove the
legend to be replaced by pressing masking tape
against the legend, then pulling off the gummed
tape.
Scale Selection.
Figure 2 shows the full-scale display for the three
selectable scales: ±5000 counted by 1's, ±10000
counted by 2's, and ±20000 counted by 5's. The
figure also indicates the last active digit and the
dummy zero which can be lit for any scale
selection. The first digit of the display contains the
polarity sign and lights as 1 on the 10000 and 20000
scales for values equal to or greater than 10000. On
the 20000 range, because the most significant digit
is either unlit or a 1 and the count is by 5's, the
greatest number which can be displayed is 19995.
Of course, this would be displayed as 199950 if the
dummy zero were lit.
Scale selection is accomplished with the two
pushbutton switches located at the rear panel. The
panel is marked to indicate which switches are
pushed IN or left OUT for the corresponding scale
selection. The switches have a push-push action

MODEL 8120 DIGITAL INDICATOR OPTION OPERATION MANUAL
4
and are illustrated, with the scale selection coding,
in Figure 3. With both switches OUT, the ±5000
range is selected. With the left switch OUT and the
right switch IN, the ±10000 range is selected. With
the left switch IN and the right switch OUT, the
±20000 range is selected.
Figure 2 - Full-Scale Displays for 3 Ranges
Decimal Point/Dummy Zero Selection
Decimal-point location and dummy zero activation
is selected with a rear-panel miniature slide switch
bank. The switch bank is marked on the rear panel
as shown in Figure 3. The decimal-point position
can be fixed at any one of the display locations
indicated on Figure 3. Place any one of slide
switches 1 through 4 ON to light the decimal point
at the desired location. Place slide switch 5 ON if
no decimal point is to be lit. To activate the dummy
zero (digit to the right of last active digit will
continuously light as a zero), place slide switch 6
ON.
Figure 3 - Scale, Decimal Point, Dummy Zero Switches
AC Power Connection
To protect operating personnel, the 8120 Series
Instruments are equipped with a three-conductor
power cord. When the cord is plugged into the
appropriate receptacle, the instrument is grounded.
The offset pin on the power cord is ground. To
maintain the safety ground when operating the
instrument from a two-contact outlet, use a three-
prong to two-prong adaptor and connect the green
pigtail on the adaptor to ground.
To prepare the instrument for operation, connect the
power cable to a 105-135 volt ac, 50-400 Hz power
source. The instrument can use up to 5 watts of
power.
3.0 OPERATION
The only operation required is turning ON/OFF ac
power to the instrument. This is accomplished with
the rear-panel slide switch (see Figure 3). The
display lights immediately when ac power is ON.
NOTE: In all instances, a flashing display indicates
that an overrange condition has occurred, and it is
likely that the Signal Conditioner amplifiers are
being overdriven. The 5000 and 10000 ranges are
analog limited at approximately 5600 and 11200,
and while a number may be displayed, if the display
is flashing an overrange condition has occurred.
Consequently, the displayed value may be invalid.
The 20000 range is digitally limited to 19995.
When an overrange occurs on this range, the display
will flash all zeros.

MODEL 8120 DIGITAL INDICATOR OPTION OPERATION MANUAL
5
4.0 BLOCK DIAGRAM DESCRIPTION
The purpose of this section is to explain how the
Digital Indicator works by using a simplified block
diagram. This section is not intended to provide a
detailed explanation of electronic circuits for
personnel untrained in electronic technology.
However, it provides an adequate overview of
operation for those familiar with basic electronic
circuit operation. Throughout the following, refer
to Figure 5.
Power Supplies
The integrated-circuit chips which comprise the
A/D Converter and the Overrange Comparator are
CMOS circuits which require ±9 volts regulated.
These voltages are supplied from power supplies
contained on the Signal Conditioner circuit board
and are discussed in the Signal Conditioner
Instruction Manual.
The digital part of the A/D Converter, the Bit
Selector, and the various logic gates and inverters
are operated from +5 volts regulated (TTL logic).
The +5 volt supply consists of a three-terminal
Regulator. The unregulated input to the Regulator
is obtained from Signal Conditioner circuit board
(unregulated side of +9 volt supply).
The BCD-to-7-Segment, Decoder, Display Drivers,
and Display LED’s operate from +6 volts
unregulated. Five volts ac is supplied from the
Signal Conditioner circuit board (secondary of
power transformer located on board). Plus 6 volts
unregulated is developed with a Diode Bridge and
Filter located on the Digital Indicator board.
A +2.5 volts precision reference is supplied from a
precision power supply located on the Signal
Conditioner circuit board. This reference is used in
the A/D Converter for digitizing the analog input
signal.
A/D Converter
The A/D Converter is a dual-slope converter which
digitizes the analog input signal using a ratiometric
integrating technique. The analog signal input, a
reference input, and a clock input are applied to the
converter. The measurement cycle is divided into
an Auto-Zero cycle, a Signal Integrate cycle, and a
Reference Integrate cycle. Each cycle has a time
base in which a certain amount of clock pulses
occur. The clock used is a 100-kHz crystal
oscillator. The Auto-Zero cycle is used to bring the
output of the integrator to zero and lasts 10,000
counts. The next cycle is the Signal Integrate cycle
which also lasts 10,000 counts. If the analog input
is zero at the start of the Signal Integrate cycle, the
integrator will see the same voltage that existed in
the previous state. Thus, the integrator output will
not change but will remain stationary during the
entire Signal Integrate cycle. If the analog input is
not equal to zero, an unbalanced condition exists
compared to the Auto-Zero cycle and the integrator
will generate a ramp whose slope is proportional to
the analog input. At the end of this cycle, the sign
of the ramp is determined. If the input signal was
positive, a voltage which is VREF more negative
than during Auto-Zero is applied to the integrator
input. The A/D Converter chip generates the
equivalent of a +Reference or –Reference from the
single +Reference applied. The reference voltage
returns the output of the integrator to zero. The
time, or number of counts, required to do this is
proportional to the input voltage. The Reference
Integrate cycle can be a maximum of 20,000 counts.
The full measurement cycle is then a maximum of
40,000 counts, with the answer to the measurement
being achieved when the reference voltage returns
the integrator output to zero. The full measurement
cycle is shown in Figure 4.
The DIGIT DRIVES are positive-going signals that
last for 200 clock pulses (see Figure 4). The scan
sequence is D5 (MSD), D4, D3, D2, and D1 (last
active digit). The scan is continuous unless an
overrange occurs. Then all DIGIT DRIVES are
blanked from the end of the first scan until the
beginning of the Reference Integrate cycle when D5
will start the scan again. This gives a blinking or
flashing display as a visual indication of overrange.
Because the Digital Indicator has 5000 and 10000
ranges as well as a 20000 range, an analog
Overrange Comparator is used as well as the
inherent overrange capability of the A/D Converter.


MODEL 8120 DIGITAL INDICATOR OPTION OPERATION MANUAL
6
The Overrange Comparator is described in a
following paragraph.
The binary-coded-decimal (BCD) outputs of the
A/D Converter are positive logic signals that go on
simultaneously with the DIGIT DRIVE. Since the
DIGIT DRIVES are blanked for an overrange on
the 20000 scale, the display will flash all zeros
when this condition occurs on this scale.
Input Attenuators/Range Switches
The 5-volt analog signal input (full scale) and the
2.5-volt reference from the Signal Conditioner are
applied to attenuator networks where 2-volt and l-
volt signal and reference inputs are developed for
the A/D Converter. Since, on the 20000 range, the
Reference Integrate cycle can be twice as long as
the Signal Integrate cycle, the analog input voltage
required to give a full-scale reading is exactly equal
to 2 VREF. Consequently, on the 20000 range, the
VREF is 1 volt and the VSIG is 2 volts for full
scale. On the 10000 range, the two cycles can be
equal; thus, VSIG = VREF = 2 volts. On the 5000
range, the analog voltage for a full-scale reading is
then equal to 1/2 VREF; thus, VREF must be 2
volts and VSIG 1 volt. The appropriate levels are
switched to the A/D Converter through the rear-
panel Range switches.
Bit Selector/Decoding Logic
The Bit Selector transfers one of two sets of 4-line
BCD data applied at input ports to output ports
upon receiving a command at the A SELECT or B
SELECT port. When the A SELECT port is high,
the X input data is transferred to the Z output ports.
Conversely, when the B SELECT input is high, the
Y input data is transferred to the Z output ports.
The Y data is obtained directly from the BCD
output ports of the A/D Converter. The X data is
comprised of specially coded bits used to count by
2' s or 5' s when the 10000 or 20000 ranges are
selected, respectively. On the 5000 range, the A
SELECT input is held low through the Range
switches and the B SELECT input is high. The Y
data is transferred to the output of the Bit Selector
and the display count is by 1's. On the 10000 range,
the A SELECT input is held low except when the
Dl DIGIT DRIVE is high. When D1 is high, the A
SELECT is high and the B SELECT is low,
transferring the X data to the Z ports of the Bit
Selector and allowing the display to count by 2's.
Operation on the 20000 range is identical except
that the bit coding is arranged to give a count by 5's
with the X data.
Display Coding/Driving
The display is a 4.5-digit LED display with polarity
and a dummy zero. DS2 through DS6 are 7-
segment displays with common cathodes. The Bit
Selector output ports are connected as inputs to a
BCD-to-7-Segment Decoder. The 7 outputs of the
decoder are connected as inputs to the segments
(anodes) of DS2 through DS6. The DIGIT
DRIVES of the A/D Converter are used to
sequentially turn on DS2 through DS6 through
Display Drivers which sink current. DS1 is either
unlit or lights as a 1 for displays of 10000 or
greater. Unlike DS2 through DS6, DS1 is a
common anode device. The DS1 segments
(cathodes) are sinked via a display driver from the 1
bit of the A/D Converter. The DS1 anode is then
brought high by D5 through a driver comprised of
an inverter and a transistor which applies +6 volts
unregulated to the anode when D5 is high.
The last digit of the Display (DS6) is the dummy
zero digit. When the Dummy Zero Select switch is
ON, the DS6 cathode is sinked when D5 is high.
The outputs of the BCD-to-7-Segment Decoder are
tied to the DS6 segments. Also, when D5 is high,
the B SELECT input to the Bit Selector is pulled
low through the NOR gate connected to the port.
The A SELECT input is also low since it is either
held hard low through the Range switches on the
5000 range or it is connected to D1 through the
Range switches on the 10000 and 20000 ranges
(when D5 is high D1 must be low). With the A
SELECT and B SELECT inputs both low, the Z
ports of the Bit Selector assume the low state no
matter what the X and Y input data reads.
Consequently, each time D5 is high, DS6 displays a
zero.

MODEL 8120 DIGITAL INDICATOR OPTION OPERATION MANUAL
7
The polarity sign is also part of DS1. The minus (-)
segment is always lit through 6 volts and an
external resistor tied to circuit common. When the
A/D Converter senses a positive polarity, the
POLARITY port goes high. This action drives an
inverter low to light the vertical portion of the
polarity sign.
Decimal point position is selected with rear-panel
slide switches (as is dummy zero selection). Only
one of the Decimal slide switches is turned ON at
any one time. The decimal point LED for DS1 is
hard wired to +6 volts. Turning ON the associated
Decimal switch connects an external resistor and
circuit common to the other side of the decimal
point LED. Since the remaining digits with
decimal-point LED’s (DS2 through DS4) are
common cathodes devices, each LED is sinked
when the corresponding DIGIT DRIVE is high and
associated Decimal switch is ON, applying +6 volts
to the other side of the LED through an external
resistor.
Analog Overrange
Digital overrange for the 20000 range is inherent in
the A/D Converter chip and has been previously
described. However, for the 5000 and 10000
ranges, an analog overrange circuit is required. The
Overrange Comparator is dc biased with equal
resistors returned to the ±9 volt supplies so that its
output is at approximately 4.5 volts. Both of the
comparator inputs are connected through diodes to
the analog input from the Signal Conditioner.
When the analog input is one diode drop above or
below the comparator biasing, an overrange
condition exists since approximately 5.2 volts is
present at the analog input (5 volts = full-scale
value). The output of the Overrange Comparator
goes low when either of the input diodes is forward
biased. The comparator output and the BUSY
output of the A/D Converter are gated through an
OR gate. The BUSY signal is high during the
Signal and Reference Integrate cycles of the A/D
Converter, then it goes low. This causes the output
of the OR gate to go low. The BLANK port of the
BCD-to-7-Segment Decoder is normally held high
through an external resistor. When the OR gate
output goes low, the BLANK port is pulled low
through a diode, causing DS2 through DS6 to flash.
Since DS1 is not driven from the decoder, a second
diode and resistor are used to pull the A/D
Converter 1-bit output low when the overrange OR
gate is low. This action causes DS1 to flash.
5.0 VERIFICATION OF
NORMAL OPERATION
It is the purpose of this section to aid the user in
rapidly determining whether the Digital Indicator is
functioning normally or whether it is the source of
the observed trouble. In the event a repair to the
Digital Indicator is required, a complete parts list,
schematic diagram, and component location
drawing are included in this manual. The user may
also contact the factory for assistance.
One of the two techniques can be used to rapidly
determine whether the Digital Indicator is
malfunctioning or whether the problem is in the
Signal Conditioner, transducer, or transducer
cabling. If the unit is a –_10A instrument (no Hi-
Lo Limits), attempt to zero and calibrate the Signal
Conditioner while observing the Signal Conditioner
analog output (use the dc-to-2Hz output) on a dc-
coupled oscilloscope. If the Digital Indicator is
unstable or reads erratically, but the oscilloscope
indicates a stable analog output from the Signal
Conditioner, the problem is likely in the Digital
Indicator. In the event the Signal Conditioner
output is unstable or noisy, consult the Signal
Conditioner Instruction Manual for the proper
action to be taken.
If the instrument is a –_30A type, push one of the
Limit pushbuttons and observe how the limit value
is displayed on the Digital Indicator. If the display
is stable with the Limit button pressed, but is
unstable when the button is released, the problem is
in the Signal Conditioner, transducer, or transducer
cabling. If the display is unstable or erratic whether
the button is pressed or released, the problem is in
the Digital Indicator.

MODEL 8120 DIGITAL INDICATOR OPTION OPERATION MANUAL
8
Figure 4 - A/D Converter Timing Diagram

MODEL 8120 DIGITAL INDICATOR OPTION OPERATION MANUAL
9
Figure 5 - Block Diagram

ii
MODEL 8120-100A/110A STRAIN GAGE CONDITIONER OPERATION MANUAL ii
Table of Contents
Table of Contents ii
Reference Figures and Tables ii
1.0 Description 1
2.0 Installation and Cabling 1
3.0 Calibration 2
4.0 Verification of Normal Operation 3
5.0 Repair / Service 4
6.0 Return Procedure 4
7.0 Customer Service / Warranty 4
Reference Figures and Tables
FIGURE 1 Star Bridge Construction 4
FIGURE 2 Front Panel Description 6
FIGURE 3 Rear Panel Description 6
FIGURE 4 Instrument Mounting Dimensions 7
FIGURE 5 Instrument Panel Mountings 8
FIGURE 6 PCB Model 8120 Instrument I/O Connector w/pin Designations 9
TABLE 1 Specifications 5

1
MODEL 8120-100A/110A STRAIN GAGE CONDITIONER OPERATION MANUAL 1
1.0 Description
Model 8120-100A/110A Signal Conditioner/Amplifiers
are designed for use with strain gage transducers that
can operate with a dc excitation-amplification source.
They supply either a 5 volt or a 10 volt transducer
excitation, which can be selected through proper wiring
at the I/O connector on the rear panel. Remote sensing
techniques are used to regulate the excitation voltage at
the transducer. The excitation voltage is protected
against overloads and accidental short circuits.
The 8120 uses a CMOS chopper-stabilized differential
signal amplifier, which has over 100-megohms input
impedance per input line. The circuit guarantees
negligible drift with temperature variations or
component aging.
The 8120-100A/110A contains all necessary balancing,
gain, and calibration controls and conditions/amplifies
the applied input to a standard +/-5 volt dc analog
output level. Two analog outputs, both having a low-
pass cutoff frequency, one of 2 Hz and the other of 200
Hz are provided. The filtered outputs allow for
averaging of signals containing noise, or other
unwanted dynamic components, which are periodic in
nature.
The 8120-110A is similar to the 8120-100A except it
also contains a dedicated 4.5 digit LED display with a 3
Hz update rate. The resolution of the digital display is
1:5000 (0.02% F.S.). The display also has a selectable
decimal point, trick count multiplier, and a trailing inert
zero.
Calibration of the instrument, to the transducer, is made
through conventional shunt technique, using an
internally installed calibration resistor. Front panel
push button provides for calibration in the positive
direction. Positive direction calibration can be checked
by means of Remote Cal terminals on the instrument
I/O connector.
2.0 Installation and Cabling
Mounting
The 8120 Series Instruments can be operated as bench-
top units or they can be rack or panel mounted.
Dimensions for all three types of installations are
shown in Figure 4 of the manual. Panel cut-out
dimensions for mounting the 8120 are also shown in
Figure 4. Up to four 8120 Instruments can be mounted
in a 19 inch rack by using the 1 3/4 inch high Rack
Adaptor, (See B on Figure 1, page 7).
To panel mount a 8120, in a panel cut-out, please see
Item C on Figure 4, page 7, and Figure 5, on page 8,
for details. It is important, when panel mounting the
unit to remove the two spacer washers that are on the
securing screws of the rear panel I/O connector. This is
so that the printed-circuit board may move forward
about 1/8" during step (f).
(a) Remove the front panel by removing the two 2-56
x 3/8 flat head screws.
(b) Remove the front bezel by removing the four 6-32
x 5/8 fillister-head screws.
(c) Make the panel cut-out and drill the screw
clearance holes indicated in Figure 4.
(d) The front bezel can be used as a template to define
the rectangular cut-out and locate the clearance
holes.
(e) Hold the instrument enclosure behind the panel
and re-attach the front bezel to the enclosure from
the front of the panel with the four remaining
screws.
(f) Reinstall the front panel.
(g) Tighten the two securing screws of the rear panel
I/O connector to insure that the connector is seated
and that the conditioner printed-circuit board is
pushed fully forward so that the front-panel
screwdriver adjustments and buttons are
accessible. These screws give approximately 1/8
inch adjustment; consequently, this is the
maximum panel thickness, which should be used.
CAUTION: Do not over tighten the connector
securing screws or resultant damage may occur to
the printed circuit board.
AC Power Connection
To protect operating personnel, the 8120 Series
Instruments are equipped with a three conductor power
cord. When the cord is plugged into the proper power
receptacle, the instrument is grounded. The offset pin
on the power cord plug is ground. To maintain the
safety ground, when operating the unit from a two
contact outlet, use a three prong to a two prong adaptor
and connect the green pigtail on the adaptor to a good
water pipe ground.
To prepare the instrument for operation, connect the
power cable to a 105-135 volt ac, 50-400 Hz power

2
MODEL 8120-100A/110A STRAIN GAGE CONDITIONER OPERATION MANUAL 2
source. The instrument can use up to 5 watts of power.
Calibration Resistor
If a fixed resistor is shunted across one arm of a strain
gage bridge, it produces an unbalance equivalent to
that of a particular value of mechanical input. If this
Equivalent Input value is accurately known, it can be
used as a reference point for shunt calibration of the
system. Upon completion of installation of the
transducer and its associated cabling, the user can:
1. Perform an overall deadweight calibration
using a precisely known value of mechanical
input. The calibration can then be transferred
to the installed calibration resistor for
convenience in checking later.
2. Replace the installed calibration resistor with
one supplied by the transducer manufacturer,
or an equivalent resistance value, to achieve a
precisely known equivalent input, allowing the
instrument sensitivity to be adjusted correctly.
3. A 59K ohm resistor is installed at the factory
and is used during final checkout of the
instrument. It should be replaced with the
proper value and accuracy calibration resistor,
for the transducer, that will be used with the
instrument. The resistor is mounted on
terminals located at the front edge of the
printed circuit board in the instrument. It can
be reached by removing the front panel.
Transducer Cabling
Cabling to the transducer is constructed to mate with
the I/O connector (P1) on the rear of the 8120. The I/O
connector pins and functions are given in figure 6 of
the manual. Figure 6 provides diagrams for several
configurations of cables with differences in length and
usage. For cable lengths under 20 feet, and when
deadweight calibration can be used as a crosscheck, the
4 wire configuration can be used. The 7 wire
configuration should be used with cable lengths longer
than 20 feet since the excitation voltage is then sensed
and regulated at the transducer.
PCB can supply finished cables to meet the
requirements of interfacing the 8120 to the customer's
transducer and will provide a quotation if desired.
Transducer Excitation
Either 5-volt or 10-volt bridge excitation can be
selected. In general, 5-volt excitation is used with 120-
ohm transducers, and the 10-volt excitation is used with
350-ohm transducers. However, for any transducer,
which has a 4 mV/V or higher sensitivity, 5-volt
excitation must be used to maintain proper operation
without saturating the conditioner amplifiers. Five-volt
excitation is selected by shorting pins D and E of the
module I/O connector (see Figure 6). Ten-volt
excitation is achieved when pins D and E are not
connected together.
Remote Calibration Check
The instrument can be remotely placed in the
calibration mode by shorting pins 5 (Signal Common)
and 8 (Remote Cal) of the module I/O connector.
Figure 4 indicates three methods of remotely entering
the calibration mode through the use of an external
switch, transistor, or TTL source. The Remote Cal
function provides a convenient method for periodically
monitoring calibration of the instrument.
Analog Outputs
Three different analog outputs are available at the
module I/O connector. Each output has a different
passband: dc to 2kHz, dc to 200 Hz, and dc to 2 Hz.
The 200 and 2 Hz cutoff frequencies are achieved with
active low-pass filters. As the cutoff frequency is
lowered, a trade off is made between noise elimination
and increased time-to-answer or slew rate time. Each
output has a 60 dB roll off a decade from the cut-off
frequency. The filter characteristics are given by the
following equations:
Aout @ f0= 0.7Ain
Aout @ 10f0= 0.001 Ain
T = 1.4/ f0
Where:
Aout = output amplitude
Ain = input amplitude
f0= selected cutoff frequency
T = time-to-answer in seconds (output of filter within
0.1% of final value after step function is applied).
3.0 Calibration
This section contains the instructions for calibrating the
8120-111A/110A. Included is a functional description
of the module front panel (See Figure 2). To perform
calibration, proceed as follows.
(a) Turn power ON by placing the rear-panel slide
switch in the ON position. The front-panel
indicator should light to indicate the application of
ac power. Allow 30 minutes of warm-up for

3
MODEL 8120-100A/110A STRAIN GAGE CONDITIONER OPERATION MANUAL 3
stabilization of transducer characteristics.
(b) With the transducer unloaded, set the module
output to zero using the coarse (Rc) and fine (Rf)
BALANCE controls. In some instances, an integral
digital indicator will be used to display the
conditioner output such as our 8120-110A. When
only the conditioner is supplied (8120-100A), an
external indicator must be used to monitor the
conditioner output.
(c) Load the transducer to a convenient up-scale value,
which is greater than one half of full scale. Adjust
the coarse (c) and fine (f) SPAN controls until the
output signal causes a reading equal to the dead
weight value. Remove the dead weight, then press
the CAL button and note the indicator reading
obtained. This reading can now be used in future
calibrations since it is related to a value obtained
thru dead weight calibration. To calibrate the
instrument in the future, simply press the CAL
button and adjust the SPAN controls to obtain the
reading previously recorded after dead weight
calibration.
(d) If dead weight calibration is not practical and the
transducer manufacturer has supplied a calibration
resistor (or resistor value), install the
recommended calibration resistor. Now press the
CAL button and adjust the SPAN controls until the
module output is equal to the Equivalent Input
value simulated by the installed calibration
resistor.
(e) If dead weight calibration is not practical and the
transducer-calibration data is unknown, the
Equivalent Input value for the factory-installed
calibration resistor can be approximated as
follows, assuming that the mV/V sensitivity rating
of the transducer and the bridge resistance are
known.
X = 25000 Rb
K Rc
Where X = Equivalent Input, % of full scale
Rb = bridge resistance, ohms
K = transducer sensitivity, mV/V full
scale
Rc= calibration resistance, ohms (59 K
installed)
Sample Calculation: Assume that K = 3.000 mv/v for a
5000 pound load cell (full scale) with a bridge
resistance of 350 ohms.
X = 25000 x 350 = 49.44% of full scale = 2472 lbs
59000 x3
4.0. Verification of Normal Operation
It is the purpose of this section to aid the user in
determining, in the event of a malfunction, to which the
Model 8120 is suspected of contributing, whether the
module is functioning normally or whether it is a
source of the observed trouble. In the event the module
requires repair the user may contact the factory service
department or the local representative for assistance.
If the module is suspected of faulty operation, observe
the following steps:
(a) If the module is totally inoperable (front panel
power indicator does not light), check the primary
power fuse (F1) located on the conditioner printed-
circuit board. If the fuse is blown, replace it with a
0.50-ampere fuse. Before reapplying power,
visually inspect the power cord wiring and the
printed-circuit board for any discrepancy, which
could have caused the overload.
(b) If the transducer has some preloading, the
BALANCE controls may not allow successful
zeroing of the module output. This condition can
be remedied by connecting a resistor (50 K - 200
K range, metal film type) from the + Signal
terminal of the transducer to the + or - Excitation
terminal. The Excitation terminal to which the
connection is made is determined by the direction
of the loading or off-zero reading.
(c) The inability to balance correctly where the
module output reads totally off scale and the
BALANCE controls have no authority can very
likely be the result of a damaged or defective
transducer or interconnect cable. This possibility
can be confirmed (or eliminated) by substituting a
transducer and cable known to be in good
condition or by simulating a balanced transducer,
using either a commercially available transducer
simulator or the simple Star Bridge arrangement
supplied with the 8120. The Star Bridge simulates
a conventional 4-arm bridge in an exact condition
of balance. Plug the Star Bridge into the
connector, on the rear of the instrument, in place of
the interconnect cable. Attempt to balance the
substitute bridge on the instrument. If conditions
now appear to be normal, the transducer or cable is
at fault. If the previous difficulties persist, the
module is faulty.

4
MODEL 8120-100A/110A STRAIN GAGE CONDITIONER OPERATION MANUAL 4
Figure 1 Star Bridge Construction
5.0 Repair/Service
Because of the nature of most PCB instrumentation,
field repair is typically NOT recommended and may
void any warranty. If factory service is required, return
the instrument according to the RETURN
PROCEDURE below. A quotation will be provided
prior to servicing at no additional charge.
6.0 Return Procedure
To expedite the repair process, contact the factory for a
RETURN MATERIAL AUTHORIZATION (RMA)
number prior to sending equipment to the factory.
Please have information available, such as model and
serial number. Also, to insure efficient service, be sure
to include a written description of the symptoms and
problems with the equipment to a local sales
representative or distributor, or contact PCB if none are
located in your area.
Customers outside the U.S. should consult their local
PCB distributor for information on returning
equipment. For exceptions, please contact the
International Sales department at PCB to request
shipping instructions and an RMA. For assistance,
please call (716) 684-0001, or fax us at (716) 684-
8877. You may also receive assistance via e-mail at
7.0 Customer Service / Warranty
The employees of PCB strive to provide superior,
unmatched customer service. Should you at any time
find yourself dissatisfied with any PCB product for any
reason, consult a PCB Application Engineer or local
representative/distributor to discuss repair, refund, or
exchange procedures.
PCB instrumentation is warranted against defective
material and workmanship for one year unless
otherwise expressly specified. Damage to instruments
caused by incorrect power or misapplication is not
covered by warranty. If there are any questions
regarding power, intended application, or general
usage, please consult with your local sales contact or
distributor. Batteries and other expendable hardware
items are not covered by warranty.
When unexpected measurement problems arise, call
our 24-hour SensorLine to discuss your immediate
dynamic instrumentation needs with a Factory
Representative. Dial 888-684-0011.

5
MODEL 8120-100A/110A STRAIN GAGE CONDITIONER OPERATION MANUAL 5
Table 1 Specifications
Transducers: 4-arm bridges, 90 to 2000 ohms, nominally 1 to 8 mV/V, full scale
(120 ohms or less requires 5-volt excitation).
Cables: 4-, 5-, or 7-wire, depending on application; 1000 feet maximum length.
Bridge Excitation: Regulated 5 volts or 10 volts dc, selected with I/O connector
wiring. Transducers with sensitivity from 4 to 8 mV/V full scale must use 5-volt
excitation.
Balance Adjustments: 10-turn coarse and fine; will balance 1.5 mV/V initial
unbalance.
Span Adjustments: 10-turn coarse and fine; 1 to 8 mV/V, full scale.
Analog Outputs: Three analog outputs available; 0 to +/- 5 volts with 50% over
range, 5 milliamperes maximum. Band pass is dc to 2 kHz, dc to 200 Hz, or dc to
2 Hz, depending on output used. Active low-pass filters provide for roll off of 60
dB per decade above cutoff frequency. Full-scale slew time is 1.4/f seconds,
where f is the cutoff frequency.
Common Mode Rejection: Greater than 80 dB.
Output Ripple and Noise: 0.15% of full scale (rms) maximum for 2-KHz and
200 Hz outputs; 0.02% of full scale (rms) on 2 Hz output.
Accuracy: 0.05% of full scale.
Dimensions: 1.7 x 4.41 x 8.5 (H x W x D inches).
Operating Temperature Range: 0 to +130 degrees F.
Power Requirements: 105 to 135 volts ac, 50 to 400 Hz at 5 watts maximum.
Table of contents
Other PCB Piezotronics Power Supply manuals

PCB Piezotronics
PCB Piezotronics 488B04 User manual

PCB Piezotronics
PCB Piezotronics 443B02 User manual

PCB Piezotronics
PCB Piezotronics 682A01 User manual

PCB Piezotronics
PCB Piezotronics 488B10 User manual

PCB Piezotronics
PCB Piezotronics F482A20 User manual

PCB Piezotronics
PCB Piezotronics 482A20 User manual

PCB Piezotronics
PCB Piezotronics 441A101 User manual
Popular Power Supply manuals by other brands

Crestron
Crestron FT2A-UTK-PWS installation guide

CARLO GAVAZZI
CARLO GAVAZZI SPD244801 Technical data, installation and operation

SEAWIN Electricals
SEAWIN Electricals MP6401 product manual

AMX
AMX NXA-UPSEPM NXA-UPS1500EPM installation guide

Agilent Technologies
Agilent Technologies U8001A Specifications

ABB
ABB ACS550-01 user manual