PCE Health and Fitness PCE-MM200 User manual
www.pce-industrial-needs.com
Tursdale Technical Services Ltd
Unit N12B
Tursdale Business Park
Co. Durham
DH6 5PG
United Kingdom
Phone: +44 ( 0 ) 191 377 3398
Fax: +44 ( 0 ) 191 377 3357
info@tursdaletechnicalservices.co.uk
http://www.industrial-needs.com/
Manual
PCE-MM200

Manual.....................................................................................................................................1
PCE-MM200............................................................................................................................1
Product Specifications.............................................................................................................3
Safety Cautions.........................................................................................................................3
Package Contents.....................................................................................................................4
System Requirements .............................................................................................................4
Software Installation process .....................................................................................................5
Window XP OS Installation........................................................................................................5
Window Vista OS Installation...................................................................................................10
PCE-MM200 digital microscope Connectting............................................................................14
PCE-MM200 Application software.........................................................................................16
Tool Bar Description.......................................................................................................................... 17
Thumbnails remark..................................................................................................................... 18
Take Photo.................................................................................................................................... 18
Take Video.................................................................................................................................... 19
Take time lapsed Photos.............................................................................................................. 20
Email ............................................................................................................................................. 21
Save as........................................................................................................................................... 22
Menu Bar Function Description................................................................................................22
File................................................................................................................................................. 22
Setting............................................................................................................................................ 22
Capture ......................................................................................................................................... 24
Help ............................................................................................................................................... 24
Rate................................................................................................................................................ 24
Full Screen Display and return .......................................................................................................... 24
Photo Viewing and Measure.............................................................................................................. 25
Video player....................................................................................................................................... 26
Troubleshooting......................................................................................................................27
Common Fix ...................................................................................................................................... 27

Product Specifications
m
Operation system: Windows XP SP2/Vista
m
PC interface: USB 2. 0
m
Image Sensor: 1. 3 Mega pixels
m
Video Capture Resolution 1280x1024, 640x480, 320x240
m
Color: YUV or 24bit RGB
m
Lens: Dual Axis 27X & 100X Microscope Lens
m
Focus Range Manual Focus From 8mm to 300mm
m
Magnification Ratio 10X to 200X
m
White Balance: Auto.
m
Exposure: Auto
m
Light Source: 8 adjustable LED White Light
m
Power supply: 5V DV from USB Port
m
Size: 120mm (L) X36mm (R)
Safety Cautions
1. Avoid touching the lens with finger to dirty it and protect the product from
electrostatic damage.
2. Do not attempt to disassembly any part of this product.
3. Do not attempt to service this product yourself. Opening the covers may expose
you to dangerous voltage points or other risks.
4. Storing and operating PCE-MM200 digital microscope at Temp: -20 ~ 45°C,
Humidity: 45% ~ 85%, as this will extend Product life and prevent damage to the
product.
5. Do not allow this product to have contact with water or other liquids. If water or
other liquids enter the product interior, immediately unplug the product from PC.
Continued use of the product may result in fire or an electrical shock.
6. Do not use any detergent or volatile solution, which will damage the camera
case, painted surfaces and lens. Only use a soft cleaning cloth to clean it.
7. Do not place this product near a heat source or expose direct flame, avoid the
lens damaged by high temperature or humidity
8. If the lens is dirty, please use a kens brush on soft cloth to wipe clean. Avoid
touching it with your fingers. Exercise care to avoid scratching the lens.
9. Need to read PCE-MM200 digital microscope User’s Manual before using and
storing it.
10. To avoid electric shock, remove all electricity source before moving PC.
Package Contents
The PCE-MM200 digital microscope package includes the following:
1. USB microscope
2. CD ROM (Software) and Quick manual
3. Stand (Plastic)
4. 2pcs Cover
System Requirements
In order to install PCE-MM200 digital microscope, you will need the following minimal
systems:
. OS: Windows XP SP2 or Vista
. CPU: Pentium IV 1.0G, Celeron, AMD Athlon
. CD-ROM drive
. Available USB port (if it is USB1.1,please use PCE-MM200-Beta.exe application
inside CD)
. 256MB RAM
. 100MB available hard disk space
. Graphic card: 16-bit
Recommended PC specification for optimal performance:
√OS: Windows XP SP2 or Vista SP1 or above
√CPU: Pentium IV 1.6G, Celeron, AMD Athlon or above
√CD-ROM drive
√Available USB 2.0
√512MB RAM or above
√10GB available hard disk space or above
√Graphic card: 16-bit or above
Software Installation process
The following instructions will guide you to through the process of installing the PCE-
MM200 digital
microscope:
I. Power on PC and place installation CD into CD-ROM driver, do not connect USB
Cable from
PCE-MM200 Device to PC before software installation.
II. Select “Install Software”, and follow the instructions to complete installation.
III. As driver installation completed, and if system asking for restarting, please restarting
PC.
Window XP OS Installation
1. Place the installation CD-ROM into CD-ROM drive, the installation program should
be started automatically. Otherwise, please execute the AUTORUN.EXE directly from the
CD-ROM.
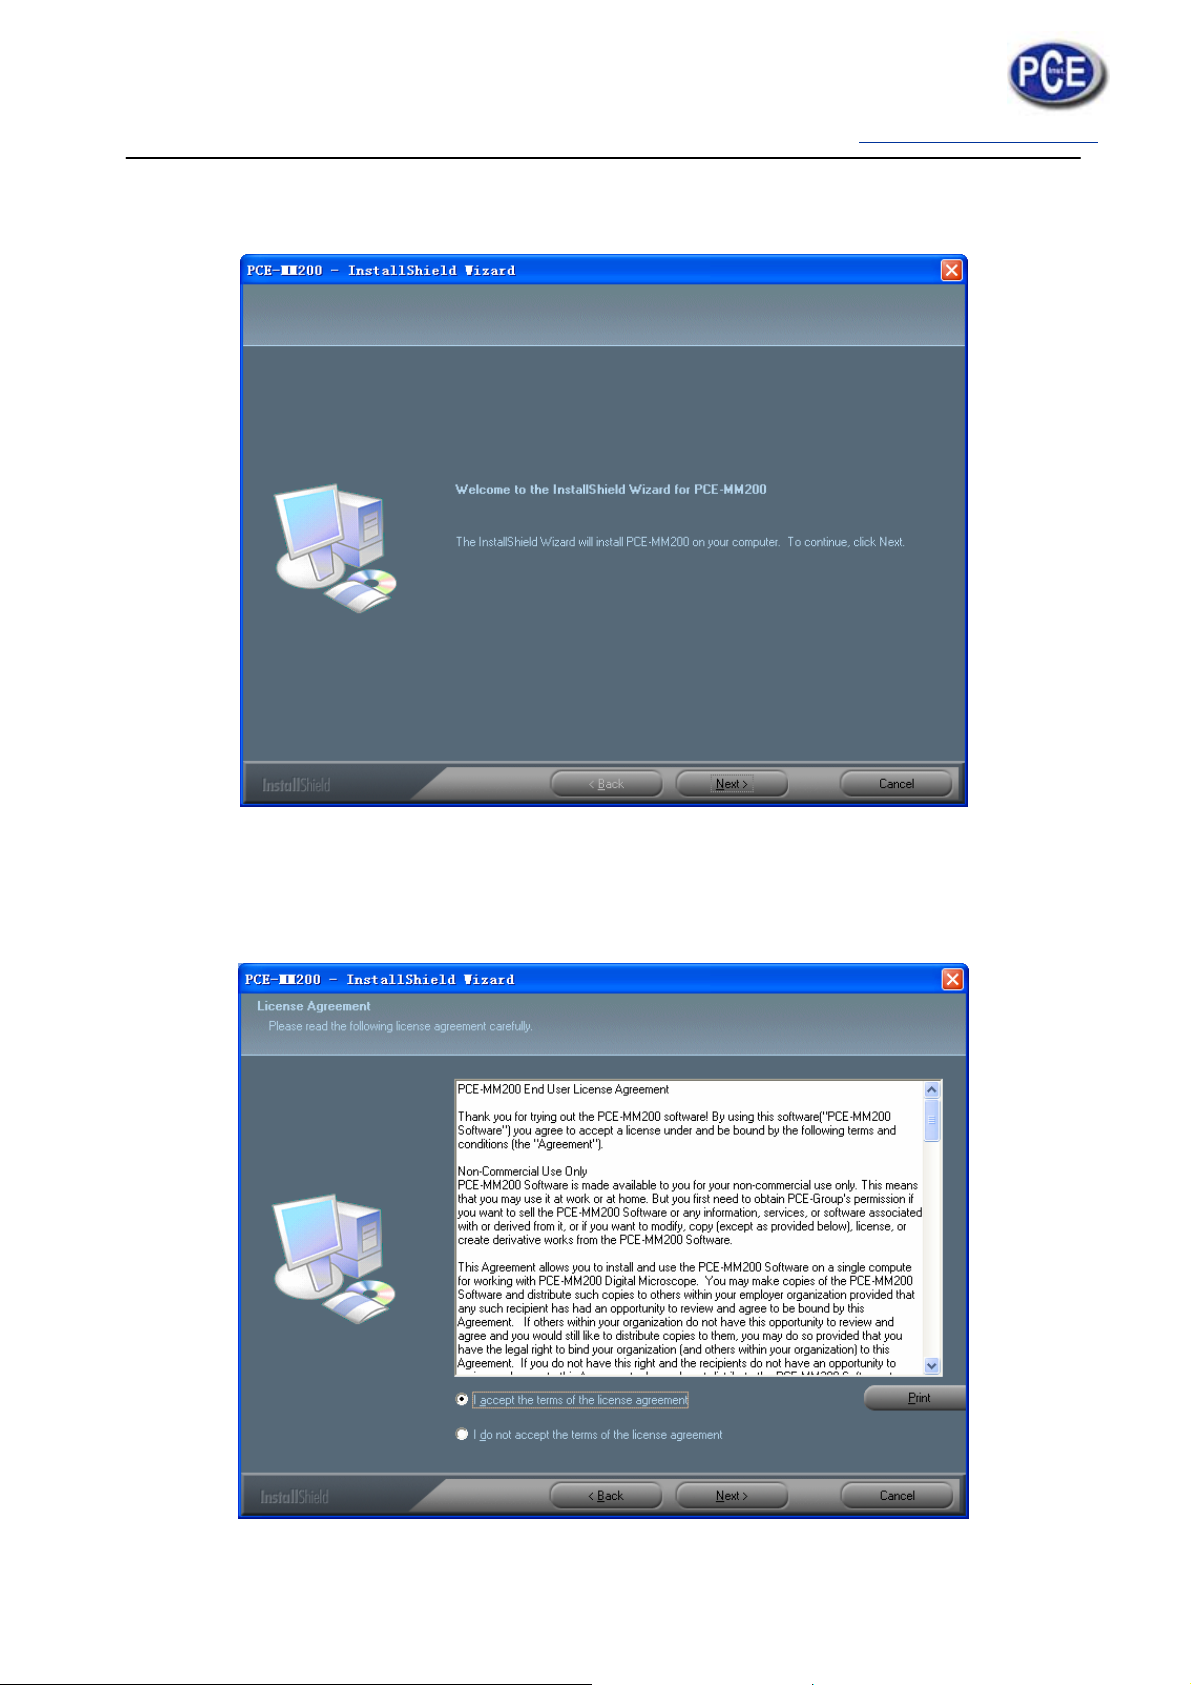
2. Select “SOFTWARE” item, you will see the following popup .Press “Next” to proceed or
“Cancel” to abort installation.
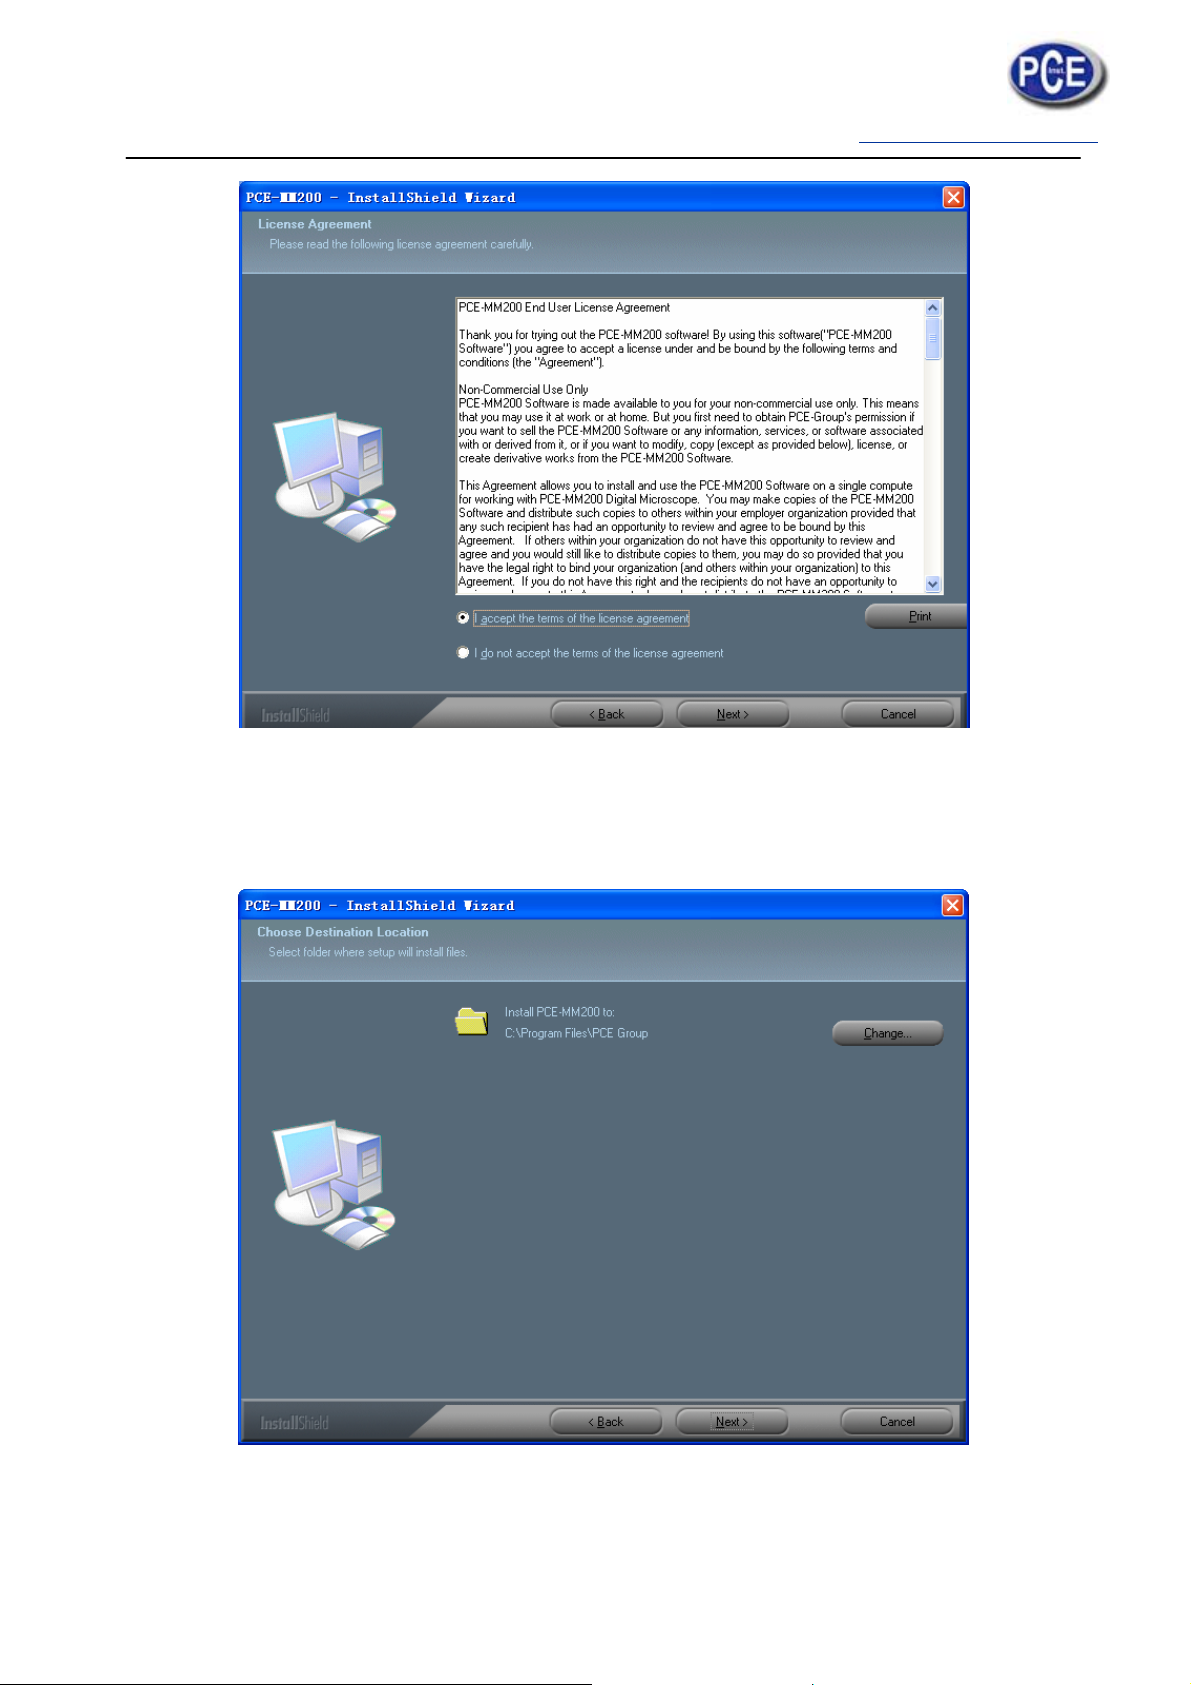
3. You will see the End User License Agreement. If you accept the License Agreement,
then you can Click the “Next” button which is availability to process, or “Cancel” to abort
installation.
4. Click “Install” to start to install the application, click “Cancel” button to abort installation.
Click on “Back” to back to read the End User License Agreement again.

5. You will see the following progress bar below indicating that the installation is
proceeding. If click “Cancel” button, it will abort installation.
6.Wait until you see the following popup and press “Finish” button.

7. Please plug USB cable to PCE-MM200 digital microscope Device to connect with PC and
power on. You will see the following popup window.
8. Please select “No,not this time” and click “Next” to continue.
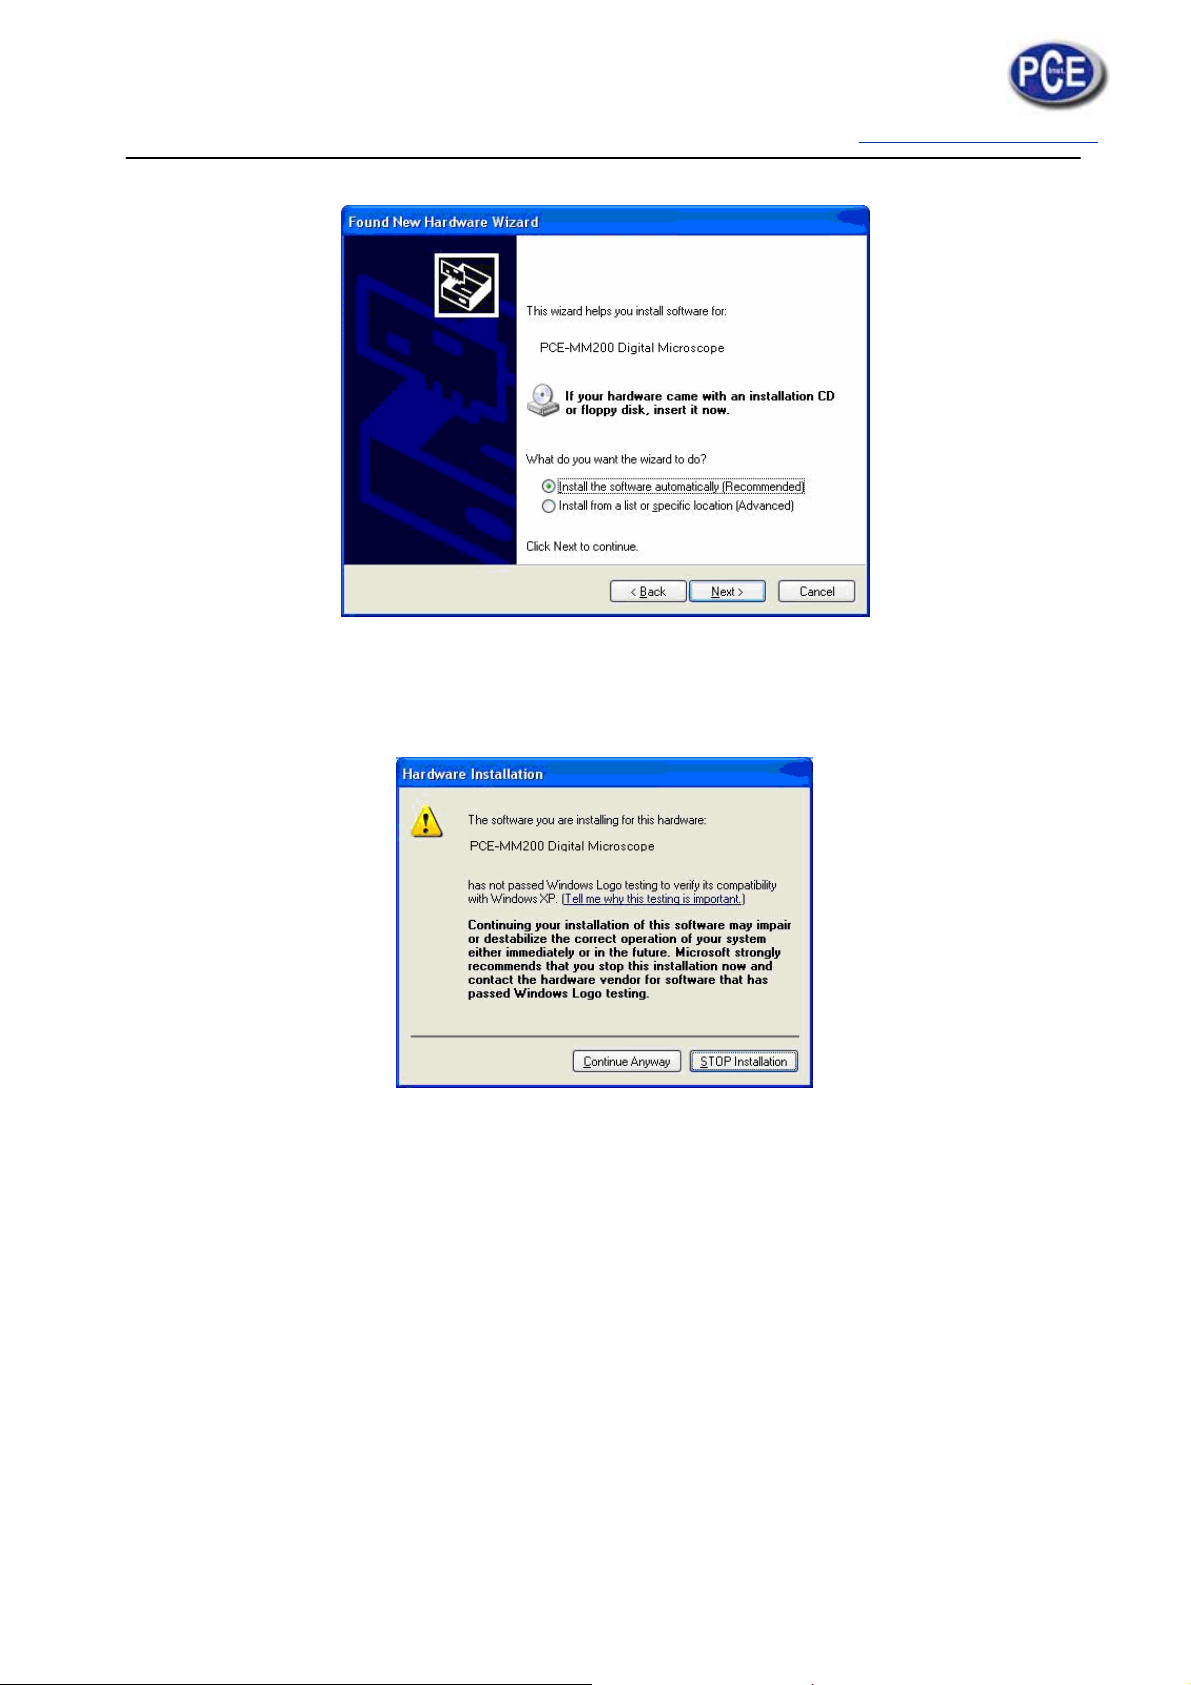
9. Please select “Install the software automatically (Recommended)” and click “Next” to
continue. It would popup the following window.
10. Please click “Continue Anyway” to continue till popup the following window.

11. Click “Finish” to finish all software installation.
Now the software installation was completed, you can use free PCE-MM200 digital
microscope.
Window Vista OS Installation
1. Place the installation CD-ROM into CD-ROM drive, the installation program should
be started automatically. Otherwise, please execute the AUTORUN.EXE directly from the
CD-ROM.

2. Select “SOFTWARE” item, you will see a “User account control” popup. Please press
“Allow” to continue or “Cancel” to abort installation.
2. You will see the following popup .Press “Next” to proceed or “Cancel” to abort
installation.
4. You will see the End User License Agreement. If you accept the License agreement,
then you can Click the “Next” button which is availability to process, or “Cancel” to abort
installation.
5. Click “Install” to start to install the application, click “Cancel” button to abort
installation. Click on “Back” to back to read the End User License Agreement again.
6. You will see the following progress bar below indicating that the installation is
proceeding. Click “Cancel” button to abort installation.

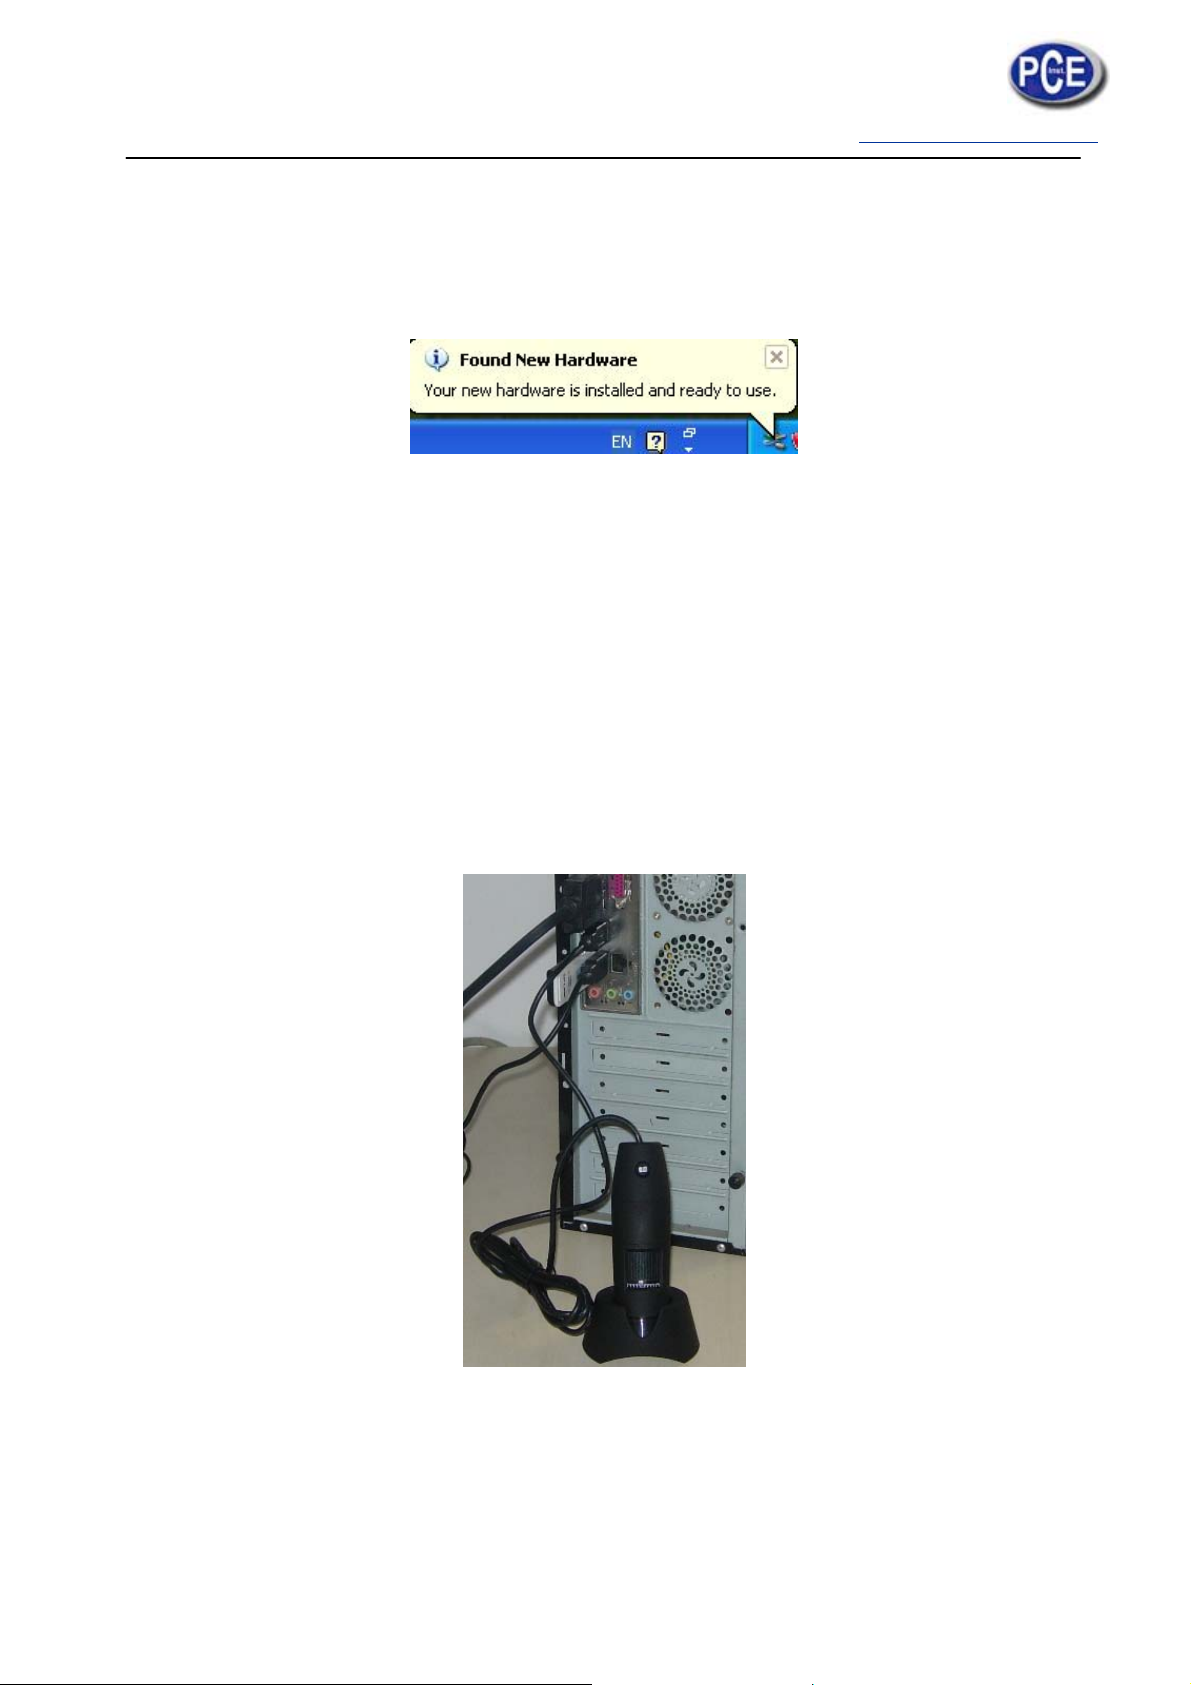
8. Please plug USB cable to PCE-MM200 digital microscope Device to connect with PC and
Power on. System will automatically search and install the driver. Wait until you see this
message that system show “Your new hardware is installed and ready to use”.
Now the software installation was completed, you can use free PCE-MM200 digital
microscope.
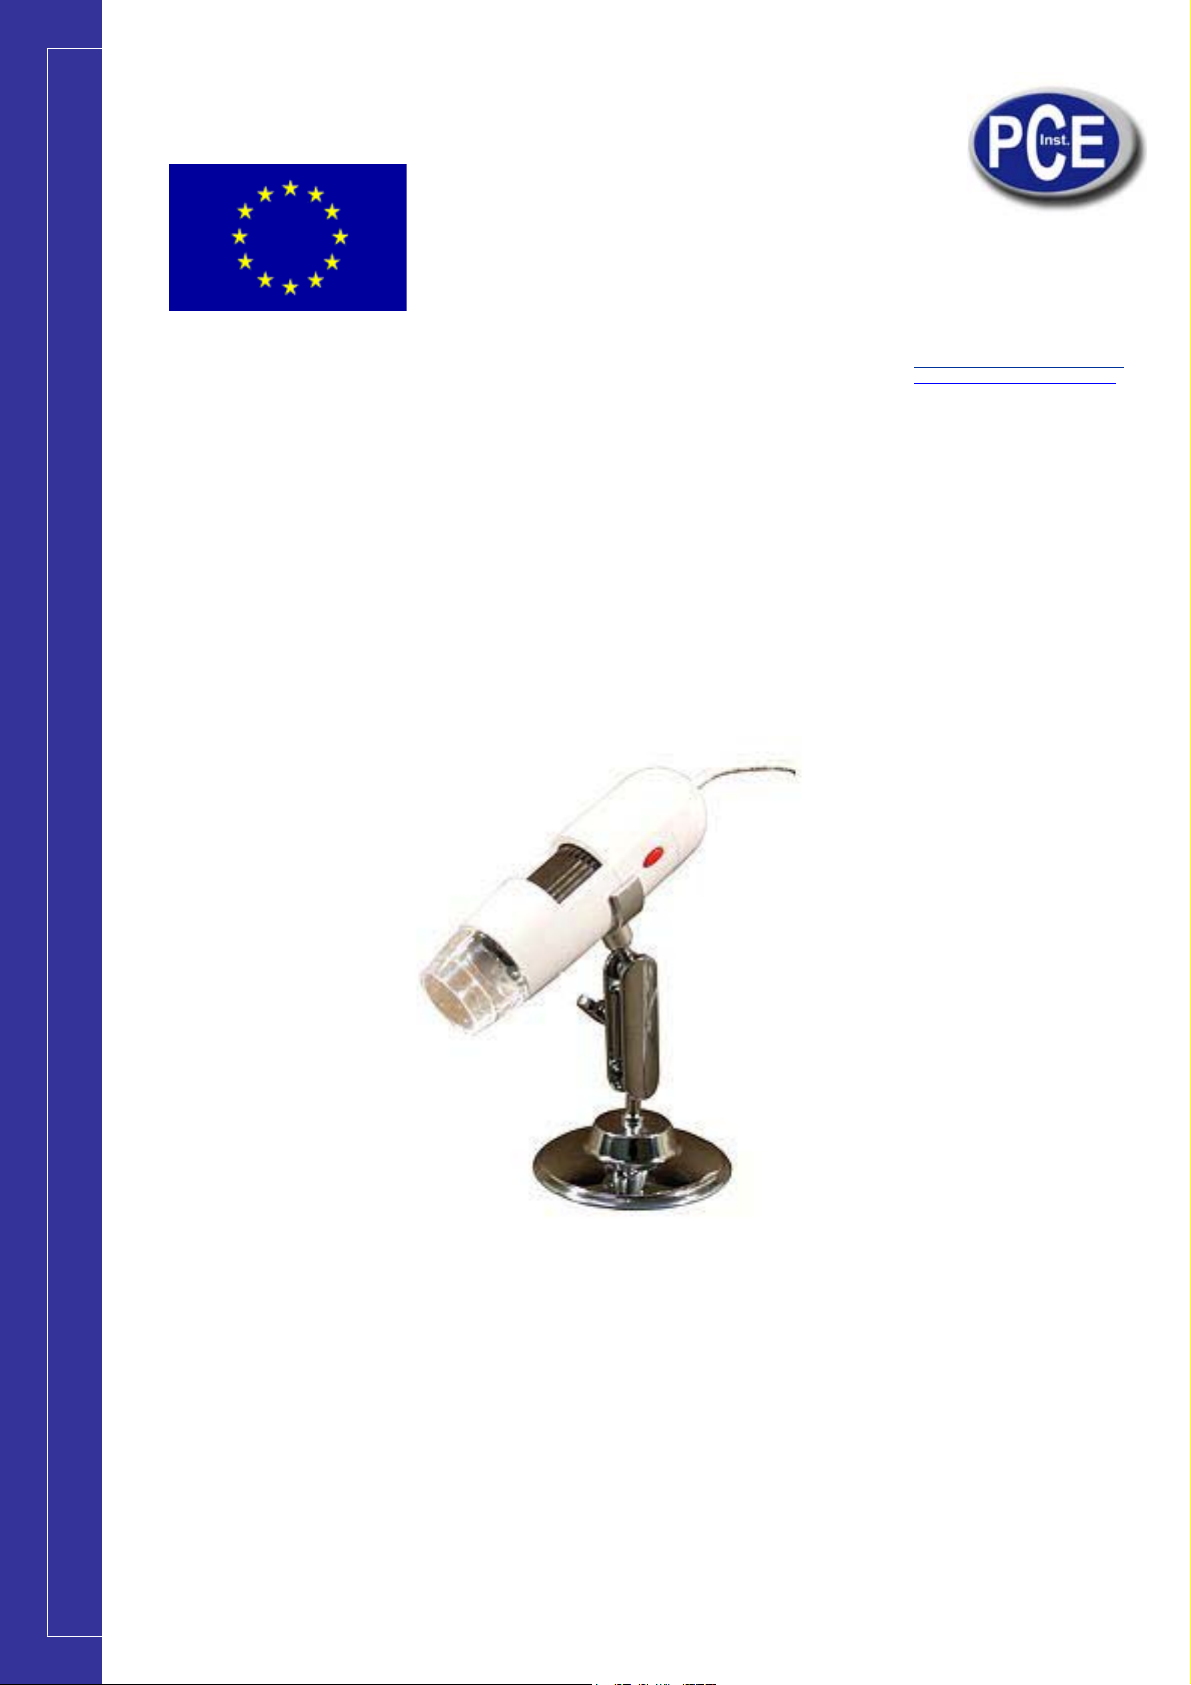
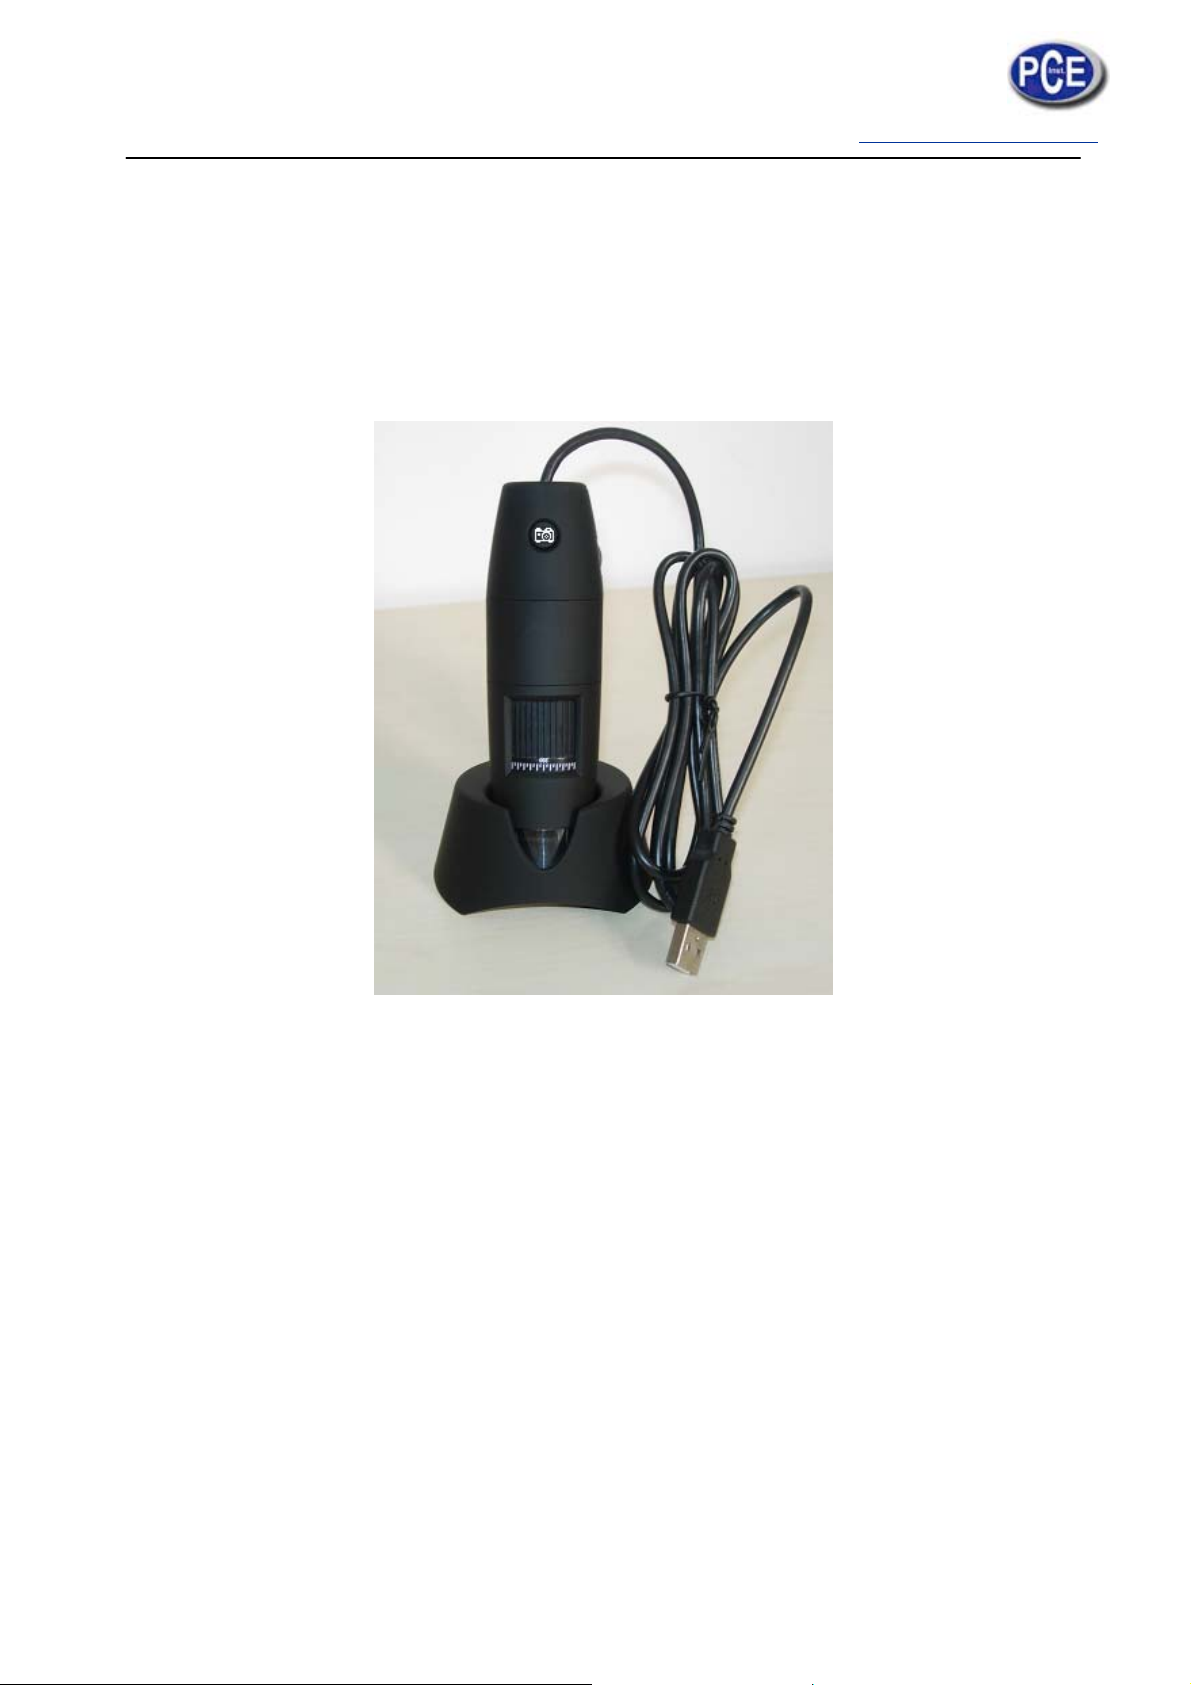
PCE-MM200 digital microscope Connectting
The following procedure will show you how to properly connect PCE-MM200 digital
microscope with yourPC.
i. Connect USB Cable on PCE-MM200 digital microscope to PC USB port and
Power on
ii. The PCE-MM200 digital microscope has 1 switch for power on and LED
adjusting on one side as shown:

Operating PCE-MM200 digital microscope Process
The following process will show you how to operate PCE-MM200 digital microscope.
①. To have a right image, suggested holding PCE-MM200 digital microscope as shown:
②. Put the to-be-observed object near the PCE-MM200 digital microscope, the distance
between both (object distances) don’t exceed to 30CM.
③. Adjust the focus: Use any finger to rotate the roller, till the image is clear.
④. The Zoom time will be larger as PCE-MM200 digital microscope is closer to the
observed object.
⑤. When the observed object is located at the top of the transparent cover, there are
two focus positions you can be found by rotating the roller: long cover—60X and 200X;
short Cover—80X and 150X. If you want other zoom time, you must adjust the object
distance and ever must take off the transparent cover to adjust it.

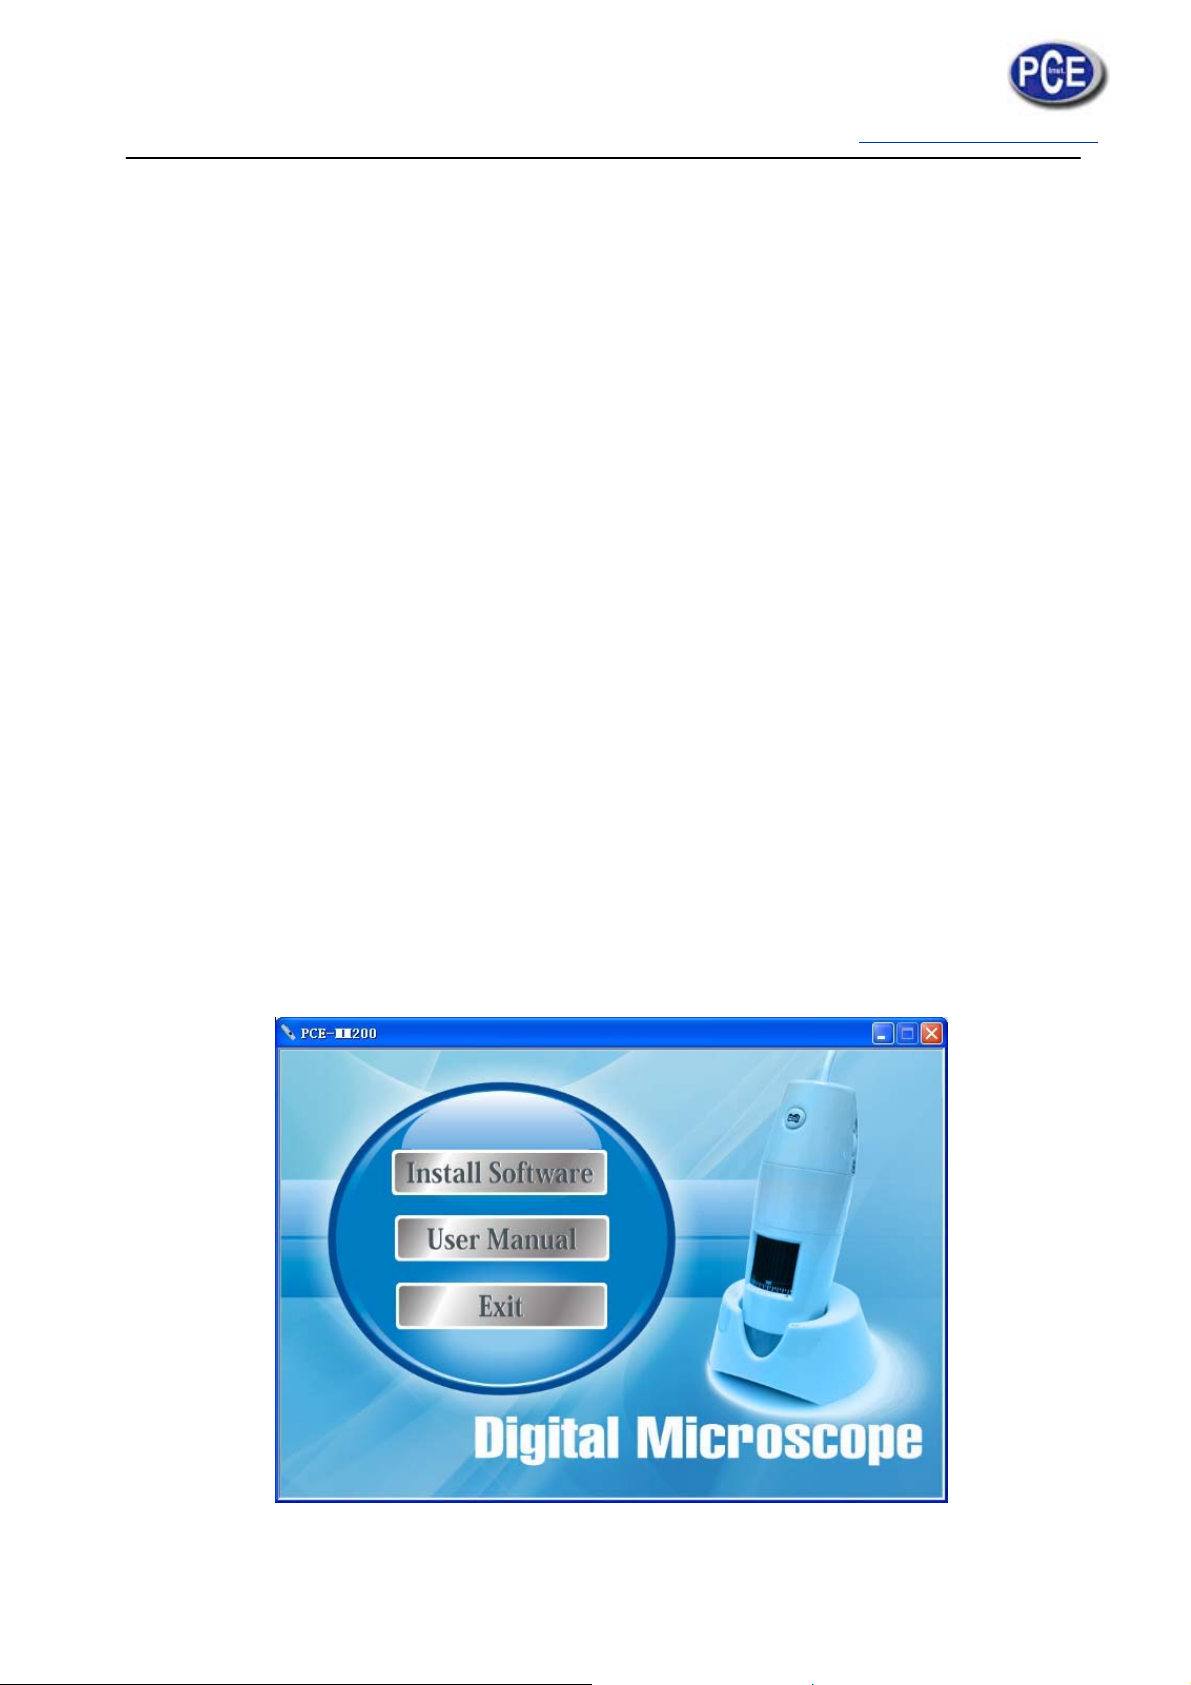
PCE-MM200 Application software
Note: Before start PCE-MM200 program, please make sure PCE-MM200 digital microscope
has been connected to PC via USB line and Power on.
Double-Click PCE-MM200 icon on desktop , the PCE-MM200 main screen will
be Shown as below:
If PCE-MM200 digital microscope has not been found while opening the PCE-MM200
program, the message will be shown as below:

Tool Bar Description
: Take Photo
: Take Video
: Take time lapsed Photos
:Email
:Save as--A took-Photo can be saved as “jpg” or “bmp” to your specified disk.
Photo / Video Folder
Photo/Video Folder is on the left side of the program, which contains the thumbnails of
Photo or video captured by the program.
The Ph
o
program.
keep thi
s
Thumbna
The Pho
t
pop a
m
clicking、
Take Pho
t
You can t
a
(Note: Thi
s
Hotkey:
F
o
tos/video
Thus, it
s
folder cle
ils remar
k
The P
h
t
o or vide
o
m
enu, or
be saved
、
t
o
a
ke Photo
s
is Photo
F2
in the f
o
is sugges
an for file
k
T
h
oto o
r
vid
e
o
is select
e
click the
、
be mail
e
by clickin
g
folder as
b
o
lde
r
will
ted to sa
v
security a
n
he Photo
o
e
o has not
e
d, the m
o
related b
u
e
d、be op
e
g
ico
n
b
elow)
not be
a
v
e manual
n
d progra
m
or
video h
a
yet been
s
o
use stay
t
u
ttons of
e
ned to ed
n
on Tool
b
a
utomatic
a
ly the ne
e
m
’s perfor
m
a
s been s
a
s
aved.
t
here, the
n
tool bar
it、be del
e
b
a
r
or this
i
a
lly delete
e
dful Phot
o
m
ance con
a
ved
n
click the
,it can b
e
e
ted.
button
i
nfo@tursdalete
c
d when
c
o
or vide
o
cern.
right key
e
viewed
on PCE-
M
c
hnicalservices.c
o
c
losing th
o
, and the
of mouse
by doubl
M
M200 de
v
o
.uk
e
n
to
e-
v
ice

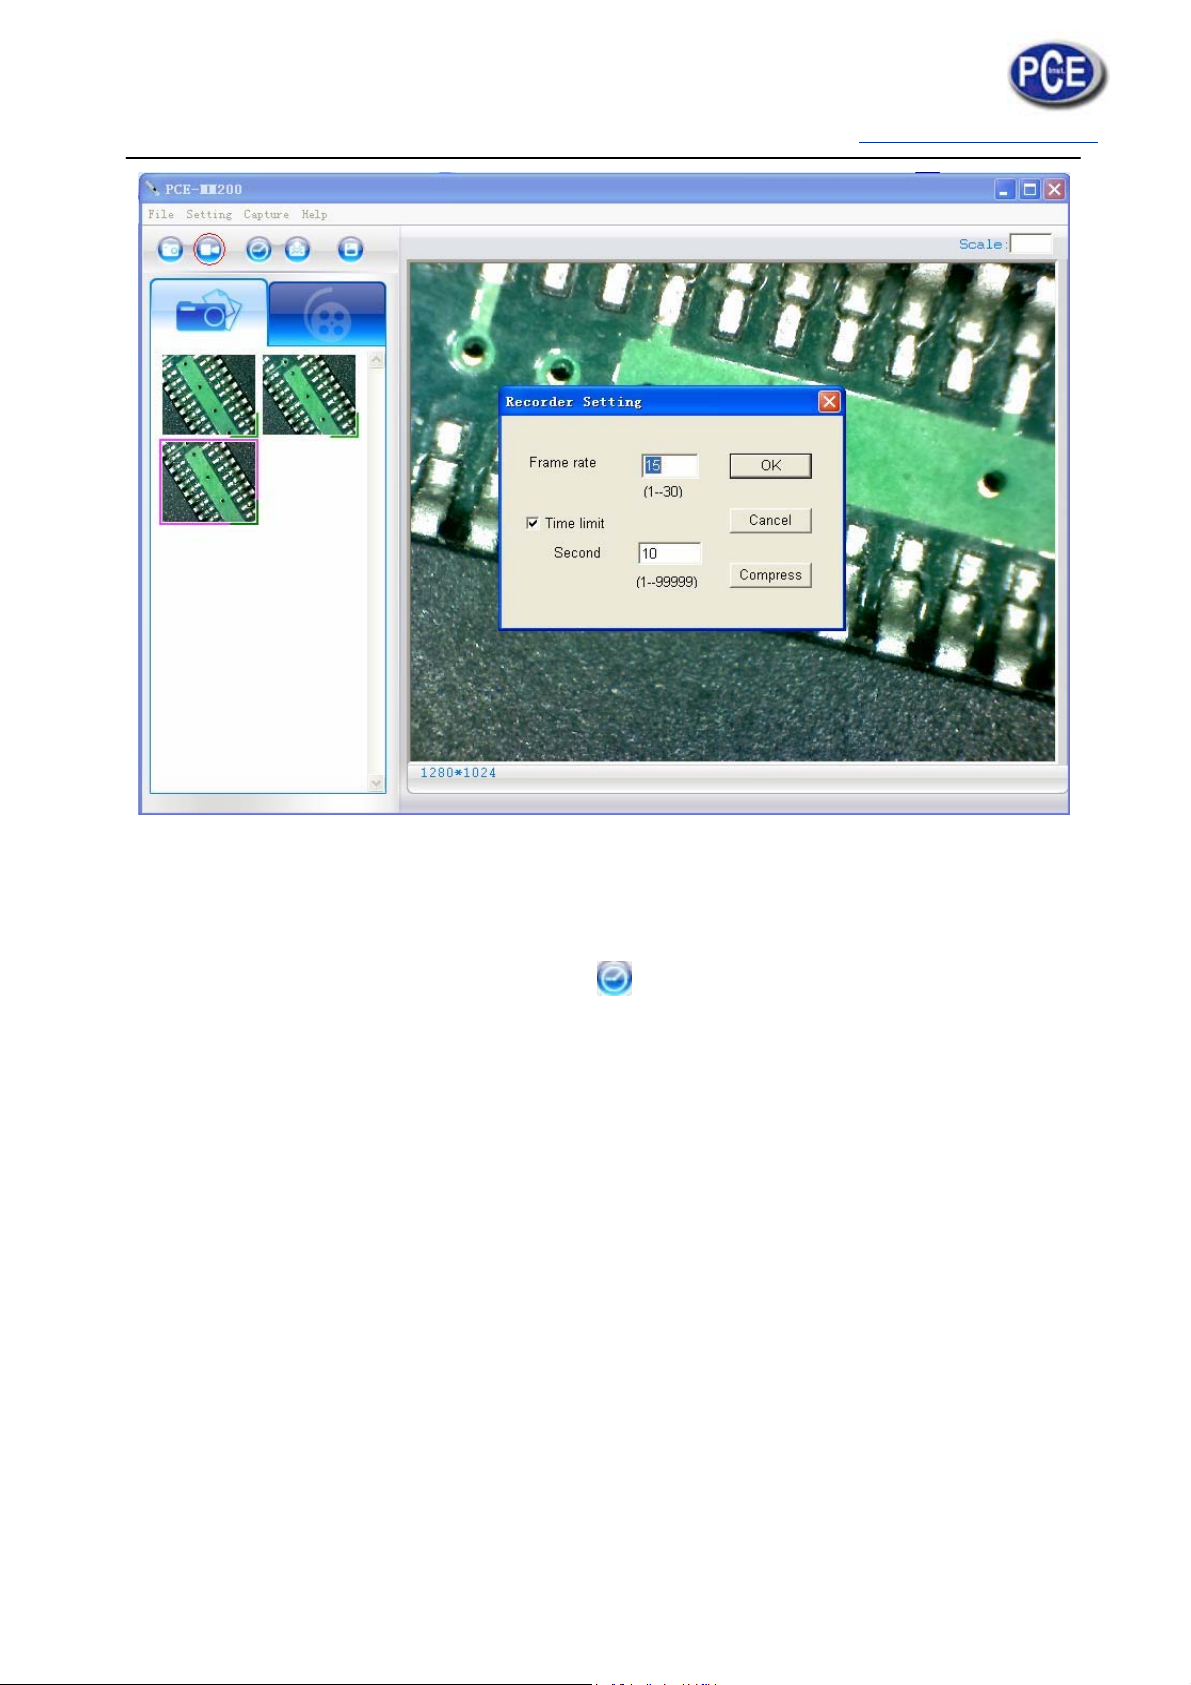
Take Video
The Video can be taken by clicking icon on Tool bar. (Note: This is Video folder as
below). Recorder setting:
1. Frame rate: it is the number of frames or images that are projected or displayed per
second. The number range is 1~30
2. Timer limit: it is the time of video recording to avoid video file size exceed to the
space of disk. The number range is 1~99999
3. Compress: click it and you can select the video compressed format to reduce video
size. It loads automatically compress programs according to your PC system. The
video quality may be varied with different compress program.
Hotkey: F3-Start, F4-Stop
Take time lapsed Photos
You can take time lapsed Photos by click the icon of Tool Bar as below shown.
Table of contents
Other PCE Health and Fitness Microscope manuals


