PDMOVIE Live Air 2 User manual

Live Air 2
PDMOVIE Wireless Follow Focus System

Before using the product, please read the instructions carefully or
watch the tutorial videos to learn how to use the products properly. If
there are any direct or indirect adverse effects due to operational
errors, PDMOVIE will not assume any responsibility.
Please do not dismantle, repair or refit the internal structure of the
product without authorization. If the product is damaged
due to the above improper operation,PD Movie has the right
to refuse product service.
Notice For Use
Wecome To Use LIVE AIR 2

Configuration List
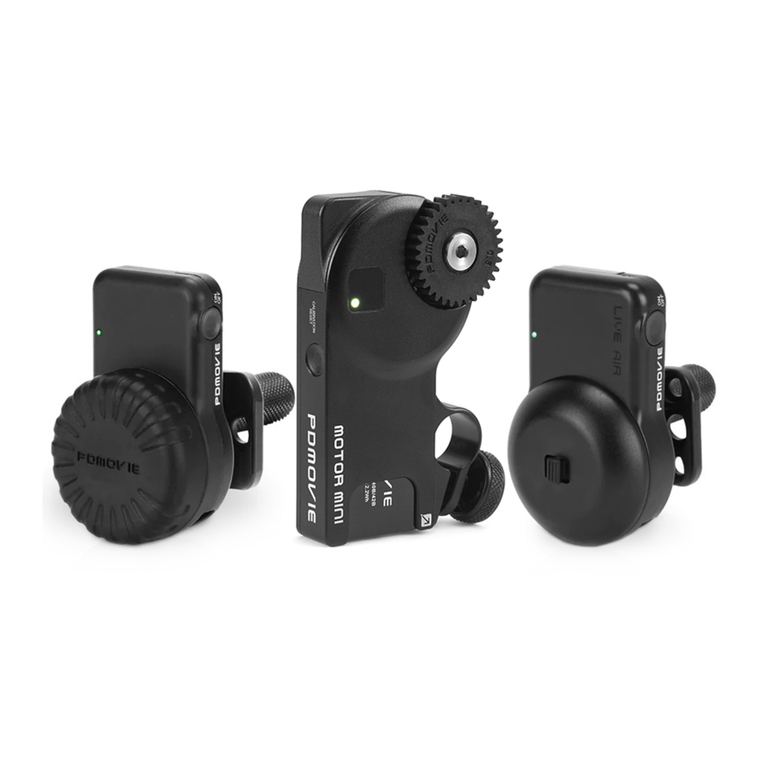
MOTOR MINI
(PD-BTMP)
Li42B Battery Li42Bx2 Battery
①
⑤ ⑥ ⑦ ⑧
⑨ ⑩
③ ④
②
11
PDL-AFP PDL-AP
PDL-AZP
5
1 1 - -
- - 1
- - 1
- 1 -
1 1 1
1 - 1
2 2 2
2 2 1
2
3
4
6
7
8
9
10
11
Controller(PDL-TC-AFP)
Controller(PDL-TC-AZ)
Controller(PD2-HT)
MOTOR MINI(PD-BTMP)
Li42B Battery (3.7V 600mAh 2.2Wh)
Li42Bx2 Battery (3.7V 600mAh 2.2Wh*2)
15MM Pipe
1 1 1
1 1 1
1 1 1
Micro USB Charging Cable
Li42B Battery Charger
Camera Hot Shoe Clamp
USB Charging Cable 0.9m( 4 pin )
Serial number
Name
Controller
(PDL-TC-AFP)Controller
(PDL-TC-AZ)
Controller
(PD2-HT)
Micro USB
Charging Cable
Li42B Battery Charger
Camera Hot Shoe Clamp 15MM Pipe USB Charging Cable 0.9m
( 4 pin )

PDL-AFP/AZP Instruction Manual
Step 1.
Install the
motor on
15mm rod.
Step 2.
Locking U-clamp.
Step 3.
Install battery.
1. Install Motor
Install the motor on the 15mm rod and make sure the motor
gear matches with the lens gear.( If it install on DSLR Camera
lens, please use the camera hot shoe clamp.)
Micro USB
Charge Interface
Focus Control
Wheel
Lights For
Controller Status
ON/OFF
Button
Lights For
Motor Status U-clamp
Battery
0.8 Gear
CALIBRATION/
RESET Button
Antenna
Note: If using a DSLR camera
lens,the lens will need a 0.8
lens zip gear in order to fit with
the motor gear.
*

2. Turn on the Bluetooth controller and motor
Press the ON/OFF button on the Bluetooth controller for three
seconds until the indicator light powers on. The motor will turn on
automatically when the battery is inserted.
3. Bluetooth Connection
After the Bluetooth controller is turned on, the indicator lights
will flash quickly for 60 seconds, which means the Bluetooth is
searching. When the Bluetooth connection is successful, the
controller indicator light will brighten all the time.
4. Calibration
(1) Press the ON/OFF button of the Bluetooth controller
once, then press it again and hold until the motor rotates.
(2) Press and hold the button on the bottom of the motor for
three seconds until the motor rotates.
*1.The recommended control distance of the controller is about 100 meters,
although the actual control distance can be affected by environmental factors.
2.The motor and the controller will disconnect when the signal is weak. After the
signal returns to normal, the motor and controller will automatically reconnect.
(1) Press the button once,
then press it again for three
seconds.
(2) Press the button
for three seconds.
Bluetooth
controller Motor
Press the ON/OFF button.
Plug in the
battery.
Searching Bluetooth Connect successful
Blinking
Light
Blinking fast
Light

(3) Manually calibration:
A. When the motor gear and the lens gear are completely
connected,turn the lens to the starting point and hold for 0.5
seconds.
B. Then turn the lens ring to the end and hold for 0.5
seconds.
C. Finally turn the lens ring back towards the center to finish.
(It is recommend that you use manual calibration when using a DSLR
camera lens)
The color of the
indicator light Residual electricity
100% - 75%
75% - 50%
50% - 25%
25% - 0%
WHITE
GREEN
YELLOW
RED
(1) Turn the lens ring to
the starting point and
hold for 0.5 seconds.
Table 1 The color of the indicator light
Lights For Charger Status
During charging, the light is red.
When the charging is finished,
the light is green.
5. Charging instructions
Use the charging device provided in the package to charge
the product to activate the battery and ensure the product is used
smoothly. Insert the battery into the corresponding battery slot to
start charging the battery
(2) Turn the lens ring to the
end and hold for 0.5
seconds, then turn the lens
ring toward the center.

Turn on the Bluetooth
Number of click
on the buttons Function
Restore the lens stroke when power off /
Remove the lens stroke
Calibration Lens Stroke
Switch Motor Rotate Direction
② Cancel the calibrated stroke: Please press the button four times to
reset the stroke manually;
Restore lens stroke when powered off: When the motor is suddenly
powered off, please press the button 4 times to restart the calibration
stroke.
Motor Direction
Number of clicks on the buttons Function
ON/OFF
A-B Focus Limits
Auto Calibration
Bluetooth Pairing
Table 2 Bluetooth controller. Instruction of button
Table 3 Motor Instruction Table
①
②
③
④
⑤
①
②
③
④

REMOTE AIR APP
The motor can also be controled by the iOS app. Please
search PDMOVIE or REMOTE AIR, then download the app
from the Apple store.
1.Turn on the motor.*2.Initiate Bluetooth
on phone.
3. Turn on the APP
(Automatically
connects to the motor)*
1. Please make sure the Bluetooth controller is off.
2. Before opening the app, please make sure the app is not already
running, if so, please close the app and reopen again.
Lights For Focus Control Wheel
Lights For Iris Pull-push Lever
Lights For Controller Status
Lights For Zoom Pull-push Lever
OLED Screen
PD2-HT Front Sketch Map
Focus Function Button
Zoom Function Button
ZOOM Pull-push Lever
PD2-HT Left Side Sketch Map
FOCUS
ZOOM
PDL-AP Instruction Manual
Product Sketch Map

Start pairing
1. Controller turns on Bluetooth
mode:
Please make sure the handle is
turned off, and then press the
ON/OFF button and the FOCUS
button in the meantime.Short
press three times, then press
and hold the ON/OFF button to
refresh the bluetooth.
2. Insert the battery to start the
motor.
3. Successful connection:
The Bluetooth logo on the
controller screen is always
on and the status indicator of
the control handle is green,
indicating that the handle is
successfully connected to
the motor.
PDL-AP Instruction Manual
Bluetooth Control
1. If the connection is not successful, please return to the first step and re-do it.
2. After the pairing is successful, confirm that the focus handwheel indicator is
red (double-click the FOCUS button to switch the color). Press and hold the FOCUS
button for 3 second to automatically calibrate the lens stroke (for other methods,
refer to the fourth - method 2 / method 3). After the calibration is completed, the
handwheel can be turned to control the motor.
*
PD2-HT 指令表
Button
ON/OFF
+
FOCUS
ON/OFF
FOCUS
Number of click Function
BLUETOOTH PAIRING
BLUETOOTH MODE
A-B LIMITS
R1 Y4
MOTOR DIRECTION

Supplementary Specification
1. App introduction information or video obtained by PDMOVIE official
website/ FACEBOOK/ YOUTUBE. Or find it from APP interface - “SET” -
“HELP” .
2. The normal run time of Bluetooth controller PDL-TC-AF is 8-10
hours. If the controller battery runs out , it can use the USB 5V output or
other mobile power for charging. The normal charge time is 20-25
minutes.
3. The distance for Bluetooth control is 32 feet, and Bluetooth controller
(PDL-TC-AF) is mainly used for a single user.
4. The PDL-AP is a special configuration model. The control handle has
more functions to be used with other series of products. For details,
please contact the WeChat public account or contact technical support
for advice.
Notice
1. Emergency stop of calibration:If the motor has any problems in the
calibration process, please press the button once to stop the
calibration.
2. Live Air 2(PDL-AZP) can adjust the response speed of the motor,
click the ON/OFF button on the controler five times to change the motor
speed. The motor has slow, medium, and fast settings.
3. If the motor's calibration does not coincide with the original
calibration setting, please check if the light is blinking on the controller. If
the channel color is blinking white, the A-B point is set. If youwant to
cancel the set A-B points, please press the ON/OFF button.
4. Battery maintenance: It is recommend that you check the battery level
every month to ensure that the battery has enough power when the unit
has not been turned on for more than a month. When the unit is in a low
state of power for a extented period of time, it will lead to a smaller
capacity of the battery. Overcharging for a long period of time will cause
loss to the battery. It is recommended that the user keep the device
power at 50~74%.
CALIBRATION/
RESET
Other manuals for Live Air 2
1
Table of contents
Other PDMOVIE Camera Accessories manuals