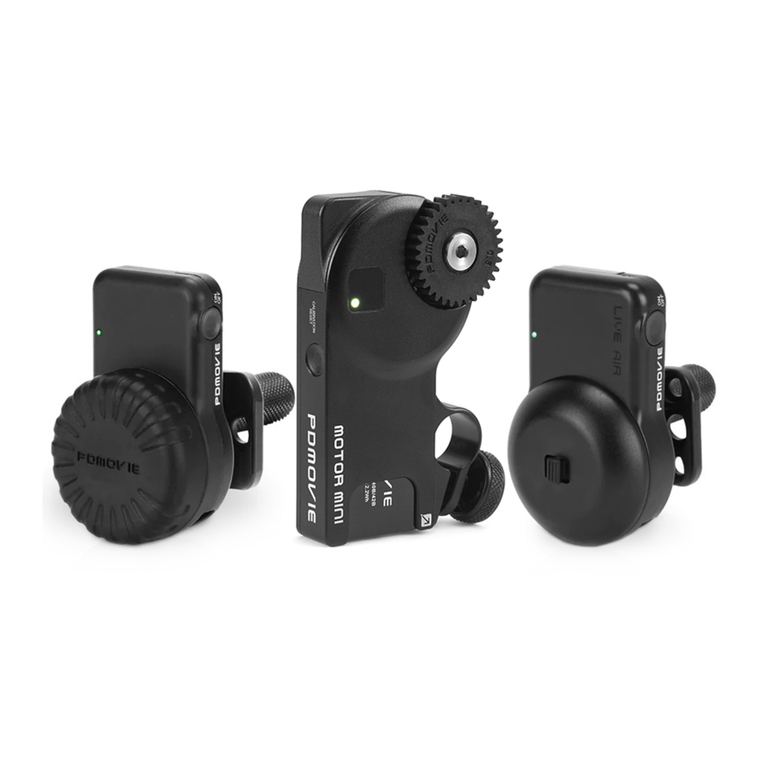
PDMOVIE Live Air 2S User manual

Product manual
Live Air 2S
(PDL-AFX/PDL-AFX-R)

Before using the product, please read the instructions carefully or watch
the tutorial videos to learn how to use the products properly. If there are
any direct or indirect adverse effects due to operational errors, PDMOVIE
will not assume any responsibility.
Please do not dismantle, repair or refit the internal structure of the
product without authorization. If the product is damaged due to the above
improper operation,PDMOVIE has the right to refuse product service.
If you need technical support or if the product has any problems, Please
contact us.
E-mail: [email protected]
Website: www.pdmovie.com
Instagram: pdmovie_official
Facebook: PDmovie / PDMOVIE_OFFICIAL
Youtube: PDMOVIE
WhatsApp: +8613542105054
PD-BTMP
Bluetooth Motor
PDL-TC-AFX
Bluetooth Controller
REMOTE AIR RIG
Large handwheel device

Li42Bx2 Battery Micro USB
Charging Cable
ChargerLir2477 Battery
Hot Shoe Clamp 15MM Pipe Lens Gear
Ring
Inner hexagon spanner
1/4 Screw
⑤ ⑥ ⑦ ⑧
⑨ ⑩
③ ④
②
⑪
Bluetooth Controller
PDL-TC-AFX
Large handwheel
device
Bluetooth motor
PD-BTMP
Fixed fixture
⑫
①

1. Install Motor
Install the motor on the 15mm rod and make sure the motor
gear matches with the lens gear.( If it install on DSLR Camera
lens, please use the camera hot shoe clamp.)
CALIBRATION/
RESET Button
Lights For
Motor Status
Lights For
Controller Status
Battery
0.8 Gear
Antenna
Step 1.
Install the
motor on
15mm rod.
Step 2.
Locking U-clamp.
Step 3.
Install battery.
Note: If using a DSLR camera
lens,the lens will need a 0.8
lens zip gear in order to fit with
the motor gear.
*
Micro USB
charge
ON/OFF
Button
1/4Screw
Battery
compartment
*After the controller
shell is unplugged

2. Turn on the Bluetooth controller and motor
Press the ON/OFF button on the Bluetooth controller for three seconds
until the indicator light powers on. The motor will turn on automatically
when the battery is inserted.
3. Bluetooth Connection
When the controller and motor are turned on at the same time, Bluetooth
will be paired automatically, and the indicator light flashes quickly. After
successful pairing, the indicator lights of the controller and the motor are
always on. After the controller is turned on for 60 seconds, it will stop
searching for Bluetooth without pairing. If the pairing fails, you need to
restart the Bluetooth search function of the controller. (Restart the Bluetooth
search function of the controller/pair a new motor: make sure that the
controller and the motor have been activated, and then see Table 2-④)
4. Calibration
(1) Press the ON/OFF button of the Bluetooth controller once, then
press it again and hold until the motor rotates.
(2) Press and hold the button on the bottom of the motor for three
seconds until the motor rotates.
*1.The recommended control distance of the controller is about 100 meters, although the actual control
distance can be affected by environmental factors.
2. In an environment with strong signal interference, the motor and controller will occasionally be disconnected.
It is recommended to shorten the operating distance. After the signal returns to normal, the motor and controller
will automatically restore the connection.
(2) Press the button
for three seconds.
Bluetooth
controller Motor
(1) Press the button once,
then press it again for three
seconds.
Press the ON/OFF button.
Plug in the
battery.
Searching Bluetooth Connect successful
Not Blinking
Light
Blinking fast
Light

Residual electricity
The color of the
indicator light
75% - 50%
25% - 0%
100% - 75%WHITE
(1) Turn the lens ring to
the starting point and
hold for 0.5 seconds.
(3) Manually calibration:
A. When the motor gear and the lens gear are completely connected,turn
the lens to the starting point and hold for 0.5 seconds.
B. Then turn the lens ring to the end and hold for 0.5 seconds.
C. Finally, turn the lens ring slightly to the middle, Calibrate done.(It is
recommend that you use manual calibration when using a DSLR
camera lens)
5. Charging instructions
- The controller is plugged into the charging cable, and the controller battery
is charged via usb 5v. (See the picture below-1)
- The motor battery charge 1 charge 4 charging device, through the usb 5v
to charge the motor battery. (See the picture below-2)
(2) Turn the lens ring to the
end and hold for 0.5
seconds, then turn the lens
ring slightly toward the
center.
GREEN
50% - 25%YELLOW
RED
·Lights For Charger Status
·During charging, the light is red.
·When the charging is finished,
the light is green.
·Lights For Charger Status
·During charging, the light is
purple.
·When the charging is finished,
the light is white.
Indicator light

②
①
②
③
④
⑤
Cancel the calibrated stroke: when the motor have a strocke, Press the button
four times to clear the motor stroke.
Restore lens stroke: If the motor need to change battery, press the button for 4
times to restart the previous trip after restarting.
①
②
③
④
⑤
⑥
②Press once to set point A, press the second to set point B, press the third time to
start the automatic operation of point AB, press the fourth time to cancel the
automatic operation Run, cancel point AB. (*The speed of automatic operation
increases or decreases linearly according to the rotation angle of the knob)
Table 3 Motor Instruction of button

R
R
1. Installation
First install the Bluetooth thumb wireless controller into the slot of the
REMOTE AIR RIG large handwheel extension device (*must be inserted to
the end). Then turn the controller clockwise until the controller can't rotate,
that is, the installation is complete.
2. Disassembly
First, turn the Bluetooth thumb wireless controller counterclockwise to
the limit of the controller, and then apply a little force to continue to rotate
the controller counterclockwise until the 1/4 screw of the controller is
completely out of the large handwheel slot, then you can pull out the
controller .
Loosen to adjust
the position of
the handwheel
Handwheel
connecting rod
(Removable)
Lens data mark
(Labels can be affixed)
Controller
installation slot
(1/4 screw hole)
1/4 screw
1.APP download
- Users can use APP to connect and control up to 6 Bluetooth motors.
- Search for PDMOVIE or REMOTE AIR in the Apple App Store to
download.
- Log in to the official website www.pdmovie.com with your mobile phone,
and enter the APP download page of technical support to download and
install the APP. (APP currently only supports IOS system)
REMOTE AIR RIG Installation note

2. Connect
Before APP Bluetooth connects to the motor, please make sure that the
controller is turned off. And make sure that the APP is not running in the
background. The specific connection steps are as follows:
- If you need to connect multiple Bluetooth motors, repeat steps 3 and 4.
- Step 6: Automatically calibrating the lens stroke can also be replaced by manually
calibrating the lens stroke for calibration.
- For more about APP functions, please enter the APP SET interface and enter the HELP
item to view more detailed graphic tutorials.
1. Turn on the bluetooth
of the mobile phone and
start the APP
2. Click to enter the Bluetooth
selection interface
4. Select the displayed
bluetooth of the motor
to rename it
5. Click the connecticon, then
click CONTINUE enters the
main interface of the APP
6. Long press the AUTO
frame to automatically
calibrate the lens
7. Tap the "-" icon in the
control frame select the
motor to be controlled
8. Complete the settings,
slide the control bar to check
the motor can be controlled
normally
3. Insert the battery into the
motor and start the motor
When the controller replaces the battery, you need to pull up the shell
to see the battery compartment. Before pulling out the shell, first fix the
controller to any object with 1/4 screw hole by 1/4 screw. Then pull up the
casing forcefully and use a small wrench to push out the battery.
Unless you encounter force majeure factors such as battery damage
and drastically reduced battery life, it is not recommended to replace the
controller battery frequently. When replacing the battery, please check
whether the positive and negative directions of the battery are correct, and
then insert the battery.
1. Pull up the shell
forcefully
2. Use a small wrench
to push out the battery
Battery replacement instructions

To replace the battery of the motor, you need to press the battery to the right first, and
then pull it out. (Refer to the direction of the laser indicator on the lower right of the motor.)
If the battery is difficult to access due to excessive sweating, you can use a power sticker
to help remove the battery.
M
OTORMINI
Press the battery
to the right first
Then unplug the battery
Notice
- Stop calibration: the motor jumps teeth during the automatic calibration process,
which causes the phenomenon of non-stop rotation. You only need to click once
of the motor button to terminate the calibration;
- When the rotation stroke of the motor does not match the calibrated stroke,
please check whether the indicator light of the Bluetooth controller is flashing blue
and the current battery color alternately. If the above state appears, it means that
the controller has set the stroke of point AB Limit, you need to short press the
controller button to start AB automatic operation, and then short press again to
cancel the automatic operation and cancel the AB point stroke limit.
- The controller defaults FOCUS mode. If it is switched to ZOOM mode, it will be
equally divided based on the rotation of the wheel 300 degrees, and the middle
10 degrees is the static position. Turn to the left to advance forward, and turn to
the right to advance backward. The advancing speed is adjusted linearly
according to the angle of rotation.
- The motor defaults to the lens control mode. For example, after switching to the
electric slide/pan/tilt mode, when the motor starts without Bluetooth connection, it
will automatically calibrate the stroke and run automatically in a constant speed
cycle.
- Regarding battery maintenance: When the product is not used for a long time, it
is recommended to check the power of the device every other month to ensure
that the battery has sufficient power; when the device is in a low or no power state
for a long time, the battery capacity will decrease.
Slow
Fast
Slow
Fast
Stop
*ZOOM mode needs to be used
with ZOOM RIG accessories.

PDMOVIE Technology Co., Ltd.
Web: www.pdmovie.com
Instagram: pdmovie_official
Facebook: PDmovie
Youtube: PDMOVIE
LIVE AIR 2s
©2021 PDMOVIE All rights reserved.
This manual suits for next models
2
Table of contents
Other PDMOVIE Camera Accessories manuals
Popular Camera Accessories manuals by other brands

Panasonic
Panasonic HFS1442A operating instructions

Zacuto
Zacuto 1-EVF-1S user manual

Torqeedo
Torqeedo Power 48-5000 Translation of the original operating instructions

Silverline
Silverline 830427 quick start guide

Nikon
Nikon AF-S NIKKOR 500mm f/4E FL ED VR user manual

Vinten
Vinten Quattro SL operating instructions