Peak PCAN-Router DR User manual

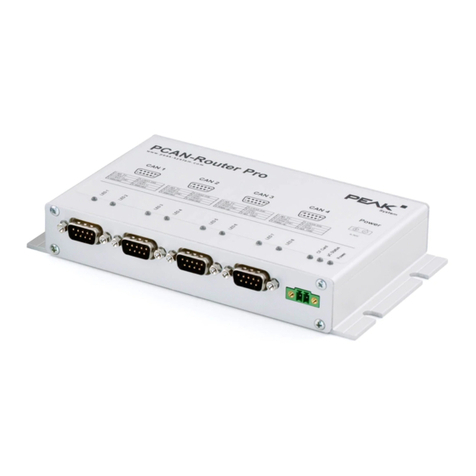
PCAN-RouterDR
User Manual
User Manual 3.0.0 © 2023 PEAK-System Technik GmbH

Relevant Product
Product Name Model Part Number
PCAN-RouterDR Industry IPEH-002213
Imprint
PCAN is a registered trademark of PEAK-System Technik GmbH.
All other product names in this document may be the trademarks or registered trademarks of their
respective companies. They are not explicitly marked by ™ or ®.
© 2023 PEAK-System Technik GmbH
Duplication (copying, printing, or other forms) and the electronic distribution of this document is only
allowed with explicit permission of PEAK-System Technik GmbH. PEAK-System Technik GmbH reserves the
right to change technical data without prior announcement. The general business conditions and the
regulations of the license agreement apply. All rights are reserved.
PEAK-System Technik GmbH
Otto-Röhm-Straße 69
64293 Darmstadt
Germany
Phone: +49 6151 8173-20
Fax: +49 6151 8173-29
www.peak-system.com
Document version 3.0.0 (2023-05-04)
Relevant Product PCAN-RouterDR
User Manual 3.0.0 © 2023 PEAK-System Technik GmbH
2

Contents
Imprint 2
Relevant Product 2
Contents 3
1 Introduction 5
1.1 Properties at a Glance 6
1.2 Scope of Supply 7
1.3 Prerequisites for Operation 7
2 Connections and Operating Elements 8
2.1 CAN 1/CAN 2 9
2.2 RS-232 9
2.3 Power Supply 10
2.4 Galvanic Isolation of the Connections 10
2.5 Rotary Switch 11
2.6 Reset Push Button 11
3 Hardware Configuration 12
3.1 Configure Bit Rate 12
3.2 Activate CAN Bootloader 13
3.3 Internal Termination 14
4 Operation 17
4.1 First Steps 17
4.2 Restart 18
4.3 Signal Delay 19
4.4 Status LEDs 19
5 Creating Own Firmware 20
5.1 Library 22
6 Firmware Upload 23
6.1 System Requirements 23
Contents PCAN-RouterDR
User Manual 3.0.0 © 2023 PEAK-System Technik GmbH
3

1 Introduction
The PCAN-RouterDR has two High-speed CAN channels. Their bit rate is adjusted
with a rotary switch on the device front. The module forwards the message traffic
bi-directionally 1:1 between both connected CAN busses.
The ports of the PCAN-RouterDR are isolated against each other and against the
power supply with at least 500 V. Furthermore, CAN 1 has a separation voltage of up
to 5 kV conforming with IEC 60601-1. With its DIN rail casing and the support of the
extended temperature range, the module is suitable for use in an industrial
environment.
Just like the PCAN-Router in the aluminum casing, the PCAN-RouterDR can be freely
programmed. A corresponding development package is included in the scope of
supply.
1 Introduction PCAN-RouterDR
User Manual 3.0.0 © 2023 PEAK-System Technik GmbH
5

1.1 Properties at a Glance
NXP LPC21 series microcontroller (16/32-bit ARM CPU)
32 kbyte EEPROM
Two High-speed CAN channels (ISO 11898-2)
Comply with CAN specifications 2.0 A/B
Bit rates from 5 kbit/s up to 1 Mbit/s, adjustable with a rotary switch
NXP PCA82C251 CAN transceiver
Reset of the device with a push button
Switchable termination for each CAN channel
Status indication via LEDs for the module status, both CAN channels, and the
power supply
Connections for CAN, RS-232, and power supply via 4-pole screw-terminal strips
(Phoenix)
CAN 1 is isolated up to 5 kV against CAN 2, RS-232, and the power supply
(compliant with IEC 60601-1)
CAN 2 and RS-232 are isolated with 500 V against each other and against the
power supply
Plastic casing (width: 22.5 mm) for mounting on a DIN rail (DIN EN 60715 TH35)
Voltage supply from 8 to 30 V
Extended operating temperature range from -40 to +85 °C (-40 to +185 °F)
RS-232 connector for serial data transfer (reserved for future use)
New firmware can be loaded via CAN interface
1 Introduction PCAN-RouterDR
User Manual 3.0.0 © 2023 PEAK-System Technik GmbH
6

1.2 Scope of Supply
PCAN-RouterDR in DIN rail plastic casing
Mating connectors for both CAN channels, RS-232, and power supply
(Phoenix Contact MSTB 2.5/4-ST BK - 1756298)
Download
Windows development package with:
GCC ARM Embedded
Flash program
Programming examples
Manual in PDF format
1.3 Prerequisites for Operation
Power supply in the range of 8 to 30 V DC
For uploading a new firmware via CAN:
CAN interface of the PCAN series for the computer (e.g. PCAN-USB)
Operating system Windows11(x64/ARM64), 10 (x86/x64)
1 Introduction PCAN-RouterDR
User Manual 3.0.0 © 2023 PEAK-System Technik GmbH
7

2 Connections and Operating
Elements
Connections and operating elements on the PCAN-RouterDR
2 Connections and Operating Elements PCAN-RouterDR
User Manual 3.0.0 © 2023 PEAK-System Technik GmbH
8

2.1 CAN 1/CAN 2
The CAN connectors are located on the upper side of the casing.
CAN Connector (Phoenix) Pin Function
1 CAN_High
2 CAN_Low
3 CAN GND
4 CAN Shield
2.2 RS-232
The RS-232 connector is located on the lower side of the casing.
CAN Connector (Phoenix) Pin Function
1 GND
2 RxD
3 not connected
4 TxD
2 Connections and Operating Elements PCAN-RouterDR
User Manual 3.0.0 © 2023 PEAK-System Technik GmbH
9

2.3 Power Supply
The connection for the power supply is located on the lower side of the casing.
CAN Connector (Phoenix) Pin Function
1 GND
2 not connected
3 Vbat (8 - 30 V)
4 Shield
2.4 Galvanic Isolation of the Connections
Galvanic isolation
The ports of the PCAN-RouterDR are isolated against each other and against the
power supply with at least 500 V. Furthermore, CAN 1 has a separation voltage of up
to 5 kV conforming with IEC 60601-1.
2 Connections and Operating Elements PCAN-RouterDR
User Manual 3.0.0 © 2023 PEAK-System Technik GmbH
10

2.5 Rotary Switch
The rotary switch of the PCAN-RouterDR can be used to set the CAN bit rate and
activate the CAN bootloader. The selected bit rate applies to both CAN channels.
The setting for the bit rate is explained in section 3.1 Configure Bit Rate.
The activation for the CAN bootloader is explained in section 3.2 Activate CAN
Bootloader.
2.6 Reset Push Button
The reset button is located behind a small hole on the front of the PCAN-RouterDR.
The reset button can be used to restart the PCAN-RouterDR.
The application is explained in section 4.2 Restart.
2 Connections and Operating Elements PCAN-RouterDR
User Manual 3.0.0 © 2023 PEAK-System Technik GmbH
11

3 Hardware Configuration
3.1 Configure Bit Rate
Using the rotary switch of the PCAN-RouterDR, the CAN bit rate can be adjusted. The
selected bit rate applies to both CAN channels. At delivery, the switch is set to C
(500kbit/s). A changed setting takes effect after the reset of the PCAN-RouterDR.
Performing a reset is described in section 4.2 Restart.
Rotary Switch Switch Position Bit Rate
0 (left) 5 kbit/s
1 10 kbit/s
2 20 kbit/s
3 33.3 kbit/s
4 (top) 47.6 kbit/s
5 50 kbit/s
6 83.3 kbit/s
7 95.2 kbit/s
8 (right) 100 kbit/s
9 125 kbit/s
A 200 kbit/s
B 250 kbit/s
C (bottom) 500 kbit/s
D 800 kbit/s
E 1 Mbit/s
F CAN-Bootloader
3 Hardware Configuration PCAN-RouterDR
User Manual 3.0.0 © 2023 PEAK-System Technik GmbH
12

3.2 Activate CAN Bootloader
With rotary switch position F the CAN bootloader is activated after a reset. This
allows you to transfer a self-created firmware to the PCAN-RouterDR via CAN. The
upload procedure is described in detail in chapter 6 Firmware Upload.
Rotary switch position F for activation of the CAN bootloader
When the CAN bootloader is activated, the LEDs indicate the following states:
LED Status
Status off
CAN 1 orange blinking
CAN 2 orange on
3 Hardware Configuration PCAN-RouterDR
User Manual 3.0.0 © 2023 PEAK-System Technik GmbH
13

3.3 Internal Termination
The termination for each CAN channel can be separately activated with switches on
the board. At delivery, the termination is switched off. A High-speed CAN bus
(ISO11898-2) must be terminated on both cable ends with 120 Ω. Otherwise,
malfunctions may arise.
We recommend to do termination at the CAN cabling, for example with
the terminating resistors PCAN-Term (IPEK-003002) or PCAN-MiniTerm
(IPEK-003002-Mini). Thus, CAN nodes can be flexibly connected to the
bus.
Activate internal termination:
Attention! Electrostatic discharge (ESD) can damage or destroy
components on the card. Take precautions to avoid ESD.
3 Hardware Configuration PCAN-RouterDR
User Manual 3.0.0 © 2023 PEAK-System Technik GmbH
14

1. Disconnect the power supply to the PCAN-RouterDR.
2. Using a slotted screwdriver, lightly press into the recesses of the latches on
the top and bottom of the housing.
The latches are unlocked.
Side view PCAN-RouterDR
3. Pull out the front of the housing together with the circuit board.
Open housing with the circuit board
3 Hardware Configuration PCAN-RouterDR
User Manual 3.0.0 © 2023 PEAK-System Technik GmbH
15

4. Make the desired setting(s).
The following figure shows the positions of the switches term. CAN-1 and
term. CAN-2. The table below contains the possible settings.
Note: Notice that both switches of each switch block have to be
set to On to activate the internal termination.
Switch on the circuit board for the termination of the CAN channels
CAN
Connector
Switching
Block
Off (default) Active
CAN 1 term. CAN-1 No internal
termination
120 Ω between CAN_L
and CAN_H
CAN 2 term. CAN-2 No internal
termination
120 Ω between CAN_L
and CAN_H
5. Re-insert the board with the housing front into the guide slot of the housing.
6. Push both halves of the housing together until the snap locks engage with a
clicking sound.
3 Hardware Configuration PCAN-RouterDR
User Manual 3.0.0 © 2023 PEAK-System Technik GmbH
16

4 Operation
The PCAN-RouterDR is activated by applying the supply voltage to the respective
connectors. More information about the connections can be found in chapter 2
Connections and Operating Elements. The firmware in the flash memory is
subsequently run.
On delivery, the PCAN-RouterDR is supplied with an standard firmware which
forwards CAN messages 1:1 between the two channels. The bit rate selected at the
rotary switch is used. An incoming CAN message causes a change between green and
orange of the LED status indication for the respective CAN channel.
Information on firmware can be found in chapter 15 Creating Own Firmware.
4.1 First Steps
1. Mount the PCAN-RouterDR at the appropriate position on the DIN rail by
hanging it in at the top of the rail and snapping it to the bottom.
2. Connect each of the two CAN ports with the corresponding CAN network.
3. If the bit rate is different from the default 500 kbit/s, set the bit rate with the
rotary switch (see section 3.1 Configure Bit Rate).
The new bit rate takes effect after reset (see section 4.2 Restart).
4. Connect the PCAN-RouterDR to a power supply (8 to 30 V DC).
The PCAN-RouterDR now forwards the CAN messages one on one.
4 Operation PCAN-RouterDR
User Manual 3.0.0 © 2023 PEAK-System Technik GmbH
17

4.2 Restart
For a restart, the reset button can be pressed with a paper clip, for example.
Alternatively, the voltage supply can be disconnected and reconnected.
4 Operation PCAN-RouterDR
User Manual 3.0.0 © 2023 PEAK-System Technik GmbH
18

4.3 Signal Delay
The signal delay at forwarding of a CAN message consists of a fixed processing time
of the microcontroller of about 30 μs and a variable delay depending on message
length and bit rate.
For example, the signal delay of a CAN message with an 11-bit ID and eight data
bytes at 500 kbit/s is approximately 260 μs.
4.4 Status LEDs
A standard firmware is pre-installed on delivery. Therefore, the LEDs CAN 1 and CAN 2
light up between green and red on incoming and outgoing CAN messages.
The LEDs can indicate the following states:
LED Status Meaning
Status
Off No CAN communication
Green blinking Operational
Red flashing Reset
CAN 1/CAN 2
Green blinking Data is transmitted
Red flashing Communication error (error frames)
Power Green on Power supply is present
Additionally, they light up orange when the bootloader is activated. Additional LED
functions can be programmed with your own firmware. More details can be found in
the programming examples supplied.
4 Operation PCAN-RouterDR
User Manual 3.0.0 © 2023 PEAK-System Technik GmbH
19

5 Creating Own Firmware
With the help of the PEAK-DevPack development package, you can program your
own application-specific firmware for PEAK-System programmable hardware
products. For each supported product, examples are included.
On delivery the PCAN-RouterDR is supplied with the standard firmware
which forwards CAN messages 1:1 between both CAN channels.
System requirements:
Computer with operating system Windows11 (x64), 10 (x86/x64)
CAN interface of the PCAN series to upload the firmware to your hardware
via CAN
Download of the development package:
www.peak-system.com/quick/DLP-DevPack
Content of the package:
Build Tools Win32\
Tools for automating the build process for Windows 32-bit
Build Tools Win64\
Tools for automating the build process for Windows 64-bit
Compiler\
Compilers for the supported programmable products
Debug\
OpenOCD and configuration files for hardware which supports debugging
VBScript SetDebug_for_VSCode.vbs to modify the example directories
for the Visual Studio Code IDE with Cortex-debug
Detailed information about debugging in the enclosed documentation of the
PEAK-DevPack Debug Adapter
5 Creating Own Firmware PCAN-RouterDR
User Manual 3.0.0 © 2023 PEAK-System Technik GmbH
20
Table of contents
Other Peak Network Hardware manuals
Popular Network Hardware manuals by other brands

Arista
Arista CCA-ETM-Q6E quick start guide

Terasic
Terasic DE10-Standard manual

VIA Technologies
VIA Technologies ARTiGO A3000 quick start guide

ProfiTap
ProfiTap PROFISHARK 1G user manual

Stahl
Stahl HFisolator 9730/26-11 operating instructions

Nokia
Nokia NBB0150000 - IP150 - Security Appliance installation guide