Contents
1. Warranty
2. Important safety information
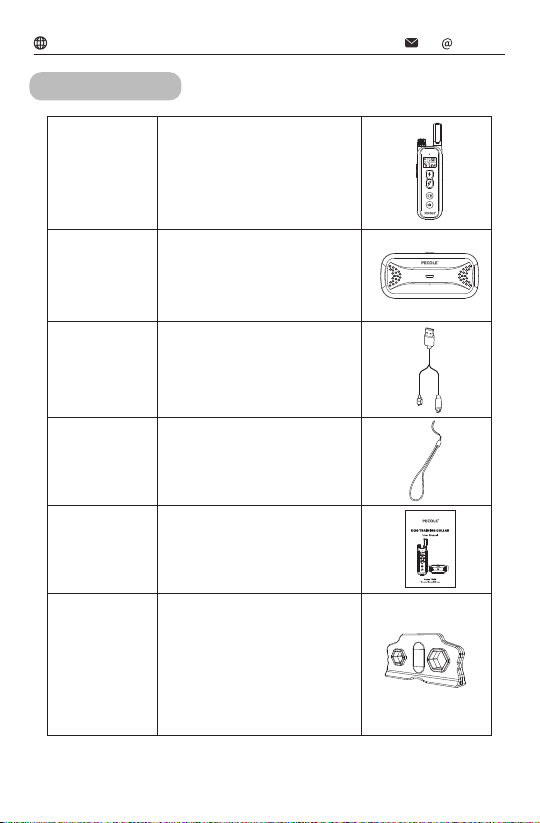
3. Components
4. Function
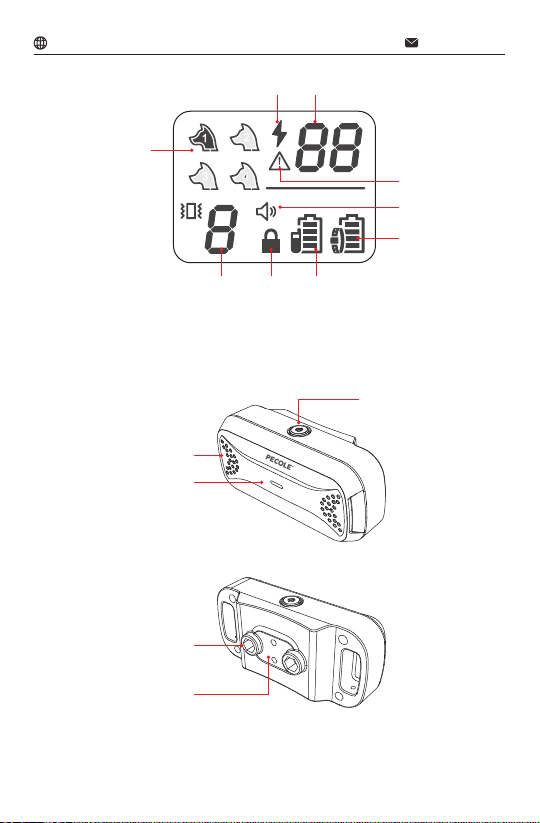
4.1 Remote transmitter........
4.2 Receiver collar
4.3 Key definitions
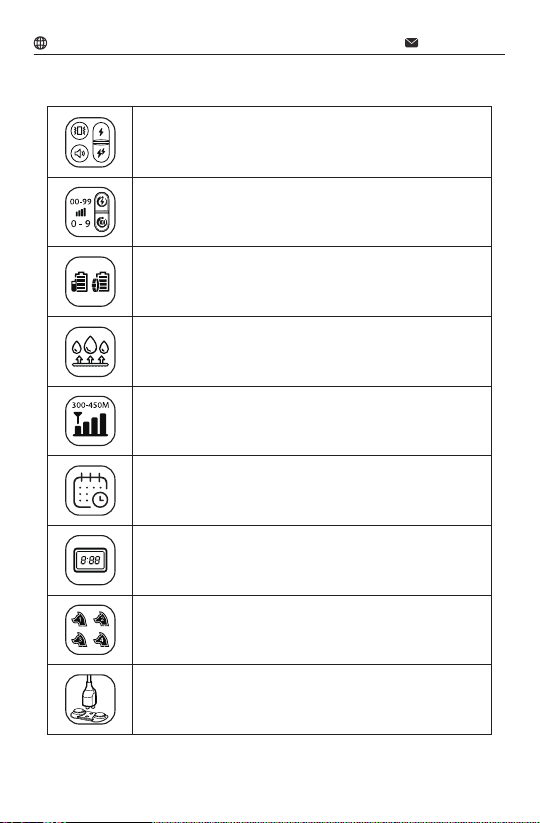
4.4. Main characteristics
5. Product setting steps
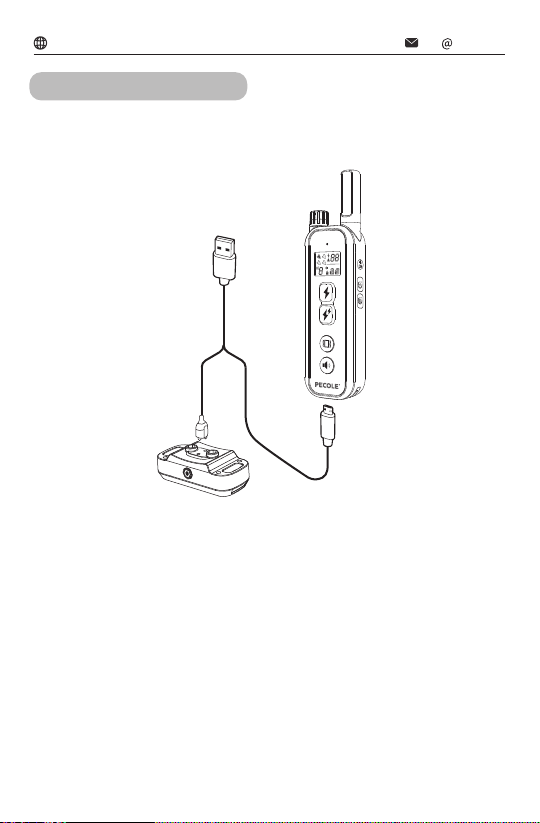
5.1 Remote transmitter and receiver collar charging ...............
5.2 Installation of contact points and conductive silicone prongs....
5.3 Adjustable receiver collar
5.4 Test
5.5 How to use test light tool
5.6 Pairing
5.7 Installing the receiver collar
5.8 Turning on the remote transmitter and receiver collar
5.9 Keypad lock
5.10 Three training mode instructions
5.11 Multiple receiver collar systems
5.12 Matters needing attention in pet training
6. Frequently asked questions
7. Replacement parts and accessories
..........................................................................................
......................................................
....................................................................................
...........................................................................................
............................................................
.........................................................................
...............................................................
.....................................................................
......................................................
.............................................................................................
.........................................................
.......................................................................................
...................................................
......
.............................................................................
......................................
........................................
..........................
.........................................................
..........................................
01
01
03
04
04
05
06
07
08
08
08
09
09
10
11
12
13
13
14
15
17
18
19
............................................................................