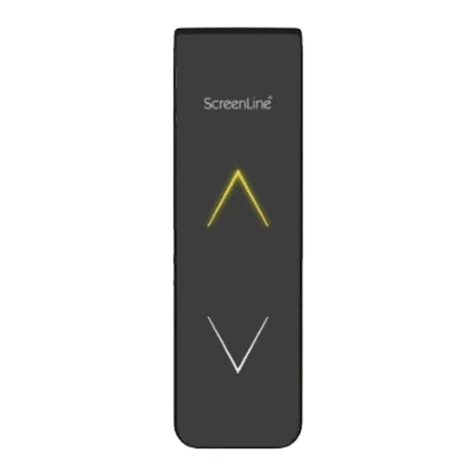
Pellini ScreenLine SL 2380 User manual

SL2380
www.pellini.net
Manuale
per l’utente
User’s
guide
Anwender-
Handbuch
Notice
utilisateur
Dispositivo
di comando tenda
Modulo batteria
Blind control device
Battery module
Batterie-/Bedienungs-Modul
Module batterie
1
Owner’sKit


MODULO BATTERIA SL2380
Uso
Il dispositivo è dotato di una zona sensibile programmata per
svolgere tutte le funzioni; non ha pulsanti meccanici.
IMPORTANTE: al ne di un corretto funzionamento il
contatto tra dito e zona sensibile deve coprire una su-
percie sufcientemente ampia.
SOLLEVAMENTO/ABBASSAMENTO
Modulo batteria in posizione verticale:
Il sollevamento della tenda si può ottenere in due modi:
• facendo scorrere
rapidamente il dito
lungo tutta la zona
sensibile, dal basso
verso l’alto (da 1 a
2)
• toccando per più di
due secondi la zona
sensibile in alto (2)
La tenda si metterà in
movimento no a raggiungimento della posizione di totale
apertura.
Per fermare il movimento in qualsiasi momento è sufciente
toccare brevemente una qualunque parte della zona sensi-
bile.
L’abbassamento della tenda si può ottenere in due modi:
• facendo scorrere rapidamente il dito lungo tutta la
zona sensibile, dall’alto verso il basso (da 2 a 1)
• toccando per più di due secondi la zona sensibile in
basso (1)
La tenda si metterà in movimento no a raggiungimento della
posizione di totale chiusura.
Per fermare il movimento in qualsiasi momento è sufciente
toccare brevemente una qualunque parte della zona sensi-
bile.
Modulo batteria in posizione orizzontale:
Il sollevamento della tenda si può ottenere in due modi:
• facendo scorrere rapidamente il dito lungo tutta la
3
Zona sensibile
Zona sensibile
LED
2
1
IT

zona sensibile, da destra ver-
so sinistra (da 1 a 2)
• toccando per più di due se-
condi la zona sensibile a sini-
stra (2)
La tenda si metterà in movimento
no a raggiungimento della posizio-
ne di totale apertura.
Per fermare il movimento in qualsiasi
momento è sufciente toccare bre-
vemente una qualunque parte della
zona sensibile.
L’abbassamento della tenda si può ottenere in due modi:
• facendo scorrere rapidamente il dito lungo tutta la
zona sensibile, da sinistra verso destra (da 2 a 1)
• toccando per più di due secondi la zona sensibile a
destra (1)
La tenda si metterà in movimento no a raggiungimento
della posizione di totale chiusura. Per fermare il movimento
in qualsiasi momento è sufciente toccare brevemente una
qualunque parte della zona sensibile.
ORIENTAMENTO DELLE LAMELLE PER TENDE VENE-
ZIANE
Modulo batteria in posizione verticale:
Toccare brevemente (meno di due secondi) la zona supe-
riore (2) o quella inferiore (1) no ad ottenere l’orientamento
desiderato.
Modulo batteria in posizione orizzontale:
Toccare brevemente (meno di due secondi) la zona sinistra
(2) o quella destra (1) no ad ottenere l’orientamento desi-
derato.
RICARICA BATTERIE
La necessità di ricaricare le batterie è segnalata dal lampeg-
giamento del led a seguito di comando di salita o discesa.
La fase di ricarica è controllata dal modulo batteria in modo
completamente automatico.
4
Zona sensibile
Zona sensibile
LED
2 1

Per effettuare la ricarica della batterie:
1. Staccare il modulo batteria dal
supporto
2. Inserire l’alimentatore in una pre-
sa corrente
3. Inserire il connettore micro-USB
dell’alimentatore nell’apposito in-
gresso sul modulo
Con alimentatore collegato, il led segnala le seguenti con-
dizioni:
• led lampeggiante: batterie assenti, difettose o di tipo
non compatibile.
Scollegare immediatamente l’alimentatore
• led pulsante: carica in corso
• led acceso sso: carica terminata
Al termine della carica staccare il cavo e riposizionare il mo-
dulo sul suo supporto.
IMPORTANTE: quest’azione avvia la ricalibrazione del
sensore; prestare quindi attenzione a non toccare la
zona sensibile no allo spegnimento del led.
PROGRAMMAZIONE PER IL RADIOCOMANDO (OPTIO-
NAL)
Se il modulo batteria è dotato di ri-
cevitore radio per radiocomando è
possibile azionare la tenda mediante
il radiocomando stesso.
Il ricevitore radio all’interno del modu-
lo batteria può gestire no a 58 canali
differenti; il radiocomando ha 99 ca-
nali.
Per la programmazione del radioco-
mando seguire le istruzioni sotto riportate.
Memorizzazione di un canale
1. Staccare il modulo batteria dal supporto
2. Visualizzare sul display del radiocomando il canale
richiesto, premendo i pulsanti +/-
3. Premere il pulsante sul modulo batteria no all’accen-
sione del rispettivo led
5
Pulsante
Micro
USB

4. Rilasciare il pulsante
5. Premere contemporaneamente i tasti di salita e disce-
sa del radiocomando
6. Attendere che il led lampeggi lentamente ad indicare
l’avvenuta memorizzazione
Cancellazione di un canale
1. Staccare il modulo batteria dal supporto
2. Visualizzare sul display del radiocomando il canale da
cancellare premendo i pulsanti +/-
3. Tenere premuto il pulsante sul modulo batteria no
all’inizio del lampeggio veloce del led, successivo
all’accensione dello stesso led
4. Rilasciare il pulsante
5. Premere contemporaneamente i tasti di salita e disce-
sa del radiocomando
6. Attendere che il led lampeggi lentamente ad indicare
l’avvenuta cancellazione
Cancellazione di tutti i canali
1. Staccare il modulo batteria dal supporto
2. Tenere premuto il pulsante del modulo batteria no
all’inizio del lampeggio più lento, successivo a quello
veloce
3. Rilasciare il pulsante
4. Tutti i canali precedentemente memorizzati vengono
cancellati
Per ulteriori istruzioni sull’uso del radiocomando fare riferi-
mento al relativo manuale di istruzioni.
RICALIBRAZIONE DELLA ZONA SENSIBILE
In caso di funzionamento irregolare del modulo batteria è
possibile ricalibrare la zona sensibile seguendo una delle se-
guenti procedure:
1. Staccare il modulo batteria dal supporto
2. Inserire l’alimentatore in una presa corrente
3. Inserire il connettore micro-USB dell’alimentatore
nell’apposito ingresso sul modulo
4. Estrarre il connettore
6

Oppure
1. Staccare il modulo batteria dal supporto
2. Rimuovere il coperchio del vano batterie premendo nel-
le zone indicate e spingendo nella direzione indicata
3. Rimuovere una delle batterie
4. Riposizionare la batteria
IMPORTANTE: durante la ricalibrazione non appoggiare
la mano o altro materiale sulla zona sensibile.
MANUTENZIONE
Ad eccezione della eventuale sostituzione delle batterie ri-
caricabili, il prodotto non richiede manutenzione. Eventuali
riparazioni devono essere effettuate da un tecnico autoriz-
zato da Pellini SpA.
In caso di prolungato inutilizzo, rimuovere le batterie.
PULIZIA
Pulire il prodotto con un panno morbido, pulito, asciutto e
che non lasci residui. Per rimuovere sporco ostinato, il panno
può essere leggermente inumidito con acqua tiepida. Non
utilizzare detergenti contenenti solventi. Non pulire i contatti
dorati con alcool o altre sostanze.
SOSTITUZIONE DELLE BATTERIE
Nel caso si rendesse necessaria la sostituzione delle batterie
seguire la seguente procedura:
1. Staccare il modulo batte-
ria dal supporto
2. Rimuovere il coper-
chio del vano batterie
premendo nelle zone
indicate e spingendo
nella direzione indicata
nell’immagine
7

3. Rimuovere le batterie esauste
4. Inserire le nuove batterie ponendo attenzione al verso
di inserimento indicato sul fondo del vano batterie. Per
evitare possibili danni al modulo, non toccare le parti
elettroniche in vista
5. Prima di inserire l’ultima batteria porre attenzione a
non appoggiare la mano o altro materiale sulla zona
sensibile poiché, ultimata l’operazione di inserimento
di tutte le batterie, il modulo esegue subito e automa-
ticamente la ricalibrazione. In caso di funzionamento
irregolare eseguire la procedura di ricalibrazione
6. Riposizionare il coperchio del vano batterie
7. Riposizionare il modulo batterie sul supporto no ad
udire un “clack”
ATTENZIONE!
• Utilizzare solo batterie ricaricabili
NI-MH da 1.2V 2700 mAh formato AA di buona qualità
• Non utilizzare batterie al litio, alcaline o zinco-piombo.
L’utilizzo di questo tipo di batterie può danneggiare
l’apparecchiatura, causare fuoriuscita di sostanze aci-
de e generare pericolo d’incendio
• Non utilizzare insieme batterie di differenti capacità o
di marche diverse e sostituire sempre tutte e tre le bat-
terie contemporaneamente
LA MANCATA OSSERVANZA DELLE RACCOMANDAZIONI
O LA MANOMISSIONE DEL MODULO BATTERIA COMPOR-
TANO LA DECADENZA DELLA GARANZIA.
SMALTIMENTO DELLE BATTERIE
Le batterie scariche vanno smaltite in modo sicuro utilizzan-
do gli appositi cassonetti o nelle zone di raccolta (riferirsi alle
disposizioni presenti nella città dove devono essere smal-
tite). Le batterie vanno rimosse dall’apparecchio prima del
loro smaltimento. In caso di perdita di acidi dalle batterie,
toglierle, pulire delicatamente con un panno morbido ed al-
cool eventuali tracce di liquidi presenti sulla scheda o sulle
lamelle di contatto e sostituire le vecchie batterie con nuove
batterie.
8

SMALTIMENTO DEL DISPOSITIVO
Secondo le prescrizioni della direttiva 2002/96/CE il modulo
batteria è considerato appartenente alla categoria dei RAEE
(Riuti di apparecchiature elettriche ed elettroniche): non
può quindi essere smaltito come riuto urbano. Alla ne
del suo ciclo di vita l’apparecchio deve essere depositato
presso uno dei centri di raccolta differenziata per i riuti di
apparecchiature elettriche ed elettroniche provenienti dai
nuclei domestici. Fare riferimento ai centri di raccolta del
comune di appartenenza, il quale assicura la funzionalità,
l’accessibilità e l’adeguatezza dei sistemi di raccolta
differenziata, in modo da permettere ai detentori nali ed ai
distributori di conferire gratuitamente al centro di raccolta i
riuti prodotti nel loro territorio.
INFORMAZIONI SULL’USO CONFORME
Il modulo è fornito per l’azionamento di tende ScreenLine
serie “W Swipe”. SOLO PER USO INTERNO. Ogni altro tipo
di impiego non è conforme alla destinazione. Il produttore
non si assume alcuna responsabilità per i danni derivanti da
uso non conforme.
INFORMAZIONI SULLA SICUREZZA
ATTENZIONE! È fondamentale seguire e conservare le se-
guenti istruzioni, per la sicurezza delle persone!
L’apparecchio non deve essere utilizzato da bambini o da
persone le cui capacità siche, sensoriali o mentali siano ri-
dotte.
L’apparecchio non deve altresì essere utilizzato da persone
prive di esperienza o conoscenza delle modalità d’uso dello
stesso, senza la sorveglianza o l’intermediazione di una per-
sona responsabile della loro sicurezza.
L’apparecchio non è un giocattolo: tenerlo fuori dalla portata
dei bambini!
NON forzare l’uso dell’apparecchio nel caso in cui siano ne-
cessarie riparazioni o regolazioni.
NON tentare riparazioni fai-da-te: esse devono essere effet-
tuate solo da personale autorizzato.
NON lasciare incustodito il modulo durante la carica delle
batterie. 9

NON gettare le batterie esauste nel fuoco: possono esplo-
dere.
NON aprire o forare o cortocircuitare le batterie.
Utilizzare solo batterie ricaricabili tipo NI-MH.
ATTENZIONE! L’UTILIZZO DI BATTERIE NON IDONEE
PUÓ CAUSARNE L’ESPLOSIONE!
In caso di penetrazione di liquidi all’interno dell’apparecchio
o danni di altro genere, togliere immediatamente le batterie e
inviare l’apparecchio al produttore per un controllo.
In caso di inutilizzo prolungato dell’apparecchio, rimuovere
le batterie per evitarne il danneggiamento.
CARATTERISTICHE TECNICHE
Modulo batteria SL2380
3x1.2V DC Ni-MH AA 2700mAh; 1.5VA;
Carica batteria: Primario: 100-240Va.c. 50/60Hz 15VA
Secondario: 5V 2A d.c.
10
III

BATTERY MODULE SL2380
Note
The device is provided with a sensitive area that is program-
med to perform all functions; there is no mechanical push
button.
IMPORTANT: for correct operation, the contact area
between nger and sensitive area must be sufciently
wide to induce reaction.
RAISING/LOWERING
Battery module in vertical position:
The blind can be raised in two different ways:
• by quickly sliding
your nger along
the sensitive area,
from bottom to top
(1 to 2)
• by pressing the sen-
sitive area on top (2)
for more than 2 se-
conds
The blind can be lowered in two different ways:
• by quickly sliding your nger along the sensitive area,
from top to bottom (2 to 1)
• by pressing the sensitive area at the bottom (1) for more
than 2 seconds
The blind will move until reaching the completely closed po-
sition.
To stop the movement at any time, quickly touch the sensitive
area in any position.
The blind will move until reaching the completely open po-
sition.
To stop the movement at any time, quickly touch the sensitive
area in any position.
Battery module in horizontal position:
The blind can be raised in two different ways:
• by quickly sliding your nger along the sensitive area,
from right to left (1 to 2)
11
Sensitive area
Sensitive area
LED
2
1
GB

• by pressing the sensitive area
on the left hand (2) for more
than 2 seconds
The blind will move until reaching the
completely open position.
To stop the movement at any time,
quickly touch the sensitive area in
any position.
The blind can be lowered in two dif-
ferent ways:
• by quickly sliding your nger along the sensitive area,
from left to right (2 to 1)
• by pressing the sensitive area on the right hand (1) for
more than 2 seconds
The blind will move until reaching the completely closed po-
sition.
To stop the movement at any time, quickly touch the sensitive
area in any position.
SLAT TILTING FOR VENETIAN BLINDS
Battery module in vertical position:
Quickly touch (for less than two seconds) the upper (2) or lo-
wer (1) area until reaching the required tilting.
Battery module in horizontal position:
Quickly touch (for less than two seconds) the left (2) or right (1)
area until reaching the required tilting.
RECHARGING THE BATTERIES
If the batteries need recharging, the LED will ash following an
up or down command.
Recharging is automatically controlled
by the battery module.
To recharge the batteries:
1. Detach the battery module from
its base plate
2. Plug the power supplier into a po-
wer socket
12
Micro
USB
Sensitive area
Sensitive area
LED
2 1

3. Plug the micro-USB connector into the port provided
on the module.
When the power supplier is connected, the LED will indicate
the following conditions:
• LED ashing: batteries missing, defective or not of a
compatible type.
Immediately unplug the supplier
• LED pulsating: charging underway
• LED steadily lit: charging completed
After charging, unplug the cable and t the module back onto
its base plate.
IMPORTANT: this action will start a sensor recalibration
cycle; therefore, be careful not to touch the sensitive are-
as until the LED goes off.
PROGRAMMING THE REMOTE CONTROL (OPTIONAL)
If the battery module is equipped with
a radio receiver for remote control, it is
possible to activate the blind by means
of a remote control.
The radio receiver positioned inside
the battery module can memorise up
to 58 channels.
To program the remote control follow
the instructions provided below.
Memorizing a channel
1. Detach the battery module from its base plate
2. Select the required channel on the remote control
transmitter display by pressing the +/- buttons
3. Press the button on the battery module until the respec-
tive LED lights up
4. Release the button
5. Simultaneously press the up and down keys on the re-
mote control
6. Wait until the LED starts ashing slowly to indicate that
the channel has been memorised and release the but-
tons
13
Button

Deleting a channel
1. Detach the battery module from its base plate
2. Call up the channel to be deleted on the remote control
display by pressing the +/- buttons
3. Keep the button on the battery module pressed until the
LED starts ashing quickly after lighting up
4. Release the button
5. Simultaneously press the up and down keys on the re-
mote control
6. Wait until the LED starts ashing slowly to indicate that
the channel has been deleted and release the buttons
Deleting all of the channels
1. Detach the battery module from its base plate
2. Keep the button on the battery module pressed until the
LED starts ashing more slowly after ashing quickly
3. Release the button
4. All the previously memorised channels will be deleted
For further instructions on using the remote control, refer to
the specic instruction manual.
RECALIBRATION OF THE BATTERY MODULE - SENSITI-
VE AREA
If the battery module is not working properly you can recali-
brate the sensitive area by carrying out one of the following
procedures:
1. Detach the battery module from the support
2. Plug the power supplier into a power socket
3. Plug the micro-USB connector into the port provided
on the module
4. Pull out the connector
Or else
1. Detach the battery module from its base plate
2. Remove the battery compartment cover
3. Remove one of the batteries
4. Fit the battery back in place
IMPORTANT: during recalibration do not rest your hand or
any other object on the sensitive area.
14

MAINTENANCE
The product requires no maintenance, except for replacement
of the rechargeable batteries as necessary. Any repairs must
be made by a technician authorized by Pellini SpA.
In the event of prolonged inaction, remove the batteries.
CLEANING
Clean the product using a clean, dry, soft cloth that does not
leave any residues. To remove stubborn dirt, you can slightly
moisten the cloth with warm water. Do not use solvent-con-
taining detergents. Do not clean the gold-plated contacts with
alcohol or other substances.
REPLACING THE BATTERIES
To replace the batteries use the following procedure:
1. Detach the battery
module from its base
plate
2. Remove the battery
compartment cover
by pressing in the area
indicated and sliding in
the direction shown in the
image
3. Remove the spent batteries
4. Insert the new batteries, paying attention to the
direction of insertion indicated on the bottom of the
battery compartment. To avoid the risk of damaging the
module, do not touch the exposed electronic parts
5. Before inserting the last battery, be careful not to rest
your hand or any other object on the sensitive area
since, as soon as all the batteries have been inserted,
the module will become ‘live’ and immediately and
automatically carry out a recalibration. If the module
is not working properly, carry out the recalibration
procedure
6. Place the cover back onto the battery compartment
7. Fit the battery module back onto the support until a
“clack” can be heard. 15

WARNING!
• Use only rechargeable “AA” 1.2V 2700 mAh NI-MH
batteries of good quality
• Do not use lithium, alkaline or lead-zinc batteries. Use
of these types of batteries may damage the device,
cause leakage of acid substances and generate a re
hazard
• Do not use batteries of different capacities or brands
together and always replace all three batteries
simultaneously
ANY FAILURE TO OBSERVE INSTRUCTIONS OR TAMPERING
WITH THE BATTERY MODULE WILL INVALIDATE THE
WARRANTY.
DISPOSAL OF BATTERIES
Spent batteries must be safely disposed of in the special
waste containers or collection areas provided (refer to the
regulations in force in the town or city where they will be
disposed of). The batteries must be removed from the device
before their disposal. If any acid leaks from the batteries, take
them out, gently clean off any traces of liquid present on the
PCB or contact plates using a soft cloth and alcohol and
replace the old batteries with new ones.
DISPOSAL OF THE DEVICE
According to the provisions of Directive 2002/96/EC the battery
module is to be considered as belonging to the category of
WEEE (Waste Electrical and Electronic Equipment): it thus
cannot be disposed of as unsorted municipal waste. At the
end of its lifetime, the device must be taken to one of the
separate waste collection centres for waste electrical and
electronic equipment from households. Make reference to
the collection centres in your town or city, which assures that
suitable, accessible, functional separate collection systems
are set up to enable end consumers and retailers to dispose
of the waste produced within the municipal territory free of
charge.
16

INFORMATION ABOUT PROPER USE
The battery module is supplied for the purpose of operating
ScreenLine “W Swipe” blinds. FOR INDOOR USE ONLY.
Any use for other than the intended purpose is to be
considered improper use. The manufacturer accepts NO
liability for damage caused by improper use.
SAFETY INFORMATION
WARNING! It is essential to keep and follow the following
instructions to ensure people’s safety!
The device must not be used by children or individuals with
physical, sensory or mental impairments.
The device must also not be used by individuals who have
no experience or knowledge about how it is used without the
supervision of a person responsible for their safety.
The device is not a toy: keep it out of children’s reach!
DO NOT force the device to work if any repairs or adjustments
are needed.
DO NOT attempt any do-it-yourself repairs: repairs must be
carried out by authorized personnel only.
DO NOT leave the module unattended while the batteries are
charging.
DO NOT throw spent batteries into a re: they could explode.
DO NOT open or perforate or short circuit the batteries.
Use only NI-MH rechargeable batteries.
WARNING! USE OF UNSUITABLE BATTERIES MAY CAUSE
THEM TO EXPLODE!
If any liquids penetrate into the device or in the event of
damage of any other kind, immediately take out the batteries
and return the device to the manufacturer for inspection.
In the event of prolonged inaction of the device, remove the
batteries.
17

TECHNICAL DATA
Battery module SL2380
3x1.2V DC Ni-MH AA 2700mAh; 1.5VA;
Battery charger: Primary: 100-240V ac 50/60Hz 15VA
Secondary: 5V 2A dc
18
III

BATTERIEMODUL SL2380
Hinweis:
Das Gerät verfügt über einen Sensorbereich, der für die Akti-
vierung aller Funktionen programmiert ist; mechanische Ta-
sten sind nicht vorhanden.
WICHTIG: Für eine einwandfreie Funktion muss die Kon-
taktäche zwischen Finger und Sensorbereich ausrei-
chend groß sein.
HEBEN/SENKEN
Batteriemodul in senkrechter Position:
Es gibt zwei Möglichkeiten, um den Behang zu heben:
• durch schnelles
Streichen mit dem
Finger über den ge-
samten
Sensorbereich von
unten nach oben
(von 1 nach 2),
• durch Berühren des
oberen Sensorbe-
reichs (2) für mehr als zwei Sekunden.
Der Behang bewegt sich bis zum Erreichen der vollständig
geöffneten Position. Die Bewegung kann jederzeit gestoppt
werden, indem eine beliebige Stelle des Sensorbereichs kurz
berührt wird.
Es gibt zwei Möglichkeiten, um den Behang zu senken:
• durch schnelles Streichen mit dem Finger über den
gesamten Sensorbereich von oben nach unten
(von 2 nach 1),
• durch Berühren des unteren Sensorbereichs (1) für
mehr als zwei Sekunden.
Der Behang bewegt sich bis zum Erreichen der vollständig
geschlossenen Position. Die Bewegung kann jederzeit ge-
stoppt werden, indem eine beliebige Stelle des Sensorberei-
chs kurz berührt wird.
19
Sensorbereich
Sensorbereich
LED
2
1
DE

Batteriemodul in horizontaler Position:
Es gibt zwei Möglichkeiten, um den
Behang zu heben:
• durch schnelles Streichen
mit dem Finger über den ge-
samten Sensorbereich von
rechts nach links (von 1 nach
2)
• durch Berühren des linken
Sensorbereichs (2) für mehr
als zwei Sekunden.
Der Behang bewegt sich bis zum Erreichen der vollständig
geöffneten Position. Die Bewegung kann jederzeit gestoppt
werden, indem eine beliebige Stelle des Sensorbereichs kurz
berührt wird.
Es gibt zwei Möglichkeiten, um den Behang zu senken:
• durch schnelles Streichen mit dem Finger über den
gesamten Sensorbereich von links nach rechts (von 2
nach 1),
• durch Berühren des rechten Sensorbereichs (1) für
mehr als zwei Sekunden.
Der Behang bewegt sich bis zum Erreichen der vollständig
geschlossenen Position. Die Bewegung kann jederzeit ge-
stoppt werden, indem eine beliebige Stelle des Sensorberei-
chs kurz berührt wird.
WENDEN VON JALOUSIE-LAMELLEN
Batteriemodul in senkrechter Position:
Den oberen (2) oder unteren (1) Sensorbereich kurz (weniger
als zwei Sekunden) berühren, bis die gewünschte Lamellen-
position erreicht ist.
Batteriemodul in horizontaler Position:
Den linken (2) oder rechten (1) Sensorbereich kurz (weniger
als zwei Sekunden) berühren, bis die gewünschte Lamellen-
position erreicht ist.
20
Sensorbereich
Sensorbereich
LED
2 1
Other manuals for ScreenLine SL 2380
1
Table of contents
Languages:
Other Pellini Camera Accessories manuals