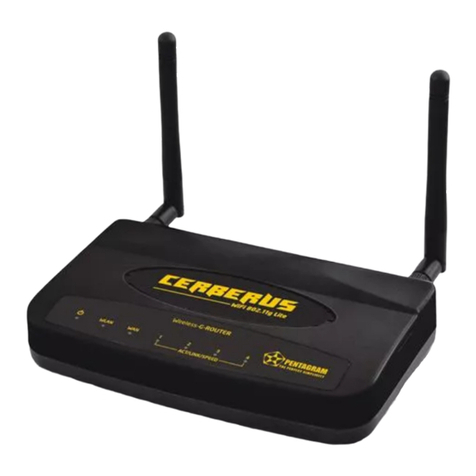
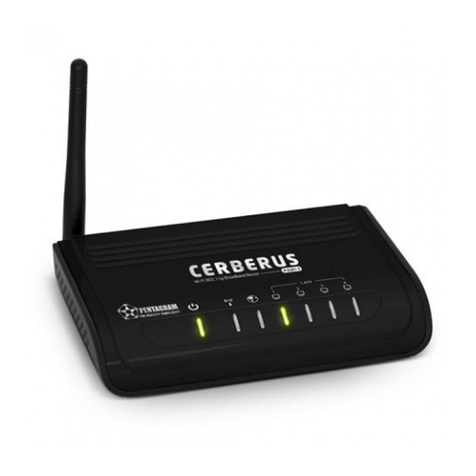
Pentagram P 6361 User manual

EN
Installation and Operation Manual
PENTAGRAM Cerberus [P 6361]
2 11- 8-16
E N
The latest versions of manual, drivers and applications are available on
www.pentagram.eu

PENTAGRAM Cerberus [P 6361]
Important information
Safety precautions
•Do not use or store the device in dusty places, where the humidity is high or in extreme
temperatures.
•Do not operate the device with wet hands to avoid the risk of device damage or electric
shock.
•Do not clean the device with chemicals, such as benzine or detergents – always clean the
device with a soft, dry cloth.
•Disconnect the device from the computer prior to cleaning.
•Do not modify or fix the device yourself in any way, it might void the guarantee.
•Do not drop or shake the device.
•Avoid using this product and all accessories outdoors.
•Only use the power adapter that comes with the package. sing a different voltage rating
power adapter may damage the router.
Information concerning waste electronic equipment
The markings on the device and in the attached documentation indicate
that it cannot be disposed of along with unsegregated general black bag
waste when withdrawn from use. The device must be recycled or processed
in another way to recover reusable materials and neutralize hazardous
components.
The users should contact recycling/recovery authorities to determine
how the device is to be disposed of in an environment-friendly manner.
2
NOTE: All information and technical data is subject to change without previous notice
and/or indication in this manual.
Copyright ©2 1 PENTAGRAM
All rights reserved; copying and reproduction is strictly forbidden.

PENTAGRAM Cerberus [P 6361]
INDEX
EN.......................................................................................................................................................................................................1
IMPORTANT INFORMATION......................................................2
SAFETY PRECA TIONS..............................................................2
INFORMATION CONCERNING WASTE ELECTRONIC EQ IPMENT...............2
INTROD CTION..................................................................5
PACKAGE CONTENTS................................................................5
OPERATING THE DEVICE........................................................6
FRONT PANEL........................................................................6
REAR PANEL..........................................................................6
CONNECTING COMP TERS TO THE CERBER S..............................7
Wired connections (LAN interface).............................................7
Wireless connections (WLAN interface)........................................7
CONFIG RING NETWORK PROPERTIES...........................................7
Windows Vista/7...................................................................7
Windows 2000/XP..................................................................9
Windows 95/98/Me..............................................................10
CONFIG RING THE RO TER..................................................11
DEFA LT SETTINGS.................................................................11
Restoring default settings.......................................................11
CONFIG RATION SING CONFIG RATION WIZARD............................12
Step 1-4............................................................................13
Step 5 Please select your broadband connection type.....................13
Step 6..............................................................................14
Step 7 MAC Address Clone.......................................................16
Step 8 Wireless Basic Settings..................................................17
Step 9 Wireless Security Settings..............................................18
Step 10 Status ....................................................................20
CONFIG RATION SING THE CONFIG RATION PAGE.........................20
Logging on.........................................................................20
NAVIGATION.........................................................................21
SET P WIZARD.....................................................................21
ADVANCED SETTINGS..............................................................24
LAN Settings.......................................................................24
WAN Settings......................................................................25
MAC Address Clone...............................................................26
DNS Settings.......................................................................27
WIRELESS SETTINGS...............................................................28
Basic Settings.....................................................................28
Wireless Security Settings.......................................................29
Advanced Settings................................................................31
WPS Settings......................................................................32
WDS Settings......................................................................33
Wireless Access Control.........................................................34
Connection Status................................................................34
DHCP SERVER.......................................................................35
DHCP Settings.....................................................................35
DHCP List and Binding...........................................................35
VIRT AL SERVER....................................................................36
Port Range Forwarding..........................................................36
DMZ Settings......................................................................37
PNP Settings.....................................................................37
3

PENTAGRAM Cerberus [P 6361]
TRAFFIC CONTROL.................................................................38
Traffic Control....................................................................38
SEC RITY SETTINGS...............................................................39
Client Filter Settings.............................................................39
RL Filter Settings...............................................................40
MAC Address Filter...............................................................41
Prevent Network Attack.........................................................41
Remote Web Management......................................................42
WAN Ping...........................................................................42
RO TING SETTINGS................................................................43
Routing Table.....................................................................43
SYSTEM TOOLS......................................................................43
Time Settings.....................................................................43
DDNS...............................................................................44
Backup/Restore Settings........................................................44
Restore to Factory Default Setting............................................45
pgrade Firmware...............................................................45
Reboot the Router................................................................45
Password Change.................................................................46
Syslog..............................................................................46
Logout..............................................................................46
TRO BLESHOOTING...........................................................47
SING LEDS TO DIAGNOSE PROBLEMS..........................................47
Power LED.........................................................................47
LAN LED............................................................................47
WAN LED...........................................................................47
PROBLEMS WITH RO TER’S DHCP SERVER AND WINDOWS VISTA...........47
PROBLEMS WITH THE WEB INTERFACE..........................................48
PROBLEMS WITH THE LOGIN SERNAME AND PASSWORD....................48
PROBLEMS WITH LAN INTERFACE................................................48
PROBLEMS WITH THE INTERNET ACCESS.......................................48
INTERNET CONNECTION DISCONNECTS:........................................48
4

PENTAGRAM Cerberus [P 6361]
Introduction
The Cerberus wireless router combines a 4-port switch, firewall, NAT router and wireless
access point (AP), making it an excellent foundation for a wireless network at home or a
small business. With the Cerberus, your Internet connection sharing, file transfer and
gaming experience can be even better and safer than before.
PENTAGRAM Cerberus can support a 802.11n (Draft 2) wireless network with a maximum
data rate of 150 Mbps. With a rich feature set, it can also interoperate with 802.11b
products (up to 11 Mbps) and 802.11g products (up to 54 Mbps) in home or office
environments, and with public hotspots. Additionally, your wireless network can be secured
using WEP, WPA or WPA2.
Package contents
1.PENTAGRAM Cerberus [P 6361]
2.9 V 0,6 A mains adapter
3.Network cable (RJ-45)
4.CD
5.Quick Installation Guide
If any of the package contents are missing, please contact your vendor.
5

PENTAGRAM Cerberus [P 6361]
Operating the device
Front panel
LED Action Description
POWER Not lit No Power
Lit up Power on
SYS Not lit No Power or system initializing
Flashing System ready
WPS Flashing Device is negotiating with client in WPS mode.
WLAN Not lit The Wireless function is disabled
Lit up The Wireless function is enabled
Flashing Data transfer
WAN & 1-4 Not lit No device connected to the corresponding port
Lit up Network device connected to the corresponding port
Flashing Network actity of the corresponding port
Rear Panel
Label Used for...
POWER Connecting with supplied power adapter
WAN (RJ-45) Connecting with DSL/cable modem through Ethernet cable
LAN 1-4 (RJ-45) Connecting with computers/devices through Ethernet cable
RESET Resetting the device.
WPS Connecting with wireless station via WPS. Press this button for about
1 second while you are connecting a PC of wireless adapter with WPS
function (you must enable WPS’ PBC function).
6

PENTAGRAM Cerberus [P 6361]
Connecting computers to the Cerberus
Computers and other network devices can be connected to the Cerberus in two ways as
described below.
Wired connections (LAN interface)
All Ethernet (LAN) ports on the router support Auto-MDIX functionality, which enables and
disables crossover automatically, as required. With the autonegotiation feature, the router
also automatically selects the highest connection speed available. For 10/100 Mbps
transfers, a Cat. 5 twisted-pair cable is required, terminated with RJ-45 connectors
according to TIA/EIA-568-A/B. One end of the cable should be connected to a computer’s
network adapter, and the other to one of the router’s LAN ports. If the connection is
correct, the LED indicator corresponding to the LAN port will light up.
Wireless connections (WLAN interface)
In order to connect a computer to the Cerberus using a wireless network, the WLAN adapter
must be installed correctly in the system, and the router must be located within the
operating range of the wireless adapter and belong to the same subnet.
Configuring network properties
Before a connection (wired or wireless) can be established between your computer and the
router, TCP/IP must be configured in the operating system (this protocol should be installed
automatically by the system when installing network adapter drivers). It is recommended to
configure TCP/IP so that the IP address and other connection settings are obtained from the
router’s DHCP server. This configuration is described below for various Windows systems.
Note: In some cases, a computer running Windows 7, Windows Vista or Windows XP Service
Pack 3 may not obtain an IP address from the router’s DHCP server. To solve this issue,
please follow the instructions provided on the Microsoft technical support website at
http://support.microsoft.com/kb/928233/en-us .
Windows Vista/7
Note: You need administrative privileges to perform network configuration. During
configuration, it may be necessary to click Allow (Windows Vista) or Yes (Windows 7) in the
User Account Control dialog, and provide an administrative user name and password if the
current user does not have administrative privileges.
1.Click Start →Control Panel.
2.Click View network status and tasks.
3.Click View status (Vista) or click the connection
type (7) for your connection.
7

PENTAGRAM Cerberus [P 6361]
4.On the General tab, click Properties.
5.On the Networking tab, select Internet Protocol
Version 4 (TCP/IPv4) and click Properties.
6.On the General tab, select Obtain an IP address
automatically and Obtain DNS server address
automatically.
7.Click OK to save the settings and close the
Internet Protocol Version 4 (TCP/IPv4) Properties
dialog.
8

PENTAGRAM Cerberus [P 6361]
Windows 2 /XP
1.Click Start →Settings →Control Panel.
2.Double-click the Network Connections icon
(2000/XP classic view) or Network and Internet
Connections and then Network Connections (XP
default view).
3.Double-click Local Area Connection.
4.On the General tab, click Properties.
5.On the General tab, select Internet Protocol
(TCP/IP) and click Properties.
6.On the General tab, select Obtain an IP address
automatically and Obtain DNS server address
automatically.
7.Click OK to save the settings and close the Internet
Protocol (TCP/IP) Properties dialog.
9

PENTAGRAM Cerberus [P 6361]
Windows 95/98/Me
1.Click Start →Settings →Control Panel.
2.Double-click the Network icon.
3.On the Configuration tab, select TCP/IP for the
appropriate network adapter and click Properties.
4.On the IP Address tab, select Obtain an IP address
automatically.
5.On the DNS Configuration tab, select Disable DNS.
6.Click OK to save the settings and close the TCP/IP
Properties dialog.
To verify whether your adapter has a valid IP address:
1. se +R hotkey or click Start > Run (Windows 98/ME/ 2000/XP) or Start > All programs >
Accessories > Run (Windows Vista/7) to display the Run dialog.
2.Type cmd (Win 2000/XP/Vista/7) or command (Win 98/ME) and press Enter.
3.Type ipconfig /all (Windows 2000/XP/Vista/7) or winipcfg (Windows 98/ME) in the
command line and press Enter.
4.Check whether the IP Address entry for the appropriate network adapter matches the
address pool of the router’s DHCP server, e.g. 192.168. .1 1 .
1

PENTAGRAM Cerberus [P 6361]
Configuring the router
Basic router settings can be configured using the configuration wizard provided on the CD
supplied with the product. This wizard allows you to configure the WAN connection (ISP
settings) and WLAN connection (wireless network established using the router). More
detailed and advanced configuration settings are available on the router’s configuration
page, which can be accessed using any Web browser.
NOTE: We recommend performing the initial router setup using a computer connected to
the device with a network cable.
Default settings
Before configuring the router, we recommend reviewing the default settings for key router
parameters shown below.
IP address 192.168.0.1
Subnet mask 255. 255. 255.0
SSID PENTAGRAM
DHCP server Enabled
DHCP server address pool 101 IP addresses
from 192.168.0.100
to 192.168.1.200
IP address lease time 86,400 seconds (24 hours)
ser name admin
Password admin
We recommend that you change the access password for the router’s configuration page as
soon as possible.
If you ever forget the access password for the router, please reset the device to its default
settings.
Restoring default settings
The router can be restored to its default settings in two ways:
•by clicking the Reset button on the Admin →Backup/Restore Settings tab on the router’s
configuration page; or
•by pressing and holding the RESET button on the back of the device for approx. 10
seconds.
11

PENTAGRAM Cerberus [P 6361]
Configuration using configuration wizard
NOTES:
•It is advised to carry out the initial router configuration from a computer connected to
the router via Ethernet cable.
•Configuration wizard is designed only for initial router configuration after it's first start.
•After changing AN settings of the router, using configuration wizard may not be possible.
1.Insert the supplied CD into the CD-ROM drive. The startup menu should open
automatically. nder Windows Vista and Windows 7, you may need to click Run: SETUP.EXE
in the AutoPlay dialog. If the menu does not open automatically, select Start > Run (under
Windows Vista and 7: Start > All Programs > Accessories > Run). In the Open field in the
Run dialog, type X:\setup.exe (where “X” is the letter corresponding to your optical drive),
then press Enter.
2.During CD menu start, you may need to click Allow (Windows Vista) or Yes (Windows 7) in
the User Account Control dialog, and provide an administrative user name and password if
the current user does not have administrative privileges.
3.Click the Start button, to begin configuration wizard.
You can exit configuration wizard at any moment without saving any changes into the router
– use Exit button visible in lower right corner of wizard's window.
12

PENTAGRAM Cerberus [P 6361]
Step 1-4
If power supply and and computer are still not connected to the router, wizard will guide
you through that process. If router isn't connected properly to the power supply or the
computer, message with additional information will be displayed. If computer is properly
connected to the router, appropriate message will be displayed – click the OK button, to go
to step 5 Please select your broadband connection type.
Step 5 Please select your broadband connection type
To continue with the configuration you need to select connection mode used by the ISP.
Ethernet broadband, get IP automatically(dynamic IP) – Select this option, if you did not
receive any access information from the ISP. In this case additional configuration is not
necessary and wizard will jump to the Step 7 MAC address clone.
Ethernet broadband,fixed IP(static IP) – Select this option, if you received from ISP access
information, like IP address, subnet mask, default gateway address, etc. After selecting this
option wizard will jump to step 6 Static IP.
PPPoE – Select this option, if you received from ISP access information in form of user name
and password. After selecting this option wizard will jump to step 6 ADSL Virtual Dialing
(PPPoE).
PPTP – Select this option, if ISP is using PPTP Tunnel connections. After selecting this option
wizard will jump to step 6 PPTP.
L2TP – Select this option, if ISP is using PPTP Tunnel connections. After selecting this option
wizard will jump to step 6 L2TP.
13

PENTAGRAM Cerberus [P 6361]
Step 6
This Step depends on option selected in Step 5. To continue with the configuration you need
to enter values acquired from ISP to all required fields. After you're done, click on the Next
button to go to the next step.
Static IP
ADSL Virtual Dialing (PPPoE)
Check Accounts button allows you to validate entered values.
14

PENTAGRAM Cerberus [P 6361]
PPTP
L2TP
15

PENTAGRAM Cerberus [P 6361]
Step 7 MAC Address Clone
In some cases ISP bounds the service to user's network adapter – for this purpose adapter's
hardware address (MAC) is used. In this case, it is required to give bound adapter's MAC
address to WAN port of the router. MAC address cloning is not recommended if it's not
necessary.
MAC Address – Field for manual input of the MAC address.
Clone MAC Address – Click this button to clone local computer MAC address.
Restore to default MAC – Click this button to revert router's MAC address to factory default.
Click on the Next button to go to the next step.
16

PENTAGRAM Cerberus [P 6361]
Step 8 Wireless Basic Settings
This step allows configuration of the basic wireless network settings.
SSID – SSID of the wireless network.
Wireless Mode – Wireless station's standards, which will be allowed to connect to router's
wireless network.
Channel – Channel (frequency) on which wireless network will work.
SSID Broadcast – If this option is disabled, wireless network won't be visible through network
survey and only users knowing network's SSID will be able to connect to the network.
Click on the Next button to go to the next step.
17

PENTAGRAM Cerberus [P 6361]
Step 9 Wireless Security Settings
In this step you can secure router's wireless network. For best security and performance
protocol WPA2 with AES encryption is recommended.
Security – Select protocol used to secure the network. Options below depends from option
selected here.
•WEP – Low security level.
Security – Change security protocol.
Authentication Mode – Select client's authentication method. Open authentication
allows everyone to connect to wireless network.
Encryption size – Select whether WEP key should be in form of a ASCII characters (digits
& latin letters) or hexadecimal characters (digits & letters a-f).
Transmit Key – Select WEP key to use.
Key – Field for WEP key input.
Click on the Next button to go to the next step.
18

PENTAGRAM Cerberus [P 6361]
•WPA – Medium security level.
Security – Change security protocol.
WPA Key Mode – Select encryption method: TKIP or AES. AES encryption is
recommended, but some network devices supports only TKIP encryption with WPA
protocol.
WPA Key – Field for encryption key input.
Key Valid Time – Connection time, after which encryption key will be automatically
changed.
Click on the Next button to go to the next step.
•WPA2 – High security level.
Security – Change security protocol.
WPA Key Mode – Select encryption method: TKIP or AES. AES encryption is
recommended.
WPA Key – Field for encryption key input.
Key Valid Time – Connection time, after which encryption key will be automatically
changed.
Click on the Next button to go to the next step.
19

PENTAGRAM Cerberus [P 6361]
Step 1 Status
This step allows for last verification of the configuration. If router is properly connected to
ISP network & Internet, IP Address should be other than . . . .
Click on the Finish button to close wizard window.
Configuration using the configuration page
Logging on
1.Launch your Web browser.
2.In the address bar, type the default IP address: http://192.168. .1 .
3.If the system password is set, enter your username and password (default: admin /
admin).
2
Table of contents
Other Pentagram Network Router manuals
Popular Network Router manuals by other brands

ADTRAN
ADTRAN NetVanta 4305 quick start guide

insys icom
insys icom MoRoS LAN Quick installation guide

Patton
Patton SmartNode 5200 quick start guide

QUCIKTE TECHNOLOGY
QUCIKTE TECHNOLOGY I30-802M Hardware installation manual

Billion
Billion BiPAC 2072 Specifications

ZyXEL Communications
ZyXEL Communications Dimension ES-108S user guide