manuals.online logo
Brands
  1. Home
  2. •
  3. Brands
  4. •
  5. ADTRAN
  6. •
  7. Network Router
  8. •
  9. ADTRAN NetVanta 4305 User manual

ADTRAN NetVanta 4305 User manual

Quick Start Guide, 61200890L1-13D, July 2005 Technical Support 1-888-4ADTRAN (1-888-423-8726) Copyright © 2005 ADTRAN, All Rights Reserved
For more detailed documentation, visit us online at www.adtran.com.
Quick Start Guide
®
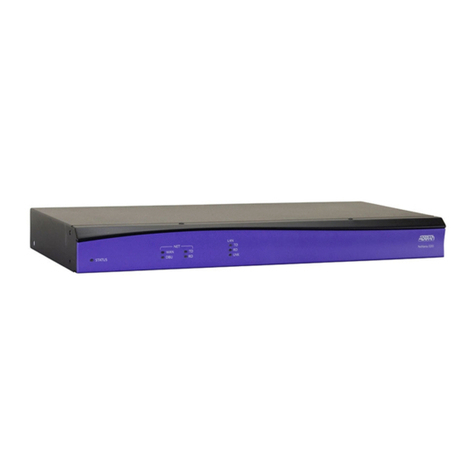
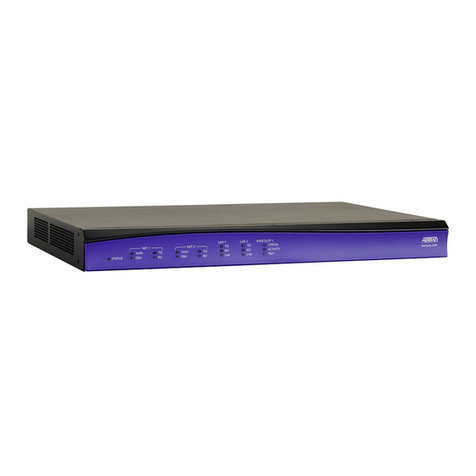
NetVanta 4305 Router P/N 1200890L2
STATUS
NET 2
WAN
DBU
TD
RD
TD
RD
LNK
LAN 2
NetVanta 4305
STATUS
ACTIVITY
TEST
WIDE SLOT 1
TD
RD
LNK
LAN 1
NET 1
WAN
DBU
TD
RD
GETTING STARTED
Two configuration methods are available for your NetVanta router:
• Web-based GUI
• AOS Command Line Interface (CLI)
The GUI lets you configure the main unit settings and provides online guidance and explanations
for each setting. However, using the AOS CLI may be necessary for more advanced
configurations.
ACCESS THE GUI
You may access the web-based GUI from any web browser on your network by following these
steps:
1. Connect the router to your PC using the ETH 0/1 port on the back of the unit.
2. Set your PC to a fixed IP address of 10.10.10.2. If you cannot change the PC’s IP address,
you will need to change the unit’s IP address using the CLI. (Refer to the next two sections for
instructions.)
3. Enter the unit’s IP address in your browser address line. The default IP address is 10.10.10.1.
4. You will then be prompted for the username and password (the default settings are admin
and password).
5. The initial GUI screen appears.
ACCESS THE CLI
Access the AOS CLI via the CONSOLE port or a Telnet session. To establish a connection to the
NetVanta router CONSOLE port, you need the following items:
• VT100 terminal or PC (with VT100 terminal emulation software)
• Straight-through serial cable with a DB-9 (male) connector on one end and the appropriate
interface for your terminal or PC communication port on the other end
1. Connect the DB-9 (male) connector of your serial cable to the CONSOLE port on the rear
panel of the unit.
2. Connect the other end of the serial cable to the terminal or PC.
3. Insert the connector of the provided power cord into the power interface on the rear panel of
the unit, and plug the cord into a standard electrical outlet.
4. Once the unit is powered up, open a VT100 terminal session using the following settings:
9600 baud, 8 data bits, no parity bits, and 1 stop bit. Press <Enter> to activate the
AOS CLI.
5. Enter enable at the >prompt.
6. Enter the enable password when prompted. The default password is password.
CONFIGURE THE UNIT’SIP ADDRESS
The following steps create an IP address (10.10.10.1 255.255.255.0) for Ethernet port 0/1. If you
are not sure what IP address to assign, please contact your network administrator.
1. At the # prompt, enter config terminal.
2. At the (config)# prompt, enter interface eth 0/1 to access the configuration parameters for
the ETH 0/1 port located on the rear of the unit.
3. Enter ip address 10.10.10.1 255.255.255.0 to assign an IP address to the ETH 0/1 port using
a 24-bit subnet mask.
4. Enter no shutdown to activate the interface to pass data.
5. Enter exit to exit the Ethernet interface commands and return to the Global Configuration
mode.
The configuration parameters used in the examples outlined in this
document are for instructional purposes only. Please replace all
underlined entries (example) with your specific parameters to configure
your application.
Depending on your configuration, you may need to set a default gateway
as well using the (config)#ip default gateway command. If IP routing is
enabled on the unit, do NOT set a default gateway.
Quick Start Guide, 61200890L1-13D, July 2005 Technical Support 1-888-4ADTRAN (1-888-423-8726) Copyright © 2005 ADTRAN, All Rights Reserved
For more detailed documentation, visit us online at www.adtran.com.
Quick Start Guide
®
NetVanta 4305 Router P/N 1200890L2
ENABLE TELNET ACCESS
The following steps create a password of adtran for Telnet access. By default, Telnet access is
enabled with a password of password.
1. Verify that the prompt of your unit displays (config)#.
2. Enter line telnet 0 4 to change the configuration parameters for the Telnet sessions.
3. Enter login to initiate Telnet access.
4. Enter password adtran to change the login password for the Telnet sessions.
5. Enter exit to return to the Global Configuration mode.
6. Verify that the prompt of your unit displays (config)#.
7. Enter do write memory to save the current configuration.
CONSOLE PINOUTS
Pin Name Description
1 DCD Data Carrier Detect (output)
2 RD Receive Data (output)
3 TD Transmit Data (input)
4 DTR Data Terminal Ready (input)
5 SG Signal Ground
6 DSR Data Set Ready (output)
7 — Unused
8 CTS Clear to Send (output)
9 — Unused
CONFIGURE YOUR APPLICATION
More detailed documentation for configuring your ADTRAN unit is provided on the ADTRAN OS
System Documentation CD included in your shipment. For more detail on hardware setup, refer to
the appropriate NIM Quick Start Guides and the Hardware Installation Guide. For more detail on
configuring your system, refer to the ADTRAN Operating System (AOS) Command Reference
Guide, configuration guides, and technical support notes.
For information on installing the VPN Accelerator Card, please refer to the
NetVanta 4305 Hardware Installation Guide on the ADTRAN OS System
Documentation CD included in your router shipment.
ETHERNET PINOUT
Pin Name Description
1 TX1 Transmit Positive
2 TX2 Transmit Negative
3 RX1 Receive Positive
4, 5 — Unused
6 RX2 Receive Negative
7, 8 — Unused
Important: For additional details on product features, specifications,
installation, and safety, refer to the appropriate Hardware Installation
Guide on the ADTRAN OS System Documentation CD shipped with the
base unit and available online at www.adtran.com.
SLOT 1 NET/DBU
CONSOLE
SLOT 2 NET/DBUSLOT 3 WIDE MODULE
WAN-T1 DSX-1 DBU
ETH 0/1
ETH 0/2
100- 250VAC, 0.75A
50/60Hz
WAN-T1 DSX-1 DBU WAN-T1 DSX-1 DBU

Other manuals for NetVanta 4305

3

Other ADTRAN Network Router manuals

ADTRAN NetVanta 340 User manual

ADTRAN

ADTRAN NetVanta 340 User manual

ADTRAN MX410 User guide

ADTRAN

ADTRAN MX410 User guide

ADTRAN Express L128FP User manual

ADTRAN

ADTRAN Express L128FP User manual

ADTRAN NetVanta 4660 Manual

ADTRAN

ADTRAN NetVanta 4660 Manual

ADTRAN NetVanta 1335 Series User manual

ADTRAN

ADTRAN NetVanta 1335 Series User manual

ADTRAN NetVanta 3120 with DBU Manual

ADTRAN

ADTRAN NetVanta 3120 with DBU Manual

ADTRAN NetVanta 5305 User manual

ADTRAN

ADTRAN NetVanta 5305 User manual

ADTRAN Total Access 1248 Instruction Manual

ADTRAN

ADTRAN Total Access 1248 Instruction Manual

ADTRAN 424RG User manual

ADTRAN

ADTRAN 424RG User manual

ADTRAN NetVanta 4300 Series Manual

ADTRAN

ADTRAN NetVanta 4300 Series Manual

ADTRAN NetVanta 2000 Series User manual

ADTRAN

ADTRAN NetVanta 2000 Series User manual

ADTRAN NetVanta 3430 User manual

ADTRAN

ADTRAN NetVanta 3430 User manual

ADTRAN 1203860G1 User manual

ADTRAN

ADTRAN 1203860G1 User manual

ADTRAN NetVanta 340 Series Manual

ADTRAN

ADTRAN NetVanta 340 Series Manual

ADTRAN ATLAS 550 User guide

ADTRAN

ADTRAN ATLAS 550 User guide

ADTRAN Express 4200 User manual

ADTRAN

ADTRAN Express 4200 User manual

ADTRAN NetVanta 3450 User manual

ADTRAN

ADTRAN NetVanta 3450 User manual

ADTRAN NetVanta 340 User manual

ADTRAN

ADTRAN NetVanta 340 User manual

ADTRAN Express XL 1200070L1 User manual

ADTRAN

ADTRAN Express XL 1200070L1 User manual

ADTRAN NetVanta 4305 Manual

ADTRAN

ADTRAN NetVanta 4305 Manual

ADTRAN NetVanta 340 User manual

ADTRAN

ADTRAN NetVanta 340 User manual

ADTRAN 424RG User manual

ADTRAN

ADTRAN 424RG User manual

ADTRAN SR700ac User manual

ADTRAN

ADTRAN SR700ac User manual

ADTRAN Express 4100 User manual

ADTRAN

ADTRAN Express 4100 User manual

Popular Network Router manuals by other brands

3Com 3CNJ100 - IntelliJack Switch installation guide

3Com

3Com 3CNJ100 - IntelliJack Switch installation guide

SMC Networks 7301TA installation guide

SMC Networks

SMC Networks 7301TA installation guide

Alcatel-Lucent 7210 SAS E OS Configuration guide

Alcatel-Lucent

Alcatel-Lucent 7210 SAS E OS Configuration guide

Siemens RUGGEDCOM RX1100P installation guide

Siemens

Siemens RUGGEDCOM RX1100P installation guide

Konig CMP-ROUTER12 Quick installation guide

Konig

Konig CMP-ROUTER12 Quick installation guide

D-Link AirPlus DWL-810+ owner's manual

D-Link

D-Link AirPlus DWL-810+ owner's manual

Asus RT-N13U - Wireless Router quick start guide

Asus

Asus RT-N13U - Wireless Router quick start guide

Draytek Vigor 2762 Series quick start guide

Draytek

Draytek Vigor 2762 Series quick start guide

Quick Eagle Networks SDIS90 brochure

Quick Eagle Networks

Quick Eagle Networks SDIS90 brochure

Bask Aerospace AeroLink Base user manual

Bask Aerospace

Bask Aerospace AeroLink Base user manual

Ericsson SmartEdge 600 Hardware guide

Ericsson

Ericsson SmartEdge 600 Hardware guide

Hirschmann MICE MS20 user manual

Hirschmann

Hirschmann MICE MS20 user manual

Raymar RT20 Series quick start guide

Raymar

Raymar RT20 Series quick start guide

Genexis FiberTwist P6426 installation guide

Genexis

Genexis FiberTwist P6426 installation guide

RouterBOARD 433GL Quick setup guide and warranty information

RouterBOARD

RouterBOARD 433GL Quick setup guide and warranty information

Paradyne Hotwire 6301 user guide

Paradyne

Paradyne Hotwire 6301 user guide

Edimax 3G-6200nL V2 Declaration of conformity

Edimax

Edimax 3G-6200nL V2 Declaration of conformity

Huawei EchoLife EG8145V5 quick start guide

Huawei

Huawei EchoLife EG8145V5 quick start guide

manuals.online logo
manuals.online logoBrands
  • About & Mission
  • Contact us
  • Privacy Policy
  • Terms and Conditions

Copyright 2025 Manuals.Online. All Rights Reserved.