Peoplbrain ISEOS ISOFIX User manual

Use the car seat ISEOS ISOFIX
Made with Peoplbrain - www.peoplbrain.com
Use the car seat ISEOS ISOFIX
Created by : Allobébé
This how to guide is doable in : 10 to 20 min
and the level is : Easy
How to use the car seat ISEOS ISOFIX
1 / 38

Use the car seat ISEOS ISOFIX
Made with Peoplbrain - www.peoplbrain.com
Step : 1/71
First glance, first smiles, first words, first steps: a baby is a lot of unforgettable moments in perspective. It's also, every day a
thousand moments of complicity and find that you have to heart to share fully in family. For you and your child, we all expected
that, day after day, you can enjoy 100% of the essential: to live the happiness of being together intensely.
So treat yourself!
Step : 2/71
GR 1 : 9 to 18 kg
2 / 38

Use the car seat ISEOS ISOFIX
Made with Peoplbrain - www.peoplbrain.com
Step : 3/71
DESCRIPTION
1 - Clip (for use with 3 point car seat-belt)
2 - Strap buckle (for use with 3 point car seat-belt)
3 - Installation sticker for use with 3 point car seat-belt
4 - Keep the instructions in the special pocket (on the back of the seat)
17 - Installation indicator for ISOFIX lower anchorage latches
18 - ISOFIX Installation sticker
19 - ISOFIX lower anchorage latches
Step : 4/71
19 - ISOFIX lower anchorage latches
20 - Handle for retracting ISOFIX latches (under the base)
21 - Storage net for anchorage strap for upper ISOFIX installation
22 - Anchoring strap for upper ISOFIX installation “Top Tether”
23 - “Top Tether” tension adjuster
24 - “Top Tether” tension indicator
25 - Clasp to anchor the “Top Tether”
3 / 38

Use the car seat ISEOS ISOFIX
Made with Peoplbrain - www.peoplbrain.com
Step : 5/71
DESCRIPTION
5 - Base
6 - Side piece
7 - Fabric
8 - Chest pad
9 - Harness support
10 - 5 point harness
11 - Harness buckle cover
12 - Adjuster for harness fit
13 - Strap for harness fit
14 - Adjuster knob for seat width
15 - Adjuster knob for seat angle
16 - Release system for ISOFIX lower anchorage latches
Step : 6/71
IMPORTANT
• All Bébé Confort products have been carefully designed and tested for your baby’s safety and comfort. Use only accessories
sold or approved by Bébé Confort.
• Using other accessories may prove to be dangerous.
• Please read these instructions carefully and make yourself familiar with the child seat before using it.
• Always keep the instructions for future reference; there is a storage pocket specifically provided on the child seat.
UNIVERSAL ISOFIX SYSTEM:
• Group 1 car seat (children from 9 to 18 Kg) - ISOFIX classification B1 - ISOFIX UNIVERSAL approved.
• To use the ISOFIX UNIVERSAL fixing system, it is ESSENTIAL to read the car handbook, before installing the child car seat.
• It will show you which points are compatible with the classification of the ISOFIX UNIVERSAL approved child car seat.
• IMPORTANT: never use both the ISOFIX fixing system and the car seat-belt to install the child car seat
• IMPORTANT: when using ISOFIX it is not enough to connect just the lower anchorage latches to the vehicle. It is essential to
fix the “Top Tether” to the upper anchorage provided by the vehicle manufacturer.
UNIVERSAL SYSTEM WITH A 3 POINT SEAT-BELT:
• IMPORTANT: never use both the ISOFIX fixing system and the car seat-belt to install the child car seat.
• When the car seat is used in combination with an adult safety belt, It can be installed only in the vehicles listed, equipped with
3 point/static/inertia reel safety-belts that conform to EEC Regulation N° 16 or other equivalent standards.
• After putting the child in the car seat, ensure that the car seat-belt is sufficiently taut by pulling the belt. Ensure also that the
belt does not become twisted
THE CHILD:
• Never leave a child unsupervised.
• Even a gentle impact on a vehicle can turn a child into a projectile.
• For your own safety and that of your child, always put the child in the child car seat, however short your journey may be.
• Ensure that the straps under the stomach lie as low as possible, to properly support the pelvis.
• The temperature inside a vehicle may become very high, particularly after a long period of exposure to the sun. It is strongly
4 / 38

Use the car seat ISEOS ISOFIX
Made with Peoplbrain - www.peoplbrain.com
recommended, under such conditions, to cover the seat of the car with a piece of material or something equivalent to prevent
the harness fixings, and in particular the metal parts, from becoming hot and burning the child.
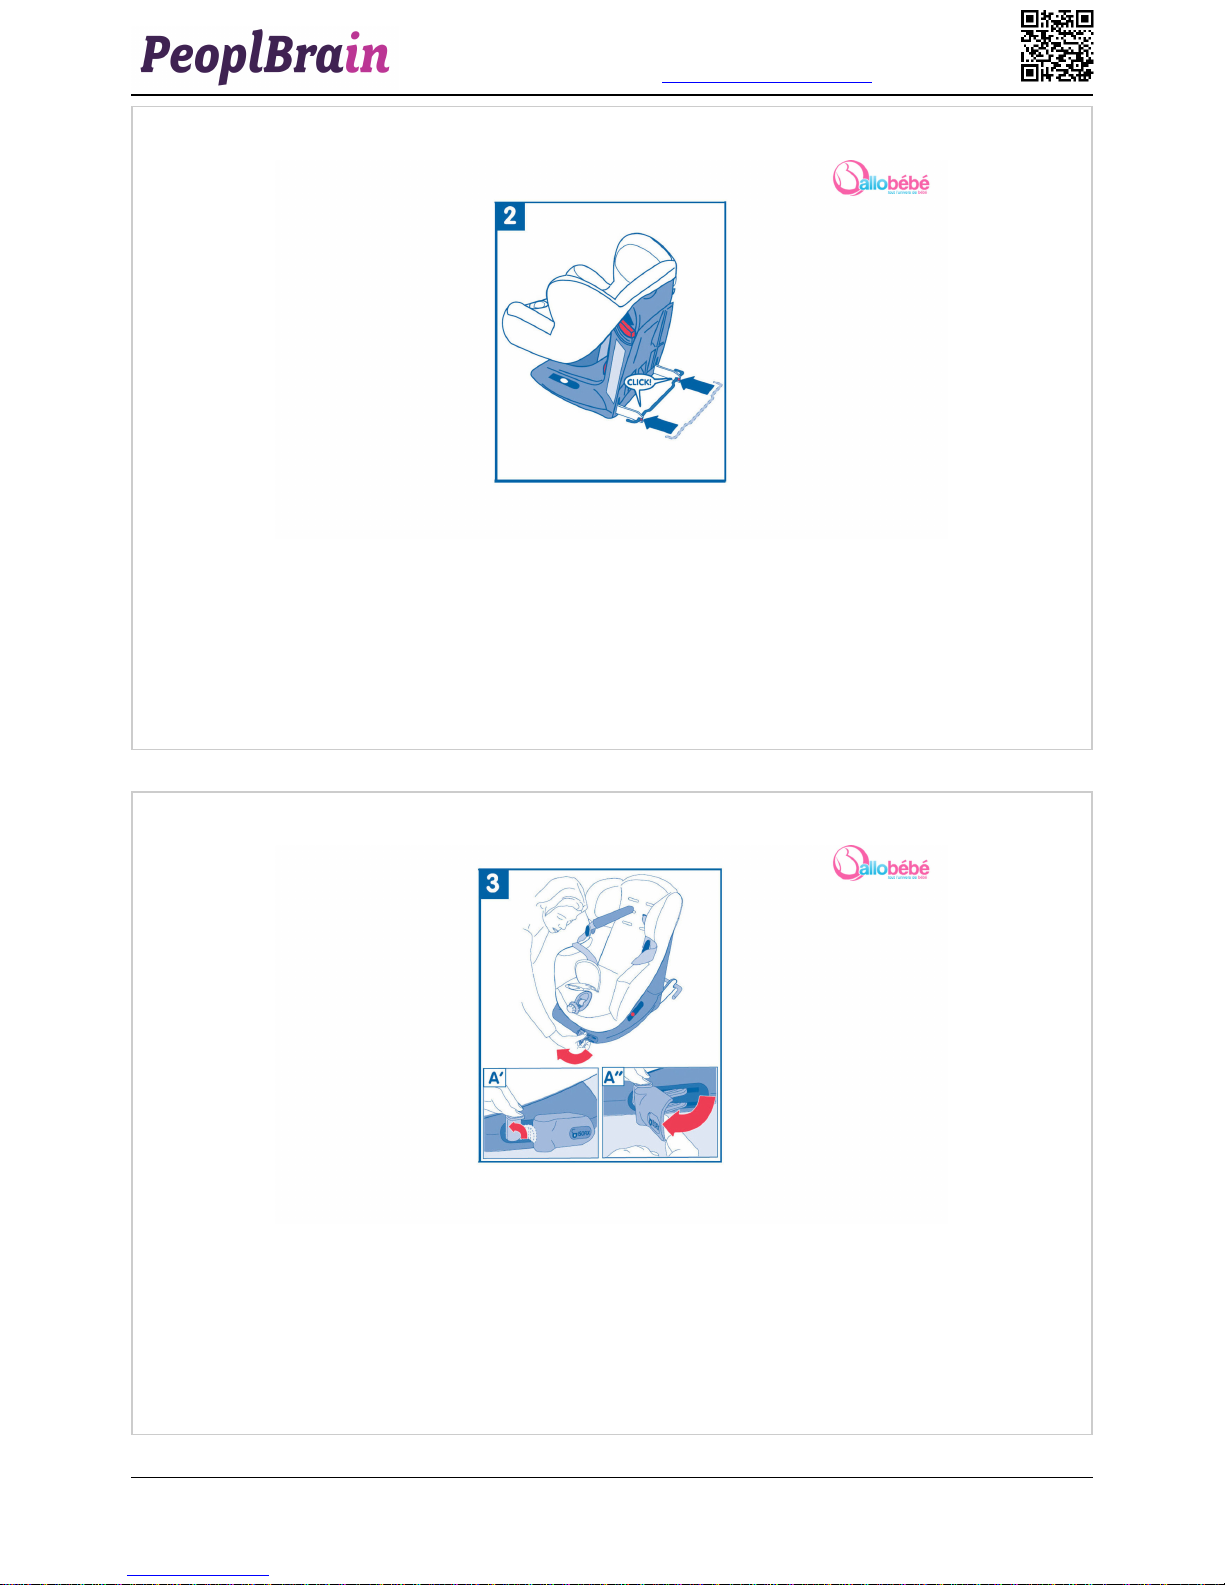
Step : 7/71
OTHER INSTRUCTIONS:
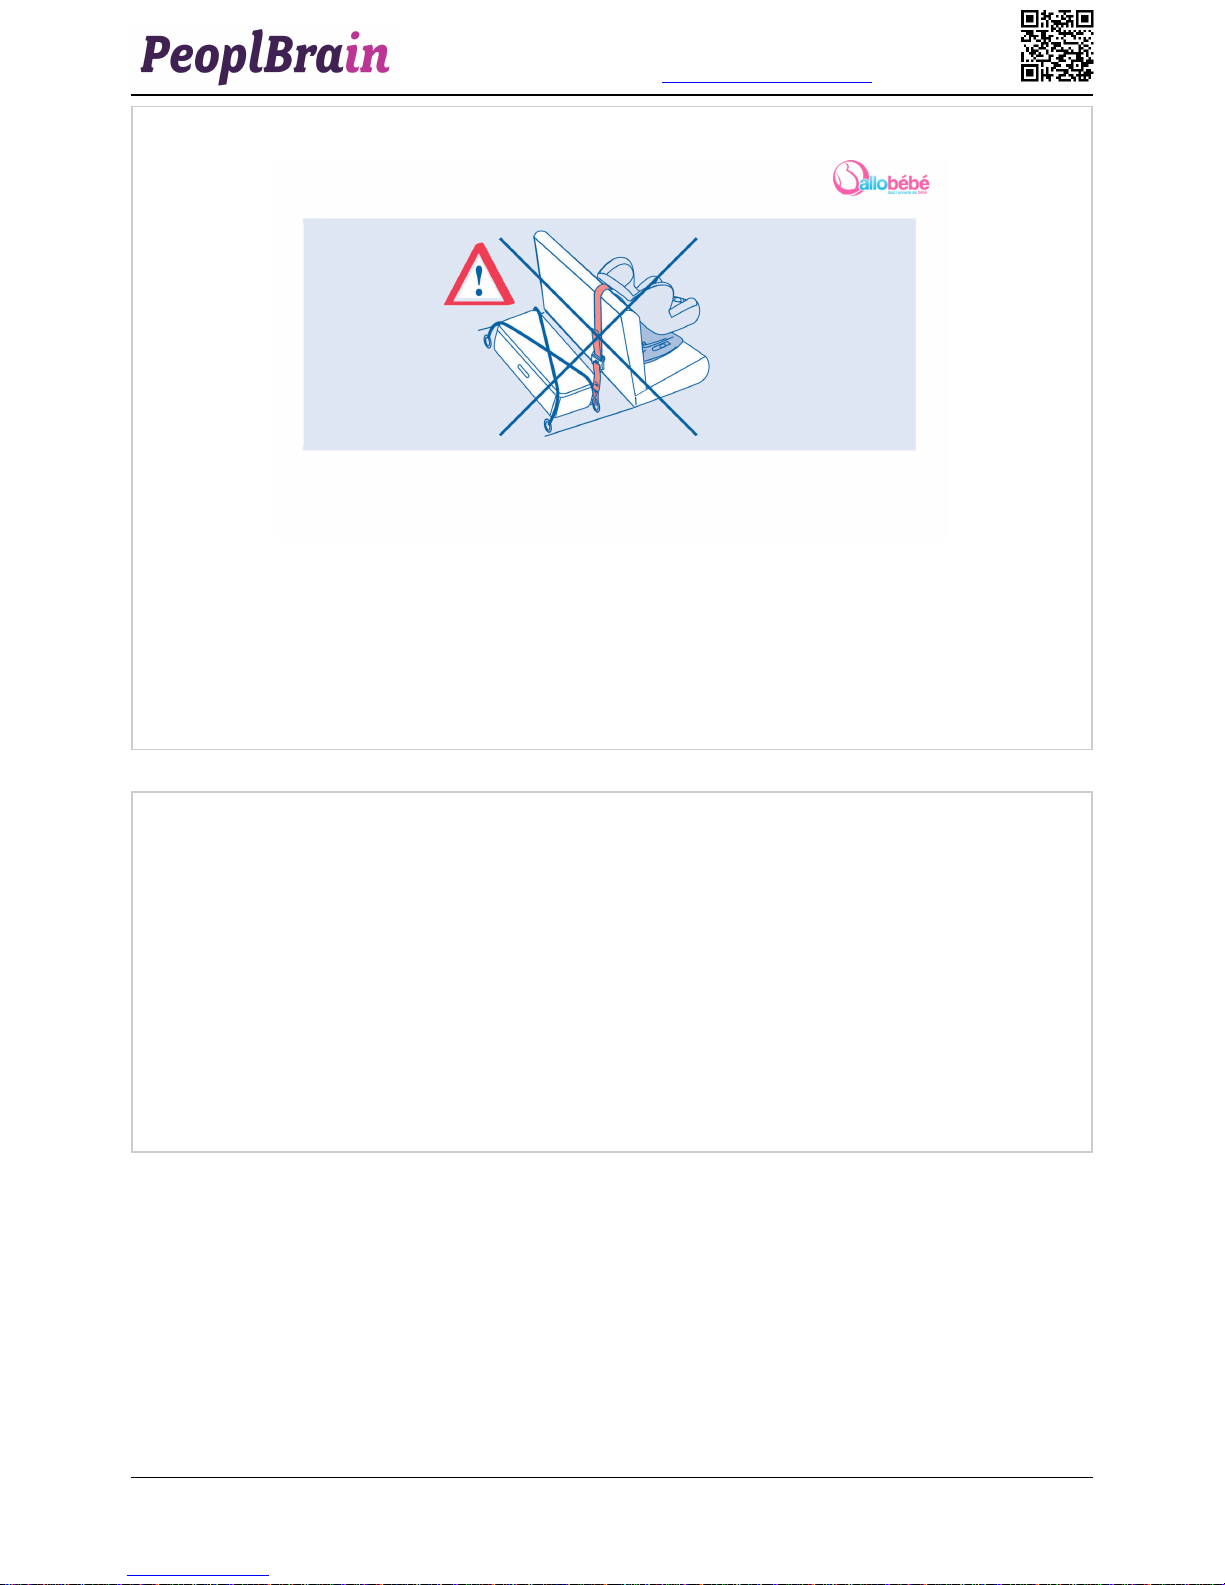
• The child car seat is to be installed facing forwards. Never install this child car seat facing backwards.
• The manufacturer’s liability is limited to what is covered under the European Regulation (R44). This approval does not
remove the necessity for care and respect for the Highway Code.
• This child restraint is effective only if the instructions for use are respected.
• Always fasten the child restraint even when the child is not sitting in it.
• The user must always check that any luggage and other objects likely to cause injury to the occupant of the car seat in the
case of impact are properly secured.
• Never place heavy objects on the rear parcel shelf, to avoid the danger of projectiles in the event of an accident.
• The rigid parts and the plastic sections of a child restraint device should be positioned and installed in such a way that they
cannot, under normal conditions of use of the vehicle, become trapped under a moving seat or in the vehicle door.
• Always check that no part of the seat or the harness is trapped under a seat or in the vehicle door.
• It is essential that the car seat be replaced after an accident.
• Never modify the construction or the materials of the car seat and its straps without consulting the manufacturer.
• Do not use the child restraint device without the cover.
Do not replace the seat cover with a cover other than that recommended by the manufacturer, because it will have a direct
effect on the functioning of the child restraint.
• If in any doubt about the correct installation or use of the system, the user is advised to contact the distributor or the
manufacturer of the child restraining device system.
SYMBOLS:
Consult the vehicle handbook
Consult the car seat instructions
The ISOFIX logo (see installation sticker)
Seat using an ISOFIX «Top tether» upper anchoring strap
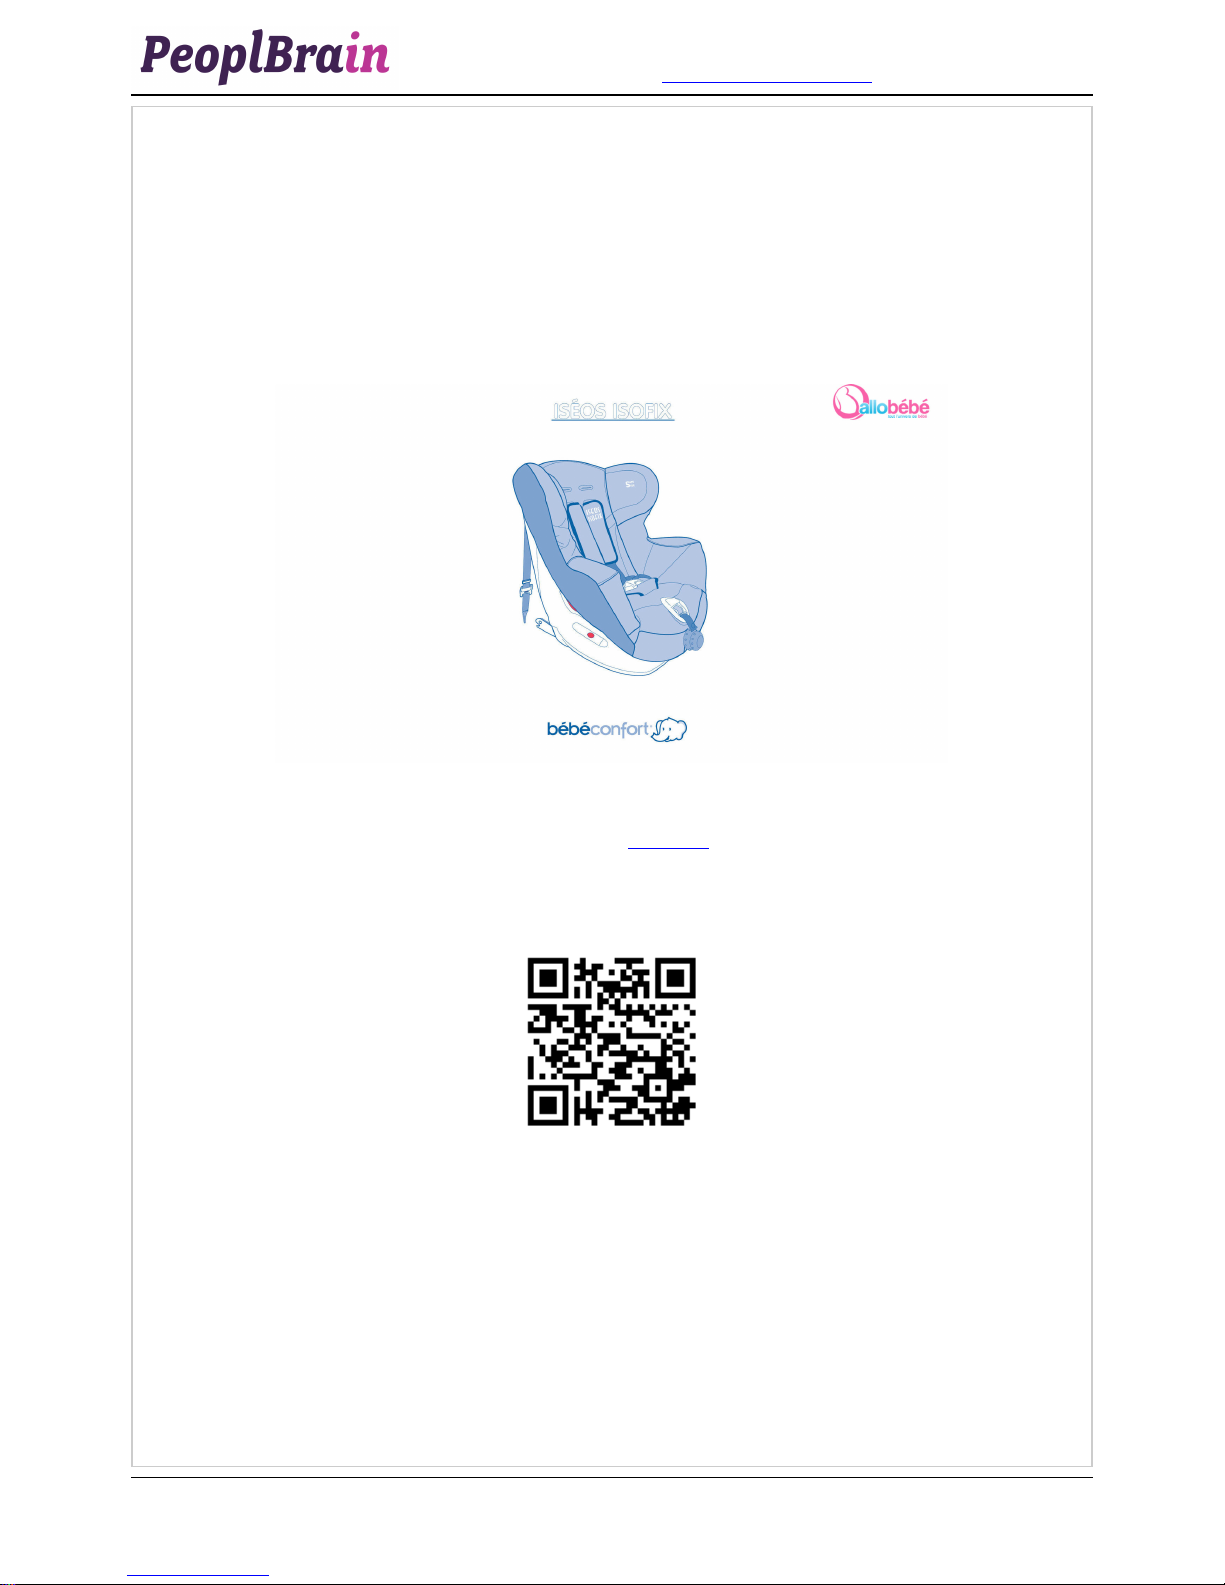
ISEOS ISOFIX UNIVERSAL
Direction
facing forwards
Rear seat *
Classification B1**
Group 1
9 to18 kg
* The child seat must be placed on the rear seat of the vehicle or, exceptionally, in the front depending on the current
legislation in the country of use.
Your ISEOS car seat is ISOFIX UNIVERSAL approved.
Under the latest changes in regulations, it is suitable for all vehicles that have the ISOFIX UNIVERSAL system built in.
** Consult the vehicle handbook, where the manufacturer will have indicated the position of the
3 seat anchorage points in the vehicle.
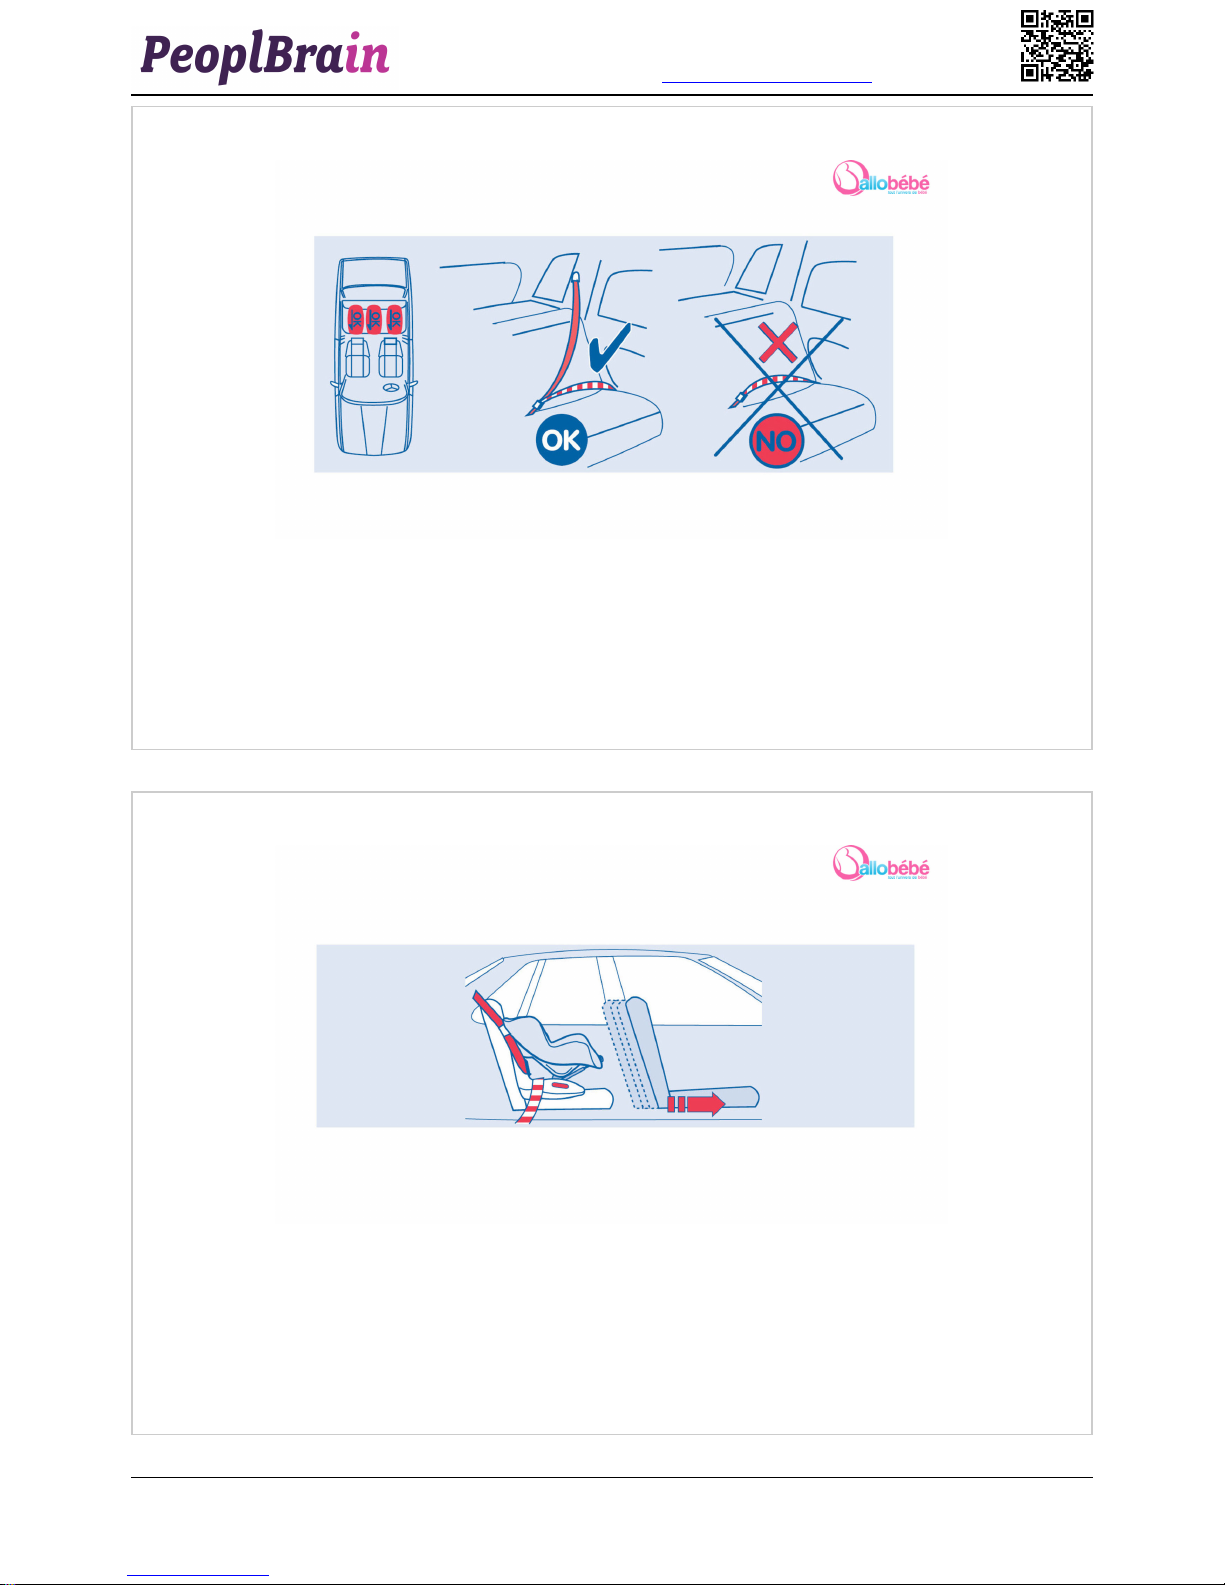
WHERE SHOULD IT BE FITTED?
• Consult the vehicle handbook where you will find the positions recommended by the manufacturer for the installation of an
ISOFIX UNIVERSAL car seat, classification B1.
• Check that the position selected corresponds to the classification of your car seat (classification B1).
• Move the front passenger seat forward so that the child does not bump into it.
5 / 38

Use the car seat ISEOS ISOFIX
Made with Peoplbrain - www.peoplbrain.com
Step : 8/71
Upper anchoring strap for ISOFIX (Top Tether)
Lower ISOFIX anchorage latches
Step : 9/71
Pass the «Top Tether» between the top of the back of the vehicle seat and the headrest.
Never pass the Top Tether over the vehicle headrest.
6 / 38

Use the car seat ISEOS ISOFIX
Made with Peoplbrain - www.peoplbrain.com
Step : 10/71
IMPORTANT: ensure that the anchorage point used for the “Top Tether” is in fact an anchorage
point intended for this purpose. Check that you do not confuse it with a ring intended for securing luggage.
Step : 11/71
WARNING
ISEOS WITH A SEAT-BELT
Direction
facing forwards
Position
Rear seats *
Group 1
9 to18 kg
* The child seat must be placed on the rear seat of the vehicle or exceptionally on the front seat depending on the current
legislation in the country of use.
7 / 38

Use the car seat ISEOS ISOFIX
Made with Peoplbrain - www.peoplbrain.com
Step : 12/71
This device should be used only on approved vehicles equipped with 3 point/static/ inertia reel seat-belts that are approved in
accordance with EEC/ UN regulation N° 16 or other equivalent standard.
Step : 13/71
Move the front passenger seat forward so that the child does not bump into it.
8 / 38

Use the car seat ISEOS ISOFIX
Made with Peoplbrain - www.peoplbrain.com
Step : 14/71
Check that the child seat is properly installed.
It is important for your child’s safety that you fit the belt correctly.
The vehicle belt must be fixed along the red markings/ location points on the isofix bebe confort iseos seat.
Please also read the label on the side of the isofix bebe confort iseos seat. Never fit the belt in any way other than that shown.
Step : 15/71
IMPORTANT : Only use this procedure to return the isofix latches inside the base if you have brought them out in error.
1 - Unhook the release tool held by two hooks on the left side of the seat.
9 / 38

Use the car seat ISEOS ISOFIX
Made with Peoplbrain - www.peoplbrain.com
Step : 16/71
2 - Clip the release tool onto the isofix latches.
Step : 17/71
3 - A’ Slide the yellow catch upwards A» While holding the catch in this position, pull the black lever until you hear the click of
the two latches being released.
10 / 38

Use the car seat ISEOS ISOFIX
Made with Peoplbrain - www.peoplbrain.com
Step : 18/71
4 - Remove the tool and push the latches into the base of the seat.
Step : 19/71
5 - Keep this tool stored on the side of the seat.
11 / 38

Use the car seat ISEOS ISOFIX
Made with Peoplbrain - www.peoplbrain.com
Step : 20/71
PREPARING TO INSTALL ISOFIX
1 - Find the lower ISOFIX anchorage points in your vehicle handbook.
Step : 21/71
2- Clip the «ISOFIX latch» guides onto each of the ISOFIX lower anchorage points on the vehicle
seat. Use of the guides is optional. It makes no difference to the effectiveness of the child car seat. The guides make it easier
to access the lower ISOFIX anchorage points.
12 / 38

Use the car seat ISEOS ISOFIX
Made with Peoplbrain - www.peoplbrain.com
Step : 22/71
3 - Take the “Top Tether” out of the net. Pull out the “Top Tether” by pressing the button (1) of the
tension adjuster, and then (2) pulling the belt.
Step : 23/71
4 - Use the handle under the car seat to bring out the ISOFIX lower anchorage latches.
WARNING! The latches can only be retracted after the car seat has been clipped into and then unclipped from the vehicle, or
by using the release tool provided (see attached instructions).
13 / 38

Use the car seat ISEOS ISOFIX
Made with Peoplbrain - www.peoplbrain.com
Step : 24/71
INSTALLING ISOFIX
equipped with the ISOFIX UNIVERSAL system. Before installation all the ISOFIX indicators must be showing red.
1 - Clip the ISOFIX latches into the two ISOFIX lower anchorage points on the vehicle.
IMPORTANT: the ISOFIX indicator changes to show green, only when the 2 ISOFIX latches are correctly locked in place.
Step : 25/71
Installation in a vehicle
2 - Press the ISEOS ISOFIX car seat firmly against the back of the vehicle seat, by pushing evenly and
firmly on the base.
14 / 38

Use the car seat ISEOS ISOFIX
Made with Peoplbrain - www.peoplbrain.com
Step : 26/71
3 - «Top tether» anchoring point/ anchoring device (depending on the
vehicle). Consult your vehicle handbook, to find the “Top Tether” anchorage point.
IMPORTANT: ensure that the anchorage point used for the “Top Tether” is in fact an anchorage
point intended for this purpose. Check that you do not confuse it with a ring intended for securing
luggage.
Step : 27/71
INSTALLING ISOFIX
Depending on vehicle
4a / 4b / 4c / 4d / 4e
15 / 38

Use the car seat ISEOS ISOFIX
Made with Peoplbrain - www.peoplbrain.com
Step : 28/71
4 - Hook the “Top Tether” strap to the anchorage point as shown with the spring hook. To tighten the top tether strap more
easily pull the top of the seat towards the vehicle seat.
IMPORTANT: the indicator changes to show green.
Step : 29/71
IMPORTANT! Ensure that no luggage interferes with the tension or the adjustment of the “Top
Tether” strap. After fitting the Top Tether please store the loose end of the strap either in the storage net or in the boot but not
within the child’s reach.
16 / 38

Use the car seat ISEOS ISOFIX
Made with Peoplbrain - www.peoplbrain.com
Step : 30/71
IMPORTANT : you have completed the installation of “ISOFIX” for your ISEOS car seat.
• Check that the ISOFIX installation indicators are showing green.
• Ensure that the “Top Tether” strap does not become twisted.
• Do not use the seat if either of the warning indicators remains at red.
Step : 31/71
REMOVING “ISOFIX”
To release the Iséos ISOFIX seat:
1 - (A) Press the button (1) on the adjuster and (2) pull on the strap, and the warning indicator will show red.
(B) Unhook the “Top Tether”.
17 / 38

Use the car seat ISEOS ISOFIX
Made with Peoplbrain - www.peoplbrain.com
Step : 32/71
2 - (A’) Slide the safety catch upwards.
(A’’) Holding up the safety catch, pull the lever until the 2 ISOFIX latches are released.
(B) Hold the lever (A) in the release position, while pulling the seat forward.
Step : 33/71
3 - After releasing the lower ISOFIX anchorage latches, slot them into the base using the handle under the base.
Important : the ISOFIX latches can only be retracted into the base after they have been clipped into and then out of the vehicle
seat, or by using the release tool provided (see attached instructions).
18 / 38

Use the car seat ISEOS ISOFIX
Made with Peoplbrain - www.peoplbrain.com
Step : 34/71
4 - Roll up the “Top Tether” strap and store it in the net provided.
IMPORTANT: when the “Top Tether” is not in use, always put it away in the net provided. In the
event of an accident, it could cause injuries to the occupants of the vehicle.
Step : 35/71
INSTALLATION WITH A SEAT-BELT
Installation with a 3 point seat-belt for vehicles not equipped with ISOFIX.
The child car seat is to be installed facing forwards.
1 - Put the ISEOS car seat into the reclined position by turning the knob to the left.
19 / 38

Use the car seat ISEOS ISOFIX
Made with Peoplbrain - www.peoplbrain.com
Step : 36/71
2 - Pass the seat-belt between the base and the seat of the child seat,
Step : 37/71
3 - Take the seat-belt from the other side of the car seat and fasten securely. Then pull firmly on the seat-belt.
20 / 38
Table of contents