Baninni Arona Isofix BN2001 User manual

C hild Safety R estraint
INSTRUCTION MANUAL OF CHILD RESTRAINT
9KG-18KG
.
Itemnummer: BN2001
Imported by Unitra Int.
Voortstraat 12
2490 Balen
Belgium
Tel. +32 14 41 25 04 - Fax. +32 14 81 44 82
BN2001-1

12
For the protection of all vehicle occupants
In the case of an emergency stop or an accident, persons or objects which are
For this reason, please always check that...
*the backrests of the vehicle seats are locked (e.g. that the latch on a folding
*all heavy or sharp-edged objects in the vehicle (e.g. on the parcel shelf) are
*all persons in the vehicle have their seatbelts fastened.
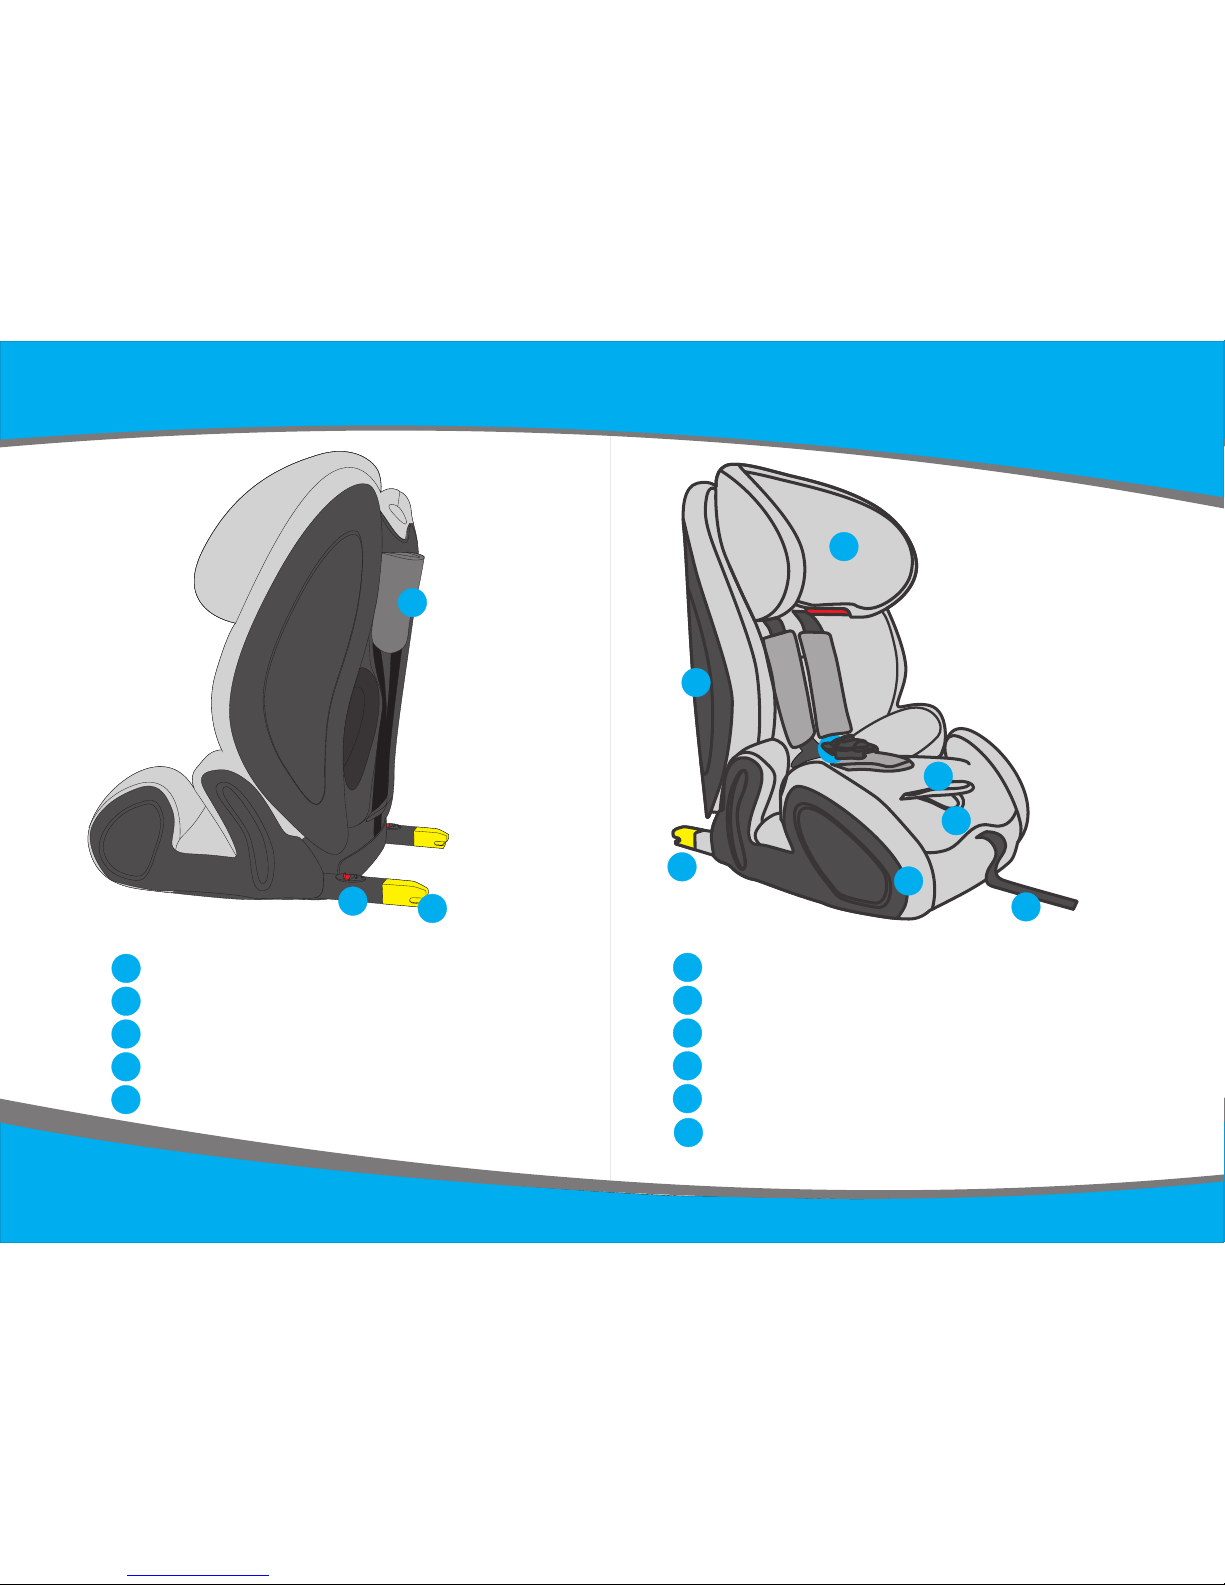
*the child safety seat is always secured in the car via the ISOFIX anchoring
.
For the protection of your child
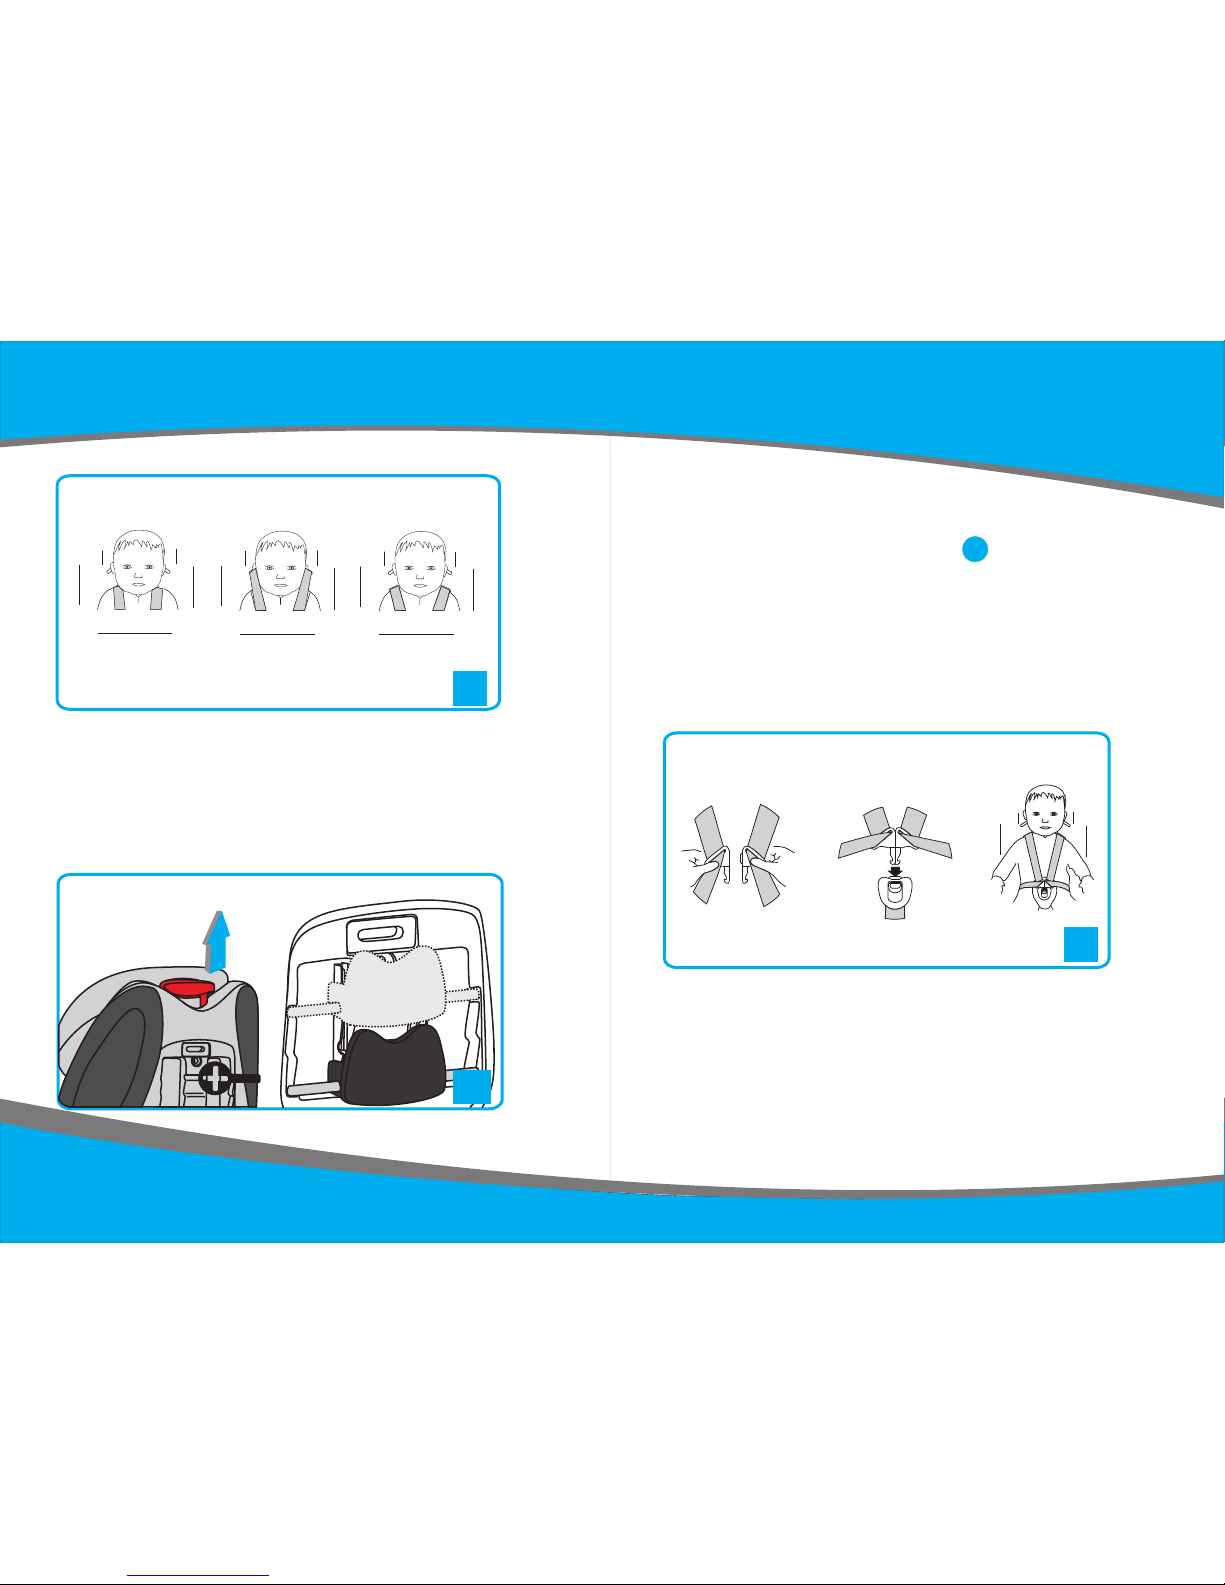
*The more snug the harness fits over your child's body, the safer your child
*Please do not ever leave your child unattended in the child safety seat in the
*Use on the rear seat:
Move the front seat forward far enough that you child's feet cannot hit the
*The child safety seat can get hot in direct sunshine. Caution: Children's skin
*Only allow your child to enter and exit the vehicle on the pavement side.
*Make stops during longer journeys to give your child an opportunity to run
To protect your vehicle
Some vehicle seat coverings made of more delicate materials (e.g. velour,
For optimum protection of your seat covers, we recommend using LB/BBC Car
.
Read this instruction manual carefully before use and save it for future
reference in the pocket provided on the backrest of the child safety seat.
serious injury to your child .
not properly secured in the car can cause injury to other vehicle occupants.
rear seat bench is engaged).
secured.
and the Top Tether, even when there is no child in the seat
will be.
vehicle.
backrest of the front seat (to prevent risk of injury).
is delicate and could be injured as a result. Protect the child seat against
intensive direct sunlight when it is not currently in use.
about and play.
leather, etc.) may develop wear marks when child seats are used.
Seat Protector, which is available from our of accessories
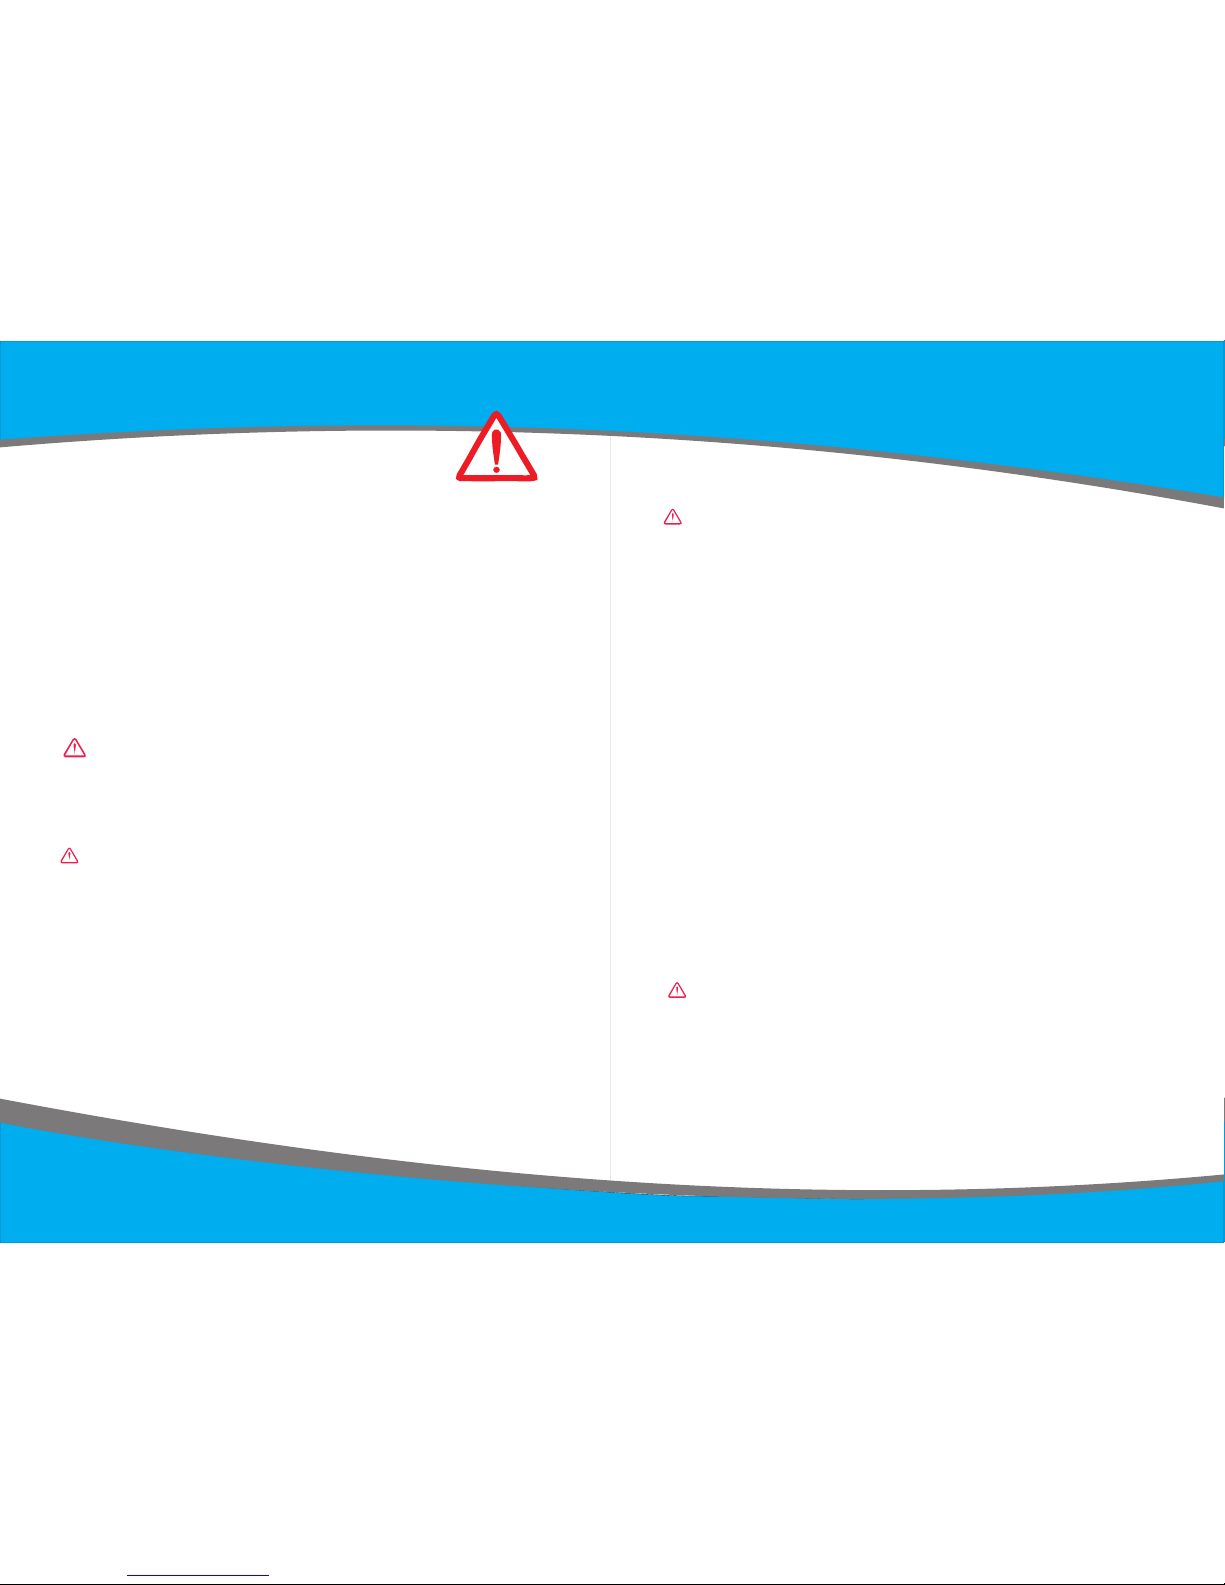
SA FE TY
Failure to follow the instructions contained in this manual could result in
NOTICE:
1.This is a “universal” ISOFIX CHILD RESTRAINT SYSTEM. It is approved
fitted with ISOFIX anchorages systems.
to Regulation No.44, 04 series of amendments for general use in vehicles
2.It will fit vehicles with positions approved as ISOFIX positions (as detailed
in the vehicle handbook),depending on the category of the child seat and of
the fixture.
3.The mass group and the ISOFIX size class for which this device is intended
is: group 1 (9 to 18kg), B.
4.If in doubt, consult either the child restraint manufacturer or the retailer.
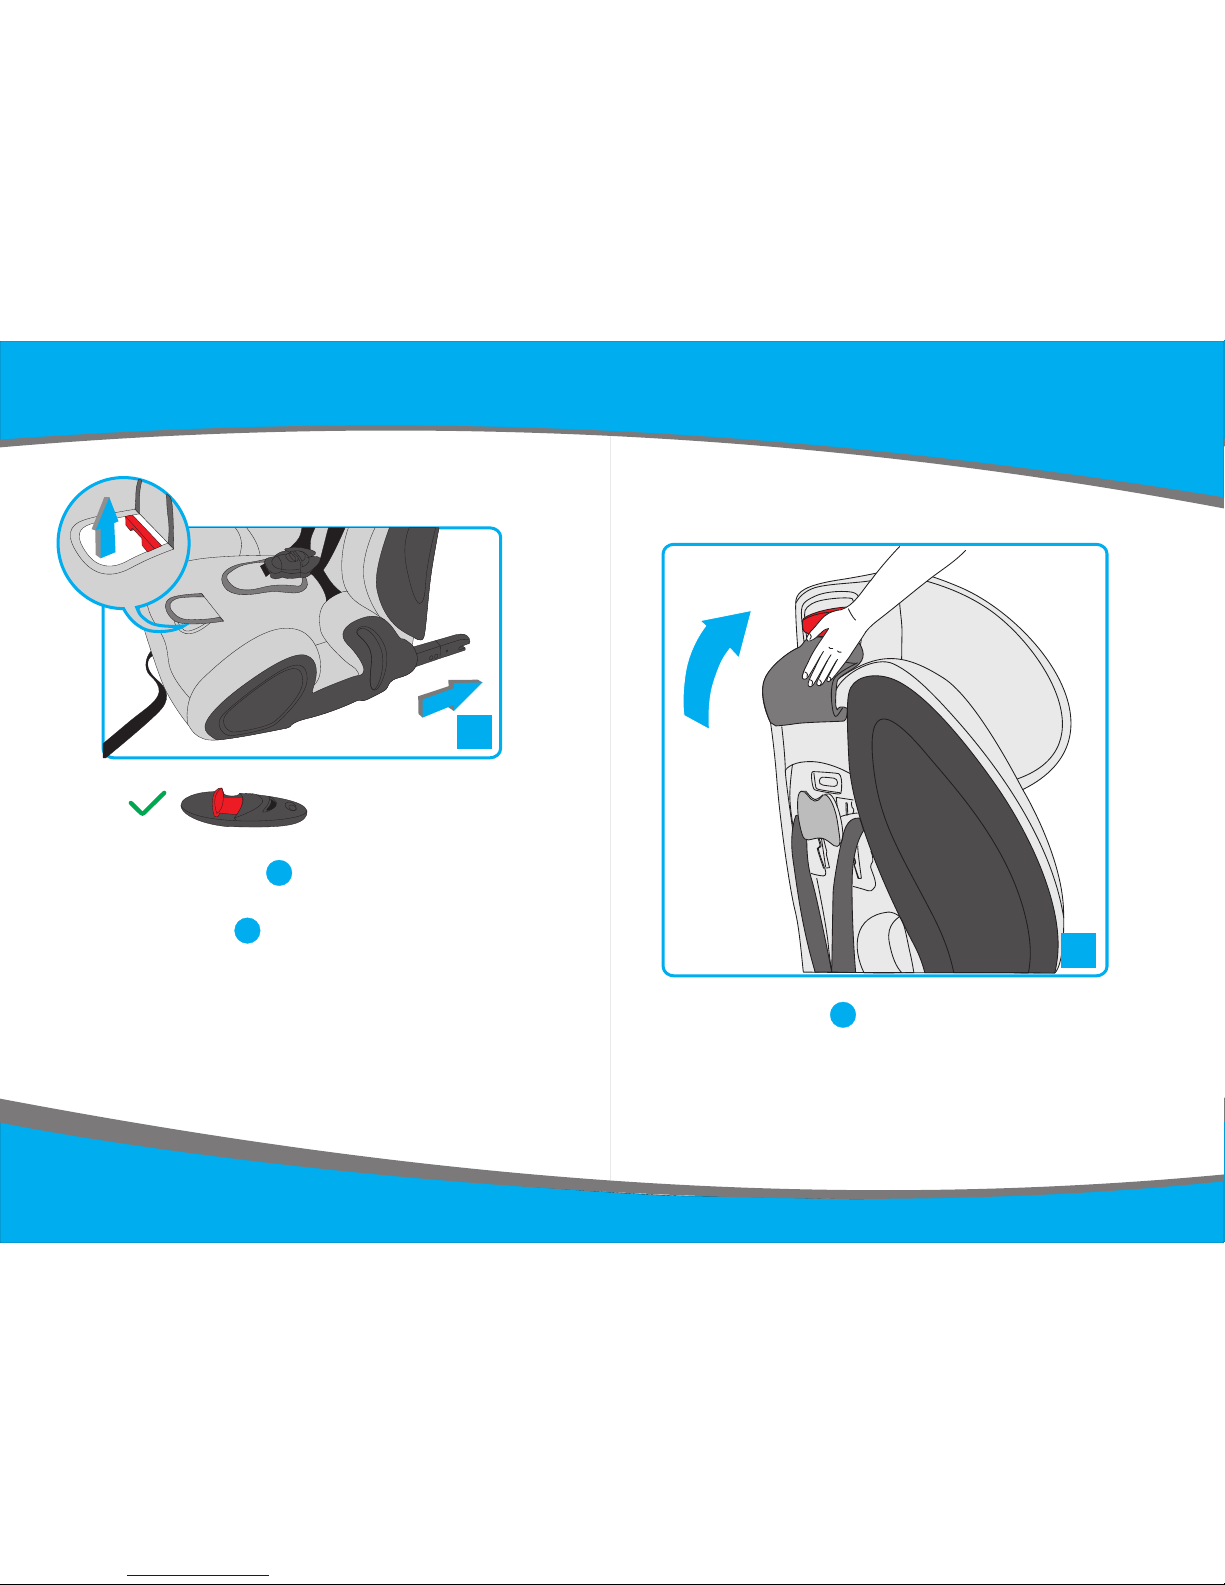
*Always make sure that any straps holding the seat restraint to the vehicle shall be
tight , any straps restraining the child should be adjusted to the child’s body, and
check that the straps shall not be twisted.
*It is dangerous to make any alteration or additions to the device without the approval
of the competent authority, and a danger of not following closely the installation
instructions provided by the child restraint manufacturer.
*The child restraint must not be used without the cover .The seat cover should not be
replaced with any other than the one recommended by the manufacturer, because
the cover constitutes an integral part of the restraint performance.
*For ISOFIX installation: Make sure you read the car manufacturer’s handbook.

34
PRODUCT OVERVIEW
F
G
H
I
J
Isofix Connect
Harness
Top Teather
Isofix Releasing Button
Adjustment strap
J
D
HE
F
GC
I
A
B
Headrest
Backrest
Base
Harness Lever And Isofix lever
ISOFIX Adjuster
A
B
C
D
E
K
KIsofix locking arms

56
child safety seat
Tested and certified according
to ECE* R 44/04
Group
are located on the orange certifcation sticker (sticker on the child
this certification will be invalidated if you make any modifcations to
The child safety seat must only be used to secure your child in the
body weight
LB/BBC526A I 9KG-18KG
The child safety seat has been designed, tested and certified according
to the requirements of the European Standard for Child Safety Equipment
(ECE R 44/04). The test mark E (in a circle) and the certifcation number
safety seat).
the child safety seat.
vehicle. It must never be used as a seat or toy in the home.
*ECE = European Standard for Child safety Equipment
CARE INSTRUCTIONS
To ensure the full protective effect of the child safety seat:
*In the event of an accident with an impact speed above 10
km/h it is possible that the child safety seat may have been
damaged, but that the damage may not be immediately
obvious. In this case the child safety seat must be replaced.
Please dispose of it properly.
*Regularly check all important parts for damage. Make sure
that the mechanical components in particular are all in per-
fect working order.
*To prevent damage, ensure that the child safety seat does
not become jammed between hard objects (car door, seat
runners etc.).
*Always have the child safety seat checked if it has been da-
maged (e.g. if it is dropped).
*Never lubricate or oil parts of the child seat.
Please observe the waste disposal regulations in your country.
Disposal of packaging Container for cardboard
Cover Residual waste, thermal utilisation
Plastic parts In accordance with the labelling in
designated containerthe
Metal parts Container for metals
Harness straps Container for polyester
Buckle &latch Residual waste

78
A. Pull the Isofix lever to pull out both locking arms
until the locking arms to the end of the site.
D
please make sure
ock. Isofix Releasing Button is unl-
J
B.
Pull the tether bag
C. Place the child safety seat facing in the direction of travel
on the vehicle seat.
upward and make sure the tether
I
1
2
bag fall.doesn’t

910
CLICK!
D.Grasp the child safety seat with both hands and slide
Caution: The locking arms are
only correctly engaged if both of the ISOFIX indica-
the two Isofix locking arms firmly into the insert
K
car seat guides until the locking arms engage with a
clicking noise on both sides.
tors are completely green.
3
J
EPull the ,seat with.Push the child safety Isofix lever
a back as it will go.substantial amount of force as far
F.Shake the child safety seat to make sure it is safely
4
attached and re-check to the Isofix Releasing B-
utton are completely green.
J
D

11 12
G.Guide the Top Tether through the middle of the head-
I
rest.
5H.Hook the snap hook into the Top Tether anchoring point re-
com guide.mended in your vehicle owner's
6

13 14
I. Tension the strap of the Top Tether until the tension ind-
icator turns green and the is tightly tensioned.Top tether
7
Caution: Check that the child safety seat is correctly attached
Caution: Do not pull on the shoulder pads
K. Open the harness buckle (press the red button).
8
J. Press the Harness Lever and at the same time pull both
D
shoulder straps forwards.

15 16
NO-Too low NO-Too high Yes -Correct
l . A correctly adjusted headrest ensures optimal protection for yo-
The headrest must be adjusted so that the shoulder straps are at
the same level as your childs shoulders or slightly above.
ur child in the safety seat:
9
J. Pull the adjusting ring of the head rest upwards
K. Move the headrest to the correct shoulder strap height and ch-
eck that it is properly engaged ead by lightly sliding the h
rest downwards.
A
L. Guide the two buckle latches together and engage them before
putting them into the harness buckle this should make a clicking
10
11
noise.

15 16
17 18
PRESS
PRESS
Caution: Pull out the adjusting strap to the front.
Caution: The hip straps must be positioned as low as possible o-
12
M. Pull on the adjusting strap until the harness lies flat at and is
close against your child’s body.
ver your child's hips.
13
Loosen the shoulder harness and slide the chest straps off the
harness connectors shaft .Pull the straps through the shoulder
strap slots from the front of the child seat. Now you can remove
the chest pad .
N.
14
Bring the shoulder belt thru the seat pad and seat back,then
through the should belt slots front side of the seat and put it on
the spliter.Take up the seat back and seat pad, disassembly the
plastic cover , as figure shows, bring the buckle body thru crotch
belt slot and place it into corresponding pit.
O.

15 16
19 20
Match the tongues well and insert the matched tongues into buckle
body. Using the plastic board to cover the the tongues insertion are
as and the buckle body slot, finally use aplastic clip fix it. Thus, it is
unnecessary to disassembly the shoulder belt, buckle and tongues, it
is suitable for group II and III, the pad can be washable. It is very
convenience.
P.
European safety child seat is sweeping the whole world now
European satety standard
Washing instruction:
If you are in doubt using or fitting of this product or you
require any replacement parts,please contact
IMPORT ANT : IF THE BABY CAR SEAT NEED TO BE USED FOR
THE CHILD,WHOSE WEIGHT IS MORE THAN 18KG,
PLEASE CONTACT WITH OUR AGENCY!
your store.
about
Table of contents
Other Baninni Car Seat manuals

Baninni
Baninni ROADTRIP BN513 User manual

Baninni
Baninni IMPERO ISOFIX BN3501 User manual

Baninni
Baninni ROADTRIP FIERO User manual

Baninni
Baninni ARONA ISOFIX User manual

Baninni
Baninni TWIRL 360 BNCS021 User manual

Baninni
Baninni BN 517 User manual

Baninni
Baninni VENTURA BNCS008 User manual

Baninni
Baninni VEGA BNCS020 User manual