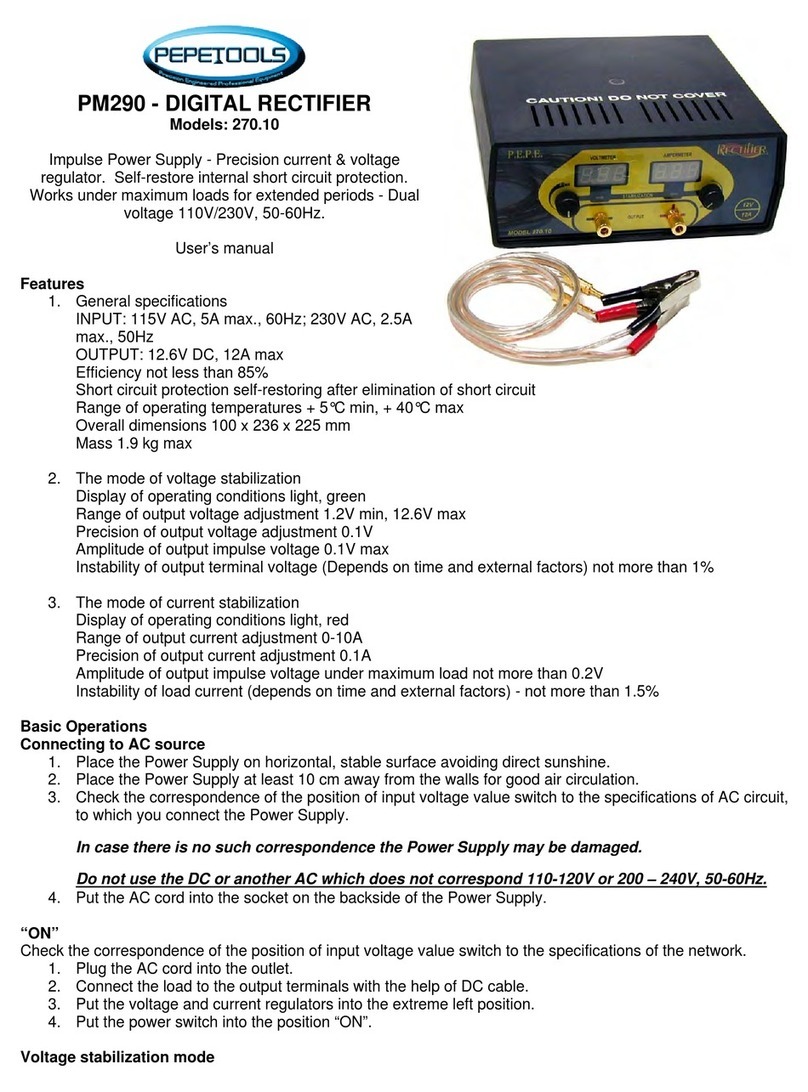
Pepe Tools IPS Series User manual

For$additional$information$visit$$$$$$$$$$$$$$$$$$$$$$$$www.pepetools.com$$$$1$
$
PEPETOOLS'INTELLIGENT'POWER'SUPPLY'
$$$$$$Certified$ $ Patent$Pending$
THE$WORLD’S$FIRST$–$ALL$IN$ONE$PLATING$SYSTEM.$
$$$$
CONGRATULATIONS,$on$your$purchase$of$Pepetools$Intelligent$Power$Supply.$$
Engineered$to$ fulfill$ the$ needs$ of$ jewelers$ and$ plating$ professionals.$ This$ state$ of$ the$ art$
device$is$built$upon$on$transformer-less$PC$Architecture.$The$software$was$coded$specifical-
ly$for$the$hardware$to$create$a$system$with$intuitive$and$easily$configurable$programming*$
No$other$devices$on$the$market$offers$anywhere$near$the$range$of$features,$precision$or$
affordability$as$Pepetools$IPS.$
When$ using$ Pepetools$ Professional$ Intelligent$ Power$ Supply$ -$ even$ the$ most$ challenging$
galvanic$operations$are$perform$with$ease,$precision$and$professional$results.$
$
Included$in$the$box:$
1$ Intelligent$Power$Supply-IPS$
1$ AC$Power$Cord$$
1$ 1$Set$of$Lead$Wires$$
1$ User$Manual$
Included$with$the$IPS$PRO$Models:$
1Immersion$Heating$Element$
Optional$Equipment:$
1$ 2.1mm$Connector$Cord$for$MixAmatic$
1$ External$Light$for$Process$Indicator$$
$
$
$
NOTE:$Warranty$will$be$void$if$security$label$removed.$$

For$additional$information$visit$$$$$$$$$$$$$$$$$$$$$$$$www.pepetools.com$$$$2$
$
$
USER$MANUAL$
The$manual$contains$information$for$all$models$of$the$Pepetools$IPS$series.$
It$provides$information$ for$ a$ correct$ installation$ and$ basic$ recommendations$ for$ use$ of$ the$ machine$ according$ to$the$ project$
hypotheses$and$technical$features,$as$well$as$information$regarding$residual$risks.$
$
$
BASIC'OPERATION'
Turning$IPS$“ON”$
1. Plug$the$AC$cord$into$the$outlet.$The$source$voltage$will$detect$automatically.$
2. Connect$the$lead$wires$to$the$DC$output$terminals.$$
3. Turn$the$power$switch$to$“ON”$position.$
$
Turning$IPS$“OFF”$
1. Turn$the$power$switch$to$“OFF”$position$
2. Disconnect$the$Power$cord$from$the$outlet.$
$
SAFETY'INSTRUCTIONS''
•Do$not$expose$the$PS$to$rain$or$moisture.$
•Do$not$disassemble$the$device.$
•Do$not$jerk$the$power$cord.$
•Do$not$block$the$ventilation$holes.$
•Place$PC$on$a$flat$stable$surface$and$at$least$4”$(100mm)$away$from$the$walls$for$good$air$circulation.$
•Do$not$place$heavy$objects$on$the$PC.$$
•When$IPS$not$used$for$an$extended$period,$disconnect$the$AC$cord.$
•We$strongly$recommend$the$use$of$a$serge$protector.$$
$
$
$
$
$
This$is$a$class$A$product.$In$a$residential,$commercial$or$light$industrial$environment,$it$may$cause$radio$
interference.$This$product$is$not$intended$to$be$installed$in$a$residential$environment;$in$a$commercial$
and$light$industrial$environment$with$connection$to$the$public$mains$supply,$the$user$may$be$required$
to$take$adequate$measures$to$reduce$interference.$
$

For$additional$information$visit$$$$$$$$$$$$$$$$$$$$$$$$www.pepetools.com$$$$3$
$
$
GENERAL$SPECIFICATIONS$&$PARAMETERS$
Nominal$input:$ $ $$ 110VAC$/$220VAC;$50/60Hz$
Input$range:$ $ $$ 105-132VAC$/$200-248VAC;$50/60Hz$
Phase$Current$$$$6.0A/110V$
(at$nominal$output$power/$voltage)$$3.0A/220V$
Output:$ $ $ $
Model$UA12V10ART$ $ 12VDC$/$10A$$
Model$UA18V18ART$$ $ 18VDC$/$18A$$
Model$UA12V25ART$$ $ 12VDC$/$25A$$$
$
Efficiency$$$>=$85%$
Operating$Temperature$ $ +5ºC$-$+40ºC$
Dimensions$$$10x150x260mm$(WxHxD)$
Weight$$$$1.9kg$
$
Adjustable$voltage$stabilization$mode:$
Output$Voltage$Adjustment:$
UA12V10ART$$$0.35VDC$-$12VDC$$
UA12V25ART$$$0.35VDC$-$12VDC$$
UA18V18ART$$$0.35VDC$-$18VDC$
Output$Voltage$Accuracy$$$$$<=$0.2%$
Output$Voltage$Adjustment$Resolution$(step)$ $ 10mV$
Output$Voltage$Ripple$and$Noise$(under$maximum$load)$<=$1%$
Instability$of$Terminal$Voltage$Output$$$<=$1%$
(Depends$on$external$factors)$ $
$
Adjustable$load$current$stabilization$mode:$
Load$Current$Adjustment:$
UA12V10ART$$$0.01$-$10A$$
UA12V25ART$$$0.01$-$25A$$
UA18V18ART$$$0.01$-$18A$
Load$Current$Accuracy$$$$$<=$1%$$
Load$Current$Adjustment$Resolution$(step)$$$10mA$
Load$Current$Ripple$and$Noise$(under$maximum$load)$<=$1%$
Instability$of$Load$Current$$$$$<=$1%$
(Depends$on$external$factors)$ $
$
Timer$adjustment$
Maximum$Time$$$$9hrs$59min$
Adjustment$Precision$$$1$second$
$
Pulse$Voltage$mode$
Positive$/$Negative$Pulse$Duration$ $ 0.1$-$90min$
Adjustment$Precision$$$1$second$
$
Heater$Input/output$$
Heater$Nominal$Power$$$140W$$
Temperature$units$(User$Selectable)$C°$/$F°$
Temperature$Range$$$1°–$85°C$/$33°$-$185°F$
Temperature$Adjustment$(step)$ $ 1°C$/1°F$

For$additional$information$visit$$$$$$$$$$$$$$$$$$$$$$$$www.pepetools.com$$$$4$
$
Temperature$Adjustment$Accuracy$±$1°C$/$±$2°F$
!
GENERAL!INFORMATION$
$$$$$$$
$$$$$$$$$$$$$$ $
$
№! Description$
1! Power!entry$
2! ON/OFF!Switch$
3! Encoder$
4! Display$
5! USB!for!Factory!use!only!!$
6! Platter!power!output$
7! +5V!DC,!1A!–!power!output!for!MixAmatic*!or!Process!Indicator*!$
8! Heater!Connector!*$
9! Cooling!Fan$
*!Available!if!the!device!is!equipped!with!the!Heater!option.$
*MixAmatic!and!Process!Indicator!are!optional!equipment.!To!be!purchased!separately.!!!!!!$
Controls!and!Lights$
Controls!$
Rotary!encoder!rotation!–!scroll!between!menu!entities!and!set!values.$
Rotary!encoder!pushbutton!–!short!pressing!enter!in!sub-menu,!select/deselect!values!in!edit!mode.$
Rotary!encoder! push! button!–! pressing! press! and! holding! for!more!than!3! seconds!will!take! you! back! to! main!
menu!and!put!the!device!into!standby!mode!(switch!off!power!supply!and!heater)$
LEDs$
Standby! ! ! !backlight!LEDs!-!ON.$
Plating!and/or!heating!backlight,!front!and!side!LEDs!-!ON$
Error!!!backlight,!front!and!side!LEDs!blinking.$
ROTARY$ENCODER!! ! $
RGB!LED$
Light!off! ! on!standby.!$
Blue!light! ! heater!is!on,!temperature!is!below!3!degree!from!set!temperature.$
Purple!light!-!heater!is!on,!temperature!is!between!3!and!0!degree!from!set!temperature.$
Green!light!-!heater!is!on!and!ready!(reaches!the!set!temperature).$
Yellow!Light!–!Power!Limit!output!by!current$
Blinking!Red!Light!–!Device!Fault$
$

For$additional$information$visit$$$$$$$$$$$$$$$$$$$$$$$$www.pepetools.com$$$$5$
$
$
$
MENU!$
Using$the$encoder$select$the$appropriate$menu:$
$
$
$
!
Start!program$$$$
Short$pressing$start/stop$program$alternative,$long$pressing$will$back$to$main$menu.$
Line$1$–$Start$selected$program$–$1-5$or$Sequence$$
Line$2$–$Select$program$$
Line$3$–$Exit$-$Back$to$main$menu$
$
!$
$
!
Start!program!$
Line$1$–$Active$program$(“P”$–$single$program,$“S”$-$programs$sequence)$
Line$2$–$Output$voltage$and$plate$time$
Line$3$–Output$current$and$plate$reverse$time$
Line$4$–$Heater$Temperature;$Delay$Time$Before$it$reaches$temperature$and$starts$the$plate$process$or$the$end$of$program$de-
lay,$depending$on$the$program$setup$$$
$
$
$
$
NOTE:$$$Depending$on$configuration,$when$some$features$are$disabled,$missing$or$not$used$(for$example$heating),$the$menus$
for$related$option$will$not$display.$
The$symbol$t$show$current$active$process$step$$
Depending$on$state$of$process,$values$show$measured$or$rest$of$time$to$end$of$the$step,$or$pre-set$value.$
!
Select!program!!$
Short$pressing$and$select$program$form$1-5,$or$sequence$of$programs,$long$pressing$will$back$to$main$menu.$
Exit$
Output$-$Back$to$main$menu.$
Heater!setup*!!$
Set-up$heater$mode.$$
$$Line$1-$heater$On/Off$control$
$$Line$2$–$Temperature$set$point$
$$Line$3$–$Temperature$units$–$Census$or$Fahrenheit$degrees.$
$$Line$4$–$Exit$–$Back$to$main$menu.$
Note:$The$unit$will$not$turn$ON$heater,$if$heater$isn't$connected.!$
*!-!Available!if!the!device!has!a!Heater!option.$
$
!!

For$additional$information$visit$$$$$$$$$$$$$$$$$$$$$$$$www.pepetools.com$$$$6$
$
!
!
!
Program!setup$
!
Configure!program$
Programs$1$to$5.$
Line$1$–$Select$current$active$program$
Line$2$–$Reverse$time$from$0$–$90$minute,$step$1$sec$
Line$3$–$Plate$time$from$0$to$9$hours$and$59$minute,$step$1$sec$
Line$4$–$Temperature$from$0-99$°C$(0$–$210°F$depending$of$temperature$units$setting),$when$is$0,$device$will$not$turn$on$the$
heater*)$
Line$5$–$Plate$voltage$–$from$0.5$to$12V$(for$P12V25Ax)$
Line$6$–$Plate$current$limit$–$from$0$to$25$A$(for$P12V25Ax)$
Line$7$–$Delay$after$end$of$plate$process$
Line$8$–$Exit$-$Back$to$main$menu$
$
$
$
$
$
$
$
$
Note:$Depending$on$configuration,$when$some$of$features$are$disabled$or$missing$(for$example$out-
put$voltage$reverse)$menus$for$related$option$will$not$display.$
*!Available!if!the!device!has!a!Heater!option.$
!
Setting!Sequence!program!$
Configure$program$from$Sequence$(programs$1$-$5$to$execute$sequentially).$
$Line$1$–$Select$current$active$program.$
$Line$2-6$–$Step$1-5$-$select$sequence$of$the$programs.$
$Line$7$–$Exit$-$Back$to$main$menu.$$
Manual!mode$$
Manual$control$of$plating,$heating,$output$voltage,$current$limit$and$output$voltage$reverse$
Line$1$–$Manual$mode$and$polarity$symbol$indication$
Line$2$–$Output$voltage$and$polarity$$
Line$3$–$Output$current$and$plate$ON/OFF$state$
Line$4$–$Exit$–$Back$to$main$menu$
Note:$Depending$on$configuration,$when$some$of$features$are$disabled,$missing$or$not$used$(for$example$heating),$the$menus$
for$related$option$will$not$display.$
$The$symbol$$“$$$$“$show$current$selected$item.$

For$additional$information$visit$$$$$$$$$$$$$$$$$$$$$$$$www.pepetools.com$$$$7$
$
$
$
$
!
SERVICE$
Line$1$–$Manufacturer$$
Line$2$–$Device$model$
Line$3$–$Software$revision$
Line$4$–$Return$back$to$service$menu$$
$
$
$
$
$
Troubleshooting!and!Service!
$
N$
Troubleshooting$
$
1$
The$IPS$won`t$start$after$turning$on$the$“ON/OFF”$
switch$
1.$Check$the$power$line$voltage.$
2.$Check$the$connection$of$the$AC$cable$to$the$IPS$
2$
Current$indicator$shows$value$“0.00A”$
Check$the$connection$to$the$load.$
3$
Can’t$ reach$ the$ desired$ value$ of$ the$ current$ or$
voltage.$
Inappropriate$value$of$the$load.$
$
Service!$
NOTE:$If$for$some$reason,$the$unit$fails$–$DO$NOT$ATTEMP$TO$REAPIR$IT$BY$YOURSELF-$the$unit$should$be$serviced$by$the$manu-
facturer$or$authorized$service$representative.$$Contact$the$distributor$were$you$purchased$the$unit$or$contact$Pepetools$-$im-
mediately$$
$
Please$have$the$following$information$about$your$unit$available$upon$contacting:$
Model$Number$and$Revision$-$located$on$the$label$on$the$back$of$the$unit$
Unit’s$Serial$Number$$-$located$on$the$label$on$the$bottom$of$the$unit$
Line$Voltage$and$frequency.$
Detailed$description$of$the$problem$encountered$including$–$load$and$ambient$temperature$at$the$time$of$the$failure.$
Please$provide$a$detailed$description$of$the$actions$taken.$
Approximate$length$of$time$devise$was$in$service.$
$
If$our$technical$staffs$are$unable$to$help$you$over$the$phone,$we$will$issue$a$RA#$number.$$
With$this$RA#$and$a$brief$description$enclosed$in$you$return$package$you$can$ship$the$unit$postage$prepaid$back$for$repair.$$$
Please$remember$to$include$in$the$package$your$contact$information:$$
Name:$
Return$Address:$
Telephone$number(s)$
Office:$
Cell:$
Email$
$
$
$
$

For$additional$information$visit$$$$$$$$$$$$$$$$$$$$$$$$www.pepetools.com$$$$8$
$
$
$
This manual suits for next models
9
Table of contents
Other Pepe Tools Power Supply manuals
Popular Power Supply manuals by other brands

PASCO
PASCO PI-9880 instruction manual

VOSS.farming
VOSS.farming Impuls duo DV 40 operating instructions

IFM Electronic
IFM Electronic DN4033 installation manual

Seneca
Seneca Z-D-OUT installation manual

Keysight
Keysight N5700A Series Declassification and Security Document

Velleman
Velleman LABPS3020 user manual

GE
GE LED 55 CC 1.4A TBDL 1-10V installation guide

Altronix
Altronix AL125220 quick start guide

Cabletron Systems
Cabletron Systems 9C500 Plus installation guide

Rockwell Automation
Rockwell Automation Allen-Bradley 1606-XLE480ERZ installation instructions

OCZ
OCZ FATALITY 750W datasheet

Altronix
Altronix AL300ULXB2 quick start guide