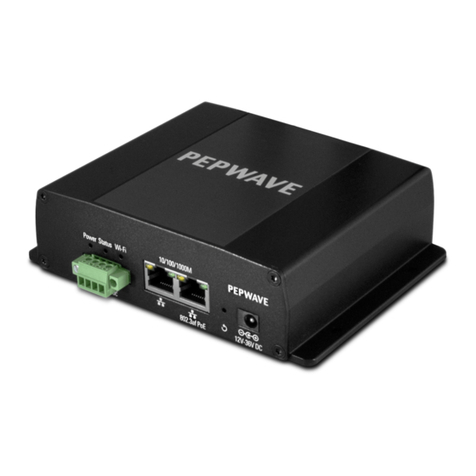
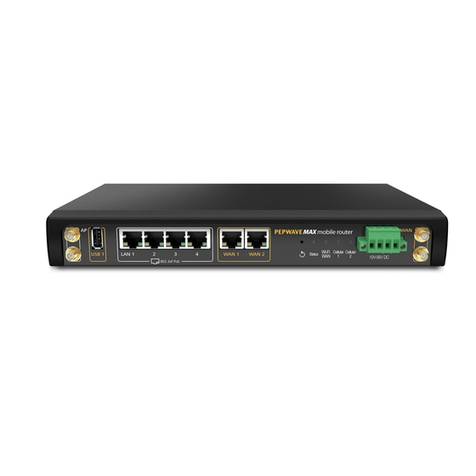
peplink PEPWAVE MAX Adapter User manual

RemoteSIM
Configurations
User Manual
April 2021

Introduction 3
Requirements 3
Scenario 1: SIM Injector in LAN of Cellular Router 4
Setup topology 4
Configuring the SIM Injector 4
Configuring the Cellular Router 5
Scenario 2: SIM Injector in WAN of main Router and multiple Cellular Routers 7
Setup topology 7
Additional configurations for Cellular Routers 8
Configuration requirements for the main Router 9
Scenario 3: SIM Injector in LAN of main Router and multiple Cellular Routers 10
Setup topology 10
Main Router configuration 11
Scenario 4: SIM Injector in a remote location 12
Setup topology 12
Cellular Router configuration 12
How to check if a Peplink Cellular Router supports RemoteSIM 14
Monitor the status of the RemoteSIM 14

Introduction
Peplink has developed a unique technology called RemoteSIM, which allows SIM cards to
remotely link to a cellular router. This can be done via cloud or within the same physical
network. There are a few key scenarios to fit certain applications.
The purpose of this manual is to provide an introduction on where to start and how to set up for
the most common scenarios and uses.
Requirements
- Cellular router that supports RemoteSIM technology.
- SIM Injector.
- SIM card.
Notes:
- Always check for the latest Firmware version for both the cellular router and the SIM
Injector. You can also check for the latest Firmware version on the device’s WEB
configuration page.
- A list of products that support RemoteSIM can be found on the SIM Injector WEB page.
Please check under the section Supported models.
SIM Injector reset and login details
How to reset a SIM Injector:
- Hold the reset button for 5-10 seconds. Once the LED status light turns RED, the reset
button can be released. SIM Injector will reboot and start with the factory default settings.
The default WEB login settings:
- User: admin
- Password: admin
- IP address: the device only has a DHCP client and no fallback IP address.. Therefore, it
is advised to check every time what IP address is assigned to the SIM Injector.
Notes:
- The SIM Injector can be monitored via InControl 2. Configuration is not supported.

Scenario 1: SIM Injector in LAN of Cellular Router
Setup topology
This is the most basic scenario in which the SIM Injector is connected directly to the cellular
router’s LAN port via an ethernet cable. This allows for the cellular router to be positioned for the
best possible signal. Meanwhile, the SIM cards can be conveniently located in other locations
such as the office, passenger area, or the bridge of a ship. The SIM Injector allows for easily
swapping SIM cards without needing to access a cellular router.
IMPORTANT: Cellular WAN will not fallback to the local SIM if it is configured to use the SIM
Injector.
Configuring the SIM Injector
1. Connect the SIM Injector to the LAN port of the cellular router.
2. Insert SIM cards into the SIM Injector. The SIM cards will be automatically detected.
IMPORTANT: SIM cards inserted into SIM Injector must not have a PIN code.
Note 1: The SIM Injector gets its IP address via DHCP and doesn't have a static IP address. To
find it’s address, please check the DHCP lease on the cellular router.

Configuring the Cellular Router
Step 1. Enable the SIM Injector communication protocol.
1a. If you are using a Balance cellular router, go to the Network tab (top navigation bar).
1b. If you are using a MAX cellular router, go to the Advanced tab (top navigation bar).
2. Under Misc. settings (left navigation bar) find Remote SIM Management.
3. In Remote SIM Management, click on the edit icon next to Remote SIM is Disabled.
4. Check the Auto LAN discovery checkbox and click Save and Apply Changes.
5. Click Save and then Apply Changes.
Step 2. Enable RemoteSIM for the selected Cellular interface.
1. Go to Network (top navigation bar), then WAN (left navigation bar) and click Details for a
selected cellular WAN. This will open the WAN Connection Settings page.
2. Scroll down to Cellular settings.
3. In the SIM Card section, select Use Remote SIM Only.

4. Enter configuration settings in the Remote SIM Settings section. Click on Scan nearby
remote SIM server to show the serial number(s) of the connected SIM Injector(s). Available
configuration options for cellular interface are shown below:
A. Defining SIM Injector(s)
- Format: <S/N>
- Example 1: 1111-2222-3333
- Example 2: 1111-2222-3333 4444-5555-6666
B. Defining SIM Injector(s) SIM slot(s):
- Format: <S/N:slot number>
- Example 1: 1111-2222-3333:7,5 (the Cellular Interface will use SIM in slot 7, then 5)
- Example 2: 1111-2222-3333:1,2 1111-2222-3333:3,4 (the cellular Interface will use SIM
in slot 1, then in 2 from the first SIM Injector, and then it will use 3 and 4 from the second
SIM Injector).
Note: It is recommended to use different SIM slots for each cellular interface.
5. Click Save and Apply Changes.
Step 3. (Optional) Custom SIM cards settings.
1a. For a Balance router, go to the Network (Top tab).
1b. For a MAX router, go to the Advanced (Top tab).
2. Under Misc. settings (Left-side tab) find Remote SIM Management.
3. Click on the Add Remote SIM button, fill in all the required info and click Save. This section
allows defining custom requirements for a SIM card located in a certain SIM slot:
- Enable/Disable roaming (by default roaming is disabled).
- Add Custom mobile operator settings (APN, user name, password).
4. Repeat configuration for all SIM cards which need custom settings.
5. Click Apply Changes to take effect.

Scenario 2: SIM Injector in WAN of main Router
and multiple Cellular Routers
Setup topology
In this scenario, each HD Dome creates a WAN connection to the main router. A single SIM
Injector is used to provide SIM cards for each HD Dome. The HD Dome can be replaced with
any Peplink cellular router supporting RemoteSIM technology.
This scenario requires the completion of the configuration steps shown in Scenario 1 in
addition to the configuration steps explained below.

Additional configurations for Cellular Routers
Step 1. Disable the DHCP server.
- HD Dome 1 should act as a DHCP server.
- HD Dome 2 should be configured to have a static IP address with DHCP disabled.
- Both routers should be in the same subnet (e.g. 192.168.50.1 and 192.168.50.2).
1. Go to Network (Top tab), then Network Settings (Left-side tab), and click on Untagged
LAN. This will open up the LAN settings page.
2. Change the IP address to 192.168.50.2.
3. In the DHCP Server section, uncheck the checkbox to disable DHCP Server.
4. Click Save and Apply Changes.
Step 2. Ethernet port configuration
The Ethernet port must be set to ACCESS mode for each HD Dome. To do this, dummy VLANs
need to be created first.
1. Go to Network (Top tab), then Network Settings (Left-side tab), and click on New LAN.
This will open the settings page to create a dummy VLAN.
2. The image below shows the values that need to be changed to create a new VLAN:
Note: set different IP addresses for each HD dome (e.g. 192.168.10.1 and 192.168.10.2).

3. Click Save and Apply Changes.
4. Go to Network (Top tab), then Port Settings (Left-side tab).
5. Set the Port Type to Access and set VLAN to Untagged LAN (see picture below).
6. Click Save and Apply Changes.
Configuration requirements for the main Router
Requirements for the main router are:
- Configure WAN 1 as a DHCP client.
-WAN 1 will automatically get the Gateway IP address from HD Dome 1.
- Configure WAN 2 as a Static IP and set it to 192.168.50.12.
- Configure WAN 2 Gateway to 192.168.50.2. Same as the HD Dome 2’s IP address.

Scenario 3: SIM Injector in LAN of main Router
and multiple Cellular Routers
Setup topology
In this scenario, SIMs are provided to the HD Domes via the main router. In this example, the
Remote SIM Proxy functionality needs to be enabled on the main router.

Notes:
- HD Dome can be replaced with any other cellular router that supports RemoteSIM.
- It is recommended to use Peplink Balance series or X series routers as the main router.
This scenario requires the completion of the configuration steps for the cellular router
and the SIM Injector as in Scenario 1. The configuration for the main router is explained
below.
Main Router configuration
IMPORTANT: Main router LAN side and Cellular Routers must be configured using different
subnets, e.g. 192.168.50.1/24 and 192.168.100.1/24.
Note: please make sure the Peplink router is running Firmware 8.1.0 or above.
1. Open the main router WEB interface and change:
From <IP address>/cgi-bin/MANGA/index.cgi to <IP address>/cgi-bin/MANGA/support.cgi.
This will open the support.cgi page.
2. Scroll down to find Remote SIM Proxy and click on [click to configure] that is located next
to it.
3. Check the Enable checkbox.
4. Click on Save.
5. Go back to the index.cgi page and click on Apply Changes.

Scenario 4: SIM Injector in a remote location
Setup topology
Requirements for installing a SIM Injector in a remote location:
● Cellular router communicates with the SIM Injector via UDP port 50000. Therefore this
port must be reachable via public IP over the Internet.
● The one way latency between the cellular router and the SIM Injector should be up to
250 ms. A higher latency may lead to instability issues.
● The cellular router must have Internet connection to connect to the SIM Injector. It can
be another Internet connection via Ethernet or Fiber if possible, or a secondary cellular
interface with a local SIM (Ignite SIM).
● Due to its high latency, it is not recommended to use satellite WAN for connecting to a
SIM Injector in remote locations.
SIM Injector configuration is the same as in Scenario 1.
Cellular Router configuration
Step 1. Enable the SIM Injector communication protocol.
1a. For a Balance cellular router, go to the Network (Top tab).
1b. For a MAX cellular router, go to the Advanced (Top tab).

2. Under Misc. settings (Left-side tab), find Remote SIM Management.
3. In Remote SIM Management, click on the edit icon next to Remote SIM is Disabled.
4. Enter the public IP of the SIM Injector and click Save and Apply Changes.
Notes:
- Do NOT check Auto LAN Discovery.
- Adding a SIM Injector serial number to the Remote SIM Host field is a mistake!
Step 2. RemoteSIM and custom SIM card settings configurations are the same as in
Scenario 1.

How to check if a Peplink Cellular Router
supports RemoteSIM
1. Go to Network (Top tab), then WAN (Left-side tab), and click Details on any cellular WAN.
This will open the WAN Connection Settings page.
2. Scroll down to Cellular settings.
If you can see the Remote SIM Settings section, then the cellular router supports RemoteSIM.
Monitor the status of the RemoteSIM
1. Go to Network (Top tab), then WAN (Left-side tab), and click Details on the cellular WAN
which was configured to use RemoteSIM.
2. Check the WAN Connection Status section. Within the cell WAN details, there is a section
for Remote SIM (SIM card IMSI, SIM Injector serial number and SIM slot).
Other manuals for PEPWAVE MAX Adapter
2
This manual suits for next models
2
Table of contents
Other peplink Network Hardware manuals

peplink
peplink Pepwave AP One AX Operating instructions
peplink
peplink Pepwave MAX Series User manual

peplink
peplink balance ONE User manual

peplink
peplink MANGA Point User manual

peplink
peplink ONE User manual

peplink
peplink Pepwave Device Connector Rugged User manual

peplink
peplink PEPWAVE HD Dome Pro User manual
peplink
peplink PEPWAVE MAX Adapter User manual