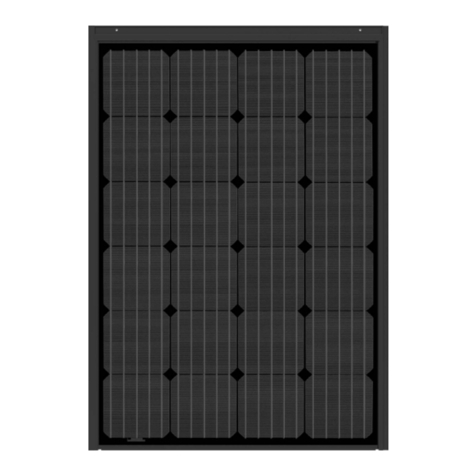
Perlight Solar PLM-OM Series User manual

Perlight Solar
PLM-OM Series
Installation Manual

Perlight Solar PLM-OM Series Installation Manual 2www.perlight.com
V.01.2022 A1.0
Table of Contents
1. Introduction .....................................................................3
2.Applicable Modules.....................................................4
4. Warning and Notes................................................5-9
5. Identification.................................................................9
6. Module Structure.......................................................10
7. Mounting and Notes ........................................... 11-13
8. Grounding......................................................................14
9. Module Wiring.............................................................15
10. Maintenance.........................................................16-17
11. Recycling.......................................................................18

Perlight Solar PLM-OM Series Installation Manual 3www.perlight.com
V.01.2022 A1.0
1. Introduction
This installation manual specifies the installation and maintenance requirements for
crystalline silicon PV modules (“solar modules”) manufactured by Perlight Solar Co., Ltd.
This installation manual is intended for the installation and maintenance of solar modules,
and helps customers to correctly install the photovoltaic power generation system. This
installation manual does not apply to the installation of the Perlight double glass modules and
conventional modules. Please read this manual carefully prior to handling and installation.
This manual contains important electrical and mechanical installation information. For correct
installation, stable power output, installation and maintenance of the solar modules, carefully
read and understand all installation instructions in the manual. Keep this manual in a safe
place for future reference (care and maintenance) and in case of sale or disposal of the solar
modules. This manual does not constitute a warranty, expressed or implied. Perlight does not
assume responsibility and expressly disclaims liability for loss, damage, or expense arising
out of or in any way connected with installation, operation, use or maintenance of the solar
modules.
The mechanical and electrical installation of the solar modules shall be made in accordance
with applicable laws and regulations, including electrical, construction and electrical
connection requirements. These regulations vary depending on the installation site, such as
building roofs, surface mounts, in-vehicle applications, and so on. The requirements may vary
depending on the installation system voltage, the use of DC or AC. Please refer to the relevant
local laws and regulations.
Installation and maintenance of Perlight Solar modules may only be carried out by trained and
qualified personnel. If you require further information, contact your supplier or local Perlight
Service Centre.
Please provide a copy of this manual to the owner and operator of the PV system for
reference.
Thank you for choosing Perlight Solar PV modules.

Perlight Solar PLM-OM Series Installation Manual 4www.perlight.com
V.01.2022 A1.0
2. Applicable Modules
This installation manual is applicable to the following Monocrystalline PERC PV modules:
PLM-xxxOM-78
PLM-xxxOM2-78
PLM-xxxOM2B-78
PLM-xxxOM2A-78
PLM-xxxOM-78B
PLM-xxxOM2-78B
PLM-xxxOM2B-78B
PLM-xxxOM2A-78B
PLM-xxxOM6-72
PLM-xxxOM6B-72
PLM-xxxOM6A-72
PLM-xxxOM6-72B
PLM-xxxOM6B-72B
PLM-xxxOM6A-72B
PLM-xxxOM-66
PLM-xxxOM2-66
PLM-xxxOM2B-66
PLM-xxxOM2A-66
PLM-xxxOM-66B
PLM-xxxOM2-66B
PLM-xxxOM2B-66B
PLM-xxxOM2A-66B
PLM-xxxOM6-60
PLM-xxxOM6B-60
PLM-xxxOM6A-60
PLM-xxxOM6-60B
PLM-xxxOM6B-60B
PLM-xxxOM6A-60B
PLM-xxxOM10-68
PLM-xxxOM10-68B
PLM-xxxOM10-57
PLM-xxxOM10-57B
Module dimensions and electrical performance data are detailed in the corresponding
technical specification datasheets.
Module electrical performance parameters
The electrical performance parameters of the module were measured under standard test
conditions (irradiance of 1000 W / m², AM 1.5 spectra, ambient temperature of 25 ° C) with a
test uncertainty of ± 3%. The maximum system module voltage is 1500V.

Perlight Solar PLM-OM Series Installation Manual 5www.perlight.com
V.01.2022 A1.0
4. Warning and Notes
Perlight Solar modules generate electricity when exposed to light. An array
of modules can cause lethal shock and burn hazards. Only authorized and
trained personnel should have access to the PV modules. To reduce the risk
of electrical shock or burns, modules may be covered with an opaque material
during installation. Do not touch live terminals with bare hands. Use insulated
tools for electrical connections.
Each Perlight Solar module has a pair of male and female waterproof connectors. For a
series electrical connection, connect positive (+) connector of first solar module to negative
(-) connector of the following module. Do not short the positive and the negative. Do not
disconnect under load. Ensure each connection is sound with no gap between the insulators.
Poor connections may cause arcing and pose a fire and/or an electrical shock hazard.
Under normal conditions, a solar PV module is likely to experience conditions that produce
more current and/or voltage than reported at standard test conditions. Accordingly the
value of Isc and Voc marked on this module should be multiplied by a factor of 1.25 when
determining component voltage ratings, conductor current ratings, fuse sizes, and sizes
of controls connected to the Perlight Solar PV module output. Refer to local and national
Electrical Code for any additional multiplying factors, which may also be applicable.
General Safety
Perlight Solar’s modules have been evaluated by according to IEC61215 and IEC61730,
application class A, modules rated for use in this application class may be used in system
operating at greater than 50V DC or 240W. The safety class of the module is Class II, the class
of fire rating is Class C (According to the standard is UL790), and the maximum series fuse is
20A.
Installing solar photovoltaic systems require specialized skills and knowledge. Installation
should be performed only by qualified people. Installers should assume the risk of all injuries
that might occur during installation, such as electric shock.
Photovoltaic modules are designed for outdoor use. Modules may be mounted on ground,
rooftops, vehicles or boats. Proper design of support structures is the responsibility of the
system designers or installers. When modules are mounted on rooftops, fire-protection rating
of the final structure should be considered, and also the later maintenance. The rooftops
and support structure for the PV system should only be certified by architectural experts or
engineers, which have a formal complete structure analysis qualification.
For your safety, do not install the modules without safety precautions, do not install or handle
the modules under wet or adverse environmental conditions, including but not limited to
strong winds, gusty winds, frosted roof surfaces, wet environments.

Perlight Solar PLM-OM Series Installation Manual 6www.perlight.com
V.01.2022 A1.0
Electrical Safety
When a module is exposed to sunlight or other light sources, a direct current is present inside
the module, and electrical contact with the module may result in an electrical shock hazard.
In order to avoid arc and electric shock, please do not disconnect electrical connections
under load. Keep all electrical connectors dry and clean, and ensure that they are in proper
working condition.
Do not insert other metal objects into the connectors.
Do not apply paint or adhesive to module surface. Do not wipe modules with corrosive
chemicals.
Do not use mirrors or other magnifiers to focus sunlight on the modules.
Do not expose the backside of modules directly to sunlight for a long time.
Do not change the configuration of the bypass diodes.
Do not disassemble the modules.
Do not make contact with the module surface when the module is wet unless to clean the
modules, please follow the requirements mentioned in this manual when cleaning.
Handling Safety
Do not open the box until it reaches the installation location. Keep the package dry and in a
dry place.
Please refer to the Unpacking manual of standard packaging of Perlight Solar photovoltaic
modules. During all handling procedures, make sure that the modules are not subject to large
vibrations, that the modules fall to the floor or that objects fall on the module, as this will
damage the modules or solar cell.
Special care must be taken not to bump, scrape, or press against the back of the module.
Keep children and unauthorized persons away from the modules while transporting or
installing them. Improper transportation or placing may lead to glass breakage or power loss
of the modules, resulting in the loss of the use value of modules.
Handle modules with care, lift and put down modules gently. It is forbidden to carry or lift the
modules by grasping the junction box or cables. Two or more people must hold the module
with both hands.
Do not step on, stand or sit on the module, which can damage the module and create a risk to
people.
Do not place any heavy objects on the front or back of the module, and do not place the
module on a sharp object surface.

Perlight Solar PLM-OM Series Installation Manual 7www.perlight.com
V.01.2022 A1.0
Installation Safety
Abide by the safety regulations for all other modules used in the PV system, including
wiring and cables, connectors, controllers, inverters, storage batteries, etc., and use suitable
equipment, connectors, wiring and mounting system for a PV system. If the PV system is
used in storage batteries, the configuration with the modules should follow the advice of the
storage batteries manufacturer. The same size, the same specifications of the model can be
connected in series.
Do not install or handle the modules when they are wet or during strong wind. Keep the
junction box’s cover closed.
Damaged modules have the risk of electric shock and fire, such modules cannot be repaired
and should be replaced immediately.
When exposed to direct sunlight, one individual solar module may generate DC voltages
greater than 30 volts.
To reduce the risk of electric shock or burning, you can install modules with opaque material
on the surface of the module. The mounting of the array of modules must be carried out with
an isolating solar installation. Do not wear metal rings, watches, earrings and other metal
accessories when installing or servicing PV systems. Do not touch the electrical parts of the
module directly by hand. Use an insulated tool to make electrical connections and keep the
tool dry.
The triangular holes on the backside frame of the module are drainage holes which cannot be
blocked.
The maximum system voltage indicated in the rating label is 1500 V. During the system
Installation, the maximum open circuit voltage in series cannot exceed the maximum system
voltage.
During module interconnection, ensure to fix the connecting cables to supporting mounting
frame, so as to restrict cable movement.
Abide by the allowable minimum bending radius of the cables (suggest no less than 43mm).
Always protect the cable with conduit where there is a risk of animals or children coming into
contact with it.
Use connectors which are specially designed for photovoltaic systems, and assemble with the
tools recommended or specified by the manufacturer. In case that the connector applicable to
the solar system is required, please contact your local supplier. Only connectors of the same
type must be used.
Make sure that the polarity is correct when connecting the module with inverter, storage
battery or combiner box to avoid damage to bypass diodes in the modules due to incorrect
polarity.
Do not drill holes in the frame, this may reduce the mechanical load ability and cause
corrosion of the frame.
Do not scratch the anodized coating of the frame (except for grounding connection), this may
cause corrosion of the frame or reduce the mechanical load ability.
Modules can’t be used to replace the roof and wall materials, partial replacement is not
allowed.
Any part (including nameplate) of modules supplied by Perlight Solar Co., Ltd can’t be
dismantled without permission.

Perlight Solar PLM-OM Series Installation Manual 8www.perlight.com
V.01.2022 A1.0
Installation conditions
Working environment
Perlight Solar’s solar module should operate in the following environmental conditions:
Ambient temperature: -20⁰C to +45⁰C
Operating temperature of the module: -40⁰C to +85⁰C
Humidity: 85%RH
Mechanical load bearing capacity: the modules have passed the mechanical load test of wind
pressure of 2400Pa and snow pressure of 5400Pa; at the same time, they have passed the
mechanical load test of wind pressure of 3600Pa and snow pressure of 3600Pa. (Only limited
to the PV module models mentioned in this manual).
Note: The module mechanical load is based on the installation method and installation site.
Calculation of mechanical load must be carried out by a professional installer according to the
system design requirements.
Installation position
In most applications, PV modules should be installed in a location where they will receive
maximum sunlight throughout the year. In the northern hemisphere, modules should typically
face south, and in the southern hemisphere, modules should typically face north.
The module shall be installed in the place where sunshine is adequate. The module surface
shall not be partly shaded by trees, building, clothes, tools, packaging materials, etc. because
these objects will form shadow in the module surface leading to loss of system output power.
The module shall be installed in a well-ventilated place; meanwhile, enough space for airflow
shall be allowed at the back and sides of the module, so that the heat generated during
operation can be radiated.
Modules cannot be used in excessive and harsh environments, such as hail, snow, sand,
smoke, air pollution, soot, flammable gases, near open flames, and highly corrosive
substances (salt, salt spray, salt water, acid rain) , as this will aect the module's safety and
performance. If the installation environment is special, such as coastal, farm, high humidity
or wind and other large environment eects, please consult your local dealer for professional
support and confirmation. If needed to be installed at a high altitude, the altitude should not
exceed 2000m.
Modules should be installed on suitable buildings, or other suitable places to install modules
(such as the ground, garage, building facades, roof).
If modules are installed in locations with frequent lightning activity, the modules must be
protected against lightning strikes.
Do not install modules in locations with water immersion or near sprinkler systems.
The pressure of the wind or snow after installation of the modules must not exceed the
maximum allowable load.

Perlight Solar PLM-OM Series Installation Manual 9www.perlight.com
V.01.2022 A1.0
Tilt angle selection
The tilt angle of the Modules is measured between the surface of the modules and a
horizontal ground surface, the modules generate maximum power output when it faces the
sun directly, as shown in figure 2.
Modules in series with the same array must be oriented in the same direction and angle.
Dierent installation directions and angles will cause the modules to absorb the total solar
radiation dierence, causing the loss of output power, thus reducing the operating eiciency
of the system.
The maximum power is generated when the sun is directed to the module, selecting the best
installation angle should consider the sun path during the winter.
External or otherwise artificially concentrated sunlight shall not be directed onto the front or
back face of the PV module.
5. Identification
Each PV module is aixed with two kinds of labels, providing the following information:
1. Label: Describes the product name, PV module model, nominal power, rated voltage, rated
current, open circuit voltage, short circuit current, maximum system voltage, PV module
size and weight under standard test conditions.
2. Serial number: Each module has a unique bar code number, each bar code number has 20
letters and numbers. The bar code is permanently encapsulated inside the module, as can
be seen clearly from the top right corner of the module. The bar code number allows you
to trace information about the module production process.
Fig.2: Installation angle
Degrees of
Latitude Tilt Angle
0⁰ ~ 15⁰ 15⁰
15⁰ ~ 25⁰ Equal to Latitude
25⁰ ~ 30⁰ Latitude + 5⁰
30⁰ ~ 35⁰ Latitude + 10⁰
35⁰ ~ 40⁰ Latitude + 15⁰
40⁰ + Latitude + 20⁰

Perlight Solar PLM-OM Series Installation Manual 10 www.perlight.com
V.01.2022 A1.0
6. Module Structure
Module Rear (mm):
Module Front & Side (mm):
Mounting hole (mm):
Frame size (mm):

Perlight Solar PLM-OM Series Installation Manual 11 www.perlight.com
V.01.2022 A1.0
7. Mounting and Notes
The PV module frame is made of anodized aluminium, and therefore corrosion can occur if
the module is subjected to a salt water environment with contact to a rack of another type
of metal (Electrolysis Corrosion). If required, PVC, EPDM or stainless steel washers can be
placed between the PV module frame and support structure to prevent this type of corrosion.
Module support structures that are to be used to support Perlight Solar modules at the
correct tilt angles should be wind and snow load rated for use by the appropriate local and
civil codes prior to installation.
Perlight Solar modules can be mounted using the following methods:
• Direct fixing to mounting structure
• Suitable module clamps as part of solar mounting system
• Insertion systems
• Roof integrated systems
Direct Fixing to Mounting Structure
2400Pa Wind Load
2400Pa Snow Load
5400Pa Wind Load
3800Pa Snow Load
Use Four Mounting Holes Use Eight Mounting Holes
Direct Fixing to Mounting Structure
The frame of each module has 8 mounting holes
(14mm*9mm), which can be used to secure the
modules to a supporting structure. The module frame
must be attached to a supporting structure using
corrosion-proof M8 stainless steel nuts and bolts with
spring washers and flat washers in at least four points
symmetrical on the PV module. Applied torque is
approx. 16 Newton-meters.

Perlight Solar PLM-OM Series Installation Manual 12 www.perlight.com
V.01.2022 A1.0
Solar Mounting Systems
2400Pa Wind Load
2400Pa Snow Load
5400Pa Wind Load
3800Pa Snow Load
Fig.:3 Use Four Clamps
Fig.: 4 Use Four Clamps on Short Side and Two
Clamps on Long Side
Fig.: 5 Use Four Clamps Fig.:6 Use Six Clamps
Module mounting clamps must not come into contact with the front glass and must not
deform the frame. Module clamps should not cause shadowing eects. It is not permitted to
modify the module frame under any circumstances. Recommended distance between two
modules is 5mm considering linear thermal expansion of the module frames.
Clearance between the module frame and mounting surface may be required to prevent the
junction box from touching the surface, and to circulate cooling air around the back of the
module.

Perlight Solar PLM-OM Series Installation Manual 13 www.perlight.com
V.01.2022 A1.0
Insertion Mounting Systems
2400Pa Wind Load
2400Pa Snow Load
5400Pa Wind Load
3800Pa Snow Load
Fig.: 7 Insertion System Short Side
Fig.: 8 Insertion System Short Side and Two Clamps
on Long Side.
Insertion Systems must not cause shadowing eects.
It is not permitted to modify the module frame under
any circumstances. Recommended distance between
two modules is 5mm considering linear thermal
expansion of the module frames.
Clearance between the module frame and mounting
surface may be required to prevent the junction box
from touching the surface, and to circulate cooling air
around the back of the module.
Fig.: 9 Insertion System Long Side
Mounting design may have an impact on fire resistance. If the modules are to be installed on
the roof or wall of a building, using an integrated mounting system, the fire resistance of roof
covering or wall should be rated for the application and certified for use to local and national
standards. Here the stand-o method or the rack method is recommended. The modules are
supported parallel to the surface of the building wall or roof. Clearance between the module
frames and surface of the wall or roof is required to prevent wiring damage and to allow air
to circulate behind the module. The recommended stand-o height is 115mm. Any slope less
than 5in/ft (127mm/305mm) is required to maintain a fire class rating. Do not mount Perlight
Solar module in such way that the drain holes of the module are intended to block up.
Roof-integrated (in-roof) systems must comply with local and national regulations, including
fire test certification where necessary.

Perlight Solar PLM-OM Series Installation Manual 14 www.perlight.com
V.01.2022 A1.0
8. Grounding
All module frames and mounting racks must be properly grounded in accordance with local
and national electrical regulations. Proper grounding is achieved by connecting the module
frame(s) and structural members continuously one to another using a suitable grounding
conductor. The grounding conductor or strap may be copper, copper alloy, or other material
acceptable for use as an electrical conductor as per local and national guidelines. The
grounding conductor must then make a connection to earth using a suitable earth ground
electrode.
Attach a separate conductor to one of the marked 4mm diameter grounding holes on the
module frame with a bolt and nut that incorporates an external tooth washer. This is to ensure
positive electrical contact with the frame.
The rack must also be grounded unless they are mechanically connected by nuts and bolts to
the grounded Perlight Solar modules. The array frame shall be grounded in accordance with
local and national guidelines.
No. Name Standard
1 Bolt M4
2 Spring washer M4 x 1.1
3 Star washer M4 x 0.8
4 Ground crimp M4 stud
5 Module Frame
6 Star washer M4 x 0.8
7Nut M4
Fig.10: Grounding crimp and washer sizes

Perlight Solar PLM-OM Series Installation Manual 15 www.perlight.com
V.01.2022 A1.0
9. Module Wiring
Each solar module is wired with two separate series cell strings.
Bypass Diodes
Bypass diodes are wired in parallel with the series cell strings to prevent hot spot heating
caused by individual cell reverse bias that occurs when a module is partially shaded.
Output Cables
Each module has two standard 90°C rated, water-proof, UV resistant output cables each
terminated with plug & play connectors. This cable is suitable for applications where wiring is
exposed to the direct rays of the Sun.
Field connections
Connecting cables should be a minimum of 12 AWG copper cables, which are UV resistant
and insulated for a minimum of 90°C. All wiring and electrical connections must comply with
local and national Electrical Code.
Blocking Diodes
In a system utilizing a battery, blocking diodes are typically placed between the battery
and the solar module output to prevent battery discharge at night. Diodes that are used as
blocking diodes must: Have a Rated Average Forward Current [IF(AV)] above maximum
system current at highest module operating temperature. Have a Rated Repetitive Peak
Reverse Voltage [VRRM] above maximum system voltage at lowest module operating
temperature.

Perlight Solar PLM-OM Series Installation Manual 16 www.perlight.com
V.01.2022 A1.0
10. Maintenance
Modules need to be inspected and maintained regularly, especially during the warranty
period. To ensure optimum performance of the modules, the following maintenance measures
are recommended.
Cleaning
When modules are working, there should not be environmental factors creating shadows on
the modules, such as other modules, supporting rail, plants, heavy dust, dirt etc., which may
directly reduce the power output and may even cause regional hot–spot eects. Therefore,
clean the glass surface on a regular basis, clean modules take measures so as:
The frequency of cleaning depends on the rate of dirt build-up. Under normal conditions, the
rain will clean the surface of the module, but it is still required to regularly clean the module
surface using a soft sponge or cloth (dry or wet).
Never use a rough surfaced material to clean modules, do not use acid and alkali cleaner to
remove dirt.
Avoid pressing hard during cleaning, which may cause glass deformation, cell damage and
reduction of the module’s life.
During snow, remove the snow covered on the module in time to avoid the module damage
caused by long-term accumulation of snow cover and freezing of melted snow.
When cleaning the rear of the module, avoid piercing backsheet.
It is recommended that modules be cleaned in the early morning or late afternoon when light
is low and the module temperature is low, especially for areas with high temperatures.

Perlight Solar PLM-OM Series Installation Manual 17 www.perlight.com
V.01.2022 A1.0
Annual Checks
Once a year, check the tightness of terminal screws and the general condition of the wiring.
Also, check to ensure the mounting hardware is tight and secure. Loose connections will
result in damage to the array.
Changed Perlight Solar modules must be of the same kind and type. Do
not touch live parts of cables and connectors. Use appropriate safety
equipment when working (insulated tools, insulating gloves, etc.).
Only trained personnel may carry-out repair work to the PV modules and system
components.
Cover the front surface of the solar module with an opaque or other material when working on
the modules. Solar modules generate high voltage when exposed to sunlight.
Visual inspection
Please carefully check the modules of the existence of visual defects, focusing on the following
items:
a) Check whether the module glass is broken.
b) Check if the front of the module is obstructed by obstacles or foreign objects.
c) Check the module backsheet, whether there is hot, negative film raised, signs of burns or
scorching and so on.
d) Check whether the encapsulation materials of the module have delamination, bubbles, etc.
e) Check the tightness of the bolts and the electrical connections at the connection points
between the modules and the supporting rail.
Inspection of connectors and cables
It is advisable to carry out a preventive check every 6 months and check the following:
a) Check Junction box adhesive for cracks.
b) Check the connector interface sealing tightness, signs of melting, aging or corrosion.
c) Check that the cable connections are secure and that the modules are properly grounded.
When a module is found to be defective, consult a qualified service technician. If servicing is
required, it should be serviced by a qualified service technician. Module exposure generates
high voltages in the sun, so cover the modules with opaque material when servicing modules
to prevent electrical shock.
Note:
1. Any problems discovered should be referred to a professional service technician for
confirmation;
2. If using maintenance and repair measures not included in this manual, consult your local
dealer for professional support.

Perlight Solar PLM-OM Series Installation Manual 18 www.perlight.com
V.01.2022 A1.0
11. Recycling
Perlight work to avoid unnecessary waste, keeping module packaging to a minimum, while
maintaining the protection of the modules during transport.
Please recycle the cardboard and paper packaging in accordance with local guidelines and
regulations.
End of Life Disposal and Recycling
Perlight solar modules are designed to produce electricity for a minimum of 25
years, however the panels may continue to oer useful energy for years to come
after this point. Once the panels reach the end of their useful life, they should be
recycled in accordance with local guidelines and regulations.
Within the European Union, solar modules are subject to Waste Electrical and
Electronic Equipment (WEEE) regulations. The WEEE symbol is displayed on
every module nameplate label at the rear of the panel. This means that this
product shall not be treated as household waste and must be disposed of
at an appropriate collection point.
Fig.11: WEEE Symbol

Perlight Solar Co.,Ltd.
Address:
Oufeng Road,
Muyu, Zeguo Town,
Wenling City,
Zhejiang Province,
317521, China
Tel: 0086-576-86477920
www.perlight.com
enquir[email protected]
Table of contents
Other Perlight Solar Inverter manuals