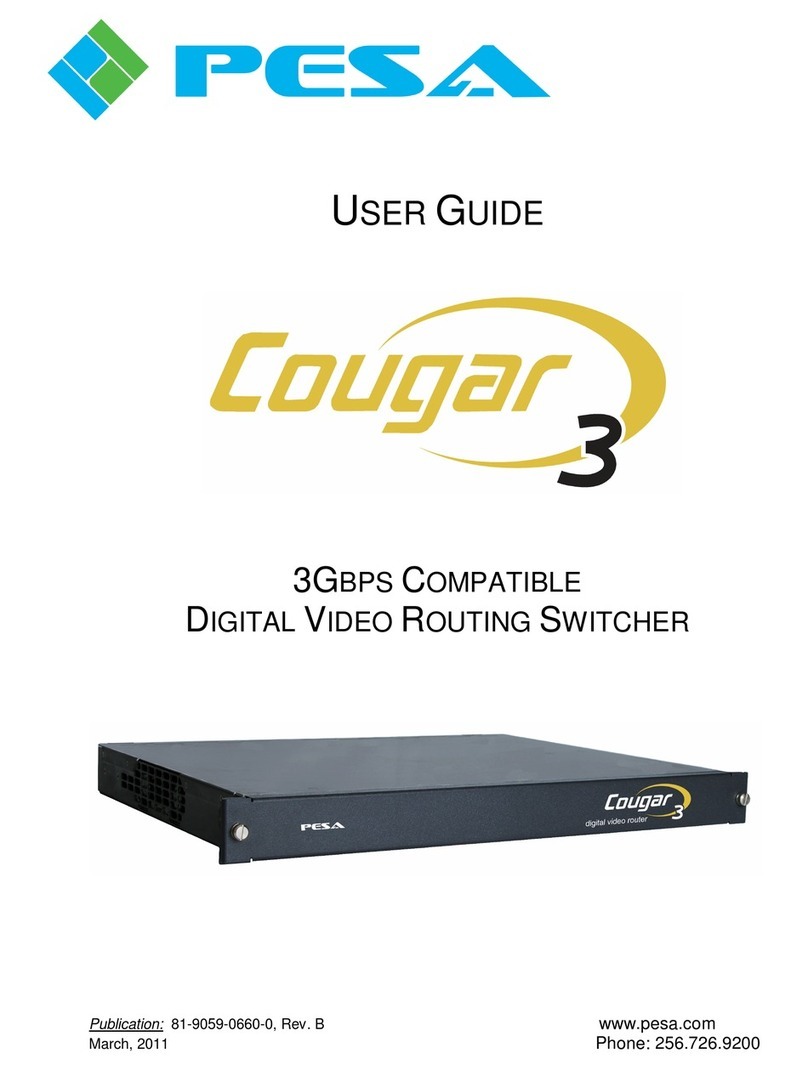
PESA Cougar Video User manual

Document No. 81-9059-0344-0 Rev. B
PESA Switching Systems
330A Wynn Drive
Huntsville, AL 35805
Cougar Digital Video

Manual Updates:
10/15/95 Manual released for initial rinting.
04/30/96 U dated manual to incor orate ECO changes.
04/20/98 U dated manual to incor orate ECO changes.
03-02-01 Rev B: Deleted Printing S ecification er ECO CE00113. GLT

Sales Office
Service and
Ordering
Assistance
Ordering Assistance,
Service & Inquiries
PESA Switching Systems, Inc.
330A Wynn Drive
Huntsville, AL 35805
Main Numbers:
Tel: (256) 726-9200
Fax: (256) 726-9271
Service Department Numbers:
Tel: (256) 726-9222
Fax: (256) 726-9268
National Sales Office
PESA Switching Systems, Inc.
35 Pinelawn Road, Suite 99E
Melville, NY 11747
Tel: (800) 328-1008
Fax: (516) 845-5023

NOTE PESA reserves the right to change any information con-
tained in this manual without notice. Unauthorized copying,
modifications, distribution, or display is prohibited. All rights
reserved.
Please address all comments or suggestions concerning
this or other PESA manuals to:
Publications Department
Attn: Charles E. Jaynes
(Engineering Technical Writer)
PESA Switching Systems, Inc.
330A Wynn Drive
Huntsville, Alabama 35805
(256) 726-9200 EXT. 145

ATTENTION
ALL EQUIPMENT ITEMS
MANUFACTURED BY OR SOLD BY
PESA SWITCHING SYSTEMS, INC.
SHOULD BE SERVICED BY
QUALIFIED SERVICE PERSONNEL
OR BY QUALIFIED SERVICE
TECHNICANS ONLY.
ATTENTION

Cougar Digital Video
i
4/98
P/N 81905903440
Table of Contents
Section 1. Introduction
1.1 Manual Overview ...................................................................... 1.1
1.2 General Description .................................................................. 1.2
1.3 Specifications............................................................................ 1.4
Figures
Figure 1-1 Cougar Digital Video Routing Switcher Front and Rear ..... 1.3
Section 2. Installation
2.1 Introduction............................................................................... 2.1
General............................................................................... 2.1
2.2 Receipt Inspection .................................................................... 2.1
2.3 Unpacking................................................................................. 2.2
2.4 Location .................................................................................... 2.2
2.5 Mounting ................................................................................... 2.2
2.6 Cabling...................................................................................... 2.3
2.7 Level Code (Strobe) Selection................................................. 2.4
2.8 Output/Input Code Selection..................................................... 2.5
Output Code ....................................................................... 2.6
Input Code .......................................................................... 2.7
2.9 System Controller Card Installation .......................................... 2.8
2.10 PS70V Setting Line Voltage ..................................................... 2.9
2.11 PS70V Power Supply Installation ............................................. 2.9
2.12 32X32 Digital Video Matrix Card Installation............................. 2.10
2.13 Rear Panel Connectors ............................................................ 2.11
RCP Panel Connectors (J9-J12) ........................................ 2.11
Serial (CPU Link) Connectors (J13 and J14)..................... 2.11
Control (PRC) Connectors (J15 and J93)........................... 2.12
CPU Alarm Connector (J16) ............................................... 2.12
Matrix Card Alarm Connector (J17) .................................... 2.13
Power In/Out Connector (J18) ............................................ 2.13
Power Supply Alarm Connectors (J23 and J24)................. 2.13
Reference (Sync) Connectors (1 and 2) ............................ 2.13
Video Input and Output Connectors ................................... 2.14
2.14 System Connections................................................................. 2.14
Connection Guide............................................................... 2.14

Cougar Digital Video
ii 4/98
P/N 81905903440
Table of Contents
Figures
Figure 2-1 Chassis Installation ............................................................ 2.3
Figure 2-2 Cables Attached to Supports ............................................. 2.4
Figure 2-3 Level Code Selection ......................................................... 2.4
Figure 2-4 Coding Switch Locations.................................................... 2.5
Figure 2-5 Output Code Selection ....................................................... 2.6
Figure 2-6 Input Code Selection.......................................................... 2.7
Figure 2-7 Cougar Digital Video Routing Switcher Rear View............. 2.11
Section 3. Operation
3.1 Operation of the Cougar Digital Video Routing Swit................. 3.1
General............................................................................... 3.1
3.2 Regulator Fault LED (Red) ....................................................... 3.1
3.3 CPU Fault LED (Red) ............................................................... 3.1
3.4 Power OK LED (Green) ............................................................ 3.1
3.5 32X32 Digital Video Matrix Card Adjustments .......................... 3.1
Section 4. Functional
4.1 Introduction............................................................................... 4.1
General............................................................................... 4.1
4.2 32X32 Digital Video Matrix Card............................................... 4.1
Control ................................................................................ 4.1
Crosspoint Matrix................................................................ 4.1
Input Equalizers .................................................................. 4.2
Output Drivers..................................................................... 4.2
Power Regulators ............................................................... 4.2
4.3 PS70V Power Supply ............................................................... 4.2
Circuit Description............................................................... 4.3
Section 2. Installation Continued:

Cougar Digital Video
iii
4/98
P/N 81905903440
Table of Contents
Section 5. Maintenance
5.1 Introduction............................................................................... 5.1
5.2 General..................................................................................... 5.1
5.3 Test Equipment......................................................................... 5.1
5.4 Preventive Maintenance ........................................................... 5.2
5.5 Maintenance ............................................................................. 5.2
5.6 Corrective Maintenance............................................................ 5.2
Factory Repair Service ....................................................... 5.2
Troubleshooting.................................................................. 5.3
System Checks................................................................... 5.4
Replacement Parts ............................................................. 5.4
5.7 Filter Cleaning........................................................................... 5.4
5.8 PS70V Power Supply ............................................................... 5.5
Section 6. Schematics
6.1 Schematics ............................................................................... 6.1
General............................................................................... 6.1
Cougar Mainframe ....................................CD63-0758 ............ 6.2
Cougar Chassis ........................................CD63-0759 ............ 6.3
32X32 Video Backplane ...........................CA25-1281 ............ 6.4
............................................................SC33-1281 ............ 6.6
32X32 Digital Video Matrix Card...............CA25-1278 ............ 6.8
............................................................SC33-1278 ............ 6.10
Power Supply Assembly ...........................CD63-0683 ............ 6.19
Power Supply Card...................................CA25-1162 ............ 6.20
............................................................SC33-1162 ............ 6.21
Section 7. Parts List
7.1 Parts List................................................................................... 7.1
General............................................................................... 7.1
Cougar Mainframe ....................................81906517410......... 7.2
Cougar Chassis ........................................81906517510......... 7.3
32X32 Video Backplane ...........................81906517520......... 7.4
32X32 Digital Video Matrix Card...............81906517480......... 7.5
Power Supply Assembly ...........................81906514550......... 7.9
Power Supply Card...................................81906514540......... 7.10

Introduction Section 1
4/98
P/N 81905903440 page 1.1 INTRODUCTION
1
INTRODUCTION
1
Digital Video
Section 1, INTRODUCTION, summarizes the manual, describes
the product, presents a list of terms, and provides the panel
specifications.
Section 2, INSTALLATION, provides installation and setup
instructions.
Section 3, OPERATION, describes system operation proce-
dures.
Section 4, FUNCTIONAL DESCRIPTIONS, presents an in-
depth description of each component.
Section 5, MAINTENANCE, explains procedures for mainte-
nance.
Section 6, SCHEMATICS, gives a complete package of techni-
cal documents such as schematics, and assembly drawings.
Section 7, PARTS LIST, provides a detailed list of system parts
and components.
FUNCTIONAL
4
DESCRIPTION
INTRODUCTIO N
1
INTRODUCTIO N
1
INSTALLATION
2
OPERAT ION
3
MAINTENANCE
5
SCHEMATICS
6
PARTS LISTS
7
1.1 Manual Overview
This manual provides detailed instructions for installing and operating the PESA
Cougar Digital Video Switcher. This manual is divided into seven sections as
shown. Sections 3 and 4 contain operational and functional descriptions of the
Cougar Digital Video Routing Switcher and the associated 32X32 Digital Video
Matrix Card.

Introduction Section 1
page 1.2 4/98
P/N 81905903440
INTRODUCTION
1
INTRODUCTION
1
Digital Video
1.2 General Description
The PESA Cougar Digital Video Routing Switcher offers a reliable low cost
answer to your digital video routing needs. The Cougar Digital Video Routing
Switcher is housed in a 3RU frame providing a small profile for space efficient
installations. The Cougar Frame can be equipped with either a single System
Controller or dual System Controllers. The option of dual controllers provides
seamless transfer of system control in case of equipment failure. The Cougar
Frame can also be equipped with redundant power supplies for maximum
reliability and fail safe operation.
The Cougar Digital Video Routing Switcher is designed with small to mid-range
size routing matrix applications in mind. This cost efficient router is expandable to
a 64X64 size matrix utilizing four Cougar Digital Video Routing Switchers and two
MVDA Combiners. The main matrix components use plug-in circuit cards for
ease of maintenance and component replacement. The Cougar Digital Video
Routing Switcher can be serviced hot, allowing circuit card changes without
powering down the matrix. Board level voltage regulation in the Cougar Frame
eliminates the possibility of a central, single point power failure.
The Cougar Digital Video Matrix Card features easily visible LED indicators for
quick view of critical voltage and circuit conditions. The Cougar Frame comes
equipped with one control port, two RS232 ports, four RS485 control panel ports,
and external alarm connectors for audible monitoring of the operation of the
internal power and controller circuits. Please note that the control port, the
RS232 port, and the four RS485 ports are only active when a controller card is
installed in the Cougar Frame. The Cougar Frame utilizes RS485 looping
interfaces for system connection to remote control panels using standard twisted
pair cables.
The Cougar Digital Video Routing Switcher utilizes the PESA System Controller
for system control. The System Controller provides a user friendly graphical
interface; operating in a Windows 3.1™ personal computer environment. The
System Controller can be installed internal to the Cougar Frame, allowing better
rack space utilization. The Cougar Digital Video Routing Switcher working in
conjunction with the System Controller utilizes PESA's low cost RCP line of
control panels for remote system operation.
The Cougar Digital Video Matrix Card is compatible with digital composite, digital
component, and compressed digital HDTV video formats. The Cougar Digital
Video Matrix card provides automatic input equalization for up to 240 meters of
Belden 8281 cable for data rates up to 270 Mbit/s, and up to 150 meters of cable
for data rates up to 360 Mbit/s.

Introduction Section 1
4/98
P/N 81905903440 page 1.3 INTRODUCTION
1
INTRODUCTION
1
Digital Video
1.2 General Description Continued:
Figure 1-1 Cougar Digital Video Routing Switcher Front and Rear Views

Introduction Section 1
page 1.4 4/98
P/N 81905903440
INTRODUCTION
1
INTRODUCTION
1
Digital Video
1.3 Specifications
INPUTS
Impedance 75 Ohm, Internally Terminated, Non-Looping, BNC
Return Loss >15dB 5MHz to 270MHz
Standard SMPTE 259M for (D1, 270Mbit/s),
(D2 or D3, NTSC, 143Mbit/s),
(D2 or D3, PAL, 177Mbit/s),
and the proposed (Compressed, 16:9 HDTV, 360Mbit/s)
Equalization Automatic equalization for 0 to 240 meters
of Belden 8281 or equivalent cable for
data rates up to 270Mbit/s and 0 to 150 meters
for data rates up to 360Mbit/s
Number 32
OUTPUTS
Impedance 75 Ohm BNC
Return Loss >15dB 5MHz to 270MHz
Signal Amplitude 800mv ±10%, Terminated into 75 Ohms
DC Offset ±0.5V, Terminated into 75 Ohms
Rise/Fall Times 0.6nS ±200pS (20% to 80%), Terminated into 75 Ohms
Timing Jitter 0.2UI p-p as defined in SMPTE 259M
Alignment Jitter 0.2UI p-p as defined in SMPTE 259M
Standard SMPTE 259M for (D1, 270Mbit/s),
(D2 or D3, NTSC, 143Mbit/s),
(D2 or D3, PAL, 177Mbit/s),
and the proposed (Compressed, 16:9 HDTV, 360Mbit/s)
Number 32

Section 2
page 2.1
10/95
P/N 81905903440 INSTALLATION
2
Installation
Digital Video
2.1 Introduction
This section details the Cougar Digital Video Routing Switcher installation
procedures. The following topics are discussed:
• Receipt Inspection
• Unpacking
• Location
• Mounting
• Cabling
• Level Code (Strobe) Selection
• Input/Output Coding Selection
• System Controller Card Installation
• PS70V Setting Line Voltage
• PS70V Power Supply Installation
• 32X32 Digital Video Matrix Card Installation
• Rear Panel Connectors
• System Connections
General
If specified when ordered, the Cougar Digital Video Frame will be config-
ured for the intended system at the factory. Before attempting to install
any frame, matrix card, controller card, or power supply; this section
should be read carefully.
NOTICE
THE COUGAR DIGITAL VIDEO ROUTING SWITCHER CONTAINS STATIC SENSITIVE
DEVICES. CARE SHOULD BE USED WHEN IT IS NECESSARY TO HANDLE THE
INTERNAL CIRCUIT CARDS. IT IS RECOMMENDED THAT A GROUND WRIST STRAP
AND GROUNDING MAT BE USED BEFORE ATTEMPTING ANY EQUIPMENT INSTAL-
LATIONS.
2.2 Receipt Inspection
The Cougar Digital Video Routing Switcher was tested and inspected
prior to leaving the factory. Upon receipt, inspect the equipment for ship-
ping damage. If any damage is found, contact the carrier immediately and
save all packing material.

page 2.2 10/95
P/N 81905903440
INSTALLATION
2
Section 2Installation
Digital Video
2.3 Unpacking
The Cougar Digital Video Matrix Switcher is comprised of a frame, back-
plane, a 32X32 Digital Video Matrix Card, up to two System Controller
Cards, and up to two PS70V Power Supplies. Prior to discarding packing
material compare the parts received against the packing list. Carefully
inspect the layers of packing material for any components which may
have been overlooked during the initial unpacking.
2.4 Location
The Cougar Digital Video Routing Switcher may be located anywhere
power is available. However, units should be mounted as close as pos-
sible to their associated equipment to minimize cable runs. Forced air
cooling is provided by a small fans located at the back of the unit. Care
should be taken not to block airflow around these fans. Installation should
be in an area where the ambient temperature does not exceed 40°C
(104°F) inside the equipment rack.
2.5 Mounting
The Cougar Digital Video Routing Switcher is rack mountable in a stan-
dard 19” equipment rack. Sufficient space must be provided behind the
equipment racks to allow for the control cables and power cable. All
mounting holes should be utilized and mounting hardware tightened
securely. As with all equipment installed in a rack, the bottom screw on
each side should be installed before proceeding with the remainder of the
screws. Then all screws should be securely tightened. Support the Cougar
Digital Switcher's bottom while installing it in the rack. Figure 2-1 illustrates
chassis installation in the equipment rack. NOTE: Remove the power
supply retaining screws before installing the Cougar Digital Video Routing
Switcher in an equipment rack.
To install a Cougar Digital Video Routing Switcher in an equipment rack
follow these steps:
1. Align the frame with the slotted opening in the rack.
2. Install the bottom screws first.
3. Install the two top screws
4. Tighten all four screws securely.

Section 2
page 2.3
10/95
P/N 81905903440 INSTALLATION
2
Installation
Digital Video
2.6 Cabling
Considerable weight will be added to the rear panel of the Cougar Digital
Video Routing Switcher by the control, signal, and power cables. There-
fore, all cables should be strained relieved and secured to racks or other
supporting structures. Failure to provide adequate cable support can result
in cables separating from connectors. If cable runs are to be stored under
an elevated floor, they should be tied to the racks as a guide. If cables are
run along the floor, do not allow them to lay in the work area behind the
racks. Stepping or tripping on the cables may result in connections being
pulled free or wire breakage inside the insulation. The Cougar Digital
Video Routing Switcher should be installed in the equipment rack prior to
attaching cables.
Use the following rules when cabling the Cougar Digital Video Routing
Switcher:
1. Lay all cables in their intended positions, separating control, video, and
power cables wherever possible.
2. Provide proper support for each cable during the cabling process. The
use of tie-wraps is recommended as shown in Figure 2-2.
2.5 Mounting Continued:
Figure 2-1 Chassis Installation

page 2.4 10/95
P/N 81905903440
INSTALLATION
2
Section 2Installation
Digital Video
2.7 Level Code (Strobe) Selection
The level (strobe) select switch, S3, (a binary coded switch) is located on
the inside of the Cougar Digital Video Routing Switcher on lower left-hand
side of the backplane. Switch numbers are 1 through 8 right to left.
Switches 1-6 select level codes 0 through 62. Switches 7 and 8 are not
used – their position is unimportant. Refer to Figure 2-3 for an example
of level code selection and see Figure 2-4 for the physical location of the
level code switch.
2.6 Cabling Continued:
Figure 2-2 Cables Attached to Supports
Figure 2-3 Level Code Selection

Section 2
page 2.5
10/95
P/N 81905903440 INSTALLATION
2
Installation
Digital Video
Physical 0 (Logical 1) = OFF (UP)
Physical 1 (Logical 0) = ON (DOWN)
NOTE: The following are logical selections. Level 0 is all switches on
(down) or all switches in the physical 1 position.
SWITCH POSITIONS 654321
STROBE LEVEL 0 000000
STROBE LEVEL 1 000001
STROBE LEVEL 2 000010
STROBE LEVEL 3 000011
STROBE LEVEL 4 000100
STROBE LEVEL 5 000101
STROBE LEVEL 6 000110
STROBE LEVEL 7 000111
UP TO....
STROBE LEVEL 62 111110
2.7 Level Code (Strobe) Selection Continued:
Figure 2-4 Coding Switch Locations
2.8 Output/Input Code Selection
Input and output coding switches are located on the inside of the Cougar
Digital Video Routing Switcher on the lower left corner of the backplane.
The input and output switch numbers run 0 to 7, right to left. Switch S1
(outcode switch) selects output codes 0-255 and switch S2 (incode switch)
selects input codes 0-255. Refer to Figures 2-5 and 2-6 for examples of
input and output code selection and see Figure 2-4 for the physical loca-
tion of the output and input code switches.

page 2.6 10/95
P/N 81905903440
INSTALLATION
2
Section 2Installation
Digital Video
Output Code
2.8 Input/Output Code Selection Continued:
Figure 2-5 Output Code Selection
Physical 0 (Logical 1) = OFF (UP)
Physical 1 (Logical 0) = ON (DOWN)
NOTE: The following are logical selections. Output code 0 is all switches
on (down) or all switches in the physical 1 position.
SWITCH POSITION 76543210OUTPUTS
OUTPUT CODE 0 000000000-32
OUTPUT CODE 1 0000000133-64
OUTPUT CODE 2 0000001065-96
OUTPUT CODE 3 0000001197-128
OUTPUT CODE 4 00000100129-160
OUTPUT CODE 5 00000101161-192
OUTPUT CODE 6 00000110193-224
OUTPUT CODE 7 00000111225-256
UP TO....
OUTPUT CODE 255111111118161-8192

Section 2
page 2.7
10/95
P/N 81905903440 INSTALLATION
2
Installation
Digital Video
Input Code
2.8 Input/Output Code Selection Continued:
Figure 2-6 Input Code Selection
Physical 0 (Logical 1) = OFF (UP)
Physical 1 (Logical 0) = ON (DOWN)
NOTE: The following are logical selections. Input code 0 is all switches on
(down) or all switches in the physical 1 position.
SWITCH POSITION 76543210INPUTS
INPUT CODE 0 000000000-32
INPUT CODE 1 0000000133-64
INPUT CODE 2 0000001065-96
INPUT CODE 3 0000001197-128
INPUT CODE 4 00000100129-160
INPUT CODE 5 00000101161-192
INPUT CODE 6 00000110193-224
INPUT CODE 7 00000111225-256
UP TO....
INPUT CODE 255 111111118161-8192

page 2.8 10/95
P/N 81905903440
INSTALLATION
2
Section 2Installation
Digital Video
2.9 System Controller Card Installation
The System Controller Card(s) are installed in the upper left-hand portion
of the Cougar Digital Video Routing Switcher . The Cougar Digital Video
Routing Switcher is designed for the installation of up to two System
Controller Cards. If only one System Controller Card is to be installed in
the Cougar Digital Video Routing Switcher, install it in the upper card slot.
To install the System Controller Card(s) in the Cougar Digital Video Rout-
ing Switcher take the following steps while referring to the Cougar Digital
Video Mainframe configuration drawing on page 6.2:
1. Align the first (primary) System Controller Card with the upper set of
circuit card guides in the upper left-hand portion of the Cougar Digital
Video Routing Switcher.
2. Carefully push the System Controller Card into the Cougar Digital
Video Routing Switcher until the circuit card connectors make initial
contact with backplane connectors. At this point, firmly but carefully
continue pushing the controller card into the frame while making sure
the connectors are properly aligned and that no connector pins are
being bent. Continue pushing the controller card until it is in place and
the connectors are firmly mated.
3. Align the second (redundant) System Controller Card with the lower
set of circuit card guides in the upper left-hand portion of the Cougar
Digital Video Routing Switcher and repeat step 2.
4. Once the System Controller Card(s) are installed in the Cougar Digital
Video Routing Switcher, install the controller card locking brace and
secure it with a twist nut to hold the controller card(s) in place. NOTE:
The controller locking brace may be removed after shipment to ease
the replacement of System Controller Card(s) when necessary.
Other manuals for Cougar Video
1
Table of contents
Other PESA Switch manuals
Popular Switch manuals by other brands

Cisco
Cisco EZXS55W - EtherFast 10/100 Workgroup Switch user guide

StarTech.com
StarTech.com DisplayPort MSTDP124DP Quick install guide

Pilz
Pilz PSEN ma1.3b-25 operating instructions

StarTech.com
StarTech.com ST4100USB Specifications

Cabletron Systems
Cabletron Systems 9E423-36 owner's manual

HP
HP JH321A Product End-of-Life Disassembly Instructions

Cisco
Cisco 3560G-24PS - Catalyst Switch Product support bulletin

FS
FS S5860-48SC Hardware installation and maintenance guide

Ruijie
Ruijie RG-ES05 Series Quick installation guide

Gude
Gude Expert Power Control 8021 Series manual

Micro Innovations
Micro Innovations USB220N Quick installation guide

Hama
Hama AV-1000 operating instructions