Pfaff 9063 User manual

Instruction Manual
9063
296-12-18 691/002
Betriebsanleitung engl. 06.02
This instruction manual applies to machines from the
following serial numbers onwards:
# 020390219

This Instruction Manual is valid for all models and subclasses listed in the
chapter " Specifications ".
The reprinting, copying or translation of PFAFF Instruction Manuals, whether in whole or in
part, is only permitted with our previous authorization and with written reference to the source.
PFAFF Industrie Maschinen AG
Postfach 3020
D-67653 Kaiserslautern
Königstr. 154
D-67655 Kaiserslautern
Redaktion / Illustration
HAAS-Publikationen GmbH
D-53840 Troisdorf

Contents
Contents ..................................................................................Chapter - Page
1Safety ............................................................................................................................ 1 - 1
1.01 Directives ...................................................................................................................... 1 - 1
1.02 General notes on safety ................................................................................................. 1 - 1
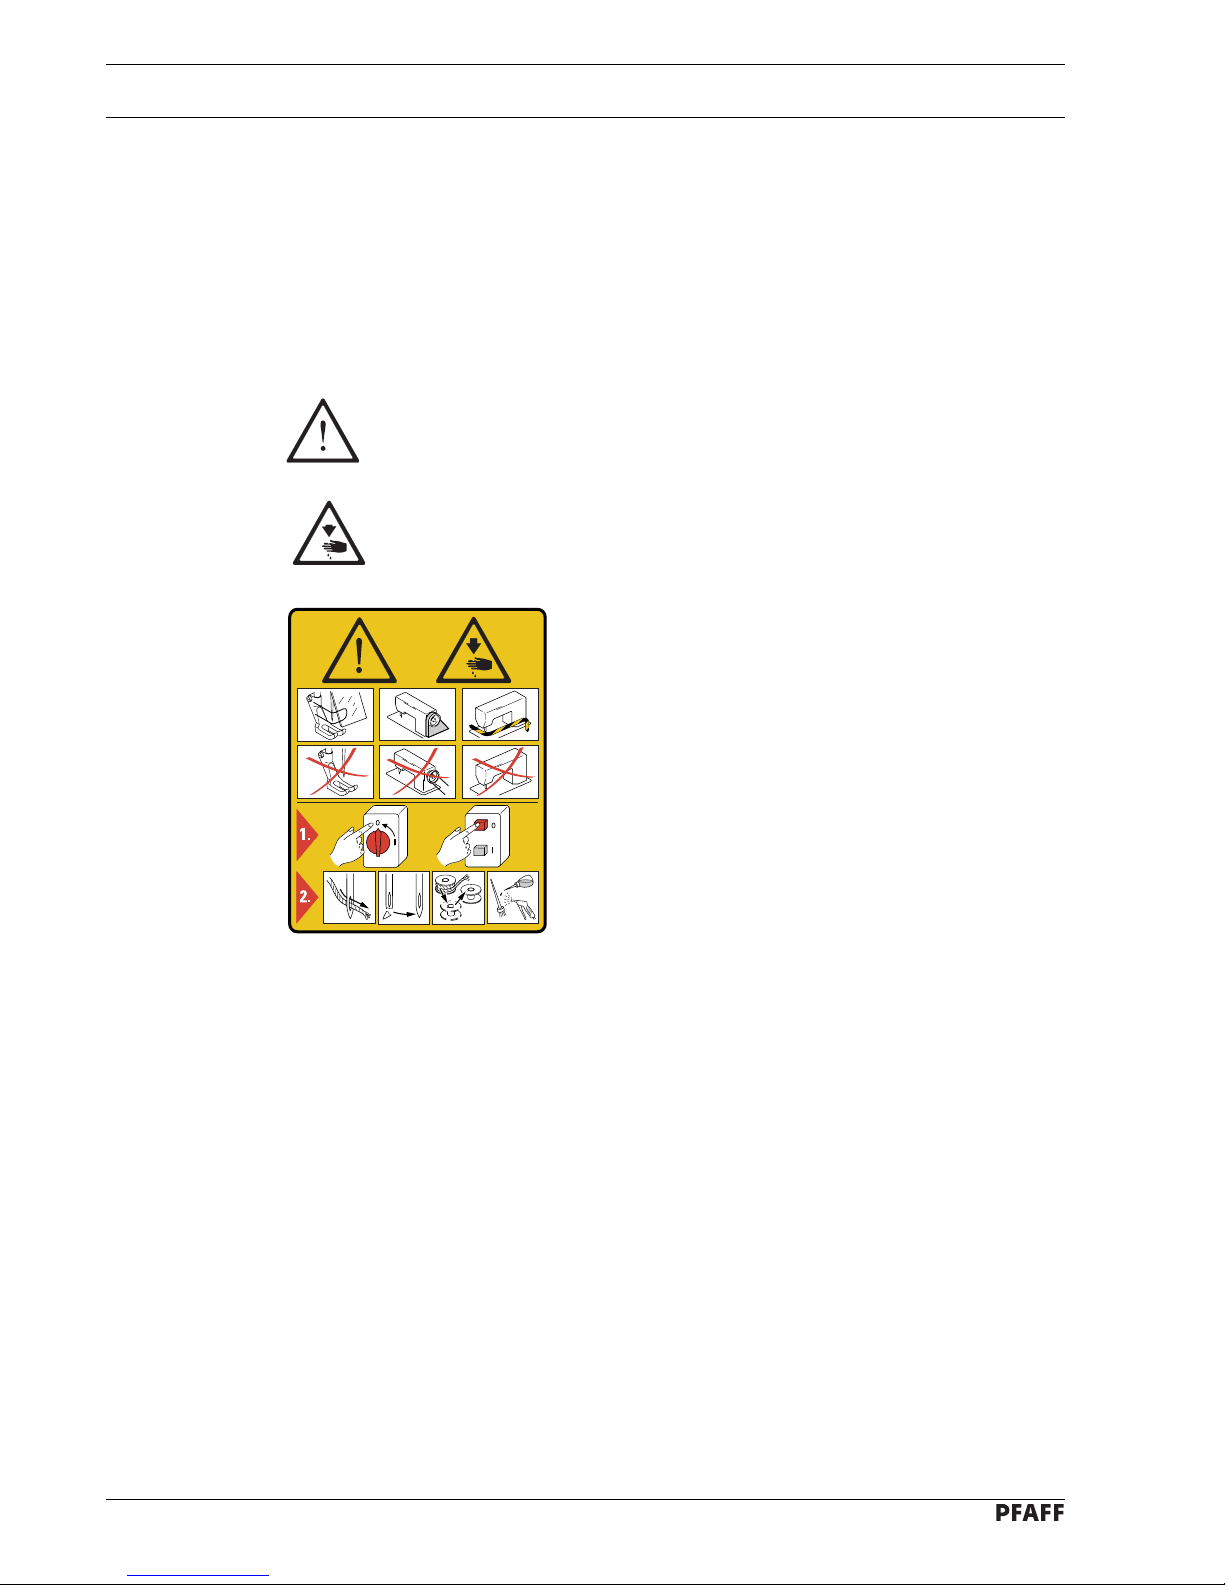
1.03 Safety symbols ............................................................................................................. 1 -2
1.04 Important points for the user.......................................................................................... 1 - 2
1.05 Important points for the user.......................................................................................... 1 - 3
1.05.01 Operating personnel ....................................................................................................... 1 - 3
1.05.02 Operating personnel ....................................................................................................... 1 - 3
1.06 Danger ........................................................................................................................... 1 - 4
2Proper use .................................................................................................................... 2 -1
3Specifications .............................................................................................................. 3 - 1
3.01 PFAFF 9063 ...................................................................................................................3- 1
3.02 Models and subclasses ................................................................................................. 3 - 1
4Disposal of machine .................................................................................................... 4 - 1
5Transport, packaging and storage .............................................................................. 5 - 1
5.01 Transport to the customer’s premises ........................................................................... 5 - 1
5.02 Transport within the customer’s premises ..................................................................... 5 - 1
5.03 Disposal of the packaging .............................................................................................. 5 - 1
5.04 Storage .......................................................................................................................... 5 - 1
6Explanation of the symbols ........................................................................................ 6 - 1
7Controls........................................................................................................................7- 1
7.01 On/Off switch ................................................................................................................7- 1
7.02 Pedal ............................................................................................................................. 7 - 1
7.03 Lever for raising the presser foot ................................................................................... 7 - 2
7.04 Knee lever ..................................................................................................................... 7 - 2
7.05 Stitch length adjustment wheel ..................................................................................... 7 - 3
7.06 Stitch length adjustment wheel ..................................................................................... 7 - 3
7.07 Key on machine head .................................................................................................... 7 - 4
7.08 Switch for thread wiper –909/93 .................................................................................... 7 - 4
8Mounting and commissioning the machine .............................................................. 8 - 1
8.01 Mounting ....................................................................................................................... 8 - 1
8.01.01 Adjusting the table-top height ........................................................................................ 8 - 1
8.01.02 Fitting the oil pan ........................................................................................................... 8 -2
8.01.03 Mounting the sewing head ............................................................................................ 8 - 3
8.01.04 Mounting the balance wheel .......................................................................................... 8 - 3
8.01.05 Tightening the V-belt ...................................................................................................... 8 - 4
8.01.06 Mounting the thread winder ........................................................................................... 8 - 5
8.01.07 Mounting the top V-belt guard ........................................................................................ 8 - 6
8.01.08 Mounting the bottom V-belt guard .................................................................................. 8 - 7
8.01.09 Fitting the thread guide .................................................................................................. 8 - 7
8.01.10 Mounting the spool holder.............................................................................................. 8 - 8
8.01.11 Connecting the plug connections and earth cable .......................................................... 8 - 8

Contents
Contents ..................................................................................Chapter - Page
8.02 Commissioning ............................................................................................................. 8 - 9
8.03 Switching the machine on/off ........................................................................................ 8 - 9
8.04 Table top cutout .............................................................................................................8-10
9Preparation ................................................................................................................... 9 - 1
9.01 Inserting the needle ....................................................................................................... 9 -1
9.02 Winding the bobbin thread / adjusting the preliminary thread tension ............................. 9 - 2
9.03 Removing/Inserting the bobbin case .............................................................................. 9 - 3
9.04 Inserting the bobbin case / Adjusting the bobbin thread tension ..................................... 9 - 3
9.05 Threading the needle thread / adjusting the needle thread tension .................................. 9 - 4
10 Care and maintenance ................................................................................................10 - 1
10.01 Cleaning the machine ...................................................................................................10 - 1
10.02 Checking the oil level / filling in oil ................................................................................10 - 2
10.03 Adjusting the lubrication ...............................................................................................10 - 3
10.03.01 Lubricating the needle head parts .................................................................................10 - 3
10.03.02 Hook lubrication ............................................................................................................10 - 3
11 Adjustment ..................................................................................................................11 - 1
11.01 Notes on adjustment ....................................................................................................11 - 1
11.02 Tools, gauges and other accessories ............................................................................ 11 - 1
11.03 Abbreviations ................................................................................................................11 - 1
11.04 Adjusting the basic machine .....................................................................................11 - 2
11.04.01 Pre-adjusting the needle height .....................................................................................11 - 2
11.04.02 Setting the bottom feed dog at its neutral position ........................................................11 - 3
11.04.03 Bottom feed dog motion ..............................................................................................11 - 4
11.04.04 Bottom feed dog position ..............................................................................................11 - 5
11.04.05 Needle rise, hook clearance, needle height and bobbin case position finger ..................11 - 6
11.04.06 Thread check spring and thread regulator .....................................................................11 - 7
11.04.07 Knee lever stop .............................................................................................................11 - 8
11.04.08 Presser foot pressure ...................................................................................................11 - 9
11.05 Adjusting the thread trimmer –900/93 .......................................................................11 - 10
11.05.01 Adjusting the synchronizer ............................................................................................11 - 10
11.05.02 Adjusting the control cam .............................................................................................11 - 11
11.05.03 Position of the stationary knife ......................................................................................11 - 12
11.05.04 Needle thread tension release .......................................................................................11 - 13
11.06 Adjusting the thread wiper –909/93 ...............................................................................11 - 14
11.07 Adjusting the automatic presser foot lift –910/93 ..........................................................11 - 15
11.08 Adjusting the backtacking mechanism –911/93 ............................................................11 - 16
12 Wearing parts ............................................................................................................. 12 - 1

Safety
1 - 1
1 Safety
1.01 Directives
This machine is constructed in accordance with the European regulations contained in the
conformity and manufacturer’s declarations.
In addition to this Instruction Manual, also observe all generally accepted, statutory and other
regulations and legal requirements and all valid environmental protection regulations!
The regionally valid regulations of the social insurance society for occupational accidents or
other supervisory organizations are to be strictly adhered to!
1.02 General notes on safety
●This machine may only be operated by adequately trained operators and only after having
completely read and understood the Instruction Manual!
●All Notes on Safety and Instruction Manuals of the motor manufacturer are to be read
before operating the machine!
●The danger and safety instructions on the machine itself are to be followed!
●This machine may only be used for the purpose for which it is intended and may not be
operated without its safety devices. All safety regulations relevant to its operation are to be
adhered to.
●When exchanging sewing tools (e.g. needle, roller presser, needle plate and bobbin), when
threading the machine, when leaving the machine unattended and during maintenance
work, the machine is to be separated from the power supply by switching off the On/Off
switch or by removing the plug from the mains!
●Everyday maintenance work is only to be carried out by appropriately trained personnel!
●Repairs and special maintenance work may only be carried out by qualified service staff or
appropriately trained personnel!
●Work on electrical equipment may only be carried out by appropriately trained personnel!
●Work is not permitted on parts and equipment which are connected to the power supply!
The only exceptions to this rule are found in the regulations EN 50110.
●Modifications and alterations to the machine may only be carried out under observance of
all the relevant safety regulations!

Safety
1 - 2
●Only spare parts which have been approved by us are to be used for repairs! We
expressly point out that any replacement parts or accessories which are not supplied by
us have not been tested and approved by us. The installation and/or use of any such
products can lead to negative changes in the structural characteristics of the machine. We
are not liable for any damage which may be caused by non-original parts.
1.03 Safety symbols
Danger!
Points to be observed.
Danger of injury for operating and specialist personnel!
Caution
Do not operate without finger guard and safety devices.
Before threading, changing bobbin and needle, cleaning
etc. switch off main switch.
1.04 Important points for the user
●This Instruction Manual is an integral part of the machine and must be available to the
operating personnel at all times.
●The Instruction Manual must be read before operating the machine for the first time.
●The operating and specialist personnel is to be instructed as to the safety equipment of the
machine and regarding safe work methods.
●It is the duty of the user to only operate the machine in perfect running order.
●It is the obligation of the user to ensure that none of the safety mechanisms are removed
or deactivated.
●It is the obligation of the user to ensure that only authorized persons operate and work on
the machine.
Further information can be obtained from your PFAFF agent.
I

Safety
1 - 3
1.05 Operating and specialist personnel
1.05.01 Operating personnel
Operating personnel are persons responsible for the equipping, operating and cleaning of the
machine as well as for taking care of problems arising in the sewing area.
The operating personnel is required to observe the following points and must:
●always observe the Notes on Safety in the Instruction Manual!
●never use any working methods which could adversely affect the safety of the machine!
●not wear loose-fitting clothing or jewelery such as chains or rings!
●also ensure that only authorized persons have access to the potentially dangerous area
around the machine!
●always immediately report to the person responsible any changes in the machine which
may limit its safety!
1.05.02 Specialist personnel
Specialist personnel are persons with a specialist education in the fields of electrics,
electronics and mechanics. They are responsible for the lubrication, maintenance, repair and
adjustment of the machine.
The specialist personnel is obliged to observe the following points and must:
●always observe the Notes on Safety in the Instruction Manual!
●switch off the On/Off switch before carrying out adjustments or repairs, and ensure that it
cannot be switched on again unintentionally!
●wait until the luminous diode on the control box is no longer blinking or on before beginning
adjustment or repair work.
●never work on parts which are still connected to the power supply! Exceptions are
explained in the regulations EN 50110.
●replace the protective coverings and close the electrical control box afer all repairs or
maintenance work!

Safety
1 - 4
76-001
1.06 Danger
A working area of 1 meter is to be kept free both in front of and behind the
machine while it is in operation so that it is always easily accessible.
Never reach into the sewing area while sewing! Danger of injury by the needle!
Never leave objects on the table while adjusting the machine settings! Objects
can become trapped or be slung away! Danger of injury!
Fig. 1 - 01
Do not operate the machine without its take-up lever guard 1!
Danger of injury due to the motion of the take-up lever!
Do not operate the machine without the finger guard 2!
Danger of injury by the needle!
If an external motor is used, do not operate the machine without the belt
guards 3and 4!
Danger of injury by the drive belt!
3
1
4
2

Proper use
2 - 1
2 Proper use
The PFAFF 9063 is a single-needle, high-speed sewing machine with bottom feed.
The machine is used to manufacture lockstitch seams in the textile industry.
Any and all uses of this machine which have not been approved of by the
manufacturer are considered to be inappropriate! The manufacturer cannot be
held liable for any damage caused by the inappropriate use of the machine! The
appropriate use of the machine includes the observance of all operational,
adjustment, maintenance and repair measures required by the manufacturer!

Specifications
3 - 1
3 Specifications
3.01 PFAFF 9063 ▲
Stitch type: .................................................................................................. 301 (lockstitch)
Needle system: ........................................................................................................... DBx1
Needle size (Nm) in 1/100 mm: ............................................................................... 80 - 100
Handwheel eff. dia.: ................................................................................................. 65 mm
Clearance under roller presser: ............................................................................ 6 - 13 mm
Clearance width: .................................................................................................... 262 mm
Clearance height: .................................................................................................... 132 mm
Bedplate dimensions: .................................................................................... 476 x 178 mm
Sewing head dimensions:
Length: ....................................................................................................... approx. 520 mm
Width: ......................................................................................................... approx. 180 mm
Height (above table): ................................................................................... approx. 250 mm
Max. stitch length:................................................................................................... 5,0 mm
Max. speed: ...................................................................................................... 5000 spm ◆
Connection data:
Operating voltage: ................................................................ 190 - 240 V 50/60 Hz, 1 phase
Max. power consumption: ........................................................................................ 400 VA
Fuse protection: ............................................................................................. 1 x 16 A, inert
Working noise level:
Emission level at workplace at a speed of 4000 spm: ................................ LpA < 77 dB(A) ■
(Noise measurement in accordance with DIN 45 635-48-A-1, ISO 11204, ISO 3744, ISO 4871)
Net weight of sewing head: ............................................................................ approx. 24 kg
Gross weight of sewing head: ........................................................................ approx. 32 kg
▲Subject to alteration
◆Dependent on material, work operation and stitch length
■ KpA = 2,5 dB
3.02 Models and subclasses
Model B:.................................... for work on medium-weight materials (standard parts set)
Work aids:
Sub-class -900/93 ........................................................................................ Thread trimmer
Sub-class -909/93 ............................................................................................ Thread wiper
Sub-class -910/93 ........................................................................ Automatic presser foot lift
Sub-class -911/93 ......................................................................... Backtacking mechanism

Disposal of machine
4 - 1
4 Disposal of machine
●The proper disposal of the machine is the responsibility of the customer.
●The materials used in the machines are steel, aluminium, brass and various plastics.
The electrical equipment consists of plastics and copper.
●The machine is to be disposed of in accordance with the locally valid environmental
protection regulations. If necessary, a specialist is to be commissioned.
Special care is to be taken that parts soiled with lubricants are separately
disposed of in accordance with the locally valid pollution control regulations!

Transport, packaging and storage
5 - 1
5 Transport, packaging and storage
5.01 Transport to the customer’s premises
Within Germany, machines with a table are delivered without packaging. Machines without a
table (sewing head only) and machines which are to be exported are packaged.
5.02 Transport within the customer’s premises
The manufacturer bears no liability for transport within the customer’s premises or to the
individual locations of use. Make sure that the machines are always transported upright.
5.03 Disposal of the packaging
The packaging of these machines consists of paper, cardboard and VCE fiber. The proper
disposal of the packaging is the responsibility of the customer.
5.04 Storage
The machine can be stored for up to 6 months if not in use. During this time it should be
protected from dust and moisture.
For longer storage the individual parts of the machine, especially the moving parts, must be
protected from corrosion, e.g. by a film of oil.

Explanation of the symbols
6 - 1
6 Explanation of the symbols
In the following section of this Instruction Manual, certain tasks or important pieces of
information are accentuated by symbols.
The symbols used have the following meanings:
Note, information
Cleaning, care
Lubrication, greasing
Servicing, repairing, adjustment, maintenance
(only to be carried out by specialist personnel)

Controls
7 - 1
7
6
-
00
2
Fig. 7 - 01
7 Controls
7.01 On/Off switch
●Turn the machine on/off by pressing the
On/Off switch 1.
●With the buttons 2the parameters, such
as back-tacking function, raising the
presser foot, needle position at sewing
stop etc., can be pre-selected (also see
the Motor Instruction Manual).
2
7.02 Pedal
0= Neutral position
1= Sewing
2= Raise presser foot (on machines with
automatic presser foot lift –910/93)
3= Trim thread (on mahcines with thread
trimmer –900/93)
Fig. 7 - 02
0
1
23
1

Controls
7 - 2
76-050
7
6
-
00
4
7.03 Lever for raising the presser foot
●Raise the presser foot by turning lever 1
in the direction of the arrow.
Fig. 7 - 03
1
7.04 Knee lever
●By pressing the knee lever 1in the
direction of the arrow, the presser foot is
raised.
Fig. 7 - 04
1

Controls
7 - 3
76-006
7.05 Stitch length adjustment wheel
●Turn adjustment wheel 1to set the
required stitch length.
Fig. 7 - 05
7.06 Reverse stitch key
●For sewing in the reverse direction, key 1
must be pressed during sewing.
Fig. 7 - 06
1
76-005
1
1

Controls
7 - 4
76-003
76
-
056
7.07 Key on machine head
●By operating key 1during sewing, the
machines switches to reverse sewing
(only on machines with backtacking
mechanism –911/93).
Fig. 7 - 07
Fig. 7 - 08
7.08 Switch for thread wiper –909/93
●The thread wiper can be switched on or
off by pressing switch 1.
Position l: unit is switched on
Position 0: unit is switched off
1
1

Mounting and commissioning the machine
8 - 1
8 Mounting and commissioning the machine
The machine must only be mounted and commissioned by qualified personnel!
All relevant safety regulations are to be observed!
If the machine is delivered without a table, be sure that the frame and the table
top which you intend to use can hold the weight of the machine and the motor. It
must be ensured that the supporting structure is sufficiently sturdy, even during
sewing operations.
8.01 Mounting
The necessary electricity supply must be available at the machine’s location. Also, a stable
and horizontal surface as well as adequate lighting are required at the location.
Depending on the type of table, the method of packaging used may require that
the table top be lowered for transport. The following is a description of how to
adjust the height of the table top.
8.01.01 Adjusting the table-top height
●Loosen screws 1and 2and set the desired table-top height
●Tighten screws 1well.
●Adjust the pedal to the desired position and tighten screw 2.
Fig. 8 - 01
76
-
007
1
2
1

Mounting and commissioning the machine
8 - 2
76
-
063
8.01.02 Fitting the oil pan
Fig. 8 - 02
1
●Insert rubber pads 1and 2and fasten them with nails.
●Attach rubber pad 3with a suitable adhesive.
1
33
●Insert oil pan 4in the table top cutout.
●Place magnet 5in the corresponding recess of the oil pan.
Fig. 8 - 03
76-008
4
5
22

Mounting and commissioning the machine
8 - 3
76-009
8.01.03 Mounting the sewing head
●Insert both hinges 1in the corresponding
holes in the bedplate of the sewing head.
●Insert the sewing head with hinges 1into
the rear rubber pads.
Fig. 8 - 04
1
76
-
010
8.01.04 Mounting the balance wheel
●Fit balance wheel 1and fasten it with 2
screws 2.
The balance wheel must only be
mounted on machines without a
synchronizer.
Fig. 8 - 05
1
2
2
Table of contents
Other Pfaff Sewing Machine manuals

Pfaff
Pfaff 3119 User manual

Pfaff
Pfaff Creative Vision Technical manual

Pfaff
Pfaff 339 User manual

Pfaff
Pfaff smart 100s User manual

Pfaff
Pfaff Smarter User manual

Pfaff
Pfaff 2081 User manual

Pfaff
Pfaff 5704 User manual

Pfaff
Pfaff hobbylock 2.5 User manual

Pfaff
Pfaff 333-712/02 User manual

Pfaff
Pfaff Creative 2134 User manual

Pfaff
Pfaff varimatic 6091 User manual

Pfaff
Pfaff Automatic 332-260 User manual

Pfaff
Pfaff cvreative 3.0 User manual

Pfaff
Pfaff 3834-3/11 User manual

Pfaff
Pfaff performance 5.0 User manual

Pfaff
Pfaff Series 580 Owner's manual

Pfaff
Pfaff Automatic 260 User manual

Pfaff
Pfaff tiptronic 6270 User manual

Pfaff
Pfaff hobbymatic 904-1 User manual

Pfaff
Pfaff hobbymatic 917 User manual