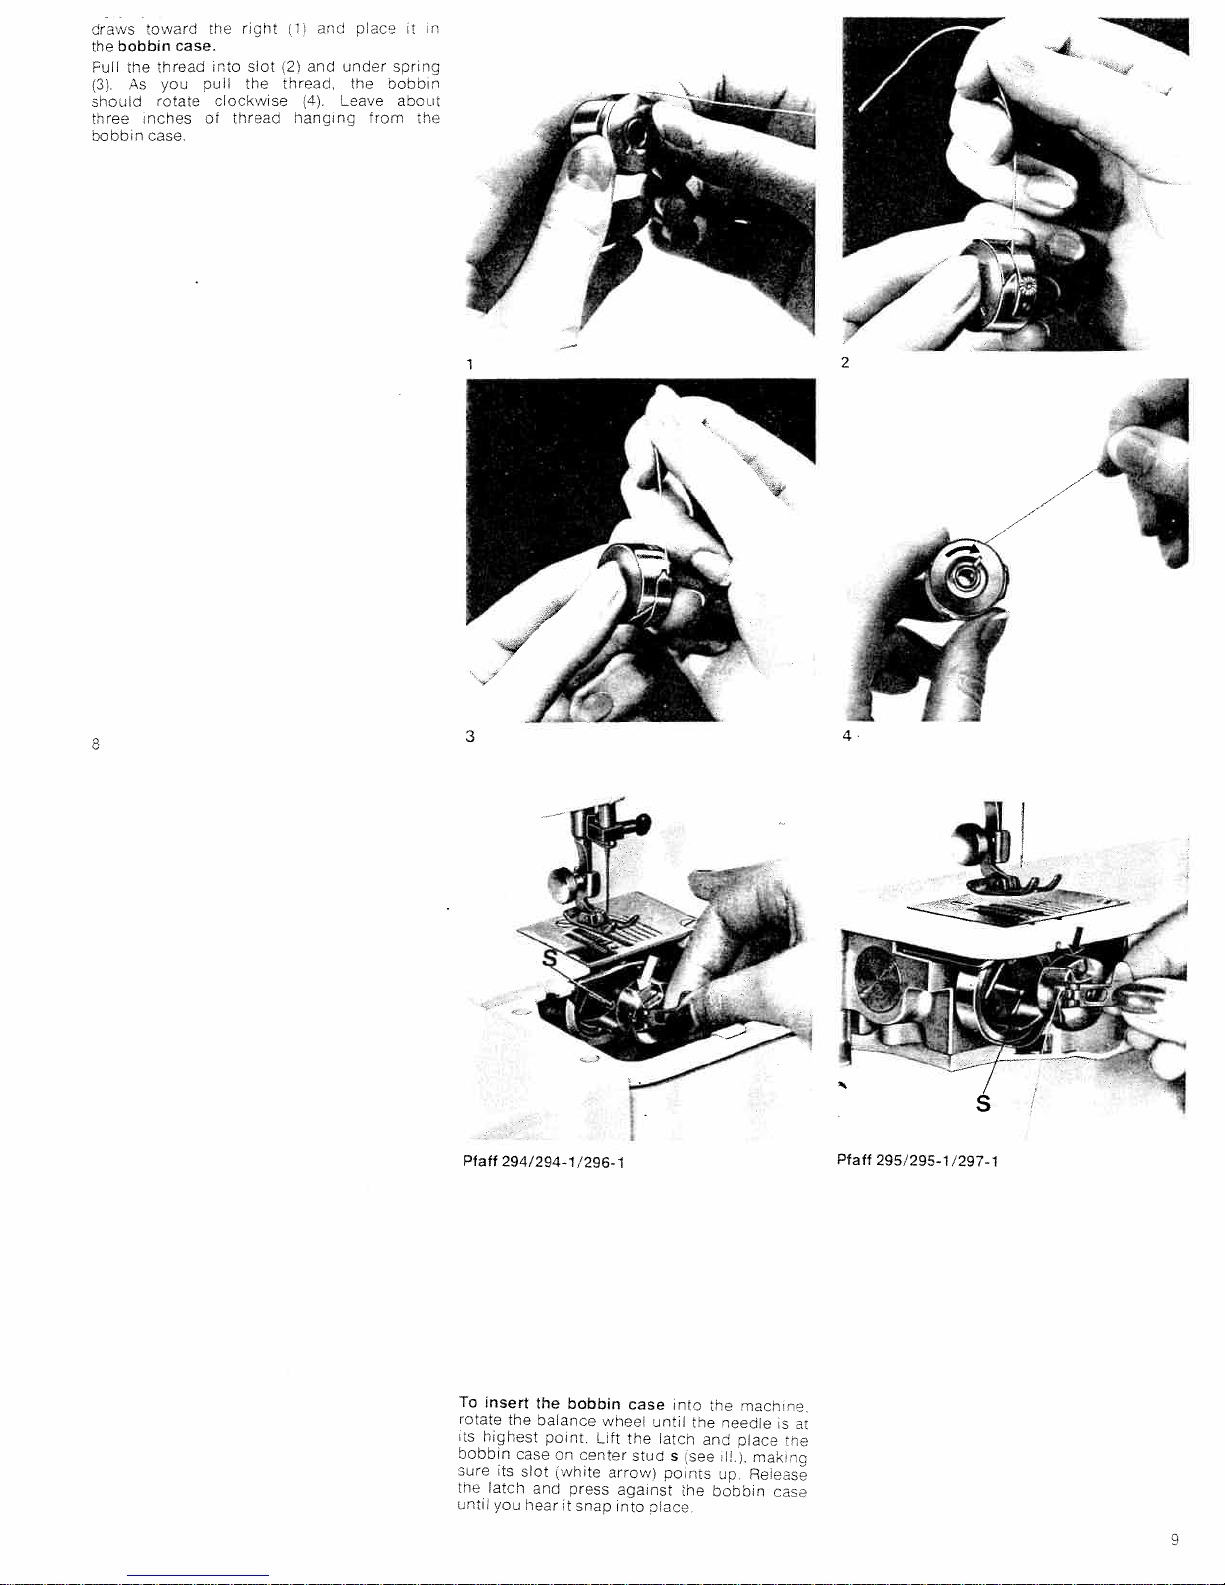
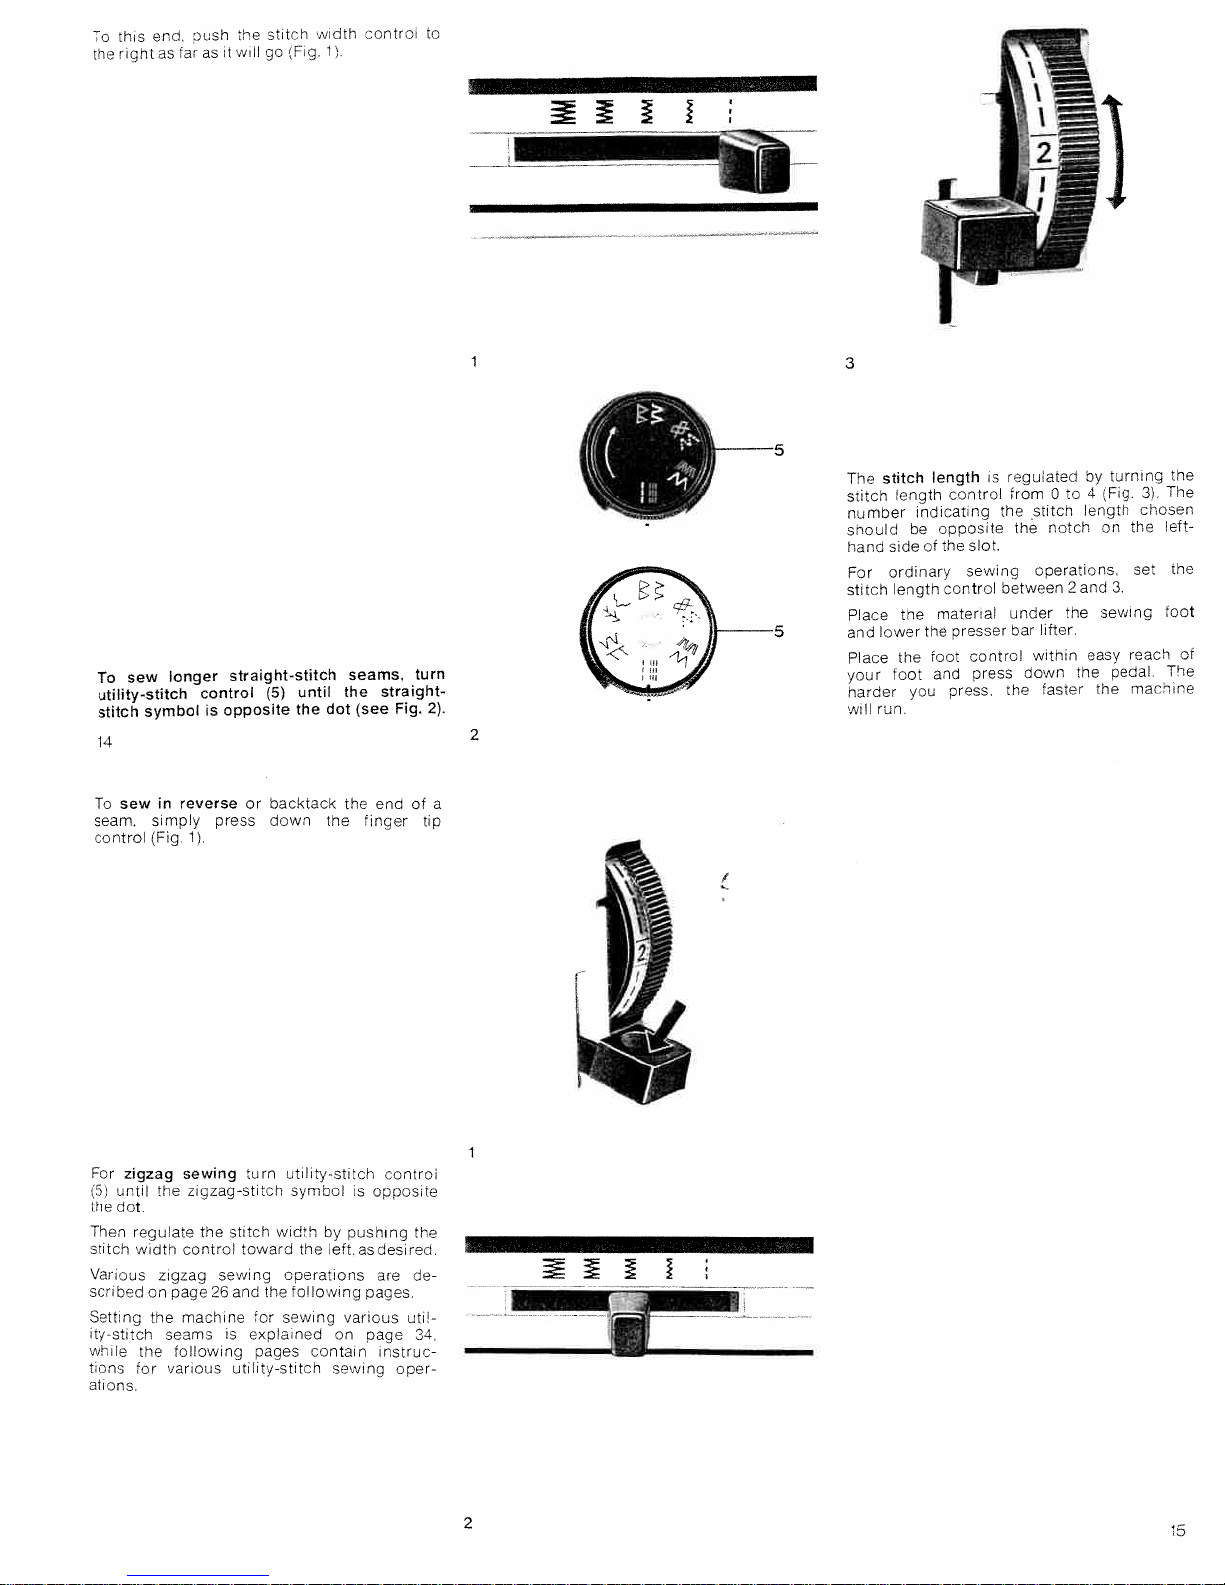
Pfaff 294 User manual
Other Pfaff Sewing Machine manuals

Pfaff
Pfaff 3734-2/01 User manual

Pfaff
Pfaff 3538-30/02 User manual

Pfaff
Pfaff expression 150 User manual

Pfaff
Pfaff 487 User manual

Pfaff
Pfaff Embroidery Mode-Stitch-Out User manual

Pfaff
Pfaff PowerLine 2231 Manual

Pfaff
Pfaff 1163 User manual

Pfaff
Pfaff Creative 2140 User manual

Pfaff
Pfaff 3334 User manual

Pfaff
Pfaff hobby GrandQuilter 1200 User manual

Pfaff
Pfaff hobbylock 4762 User manual

Pfaff
Pfaff 2481-980/30 PLUSLINE User manual

Pfaff
Pfaff 8330 User manual

Pfaff
Pfaff 1243-712/02 User manual

Pfaff
Pfaff creative 7560 User manual

Pfaff
Pfaff 2483-980/31 User manual

Pfaff
Pfaff Punching Machine Hobby 350p User manual

Pfaff
Pfaff Creative Vision Technical manual

Pfaff
Pfaff 1243 Guide

Pfaff
Pfaff Automatic 260 User manual