manuals.online logo
Brands
  1. Home
  2. •
  3. Brands
  4. •
  5. Pfaff
  6. •
  7. Sewing Machine
  8. •
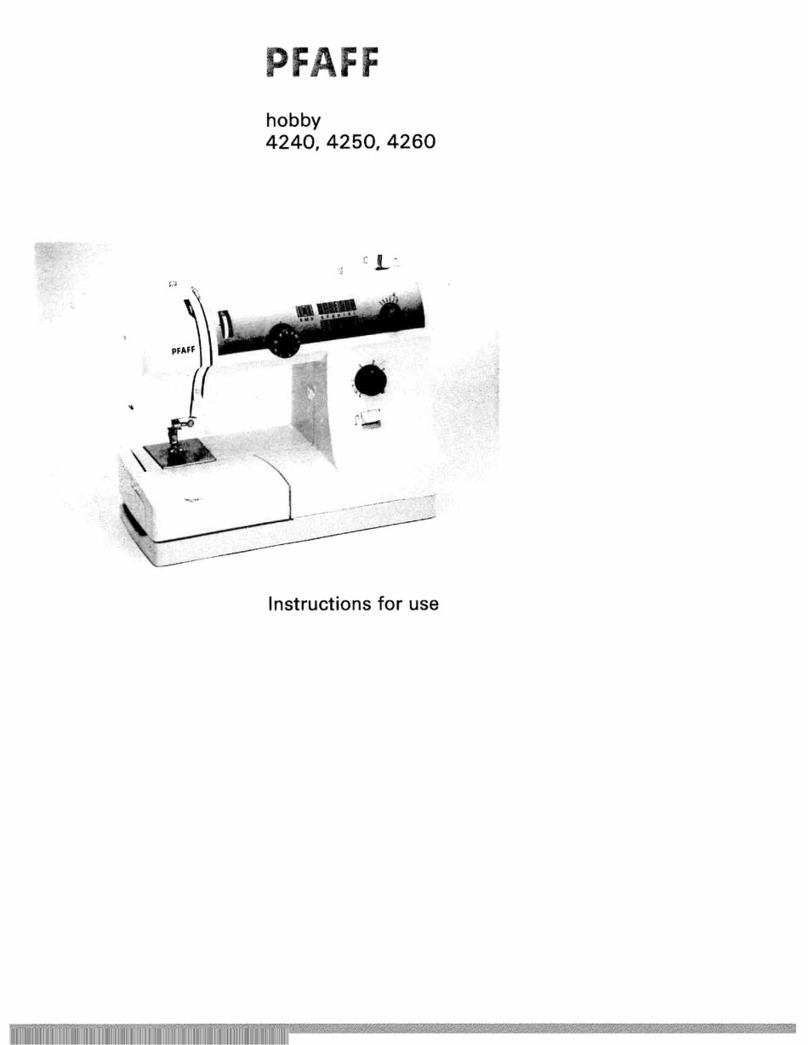
  9. Pfaff hobby 4240 User manual

Pfaff hobby 4240 User manual

Other manuals for hobby 4240

1

This manual suits for next models

2

Other Pfaff Sewing Machine manuals

Pfaff 3516-1/25 User manual

Pfaff

Pfaff 3516-1/25 User manual

Pfaff 360 User manual

Pfaff

Pfaff 360 User manual

Pfaff QUILT ARTIST II User manual

Pfaff

Pfaff QUILT ARTIST II User manual

Pfaff 8309-023 User manual

Pfaff

Pfaff 8309-023 User manual

Pfaff Creative Vision User manual

Pfaff

Pfaff Creative Vision User manual

Pfaff 3822-1/22 User manual

Pfaff

Pfaff 3822-1/22 User manual

Pfaff select 1540 User manual

Pfaff

Pfaff select 1540 User manual

Pfaff 2481-980/30 PLUSLINE User manual

Pfaff

Pfaff 2481-980/30 PLUSLINE User manual

Pfaff Automatic 260 User manual

Pfaff

Pfaff Automatic 260 User manual

Pfaff 16 User manual

Pfaff

Pfaff 16 User manual

Pfaff 5463 User manual

Pfaff

Pfaff 5463 User manual

Pfaff 3574-2/02 User manual

Pfaff

Pfaff 3574-2/02 User manual

Pfaff select 8.0 User manual

Pfaff

Pfaff select 8.0 User manual

Pfaff Synchromatic 1209 User manual

Pfaff

Pfaff Synchromatic 1209 User manual

Pfaff 939 User manual

Pfaff

Pfaff 939 User manual

Pfaff 6500 Series User manual

Pfaff

Pfaff 6500 Series User manual

Pfaff 939 User manual

Pfaff

Pfaff 939 User manual

Pfaff 5704 User manual

Pfaff

Pfaff 5704 User manual

Pfaff 421E1 User manual

Pfaff

Pfaff 421E1 User manual

Pfaff creative sensation pro II User manual

Pfaff

Pfaff creative sensation pro II User manual

Pfaff 487 User manual

Pfaff

Pfaff 487 User manual

Pfaff 1163 Guide

Pfaff

Pfaff 1163 Guide

Pfaff Creative 2134 User manual

Pfaff

Pfaff Creative 2134 User manual

Pfaff 1211 User manual

Pfaff

Pfaff 1211 User manual

Popular Sewing Machine manuals by other brands

Brother PE-180D Service manual

Brother

Brother PE-180D Service manual

Singer 569U1100 Operator's guide

Singer

Singer 569U1100 Operator's guide

ELNA 2002 instruction manual

ELNA

ELNA 2002 instruction manual

Siruba DL7200D-NM1 Instruction book

Siruba

Siruba DL7200D-NM1 Instruction book

Silver Viscount 9500e instruction manual

Silver

Silver Viscount 9500e instruction manual

JUKI DDL-9000A instruction manual

JUKI

JUKI DDL-9000A instruction manual

Reliable MSK-335B Specification sheet

Reliable

Reliable MSK-335B Specification sheet

Kenmore 385. 19000 owner's manual

Kenmore

Kenmore 385. 19000 owner's manual

Brother FD4-B271 instruction manual

Brother

Brother FD4-B271 instruction manual

Brother Computerized Embroidery Machine Operation manual

Brother

Brother Computerized Embroidery Machine Operation manual

Husqvarna Viking Designer SE user guide

Husqvarna Viking

Husqvarna Viking Designer SE user guide

Singer 645 owner's manual

Singer

Singer 645 owner's manual

Riccar RL634DE user manual

Riccar

Riccar RL634DE user manual

ZOJE ZJ9800 Operation manual

ZOJE

ZOJE ZJ9800 Operation manual

Siruba C007JP Instruction book

Siruba

Siruba C007JP Instruction book

IKEA SY user guide

IKEA

IKEA SY user guide

Singer 15-91 Adjusters manual

Singer

Singer 15-91 Adjusters manual

Brother BB370 Quick setup guide

Brother

Brother BB370 Quick setup guide

manuals.online logo
manuals.online logoBrands
  • About & Mission
  • Contact us
  • Privacy Policy
  • Terms and Conditions

Copyright 2025 Manuals.Online. All Rights Reserved.

F
hobby
4240,
4250,
4260
-4
Instructions
for
use
All manuals and user guides at all-guides.com
all-guides.com
For
easier
understanding
of
this
instruction manual
please
fold
this
or
the
last
page
out
when
reading.
Safety
rules
For
the
United
Kingdom
only
The
leads
must
definitely
not
be
connected
to
the
safety
load
terminal
I
nor
to
a
plug
with
three
pins.
The
wires
in
the
mains
lead
are
coloured
according
to
the
following
code:
Blue:
Neutral
Brown:
Live
As
the
colours
of
the
wires
in
the
mains
lead
of
this appliance
may
not
correspond
with
the
colour coding
of
the
terminals
in
your
plug,
proceed
as
follows:
The
wire
which
is
coloured
blue
must
be
con
nected
to the
terminal
which
is
marked
with
the
letter
N
or
coloured
black.
The
wire which
is
coloured
brown
must
be
connected
to
the
terminal
which
is
marked
with
the
letter
L
or
coloured
red.
Cut-off
mains plugs
are
definitely
not
to
be
used,
but
disposed
of
immediately.
Defective
mains
leads
must
be
replaced
completely.
Only
3
A
spare
fuses
must
be
used as
approved
by
ASTA
according
to
BS
1362
and
the
fuse
cover
must
be
marked
3
A
or
with
the
corresponding
colour
code.
The plug
must
never
be
used
without
fuse
cover.
Spare
fuse
covers
are
available
from
electrical
suppliers
or
the
PFAFF
agencies.
Please
also
observe
the
general
safety
notes
on
page
2.
You
will
find
the
contents
on
page
4
and
5
All manuals and user guides at all-guides.com
Important
safety
instructions
For
the
United
States
and
Canada
only
When
you
use
an
electrical
appliance, basic
safety
precauti
ons should
always
be
adhered
to
as
follows:
Read
all
instruc
tions
before
using
this
sewing machine.
DANGER
To
reduce
the
risk
of
electric shock:
1.
The
sewing
machine should
never be
left
unattended
when
plugged
in.
Always
unplug
this
appliance
from
the
electric outlet immediately
after
using
and
before
cleaning
it.
2.
Always
unplug
before relamping.
Replace bulb
with
same
type rated
1
5
Watts.
3.
Do
not
reach
for
a
sewing
machine
that
has
fallen
into
water.
Unplug
immediately.
4.
Do
not
place
or
store
a
sewing
machine
where
it
can
fall
or be
pulled
into
a
tub
or
sink.
Do
not
place
in
or
drop
into
water
or
other
liquid.
VVARNING
To
reduce
the
risk
of
burns,
fire,
electric
shock,
or
injury
to
persons:
1.
Do
not
allow
to
be
used as
a
toy.
Close
attention
Is
necessary
when
this
sewing
machine
is
used
by
or
near
children.
2.
Use
this
sewing
machine
only
for
its
intended
use
as
described
in
this
manual.
Use
only
attachments
recommended
by
the
manufacturer
as
contained
in
this
manual.
3.
Never
operate
this
sewing
machine
if
it
has
a
damaged
cord
or
plug,
if
it
is
not working
pro
perly,
if
it
has
been
dropped
or
damaged,
or
dropped
into
water.
Return
the
appliance
to
the
nearest
authorized
dealer
or
service
center
for
examination,
repair,
electrical or
mechanical
adjustment.
4, Never
operate
the
sewing
machine
with
any
air
openings
blocked.
Keep
ventilation
openings
of
the
sewing machine
and
foot control
free
from
the
accumulation
of
lint,
dust,
and
loose
cloth.
5.
Never
drop
or insert
any
object
into
any
opening.
6.
Do
not
use outdoors.
7.
Do
not
operate
where
aerosol
(spray)
products
are
being
used
or
where
oxygen
is
being
administered.
8.
To
disconnect,
turn
all
controls to
off
(“0”)
position,
then
remove
plug from
outlet.
9.
Never
operate
on
a
soft
surface such as
a
bed
or
couch
where
the
air
openings
may
be
blocked.
10.
Do
not
unplug
by
pulling
on
cord.
To
unplug,
grasp the
plug,
not
the
cord.
11.
Keep
fingers
away
from
all
moving
parts.
Special
care
is
required
around
the
sewing
machine
needle.
12.
Always
use
the
proper
needle
plate.
The
wrong plate can
cause the
needle to
break.
1
3.
Do
not
use bent
or
blunt
needles.
Use
needles recommended
by
the
manufacturer
only.
14.
Do
not
pull
or
push
fabric
while
stitching.
It
may
deflect
the
needle,
causing
it
to
break.
1
5.
Switch
the
sewing
machine
off
(“0”)
when
making any
adjustments
in
the
needle
area, such
as
threading
needle,
changing needle,
threading
bobbin,
or
changing
presser
foot, etc.
16.
Always
unplug
sewing
machine
from
the
electric
outlet
when
removing
covers, lubricating,
or
when
making
any
other
user
servicing
adjustments
mentioned
in
the
instruction
manual.
Please also
observe
the
general
safety notes
on
page
2.
Keep
these
instructions
in
a
safe
place
This
sewing machine
is
designed
and
manufactured
for
HOUSEHOLD
use
only.
All manuals and user guides at all-guides.com
PFAFF
20
H
10
19
11
18
—d
17 12
16
13
15
____________
14
—
29
232425
26------------
All manuals and user guides at all-guides.com
Parts
of
the
sewing
machine
hobby
4260
1
Bobbin
winder
tension
2
Thread guide
3
Needle
thread
tension
4
Carrying
handle
5
Bobbin
pins
6
Bobbin
winder
7
Stitch-width
adjustment
dial
8
Hand
wheel
9
Hand
wheel
release
disc
10
Stitch-length
adjustment
dial
11
Reverse
key
1
2
Connection
bushing
1
3
On/off
switch
14
Baseplate
1
5
Detachable
work
support
with
accessory
box
1
6
Needle
plate
1
7
Presser
foot
holder
with
presser
foot
1
8
Thread
guide
1
9
Thread guide
20
Threading
slots
21
Take-up
lever
22
Needle
holder
with
retaining
screw
23
Presser
foot
lifter
24
Stitch
pattern
adjustment
knob
25
Stitch
pattern chart
26
Free-arm
cover
(enclosing
sewing
hook)
27
Feed
dog
28
Needle
bar
29
Sewing
lamp
30
Thread
trimmer
All manuals and user guides at all-guides.com
Notes
on
safety
for
domestic
sewing
machines
according
to
DIN
57
700,
Section
28
or
IEC
335, Section
28.
1.
The
user
must
exercise
adequate
caution
with
regard to
the
up
and down
moving
of
the
needle
and
constantly observe
the
sewing
area
during
work.
2.
When
leaving
the
machine,
during
maintenance
work
or
when
changing
mechanical
parts
or
accessories,
always
disconnect
the
machine
from
the
mains
by
pulling
out
the
mains
plug.
3.
The
maximum
permissible
wattage
for
the
sewing
lamp
is
15
Watts.
4.
The
tension
of
the
drive
belt
must
only
be
adjusted
by
a
Pfafl
mechanic.
5.
The
machine must
be
put
into
operation
according
to
the
indications
on
the
specification
plate.
6.
Do
not
place
any
objects
in
openings
on
the
machine.
7.
Do
not
use
the
sewing
machine
if:
—
there
is
visible
damage,
—
its
function
is
disturbed,
—
it
is
wet,
e.g. with
condensation.
8.
Do
not
pull
the
mains
plug
out
of
the
socket
by
its
cord.
9.
If
this appliance
is
used
for
another
pur
pose
than
intended
or
if
it
is
wrongly
ope
rated,
we
will
not
accept
any
liability
for
any
damage
caused.
10.
To
avoid
the
risk
of
electric
shock,
do
not
open
the
machine. There are
no
parts
inside
the
machine
which
the
user
can
repair.
This
is
solely
the
responsibility
of
our qualified
service
staff.
11.
Be
sure
to
use
only original
PFAFF
parts.
Environment
The
recommended
environment
is:
Ambient
temperature
100
C
to
40°
C,
Humidity
20%
to
80%.
This
sewing
machine
is
a
high-quality
electro
nic-mechanical
appliance;
it
is
a
machine
for
supervised
use
in
the
home.
It
should
be
ope
rated
in
such
a
way
that
it
is
not
subjected
to:
dust, severe
dampness,
direct
sunlight,
sta
tic
electricity,
heat-producing objects,
cor
rosive
chemicals
or
liquids.
For
ventilation
purposes
the
machine
must
be
used
on
a
free surface,
which
is
both
firm
and
even.
Treatment
Always
protect
the
machine
against damage
which night
occur
by
hitting
or
dropping
it.
Cleaning
Housing:
To
clean
the
housing,
use
a
dry,
clean
and
soft
cloth
which
is
free
of
fluff.
To
remove
any
stubborn
dirt,
use
a
soft
cloth
with
alcohol
or
paraffin.
Please
Note!
Do
not
use
any
insecticides
or
chemical
pro
ducts
such
as
petrol
(gas)
or
thin
chemicals
for
cleaning
the
housing.
Notes
on
safety
2
All manuals and user guides at all-guides.com

all-guides.com
Effective
and
modern
sewing
Congratulations!
You
have
purchased
a
product
of
the
highest
quality
which
offers
you
unique
benefits.
Your
new
sewing
machine
can
deal with
almost
any
material and
will
sew
through
thick
and
thin
for
you.
The
design
and
technology
used
on
this
machine
are
state-of-the-art
and
you
will
find
that
these
instructions are
just
as
easy
to
use
as
your
PFAFF
sewing machine
itself.
If
you
take
the
time
to
read
through
the
instruction
booklet
carefully,
nothing
can
go
wrong.
It’s
worth
it!
Because
this
is
the
only
way
to
really
find
out
about
all
of
the
options
your
machine has
to
offer
and
how
to make
the
most
of
them.
If
you
should
have
any
questions
—
No
problem!
Your
PFAFF
specialist
is
always
happy
to
help.
So
go
for
it!
And
have
fun
making
your
fashion
ideas
a
reality.
3
All manuals and user guides at all-guides.com
Contents
Accessories
and
needles.
Accessory
compartment
.
Adjusting
stretch
stitches
Attaching
buttons
Bias
tape
binder
Blind-stitch
foot
Bobbin
case
Bobbin
thread
tension
.
Bobbin
winding
Buttonhole
Changing
the
needle
Changing
the
presser
foot
Cleaning
and
oiling
Closed
overlock
stitch
Control
panel
Control
pedal
Cording
foot
Covering
the
feed
dog
.
Darning
Darning
plate
Darning
tears
Detachable
work
support
Drawing up
the
bobbin
thread
Edge
guide
Elastic blind
stitch
Elastic
stitch
Elastic
stitches
Electrical
connection
Foot
control
Free
arm
Gathering
with
the
elastic
thread
Gathering
with
the straight
stitch
General
sewing
aids
Handwheel
release
disc
..
Hem
with
the
twin
needle
.
Hem-stitching
Honeycomb
stitch
Knit-edge
foot
Lace
Lap
feller
Left
needle-position
Light
bulb
Linen
buttonhole
Linen
buttonhole
with
gimp
thread
Lubrication
Mounting
the
bobbin
Multi-stitch
gathering
attachment.
Needle
chart
53—60
11
25
31
56
29,30
14,15
15
12,13
36,37
20
19
62,63
34
21
10
57
20
42,43
20
43
11
18
28
30
33
30,35
10
10
11
41
40
28
12,13
38
52
33
58
47
57
29
63
37
37
62
13
56
59,60
4
All manuals and user guides at all-guides.com
Needle position
29
Needle
thread
tension
20, 28
Non-elastic
stitches
39
Notes
on
safety
1
On/off switch
10
Open overlock
stitch
34
Overlock
stitches 34
Patches
42
Patchwork
quilt
51
Practical
sewing 27
—
48
Presser feet
(special
accessories)
55
Presser feet (standard
accessories)
54
Presser
foot
lifter
18
Quilt
and
patchwork
foot
58
Removing
the
needle plate
63
Reverse
sewing
22
Richelieu
50
Serging
with
the
blind
stitch foot 29, 30,
34
Serging
with
the
zigzag
stitch
29
Servicing and
trouble
shooting
61
—
64
Setting
the
utility
stitches
24
Sewing
lamp
63
Sewing
on
zippers
44,
45
Shell
edging
48
Smocking
39
Special
accessory
chart
55
Spring
stitch
35
Stabilizing
46
Stitch
chart
6
—
8
Stitch density
22
Stitch
length
adjustment
button
23
Stitch
width
adjustment
button
23
Straight
stitch
29
Stretch
triple
straight
stitch
32
Stretch
triple
zigzag
stitch
32
Thread
trimmer
18
Threading
the
machine
17
Threading
the
needle
thread
16
Topstitching
28
Trouble
shooting
64
Trouble
shooting
64
Twin
needle
23,
38
Unlocking
the
hook
62
Utility
stitch
chart
6
—
8
Zigzag
stitch
29
5
All manuals and user guides at all-guides.com
hobby
4260
-
Stitch
chart
A
,,
II)
///
/\/
-W
I’
C
—
(_
_j
—
-
\/\
‘,,\\
/
I—,j
I
..
Ill
.‘,,-
i\i
‘
FE
I
“S
N
III
\/\
—i,
l
--
V
“-
\
//7
/\/
-‘
‘Si
i
.,
I
‘-..
.-—
_....
III
-*..
\i\
“‘\
“,
-
For
these
programs the
stitch
length
can
be
set
anywhere
between
0
and
4
mm
with
the
aid
of
the stitch-length
adjustment
button
(10).
Program Name
B/AC/D
Buttonhole
E
Straight
stitch
F
Zigzag
stitch
G
Elasticstitch
H
Elastic
blind
stitch
I
Decorativ
elastic
stitch
Application
Standard
buttonhole
for
e.g.
blouses
and
bed
linen
For
all
straight
stitch
and
lockstitch
work
up
to
4
mm
For
serging
and
appliqué
For
stitching
on
elastic
band,
darning
tears
and
patches
For
invisible
hem
attachment
and
simultaneous
serging
For
overstitching
two
touching
fabric
layers
K
Greek
stitch
A
classical
decorative stitch
e.g.
for
borders
and
towels
L
Shell-edging
stitch
For
decorative
hems
on fine
materials,
e.
g.
linen
flfl
E
Stretch
triple
For
stretch
seams,
e.
g.
crotch
seams
on
straight
stitch
sport
and
workwear
JI
F
Stretch
triple
For
attaching
elastic
tape
on
zigzag
stitch elastic
materials
till
G
Honeycomb
stitch
For
sewing
on
elastic
threads,
overlocking
towelling
and
for
decorative
hem
seams
Ill!
H
Florentine
stitch
A
decorative
stretch
stitch
fl
I
Spring
stitch
For
overstitching
two
touching
fabric
layers.
Also
for
stretch
fabrics.
jflj
K
Closed
A
closing
and
serging
seam
for
fraying
overlock
stitch
materials
Iii
L
Open
A
closing and
serging
seam
for
stronger,
overlock
stitch
non-fraying
materials
6
All manuals and user guides at all-guides.com