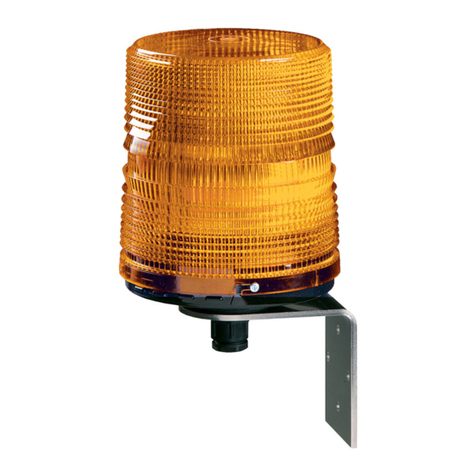
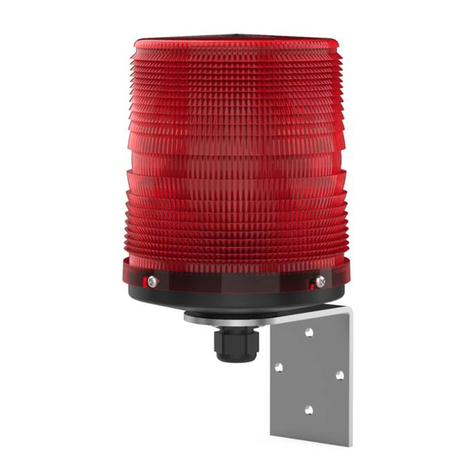
Pfannenberg PMF 2030 User manual

1085 501 868 11516-203
Betriebs- und Montageanleitung für PMF 2030
Installation and operating instructions for PMF 2030
Notice de montage et d’utilisation - PMF 2030
Rundum-Blitzleuchten sind optische Gefahrenmelder für Arbeitsstätten. Es können optische Warn- und Notsignale bis zu einer
maximalen Einzelblitzenergie von 30 Joule erzeugt werden.
Durch eine als Fresnell-Linse ausgebildete Haube und einer speziellen XENON-Blitzröhre wird eine gute Bündelung des Lichtes
in horizontaler Ebene erreicht. Dies ermöglicht eine sehr gute Erkennbarkeit über große Entfernungen, bei kleiner
Leistungsaufnahme.
Achtung: Um eine Beeinträchtigung des Sehvermögens zu verhindern, ist der dauernde, direkte Blick in die aktivierte Leuchte zu
vermeiden.
Die Rundum-Blitzleuchten sind für den Einsatz sowohl in Gebäuden als auch im Freien konzipiert. Schlagregen und Betauung
führen bei den Geräten zu keiner Schädigung. Innere Betauung ist zulässig.
All-round flashlights are optical alarms for places of work. Optical alarm and emergency signals can be generated with a maximum
single-flash energy of 30 Joules. A favourable bundling of the light on an horizontal level is achieved by a Fresnel lens-shaped
hood and a special XENON flash tube. This allows for a very good recognisibility over large distances with a small power input.
Attention: In order to avoid damage to eyesight, please refrain from looking at the flashing light for any length of time when it is
in operation.
The all-round flashlights are designed for use inside buildings and outside. Heavy rain and dew precipitation do not damage the
equipment in any way. Condensation is allowed on the inside.
Les feux tournant à lampe à éclats sont des avertisseurs de danger optiques pour postes de travail. Ils produisent des signaux
optiques d’avertissement et de secours jusqu’à une énergie d’éclat lumineux maximale de 30 joules. Une lanterne conçue sous
la forme d’une lentille en échelon et un tube à éclat lumineux spécial XENON permettent d’obtenir une bonne focalisation de la
lumière au niveau horizontal. Ceci permet une bonne perceptibilité à de grandes distances pour une faible puissance consommée.
Attention: Pour empêcher des lésions des yeux, il faut éviter de fixer longuement la lampe allumée.
Les feux tournants à lampe à éclats sont conçus pour être utilisés aussi bien dans les bâtiments qu’à l’extérieur. La pluie battante
et la rosée ne peuvent pas endommagées les appareils. La rosée interne est permise.
1. Technische Daten / Technical Data / Caractéristique techniques
Elektrische Daten / Electrical Data / Caractéristiques électriques
Nennspannung Nom. voltage Tension nominale 230V AC
Funktionsbereich Voltage range Domain de tension de service 195V .. 253V – 50/60Hz
Blitzenergie/
Flash energy/
Energie de l'éclat
Blitzfrequenz/
Flash frequency/
Fréquence de l'éclat
1 Hz 450 mA
0,75Hz 380 mA
0,5 Hz 310 mA
30J
0,1 Hz 150 mA
1 Hz 400 mA
0,75Hz 340 mA
0,5 Hz 290 mA
Nennstromaufnahme
Nom. current consumption [IRMS]
Courant nominale
20J
0,1 Hz 140 mA
Einschaltdauer Duty cycle: Durée de fonctionnement 100 %
Betriebsdauer Service life Durée de service
Nach 8.000.000 Blitzen noch 70 % Lichtemission!
after 8 million flashes still 70% light emission
Après 8.000.000 d’élairs , encore environ 70% de luminosité
Mechanische Daten / Mechanical Data / Caractéristiques mécaniques
Schutzart Degree of Indice de protection
Protection
IP 55 (EN 60529)
Schutzklasse Protection class Type de protection II
Kabeleinführung Cable entry Entrée de câble M20 x 1,5
(Winkelmontage/ Bracket mounting/ Montage angulaire)
Anschlußklemmen Terminals Bornes de raccord
Federzugbügel/ Cage Clamp/ Etrier à ressort
0,5 - 1,5 mm² feindrähtig/ fine-wire/ à fil fin - H05(07)V-K
0,5 - 2,5 mm² eindrähtig/ single-wire/ à un fil - H05(07)V-U
mit Aderendhülsen/ with end-splices/ avec des embouts
DIN 46228/1, 0,5 - 1,5 mm²
Gewicht Weight Poids Winkelmontage
Bracket mounting
Montage angulaire 1,25kg Direktmontage
Direct mounting
Montage direct 0,75kg
Material des Material Matériau du boîtier
Gehäuses of housing
Winkelmontage
Bracket mounting
Montage angulaire PC
Direktmontage
Direct mounting
Montage direct ABS
Material der Haube Material of dome Matière de la calotte Polycarbonat (PC)
Klimatische Daten / Climatic Data / Caractéristiques climatiques
Betriebstemperatur Operating temp. Température de service - 30 °C .... + 55 °C
Lagertemperatur Storage temp. Température de stockage - 40 °C .... + 70°C
Rel. Luftfeuchte rel. Humidity Humidité relative 90%

2085 501 86811516-203
3. Inbetriebnahme
Nach Entfernen der seitlichen Sicherungsschrauben kann das Gehäuse bei beiden Montagearten durch Abnehmen der Haube
geöffnet werden. Die Anschlußklemme X1 und der Betriebsartenumschalter S1 sind damit frei zugänglich. Vor dem Öffnen des
Gehäuses sind folgende Sicherheitshinweise zu beachten:
Der elektrische Anschluß darf nur von hierfür autorisierten Personen durchgeführt werden!
Vor dem Öffnen des Gehäuses ist sicherzustellen, daß die Leuchte nicht unter Spannung steht und mindestens 10 Minuten
spannungsfrei geschaltet ist!
Achtung, falsche Betriebsspannungen können zu Störungen oder zur Zerstörung des Gerätes führen!
Nach Abschluß der Arbeiten und vor dem Einschalten der Leuchte ist das Gehäuse zu verschließen.
3. Taking into operation
After the removal of the lateral safety screws, the casing can be opened in both assembly variations by removing the lens. The
connection clamp X1 and the operating mode switch S1 are therefore freely accessible. The following safety references are to be
given consideration before opening the casing:
The electrical connection must only be carried out by such persons as are authorised to do so! It must be ensured before
opening the casing that the light is not under voltage and has been voltage-free for at least 10 minutes!
Attention, false operating voltages may lead to malfunctions or the destruction of the device!
The casing must be closed after the completion of the work and before switching on the light.
S1
1 2 3 4
Blitzenergie/
Flash energy/
Energie de l'éclat
Blitzfrequenz/
Flash frequency/
Fréquence de l'éclat
OFF OFF OFF OFF 1 Hz
ON OFF OFF OFF 0,75Hz
OFF ON OFF OFF 0,5 Hz
ON ON OFF OFF
30J
0,1 Hz
OFF OFF ON OFF 1 Hz
ON OFF ON OFF 0,75Hz
OFF ON ON OFF 0,5 Hz
ON ON ON OFF
20J
0,1 Hz
X1 S1
b
U
230V AC
Branchement du câble
Wire connection
Anschluss des Kabels
Vertikaldiagramm
Vertical diagram
Diagramme vertical
Horizontaldiagramm
Horizontal diagram
Diagramme horizontale
0
20
40
60
80
100
120
0°
10 20 30
40
50
60
70
80
90
100
110
120
130
140
150
160
170
180
190
200
210
220
230
240
250
260
270
280
290
300
310
320
330340
rel. intensity
%
0
20
40
60
80
100
120
-20 -10 0 10 20
Angular Displacement [deg.]
rel. Intensity %
clear
0°
3. Mise en service
Après avoir enlevé les vis de sécurité latérales, le boîtier peut être ouvert, pour les deux types
de montage, en retirant la lanterne. La borne de branchement X1 et le commutateur de mode
d’exploitation S1 sont ainsi librement accessibles. Avant l’ouverture du boîtier, les consignes
de sécurité suivantes doivent être respectées:
Le branchement électrique ne doit être exécuté que par des personnes autorisées
pour cela!
Avant l’ouverture du boîtier, il faut s’assurer que la lampe n’est pas sous tension et
qu’elle est sans tension depuis au moins 10 minutes!
Attention, les tensions de service incorrectes peuvent conduire à des perturbations
ou destruction de l’appareil!
Il faut refermer le boîtier à la fin des travaux, et avant la
remise en circuit de la lampe.
Lichttechnische Daten / Optical Data / Caractéristiques optiques
Klar/ Clear/
Transparent
Orange/
Amber
Orange
Rot/ Red/
Rouge
Grün/ Green/
Vert
Blau Blue/
bleu
Lichtintensität Light intensity Intensité
[cd] – (Blondel + Rey) 1500 1050 250 180 650

3085 501 868 11516-203
90
50
75
4
M20x1,5
Ø6.5
50
45
170.5
Die Befestigungsbohrungen können dem Bohrbild entnommen werden.
Die Leitungsdurchführung erfolgt über eine Kabelverschraubung M20x1,5,
geeignet für Leitungsdurchmesser von 6,5 mm - 13,5 mm.
The attachment drill holes can be seen in the drill diagram. There is a
M20x1,5 screw joint for the cable fittings, suitable for cable diameters of
between 6,5 and 13,5 mm.
On trouvera les perçages de fixation sur la configuration de perçage. Le
passage de la ligne a lieu par un adaptateur vissable pour câble M20x1,5
approprié pour le diamètre de ligne de 6,5 mm - 13,5 mm.
Montage / Assembly / Montage
Für die Befestigung der Leuchte (Direktmontage) stehen zwei unterschiedliche Bohrbilder zur Verfügung. Für die Befestigung nach
Bohrbild 1 sind Gewindeeinsätze M5 x 8 am Boden der Leuchte eingelassen. Bohrbild 2 ermöglicht die Befestigung mit
4 durchgehenden Schrauben oder ähnlichen von oben. Die Bohrung für die Leitungsdurchführung ist dieser anzupassen. Als
Bohrschablone kann die beigelegte Gummidichtung verwendet werden. Achten Sie bei der Montage auf ebenen Untergrund
(Dichtung!).
Two different drill diagrams are available for the fitting of the light (direct assembly). Thread inserts M5 x 8 have been fitted to the
base of the light for attachment according to drill diagram 1. Drill diagram 2 allows for the attachment with 4 through screws or such
like from above. The drill hole for the cable fittings must be adjusted to suit this. The attached rubber seal can be used as a template
for drilling.
Please ensure that the assembly takes place on a level base (seal!).
Vous disposez de deux configurations de perçage différentes pour la fixation de la lampe (montage direct). Pour la fixation selon la
configuration de perçage 1, les inserts de filetage M8 x 5 sont encastrés dans le fond de la lampe. La configuration de perçage 2
permet la fixation avec 4 vis traversantes, ou similaires, d'en haut. Le perçage pour le passage de la ligne doit être adapté à celui-
ci. On peut utiliser le joint en caoutchouc ci-joint comme gabarit de perçage. Veillez lors du montage à avoir un support plan (joint!).
Ø177
45
185
8
Ø130
Ø5.5
163
120°
120°
Ø5.5
Ø130
Configuration de perçage 2
Ø5.5
Ø10
Drill diagram 1 (f. thread insert M5)
Bohrbild 1 (f. Gewindeeinsatz M5)
Drill diagram 2
Bohrbild 2
a) Direktmontage / Direct assembly / Montage direct
b) Winkelmontage / Angle assembly / Montage angulaire

4085 501 86811516-203
Pfannenberg GmbH
Werner-Witt-Str.1
D-21035 Hamburg
Tel. 0 40/7 34 12-0 .Fax: 0 40/7 34 12-101 085 501 868
http://www.pfannenberg.com 04/2007
4. Instandhaltung
Pflege
Das Kunststoffgehäuse nur mit Wasser und einem Handspülmittel reinigen. Keine Reinigungsmittel die kratzen oder scheuern, kein
Benzin und keine anderen Lösungsmittel verwenden.
Wartung
Die Leuchte ist wartungsfrei. Reparaturen sind grundsätzlich im Herstellerwerk auszuführen. Der Austausch von Originalersatzteilen
kann durch entsprechend qualifizierte Personen durchgeführt werden.
4. Maintenance
Care
The plastic casing must only be washed using water and a detergent which does not damage the hands. Do not use any detergents
which scratch or scrub, and do not use petrol or other solvents.
Maintenance
The light is maintenance-free. Repairs may only be carried out in the manufacturing plant. The exchange of original spare parts can
be implemented by persons with adequate suitable qualifications.
4. Entretien
Soins
Le boîtier en plastique ne doit être nettoyé qu'avec de l'eau et un produit à vaisselle. Ne pas utiliser de détergents qui grattent ou
récurent, ni d'essence ou de dissolvant.
Maintenance
La lampe est sans maintenance. Les réparations doivent être exécutées, en principe, dans l'usine du fabricant. L'échange des
pièces originales peut être réalisé par des personnes qualifiées.
Other Pfannenberg Flashlight manuals
Popular Flashlight manuals by other brands
PROMETHEUS
PROMETHEUS FOURSEVENS PROMETHEUS MXS quick start guide
DÖRR
DÖRR SCL-18042 instruction manual
Berner
Berner DUOLUX BRIGHT instruction manual
EAGTAC
EAGTAC TX25C2 user manual
Mellert SLT
Mellert SLT TL 600 operating instructions

Harbor Freight Tools
Harbor Freight Tools Dynamo LED Flashlight 65207 operating instructions
Cateye
Cateye VOLT1700 manual

Makita
Makita DEBDML815 instruction manual
Bresser
Bresser National Geographic ILUMINOS 450 operating instructions
HumanTechnik
HumanTechnik Lisa A-2414-0 operating instructions

Lumapower
Lumapower IncenDio XP-G2 R5 user manual
PARALUX
PARALUX PX2 Operating instructions and important notes
