Pfannenberg PMF 2015 Product guide

085501687b 11516-103b 1
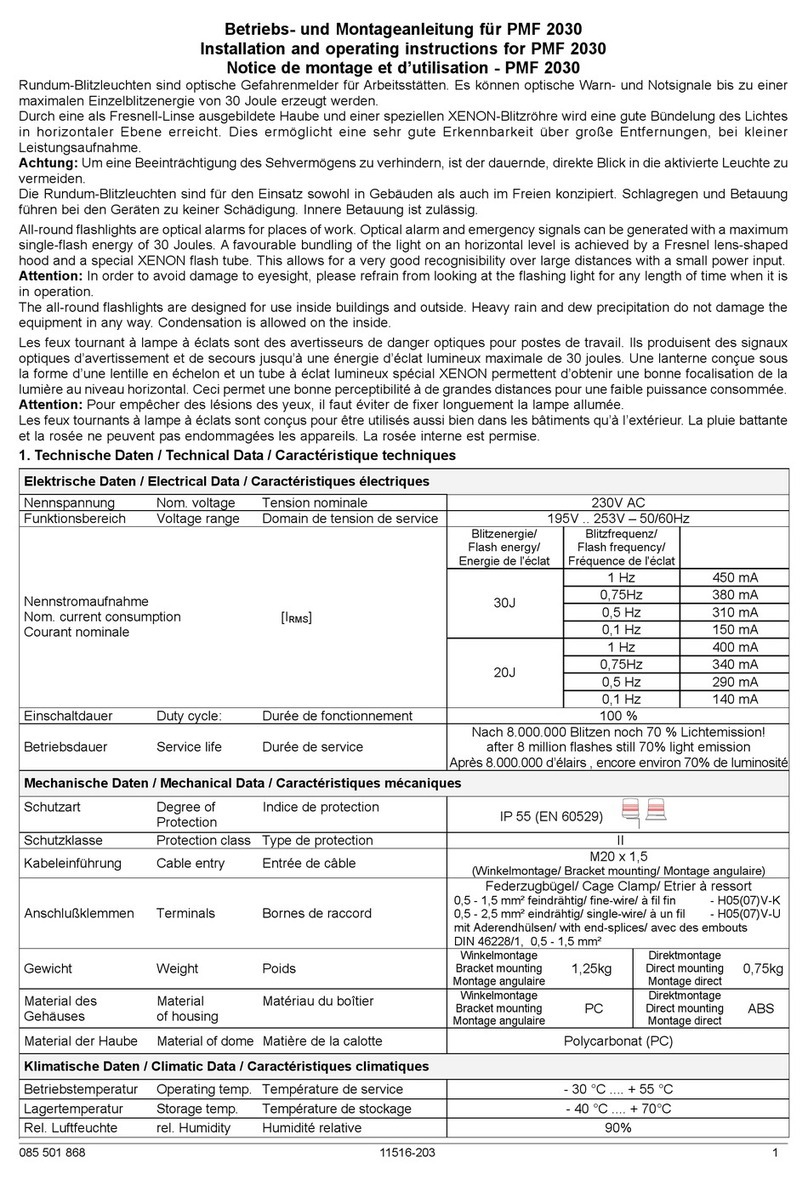
Betriebs- und Montageanleitung für Rundum-Blitzleuchten Typ PMF 2015
Operating and Assembly Instructions for All-Round Flashlights Type PMF 2015
Instruction de service et de montage pour feux tournants à lampe à éclats - PMF 2015
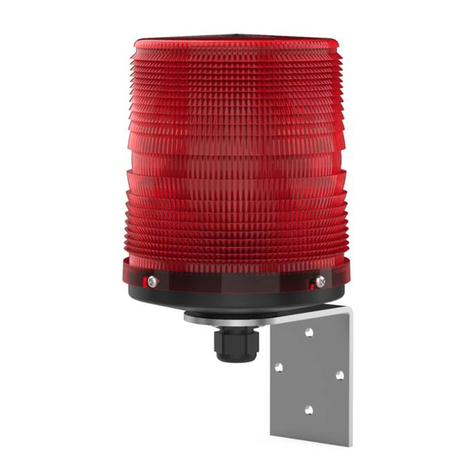
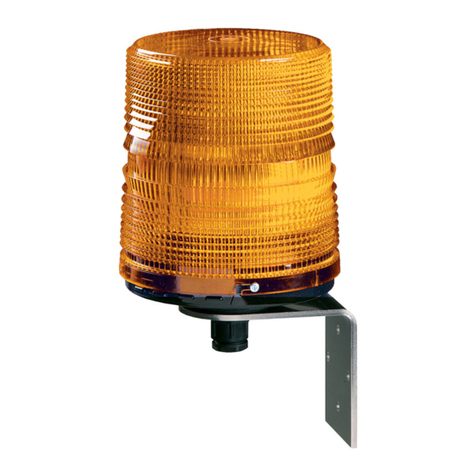
Bei der PMF-LED Flex handelt es sich um eine Multifunktions-Leuchte zur optischen Signalisierung von Gefahrzuständen oder für
die Zustandsanzeige von Maschinen und Anlagen. Die Lichtsignale werden durch LEDs mit hoher Lebenserwartung und robusten
mechanischem Aufbau erzeugt.
The multifunction light PMF-LED Flex is suitable for optical signaling of operating conditions or for the generating of warning signals.
The optical signals are generated by means of LEDs with a high life expectancy and a rugged design.
Le feu multifonctions PMF-LED Flex convient à la signalisation optique des états de fonctionnement ou à la production des signaux
1. Technische Daten / Technical Data / Caractéristique techniques
Elektrische Daten / Electrical Data / Caractéristiques électriques
Nennspannung
Rated voltage
Tension nominale de service
115/ 230V AC
24V AC/DC
Funktionsbereich
Voltage range
Plage de tensions de service
95 V .. 253 V 50/60 Hz
100 V .. 350 V DC
10V .. 60V DC
15V .. 40V 50-60Hz
Nennstromaufnahme
[IRMS]
Nom. Current
consumption [IRMS]
Courant nominale [IRMS]
60 mA
(230V-Dauerlicht/Cont. Light/
Feu fixe)
250mA
(24V DC Dauerlicht/
Cont. Light/ Feu Fixe)
Stromaufnahme
Current consumption
Courant
[IRMS]
Dauerlicht
Cont. light
Feu fixe
Blinklicht/
Blinking Light
Feu clignot-
ant
Rundumlicht
Rotating light
Feu tour-
nant
Blitzlicht/
Flashing light
Feu flash
Betriebsbereit-
schaft
Stand-by
sage
115 V AC
230 AC
220 V DC
12 V C
24 V AC
48 V AC
24 V 50 Hz
90 mA
60 mA
35 mA
550 mA
250 mA
125 mA
420 mA
65 mA
40 mA
27 mA
380 mA
170 mA
90 mA
300 mA
40 mA
30 mA
17 mA
220 mA
105 mA
55 mA
200 mA
25 mA
16 mA
13 mA
160 mA
75 mA
40 mA
125 mA
4 mA
4 mA
4 mA
46 mA
20 mA
15 mA
57 mA
Einschaltdauer
Duty cycle
Durée de fonctionnement
100 %
Betriebsdauer
Service life
Durée de service
> 50000 h
Mechanische Daten / Mechanical Data / Caractéristiques mécaniques
Schutzart
Ingress protection
Indice de protection
IP 55 (EN 60529)
Schutzklasse
Ingress protection
Type de protection
II
Kabeleinführung
Cable entry
Entrée de câble
M20 x 1,5
Anschlussklemmen
Terminals
Bornes de raccordment
Federzugbügel/ Cage Clamp/ Etrier à ressort 0,08-2,5mm²
Gewicht
Weight
Poids
Winkelmontage
Bracket mounting
Montage angulaire
0,9 kg
Direktmontage
Direct mounting
Montage direct
0,62 kg
Material Gehäuses
Material of housing
Matériau du boîtier
Winkelmontage
Bracket mounting
Montage angulaire
PC
Direktmontage
Direct mounting
Montage direct
ABS
Material der Haube
Material of lens
Matériau de la calotte
Polycarbonat (PC)
Klimatische Daten / Climatic Data / Caractéristiques climatiques
Betriebstemperatur
Operating temperature
Température de service
- 30 °C .... + 55 °C
Lagertemperatur
Storage temperature
Température de stockage
- 40 °C .... + 70°C
Rel. Luftfeuchte
rel. Humidity
Humidité relative
90 %
Lichttechnische Daten / Optical Data / Caractéristiques optiques
Lichtintensität
Light intensity
Intensité
Klar/Clear/
Transparent
Orange/ Am-
ber
Orange
Rot/ Red/
Rouge
Grün/ Green/
Vert
Blau Blue/
bleu
Cd [Blondel + Rey]
30
23
29
4,5
14
Vertikaldiagramm
Vertical diagram
Diagramme vertical
Horizontaldiagramm
Horizontal diagram
Diagramme horizontale

085501687b 11516-103b 2
3. Inbetriebnahme
Nach Entfernen der seitlichen Sicherungsschrauben kann das Gehäuse bei beiden Montagearten durch Abnehmen der Haube
geöffnet werden. Die Anschlussklemme X1 und der Betriebsartenumschalter S1 sind damit frei zugänglich. Vor dem Öffnen des
Gehäuses sind folgende Sicherheitshinweise zu beachten:
Der elektrische Anschluss darf nur von hierfür autorisierten Personen durchgeführt werden!
Vor dem Öffnen des Gehäuses ist sicherzustellen, dass die Leuchte nicht unter Spannung steht und mindestens 10
Minuten spannungsfrei geschaltet ist!
Achtung, falsche Betriebsspannungen können zu Störungen oder zur Zerstörung des Gerätes führen!
Nach Abschluss der Arbeiten und vor dem Einschalten der Leuchte ist das Gehäuse zu verschließen.
3. Taking into operation
After the removal of the lateral safety screws, the casing can be opened in both assembly variations by removing the lens. The
connection clamp X1 and the operating mode switch S1 are therefore freely accessible. The following safety references are to be
given consideration before opening the casing:
The electrical connection must only be carried out by such persons as are authorized to do so! It must be ensured before
opening the casing that the light is not under voltage and has been voltage-free for at least 10 minutes!
Attention, false operating voltages may lead to malfunctions or the destruction of the device!
The casing must be closed after the completion of the work and before switching on the light.
3. Mise en service
Après avoir enlevé les vis de sécurité latérales, le boîtier peut être ouvert, pour les deux types de montage, en retirant la lanterne.
re du
boîtier, les consignes de sécurité suivantes doivent être respectées :
Le branchement électrique ne doit être exécuté que par des personnes autorisées pour cela !
Avant l’ouverture du boîtier, il faut s’assurer que la lampe n’est pas sous tension et qu’elle est sans tension depuis au
moins 10 minutes !
Attention, les tensions de service incorrectes peuvent conduire à des perturbations ou destruction de l’appareil !
Il faut refermer le boîtier à la fin des travaux, et avant la remise en circuit de la lampe.
S1
Betriebsart / Operation mode/
Mode d’opération
1
2
3
OFF
OFF
OFF
AUS/OFF/Arrêt
OFF
OFF
ON
Rundumlicht
Rotating light
Feu tournant
2,5 Hz
OFF
ON
OFF
Dauerlicht
Continuous light
Feu Fixe
OFF
ON
ON
Blinklicht
Blinking light
Feu clignotant
1,5 Hz
ON
OFF
OFF
Blitzlicht
Flashing light
Feu flash
1Hz
ON
OFF
ON
Rundumlicht
Rotating light
Feu tournant
2,5 Hz
ON
ON
OFF
Dauerlicht
Continuous light
Feu Fixe
ON
ON
ON
Blinklicht
Blinking light
Feu clignotant
1,5 Hz
Externe Steuerung der Betriebsart/ External control of the operation mode/ Ajustage externe le mode d‘opération
S1 -
1
X1 -
Betriebsart / Operation mode/
Mode d’opération
1
2
3
4
(S1-2=OFF, S1-3=OFF)
OFF
-/N
+/L
AUS(Betriebsbereitschaft)/OFF(Standby)/
Arrêt (prêt à
OFF
-/N
+/L
+/L
Rundumlicht
Rotating light
Feu tournant
2,5 Hz
OFF
-/N
+/L
+/L
Dauerlicht
Continuous light
Feu Fixe
OFF
-/N
+/L
+/L
+/L
Blinklicht
Blinking light
Feu clignotant
1,5 Hz
ON
-/N
+/L
Blitzlicht
Flashing light
Feu flash
1 Hz
ON
-/N
+/L
+/L
Rundumlicht
Rotating light
Feu tournant
2,5 Hz
ON
-/N
+/L
+/L
Dauerlicht
Continuous light
Feu Fixe
ON
-/N
+/L
+/L
+/L
Blinklicht
Blinking light
Feu clignotant
1,5 Hz
Option BAV (nur / only/ seulement 24V AC/DC)
S1 -
1
X1 -
Betriebsart / Operation mode/
Mode d’opération
1
2
3
4
(S1-2=OFF, S1-3=OFF)
OFF
-/N
+/L
Rundumlicht
Rotating light
Feu tournant
2,5 Hz
OFF
-/N
+/L
Dauerlicht
Continuous light
Feu Fixe
OFF
-/N
+/L
+/L
Blinklicht
Blinking light
Feu clignotant
1,5 Hz
ON
-/N
+/L
Blitzlicht
Flashing light
Feu flash
1 Hz
ON
-/N
+/L
Rundumlicht
Rotating light
Feu tournant
2,5 Hz
ON
-/N
+/L
Dauerlicht
Continuous light
Feu Fixe
ON
-/N
+/L
+/L
Blinklicht
Blinking light
Feu clignotant
1,5 Hz
Anschluss des Kabels
Wire connection
Branchement du câble

085501687b 11516-103b 3
Montage / Assembly / Montage
a) Direktmontage / Direct assembly / Montage direct
Für die Befestigung der Leuchte (Direktmontage) stehen zwei unterschiedliche Bohrbilder zur Verfügung. Für die Befestigung
nach Bohrbild 1 sind Gewindeeinsätze M5 x 8 am Boden der Leuchte eingelassen. Bohrbild 2 ermöglicht die Befestigung mit
4 durchgehenden Schrauben oder ähnlichen von oben. Die Bohrung für die Leitungsdurchführung ist dieser anzupassen. Als
Bohrschablone kann die beigelegte Gummidichtung verwendet werden. Achten Sie bei der Montage auf ebenen Untergrund
(Dichtung!).
Two different drill diagrams are available for the fitting of the light (direct assembly). Thread inserts M5 x 8 have been fitted to the
base of the light for attachment according to drill diagram 1. Drill diagram 2 allows for the attachment with 4 through screws or
such like from above. The drill hole for the cable fittings must be adjusted to suit this. The attached rubber seal can be used as a
template for drilling.
Please ensure that the assembly takes place on a level base (seal!).
Vous disposez de deux configurations de perçage différentes pour la fixation de la lampe (montage direct). Pour la fixation se-
lon la configuration de perçage 1, les inserts de filetage M8 x 5 sont encastrés dans le fond de la lampe. La configuration de
perçage 2 permet la fixat
adapté à celui-ci. On peut utiliser le joint en caoutchouc ci-joint comme gabarit de perçage. Veillez lors du montage à avoir un
support plan (joint !).
b) Winkelmontage / Angle assembly / Montage angulaire
Die Befestigungsbohrungen können dem Bohrbild entnom-
men werden.
Die Leitungsdurchführung erfolgt über eine Kabelverschrau-
bung M20x1,5, geeignet für Leitungsdurchmesser von
6,5 mm - 13,5 mm.
The attachment drill holes can be seen in the drill diagram.
There is a M20x1.5 screw joint for the cable fittings, suitable
for cable diameters of between 6.5 and 13.5 mm.
On trouvera les perçages de fixation sur la configuration de
perçage. Le passage de la ligne a lieu par un adaptateur vis-
sable pour câble M20x1,5 approprié pour le diamètre de
ligne de 6,5 mm - 13,5 mm.

085501687b 11516-103b 4
4. Instandhaltung
Pflege
Das Kunststoffgehäuse nur mit Wasser und einem Handspülmittel reinigen. Keine Reinigungsmittel die kratzen oder
scheuern, kein Benzin und keine anderen Lösungsmittel verwenden.
Wartung
Die Leuchte ist wartungsfrei. Reparaturen sind grundsätzlich im Herstellerwerk auszuführen. Der Austausch von Origi-
nalersatzteilen kann durch entsprechend qualifizierte Personen durchgeführt werden.
4. Maintenance
Care
The plastic casing must only be washed using water and a detergent which does not damage the hands. Do not use
any detergents which scratch or scrub, and do not use petrol or other solvents.
Maintenance
The light is maintenance-free. Repairs may only be carried out in the manufacturing plant. The exchange of original
spare parts can be implemented by persons with adequate suitable qualifications.
4. Entretien
Soins
Le boîtier en
Maintenance
La lampe est sans maintenance. Les réparations doivent être exécutées, en principe
Pfannenberg GmbH
Werner-Witt-Straße 1 ·D- 21035 Hamburg
Tel.: +49/ (0)40/ 734 12-0 ·
Fax: +49/ (0)40/ 734 12-101
service@pfannenberg.com
www.pfannenberg.com 10/2022
www.pfannenberg.com/disposal
Other Pfannenberg Flashlight manuals
