manuals.online logo
Brands
  1. Home
  2. •
  3. Brands
  4. •
  5. Pfister
  6. •
  7. Plumbing Product
  8. •
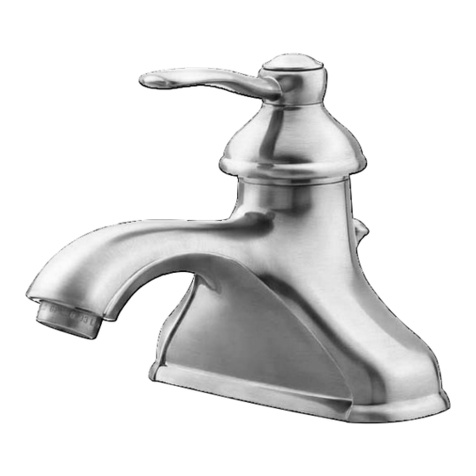
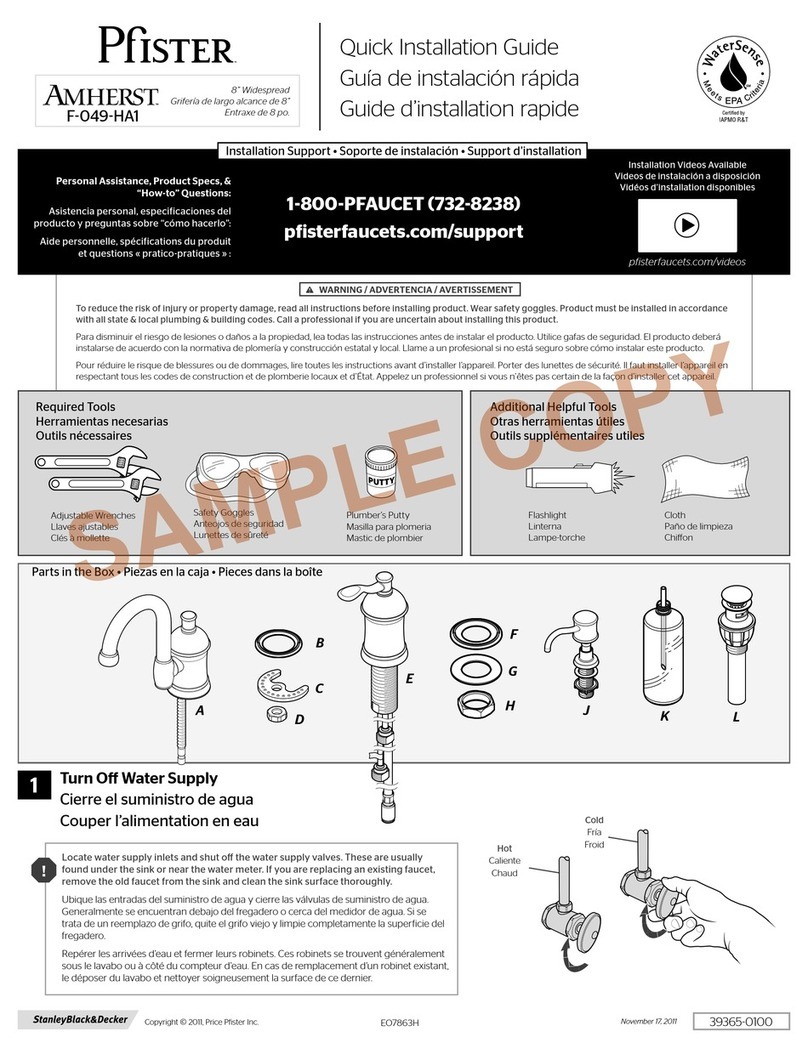
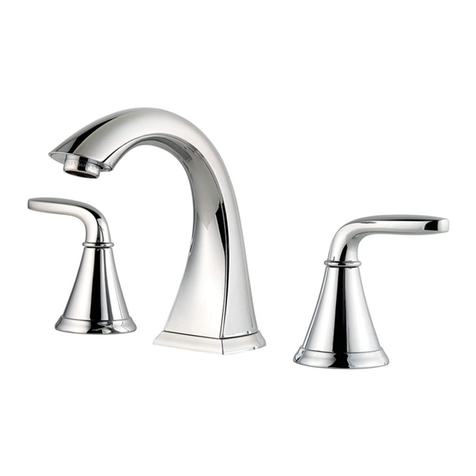
  9. Pfister Kaylon LF-049-KYCC User manual

Pfister Kaylon LF-049-KYCC User manual

To reduce the risk of injury or property damage, read all instructions before installing product. Wear safety goggles. Product must be installed in accordance
with all state & local plumbing & building codes. Call a professional if you are uncertain about installing this product.
Para disminuir el riesgo de lesiones o daños a la propiedad, lea todas las instrucciones antes de instalar el producto. Utilice gafas de seguridad. El producto deberá
instalarse de acuerdo con la normativa de plomería y construcción estatal y local. Llame a un profesional si no está seguro sobre cómo instalar este producto.
Pour réduire le risque de blessures ou de dommages, lire toutes les instructions avant d’installer l’appareil. Porter des lunettes de sécurité. Il faut installer l’appareil en
respectant tous les codes de construction et de plomberie locaux et d’État. Appelez un professionnel si vous n’êtes pas certain de la façon d’installer cet appareil.
WARNING / ADVERTENCIA / AVERTISSEMENT

Required Tools
Herramientas necesarias
Outils nécessaires
Additional Helpful Tools
Otras herramientas útiles
Outils supplémentaires utiles
Turn O Water Supply Cierre el suministro de agua 
Locate water supply inlets and shut o the water supply valves. These are usually
found under the sink or near the water meter. If you are replacing an existing faucet,
remove the old faucet from the sink and clean the sink surface thoroughly.
Ubique las entradas del suministro de agua y cierre las válvulas de suministro de agua.
Generalmente se encuentran debajo del fregadero o cerca del medidor de agua. Si se
trata de un reemplazo de grifo, quite el grifo viejo y limpie completamente la supericie del
fregadero.
Repérer les arrivées d’eau et fermer leurs robinets. Ces robinets se trouvent généralement
sous le lavabo ou à côté du compteur d’eau. En cas de remplacement d’un robinet existant,
le déposer du lavabo et nettoyer soigneusement la surface de ce dernier.
Hot
Caliente
Chaud
Cold
Fría
Froid
1
Quick Installation Guide
Guía de instalación rápida
Guide d’installation rapide
8” Widespread Faucet
Grifo de largo alcance de 8 pulg.
Robinet à 8 po de gamme étendue
Personal Assistance, Product Specs, &
“How-to” Questions:
Asistencia personal, especiicaciones del

Aide personnelle, spéciications du produit

1800PFAUCET (7328238)
pisterfaucets.com/support
G (x2)
H (x2)
Copyright © 2015, Pister Inc. Jun 22, 2015
Flashlight
Linterna
Lampe De Poche
Cloth
Paño de limpieza
Chion
Aerator Tool
Herramienta
para el aireador
Outil d’aérateur

A
J
475000100
D
E
B
C
Kaylon™
LF049KY
Adjustable Wrench
Llave ajustable
Clé réglable
Safety Goggles
Anteojos de seguridad
Lunettes de sûreté
F (x2) K
Quick Install™
Tool
1130517
SAMPLE COPY
2
Prepare & Install Valve Bodies
Prepare e instale los cuerpos de la válvula

2
2A Disassemble Valves
Desensamble las válvulas

Hot & Cold
Caliente y fría
Chaud et froid
x2
2C
2B
2D
F3
F4
F (x2)
F2
Red (Hot)
Rojo (caliente)
Rouge (chaud)
Blue (Cold)
Azul (fría)
Bleu (froid)
Temporarily place handles onto stems
to align the levers. DO NOT use handles
to tighten valve.
Coloque temporalmente las manijas en
los vástagos para alinear las palancas. NO
utilice las manijas para apretar la válvula.
Placer temporairement les poignées sur
les tiges pour aligner les leviers. NE PAS
utiliser les poignées pour serrer la valve.
Hold lats while tightening with a wrench.
Sostenga las arandelas herméticas mientras
aprieta con una llave..
Tenez les parties plates pendant que vous
serrez avec une clé.
Flats
Planos
Appartements
F3
F4
F5
F2
F1 (x2) F6 (x2)
Save for Step 5.
Reserve para el paso 5.
Conservez pour l’étape 5.
Before inal tightening, be sure that both handles rotate correctly. As shown.
Antes del apriete inal, asegúrese de que ambas manijas giren correctamente. Tal como se muestra.
Avant le serrage inal, soyez sûr que les deux poignées basculent correctement. Comme démontré.
Adjustable Wrench
Llave ajustable
Clé réglable
F1
Quick Install™
Tool
Foam gasket at bottom
Junta de espuma en la parte
inferior
Garniture de mousse en bas
3
3A 3B
Install Handles & Spout
Instale las manijas y el surtidor

3
3C
Adjustable Wrench
Llave ajustable
Clé réglable
H (x2)
A
D
E
B
C
G (x2)
Quick Install™
Tool
A
G
Make sure that the bumps on the metal washer (D) are
facing up. Be sure the spout body (A) is centered & facing
forward.
IMPORTANT: DO NOT OVERTIGHTEN.
Cerciórese que las protuberancias de la arandela metálica (D)
estén orientadas hacia arriba. Cerciórese que la estructura
del surtidor (A) esté centrada y orientada hacia adelante.
IMPORTANTE: NO APRIETE EXCESIVAMENTE.
Vériiez que les bosses sur la rondelle de métal (D) sont
tournées vers le haut. Assurez-vous que le bec (A) est centré et
tourné vers le haut. IMPORTANT: NE PAS TROP SERRER.
B
H
Or - O - Ou
C
4
Check to see if the connection is secure by
pulling down the center connector. If it does
not pull o the receiving tube, connection is
secure.
Compruebe para ver si la conexión es segura
tirando abajo del conectador de centro. Si no
arranca el tubo de recepción, la conexión es
segura.
riiez pour voir si le raccordement est bloqué par
la traction en bas du connecteur central. S’il ne
retire pas le tube de réception, le raccordement
est bloqué
Install Hose
Instale la manguera

4
No Tools Required for This Step
No se necesitan herramientas para este paso
Aucun outil n’est nécessaire pour cette étape
IMPORTANT: DO NOT damage
ORings.
 NO dañe las juntas
tóricas.
  NE PAS
endommager les joints toriques.
x2
Remove protective
cap
Retire la cubierta
protectora.
Enlevez le capuchon
protecteur.
J
J
Center Connector
Centre el conector
Raccord centre
5
5A
Connect Water Supply Lines
Conecte las tuberías de suministro de agua

5
Water Supply Lines not included. Please consult manufacturer and/or its instructions for the correct method of installation of supply lines &
ittings.
IMPORTANT: Incorrect application of supply lines and ittings may result in the failure or leak of the supply lines and itting.
Las tuberías de suministro de agua no están incluidas. Consulte por favor el fabricante y/o sus instrucciones para el método correcto de
instalación de líneas de suministro y de guarniciones.
 El uso incorrecto de líneas de suministro y de guarniciones puede dar lugar a la falta o al escape de las líneas de suministro y de la
guarnición.
 Veuillez consulter le fabricant et/ou ses instructions pour la méthode correcte d’installation des
canalisations et des garnitures d’alimentation.
  L’application incorrecte des canalisations et des garnitures d’alimentation peut avoir comme conséquence l’échec ou la fuite des
canalisations et de l’ajustage de précision d’alimentation.
5C5B
From Step 2.
Desde el paso 2.
De l’étape 2.
Adjustable Wrench
Llave ajustable
Clé réglable
Hot & Cold
Caliente y fría
Chaud et froid
x2
Hot
Caliente
Chaud
Cold
Fría
Froid
F1
F1 (x2) F6 (X2)
Quick
Install ™
Tool
F6
Hot & Cold
Caliente y fría
Chaud et froid
x2
F6
Water supply line
línea de suministro
del agua
ligne d'approvisionne-
ment en eau
Quick Install™
Tool
6
6B6A 6C
6E
Disassemble Pop-Up
Desensamble el cuerpo de drenaje
Démontez le corps de drainage
Connect to Drain
Conexión al desagüe
Branchez au drainage
Prepare & Install Push & Seal™Drain
Prepare y instale cuerpo de drenaje Push & Seal™
Préparez & installez le corps de drainage Push & Seal™
No Tools Required for This Step
No se necesitan herramientas para este paso
Pas d'outil nécessaire pour cette étape
PUSH TO ACTIVATE
EMPUJE PARA ACTIVAR
POUSSEZ POUR ACTIVER
6
Align logo to sink
Alinee la insignia con el
fregadero
Alignez le logo sur l'évier
K
Drain
Desagüe
Drainage
K1
K1
K2
K3
K2
K3
-LOGO-
6D
Save Components.
Reserve los componentes.
Conservez les composants.
Partially thread
drain body to sink.
Rosque parcialmente
el cuerpo de drenaje
en el fregadero.
Filetez partiellement
le corps de drainage
dans l'évier.
Firmly hand tighten nut (K3).
La mano aprieta irmemente la
tuerca (K3).
Fermement la main serrent
l’écrou (K3).
Do not use plumber’s putty.
It may damage seal.
No utilice la masilla del
fontanero. Puede dañar el sello.
N’employez pas le mastic du
plombier. Il peut endommager
le joint.
7
Turn On Water & Conirm Proper Installation


Flush the Faucet
Enjuague el grifo

7
8
Hot
Caliente
Chaud
Cold
Fría
Froid
Check for leaks above and below the sink.
Revise si hay fugas encima y debajo del fregadero
Assurez-vous qu’il n’y a pas de fuite au dessus ou au dessous du
lavabo
8A 8C
15
sec
Hot
Caliente
Chaud
Cold
Fría
Froid
Open
Abierta
Ouverte
Open
Abierta
Ouverte
Remove Aerator
Retire el aereador
Retirez l'aérateur
Reinstall Aerator
Reinstale el aereador
Réinstallez l'aérateur
Hand Tighten
Apriete con la mano
Serrez manuellement
Allow hot & cold water to run for at least 15 seconds each.
Deje correr el agua caliente y fría durante al menos 15
segundos cada una.
Laissez couler de l’eau chaude et de l’eau froide pendant au
moins 15 secondes chacune.
8B Open Slowly
Abra lentamente
Ouvrez lentement
For Additional Installation Help:


1800PFAUCET (7328238)
pisterfaucets.com
SAMPLE COPY

This manual suits for next models

1

Other Pfister Plumbing Product manuals

Pfister Sonterra F-WL2-45PX User manual

Pfister

Pfister Sonterra F-WL2-45PX User manual

Pfister Rosslyn F-529-7RSS User manual

Pfister

Pfister Rosslyn F-529-7RSS User manual

Pfister Park Avenue 016-FE0 User manual

Pfister

Pfister Park Avenue 016-FE0 User manual

Pfister Kenzo RT6-4DF User manual

Pfister

Pfister Kenzo RT6-4DF User manual

Pfister Auden LF-049-AD User manual

Pfister

Pfister Auden LF-049-AD User manual

Pfister Indira F-529-7ND User manual

Pfister

Pfister Indira F-529-7ND User manual

Pfister Ashfield F-049-YW2 User manual

Pfister

Pfister Ashfield F-049-YW2 User manual

Pfister Winfield RT6-5WF User manual

Pfister

Pfister Winfield RT6-5WF User manual
Pfister Venturi LF-042-VN User manual

Pfister

Pfister Venturi LF-042-VN User manual

Pfister Park Avenue 016-FE0 User manual

Pfister

Pfister Park Avenue 016-FE0 User manual

Pfister Bellance LF-042-BLL User manual

Pfister

Pfister Bellance LF-042-BLL User manual

Pfister Deckard R89-7DA User manual

Pfister

Pfister Deckard R89-7DA User manual

Pfister Vorena F534-7VO User manual

Pfister

Pfister Vorena F534-7VO User manual

Pfister Rhen LG6-4RH User manual

Pfister

Pfister Rhen LG6-4RH User manual

Pfister Tegley F-529-7TG User manual

Pfister

Pfister Tegley F-529-7TG User manual

Pfister Crete F-529-7CE User manual

Pfister

Pfister Crete F-529-7CE User manual

Pfister Marielle LF 46 Series User manual

Pfister

Pfister Marielle LF 46 Series User manual

Pfister Lita User manual

Pfister

Pfister Lita User manual

Pfister Aadaya F-529-6YA User manual

Pfister

Pfister Aadaya F-529-6YA User manual

Pfister LF-WK1-68 User manual

Pfister

Pfister LF-WK1-68 User manual

Pfister Pfirst Series F529-7PF User manual

Pfister

Pfister Pfirst Series F529-7PF User manual

Pfister KENZO 16 Series User manual

Pfister

Pfister KENZO 16 Series User manual

Pfister Avalon S10-40 User manual

Pfister

Pfister Avalon S10-40 User manual

Pfister Cantara LF-049-CR User manual

Pfister

Pfister Cantara LF-049-CR User manual

Popular Plumbing Product manuals by other brands

Moen SANI-STREAM 8797 manual

Moen

Moen SANI-STREAM 8797 manual

Grohe Allure Brilliant 19 784 manual

Grohe

Grohe Allure Brilliant 19 784 manual

Cistermiser Easyflush EVO 1.5 manual

Cistermiser

Cistermiser Easyflush EVO 1.5 manual

Kohler Triton Rite-Temp K-T6910-2A installation guide

Kohler

Kohler Triton Rite-Temp K-T6910-2A installation guide

BEMIS FNOTAB100 Installation instruction

BEMIS

BEMIS FNOTAB100 Installation instruction

Hans Grohe ShowerTablet Select 700 13184000 Instructions for use/assembly instructions

Hans Grohe

Hans Grohe ShowerTablet Select 700 13184000 Instructions for use/assembly instructions

Akw Stone Wash Basin Installation instructions manual

Akw

Akw Stone Wash Basin Installation instructions manual

Enlighten Sauna Rustic-4 user manual

Enlighten Sauna

Enlighten Sauna Rustic-4 user manual

Moen ShowHouse S244 Series quick start guide

Moen

Moen ShowHouse S244 Series quick start guide

Sanela SLWN 08 Mounting instructions

Sanela

Sanela SLWN 08 Mounting instructions

Franke 7612982239618 operating instructions

Franke

Franke 7612982239618 operating instructions

Heritage Bathrooms Granley Deco PGDW02 Fitting Instructions & Contents List

Heritage Bathrooms

Heritage Bathrooms Granley Deco PGDW02 Fitting Instructions & Contents List

Tres TOUCH-TRES 1.61.445 instructions

Tres

Tres TOUCH-TRES 1.61.445 instructions

STIEBEL ELTRON WS-1 Operation and installation

STIEBEL ELTRON

STIEBEL ELTRON WS-1 Operation and installation

Miomare HG00383A manual

Miomare

Miomare HG00383A manual

BELLOSTA revivre 6521/CR1 quick start guide

BELLOSTA

BELLOSTA revivre 6521/CR1 quick start guide

American Standard Heritage Amarilis 7298.229 parts list

American Standard

American Standard Heritage Amarilis 7298.229 parts list

BorMann Elite BTW5024 quick start guide

BorMann

BorMann Elite BTW5024 quick start guide

manuals.online logo
manuals.online logoBrands
  • About & Mission
  • Contact us
  • Privacy Policy
  • Terms and Conditions

Copyright 2025 Manuals.Online. All Rights Reserved.