Phase Linear BT1611I - Phase Linear Radio User manual

LI
,
IE
BT161
11
MP3/WMA
RECEIVER
AM/FM/CD/MP3fV1JT\11A
Receiver
with Bluetooth Technology
Receptor
AM/FM/CD/MP3fV1JT\11A
con Tecnologia Bluetooth

Para obtener instrucciones en Espanol, dirijase ala pagina 32.
PREPARATION
BT1611i
Getting
Started
Congratulations on your purchase
of
the Phase
Linear 8T1611 iMobile AM/FM/CD/MP3IWMA
Receiver. It's agood idea to read all
of
the
instructions before beginning the installation.
We
recommend having your Phase Linear
BT1611
iinstalled
by
areputable installation
shop.
Contents
Installation Instructions 3
Wiring 6
Operating Instructions 7
Tuner Operation
11
CD Player Operation 13
MP3IWMA Operation
15
Using aUSB Device or
SO
Card 19
iPod Operation
21
Bluetooth Operation 23
Remote Control 27
Care and Maintenance 28
Troubleshooting 29
Specifications 30
Installation
Requirements
This unit is designed for installation
in
cars,
trucks and vans with an existing radio opening.
In
many cases, aspecial installation kit will
be
required to mount the radio
to
the dashboard.
These kits are available at electronics supply
stores and car stereo specialty shops. Always
check the kit application before purchasing
to
make sure the kit works with your vehicle.
If
you
need akit but cannot locate one, call our
customer support line at 1-800-323-4815.
(U.S.A. and Canada only.)
Tools
and
Supplies
The following tools and supplies are needed
to
install the radio.
•
Torx
type, flathead and Philips screwdrivers
•Wire cutters and strippers
•Tools to remove eXisting radio (screwdriver,
socket wrench set or other tools)
•Electrical tape
•Crimping tool
•Volt meter/test light
•Crimp connections
•18 gauge wire for power connections
•16-18 gauge speaker wire
Speaker
Requirements
Only connect speakers rated with aload
impedance
of
4ohms. Speakers with aload
2
impedance
of
less than 4ohms could damage
the unit.
Disconnect
Battery
Before you begin, disconnect the battery
negative terminal.
--------
Toll-Free
Installation
Assistance
Ifyou require assistance, contact Technical
Support at 1-800-323-4815 from 9:00 a.m.
to
6:00 p.m. EST Monday through Friday (U.S.A.
and Canada only.)

BT1611i
~~§)~[§
LINEAR
INSTALLATION
INSTRUCTIONS
Follow the wiring diagram carefully and
make certain all connections are secure
and insulated with crimp connectors or
electrical tape
to
ensure proper operation.
After completing the Wiring connections,
attach the front panel and turn the unit on
to confirm operation (vehicle ignition
switch must
be
on). Ifthe unit does not
operate, recheck all wiring until the
problem is corrected. Once proper
operation is achieved, turn the ignition
switch off and proceed with final mounting
of
the chassis.
Carefully slide the radio into the mounting
sleeve, making sure
it
is right-side-up, until
it
is fully seated and the spring clips lock it
into place.
6.
8.
7.
Universal
Installation
Using
Mounting Sleeve
1.
Remove the detachable front panel, if it is
attached
to
the chassis, by pushing the
"Release" button.
2.
Slide the mounting sleeve off
of
the
chassis ifit has not already been removed.
If
it
is locked into position, use the removal
keys (supplied) to disengage
it.
The
removal keys are depicted
on
page
5.
3.
Check the dashboard opening size by
sliding the mounting sleeve into
it.
Ifthe
opening is not large enough, carefully cut
or file as necessary until the sleeve easily
slides into the opening.
Do
not force the
sleeve into the opening or cause it to bend
or bow. Check that there will
be
sufficient
space behind the dashboard for the radio
chassis.
4.
Locate the series
of
bend tabs along the
top, bottom and sides
of
the mounting
sleeve. With the sleeve fully inserted into
the dashboard opening, bend as many
of
the tabs outward as necessary
to
firmly
secure the sleeve
to
the dashboard.
5.
Place the radio
in
front
of
the dashboard
opening so the wiring can
be
brought
through the mounting sleeve.
This unit is designed for installation
in
cars,
trucks and vans with
an
existing radio opening.
In
many cases, aspecial installation kit will
be
required
to
mount the radio
to
the dashboard.
These kits are available at electronics supply
stores and car stereo specialty shops. Always
check the kit application before purchasing to
make sure the kit works with your vehicle.
Pre-installation
1.
Disconnect Battery
Before you begin, always disconnect the battery
negative terminal.
2.
Remove Transport Screws
3

9.
Attach one end
of
the perforated support
strap (supplied) to the screw stud
on
the
rear
of
the chassis using the hex nut
provided. Fasten the other end
of
the
perforated strap to asecure part ofthe
dashboard, either above or below the
radio, using the screw and hex nut
provided. Bend the strap, as necessary, to
position
it.
CAUTION: The rear ofthe radio
must
be
supported with the strap to
prevent damage to the dashboard from
the weight
of
the radio or improper
operation due to vibration.
10. Re-attach the front panel to the chassis
and test radio operation
by
referring to the
operating instructions for the unit.
NOTE:
For
proper
operation
of
the CD
player. the
chassis
must
be
mounted
within
20°
of
horizontal.
Make
sure
the
unit
is
mounted
within
this
limitation.
Kit
Installation
Ifyour vehicle requires the use
of
an
installation
kit to mount this radio, follow the instructions
included with the installation kit to attach the
radio to the mounting plate supplied with the kit.
1.
Wire and test the radio as outlined
in
the
Universal Installation instructions.
2.
Install the radio/mounting plate assembly
to the sub-dashboard according to the
instructions
in
the installation kit.
3.
Attach the support strap to the radio and
dashboard as described
in
the Universal
Installation instructions.
4.
Replace the dashboard trim panel.
ISO
Installation
This unit hasthreaded holes
in
the chassis side
panels which may
be
used with the original
factory mounting brackets ofsome vehicles to
mount the radio to the dashboard. Please
consult with your local car stereo shop for
assistance
on
this type
of
installation.
1.
Remove the existing factory radio from the
dashboard or center console mounting.
Save all hardware and brackets as they
will
be
used to mount the new radio.
2.
Carefully unsnap the plastic frame from
the front
of
the new radio chassis. Remove
and discard the frame.
3.
Remove the factory mounting brackets
and hardware from the existing radio and
4
BT1611i
attach them to the new radio.
Do
not
exceed M5 x 9
MM
maximum screw size.
Longer screws may damage components
inside the chassis.
4.
Wire the new radio to the vehicle as
outlined
in
the Universal Installation
instructions.
5.
Mount the new radio assembly to the
dashboard or center console using the
reverse procedure
of
step 1.
Reconnecting
the
Battery
When wiring is complete, reconnect the battery
negative terminal.

BT1611i
Removing
the
Radio
To
remove the radio after installation, remove
the trim ring by lifting
in
the center and pulling it
off from either side. Insert the removal keys
straight back until they lock, and then pull the
radio out. If removal keys are inserted at an
angle, they will not lock properly to release the
unit.
Removal
Key
Fuses
When replacing afuse, make sure the new fuse
is the correct type and amperage. Using an
incorrect fuse could damage the radio. The
8T1611 iuses one 15 amp fuse located below
the wiring connector (15 amp fast blow ATO).
5

BT1611i
I
®
§
@rn
iPod
Nano
\,..._
_
__
J
fl
~]
,((),
iPod
Mini
iPod
r
~-l'
II
1
-'
t
.'"
"(
/'
t
j
'\)
I \
.'
"
-'
iPod
Gen5
~
CD
@~
®@
CJ
0
Gray/Black
(-)
Gray(+)
@CD
@
VI,'~IBI
..
k
(-~
)®
Violel(+)
~
~
~~~
~
~
Wlile/Black (-)
®@
Wlile(+)
VVIRING
1.
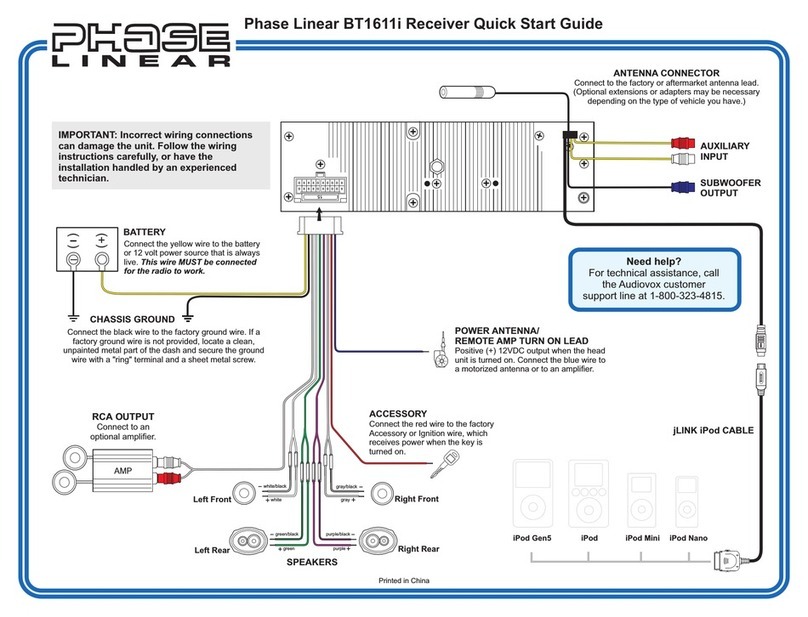
Power Antenna (dark blue wire) -Connect
to the power antenna or
an
amplifier. If not
used, tape the bare end ofwire.
2.
Ground (black wire) -Connect
to
the
ground terminal or aclean, unpainted part
of
the chassis.
3.
Memory/Battery (yellow wire) -Connect
to
the battery or
to
a12 volt power source
that is always live. The radio will not work
ifthis wire is not connected.
4.
Accessory/Ignition (red wire) -Connect
to
the existing radio wire or radio fuse.
5.
Left Front Speaker
6.
Right Front Speaker
7.
Left Rear Speaker
8.
Right Rear Speaker
9.
RCA Outputs
to
Amplifier
10. Auxiliary Input RCAs (yellow)
11.
Antenna
12. Subwoofer Output (blue)
13. iPod/jLink connector -
Use
this 8-pin
DIN
socket
to
connect your jLink iPod cable.
14. jLinkcable (iPod Cable)
NOTE:
The
amplifiers in this radio are only
designed for use with four speakers. Never
combine (bridge) outputs for use with two
speakers. Neverground negative speaker
leads
to
chassis ground. Failure to wire
exactly as shown may cause electrical
damage to the radio.
6

BT1611i
OPERATING
INSTRUCTIONS
7
adjusting audio functions, the unit will
automatically exit select mode and return to the
normal display after five seconds or when
another function is activated.
Bass
Press the AUDIO CONTROL button (4) twice
until "BASS" appears
in
the display. Within five
seconds, turn the AUDIO CONTROL (3) to
adjust the bass from
"_6"
to "+6". "0" represents
aflat response. The bass level is shown on the
display for five secondsor until another function
is activated.
o
BT16111
MP3IWMA
RECEIVER
~C%,~~
r· ·
..
t:2B
I.
I I I
cu~
III I
....
,.
...
WCCH
rl II..... = =
II
=I I=
!!!lJ
Tff!J
_I
I
11_
1.11.11.1
1.1
= = f!JjPTY
Audio
Mute
Audio
Menu
Press and holdthe AUDIO CONTROL button
(4) to access the Audio Menu. Press the
AUDIO CONTROL button repeatedly to step
through the menu
of
audio functions: volume,
bass, treble, balance, fader, and volume. When
Press c>/MUTE button (1) to mute the audio
volume. "Mute" flashes on the display. Restore
volume to the previous setting
by
pressing the
mute button again, adjusting the AUDIO
CONTROL, or
by
pressing any other button on
the unit.
Power
Press the power
C>
button (1) or any other
button on the face
of
the receiver to turn the
unit on when the ignition switch is on. Press the
power button again to turn the receiver off. If
the radio
was
left on when the ignition was last
turned off, the receiver will turn on automatically
when the ignition switch is again turned on. If
the receiver
was
offwhen the ignition was last
turned off, the receiver must
be
turned on
manually when restarting the vehicle.
Mode
Press MODE (2) to select adifferent mode
of
operation
as
indicated on the display panel.
Available modes include Tuner,
COP,
USB
Host, SO/MMC, iPod and AUX. During CD
player operation, pressing MODE will change
to
the tuner mode without ejecting the disc.
Volume
To
increase the volume, turn the AUDIO
CONTROL (3) clockwise.
To
decrease the
volume, rotate the AUDIO CONTROL counter
clockwise. When volume is adjusted, the
volume level is shown on the display panel as a
number ranging from
"DO"
(lowest) to "46"
(highest).
7

Treble
Press the AUDIO CONTROL button (4) three
times until "TREBLE" appears
in
the display.
Within five seconds, turn the AUDIO
CONTROL
(3) to adjust Treble from "-6" to "+6".
"0" represents aflat response. The treble level
is shown on the display for five seconds
or
until
another function is activated.
Balance
Press the AUDIO CONTROL button (4) four
times until "BALANCE" appears
in
the display.
Within five seconds, turn the AUDIO
CONTROL
(3) to adjust the Balance between
the right and left speakers from "R12" (full right)
to "L12" (full left).
"COO"
represents an equal
balance level between the right and left
speakers. The balance position is shown on the
display for five seconds or until another function
is activated.
Fader
Pressthe AUDIO CONTROL (4) five times until
"FADER" appears in the display. Within five
seconds, turn the AUDIO CONTROL (3)
clockwise or counter clockwise to adjust
balance between the front and rear speakers
from "R12" (full rear) to "F12" (full front).
"COO"
represents an equal balance level between the
front and rear speakers. The fader position is
shown on the display for five seconds
or
until
another function is activated.
VOLUME
FADER~
~
BASS
!
BALANCE
00.-.......
~
TREBLE
System
Menu
Press and holdthe DfDISPLAYbutton (9) to
view the system "MENU". Press the
Of
DISPLAY
button repeatedly or use the Up
Tuning »1 and Down Tuning
1«
(14, 13)
buttons to access the following MENU options.
PAIRING
This feature is used to pair your mobile phone
to the unit's Bluetooth system.
To
initiate the
pairing process select "Pairing" and then press
the AUDIO CONTROL button.
RE-CONN/DIS-CONN
Use this feature to reconnect or disconnect a
paired mobile phone manually. Turn the AUDIO
CONTROL (3)
to
select "RE-CONN" to re-
connect or "DIS-CONN" to disconnect and then
press the AUDIO CONTROL button (4) to
perform the operation.
8
BT1611i
A
ANSWER
(On/Off)
Select "On" to automatically answer calls
without pressing the
AUDIO
CONTOL button
(4),
PHONE VOL (00-38)
Use this feature to set the default ringing
volume for all incoming calls. Use the AUDIO
CONTROL to adjust the ring volume from "00"
to
"38".
CONTRAST(00-10)
Use the
AUDIO
CONTROL
to adjust the
contrast level from 00-10.
Clock
FORMAT(12H/24H)
This option allows selection
of
a12 Hour or 24
Hour clock format. The default clock format is
"12H". Turn the AUDIO
CONTROL
to select the
"24H" format.
Clock
SET
Turn the
AUDIO
CONTROL
left to adjust the
hours and right to adjust the minutes.
AREA
Turn the AUDIO
CONTROL
to select the
appropriate frequency spacing for your area:
U.S.A., Latin, Europe, or Oirt (Russia).
Distant/Local
This feature is used to designate the strength
of
the signals at which the radio will stop during
automatictuning. "Distant" isthe default setting,

BT1611i
allowing the radio to stop
at
abroader range
of
signals.
To
set the unit to select only strong
local stations during automatic tuning, turn the
AUDIO CONTROL to choose "Local".
VOL
PGM (00-46)
Use the "VOL PGM" option to select the default
volume the radio will assume when first turned
on.
To
program aspecific start-up volume level,
turn the AUDIO CONTROL to select the
desired level.
BEEP TONE
The beep tone feature allows the selection
of
an
audible beep tone to be heard each time a
button
is
pressed
on
the face
of
the radio.
"BEEP TONE On" is the default display. Turn
the AUDIO CONTROL to select the "BEEP
TONE
Off'
option.
iX-BASS
Press the
BASS
button (15) to activate the iX-
BASS feature. When listening to music at low
volume levels, this feature will boost the bass
and treble ranges to compensate for the
characteristics
of
human hearing. Press BASS
again to deactivate this feature.
Subwoofer
Press
th
e
SU
Bbutton (18) to activate the
Subwoofer function. Press again to turn the
Subwoofer function off.
NOTE: The
Subwoofer
feature
only
works
when an external
amplifier
and
subwoofer
are connected via the
Sub
line
out
connection
on
the
back
of
the unit.
Liquid
Crystal
Display
(LCD)
The liquid crystal display (LCD) panel (8)
displays the frequency, time and activated
functions
of
the unit.
NOTE:
After
being
subjected to
cold
temperatures, LCD panels
may
take
longer
to respond
and
visibility
of
the numbers
on
the LCD
may
decrease slightly.
The
LCD
display
will
return to normal when the
temperature increases to anormalrange.
Auxiliary
Input
Use the Aux
In
cables
on
the back
of
the unit to
connect aportable media device for playback
through the vehicle sound system.
To
access
the Auxiliary Input mode, press the MODE
button (2) until "AUX" is indicated
in
the display.
Front
Panel
Release
The front panel release button (10) releases the
mechanism that holds the front panel to the
chassis.
9
Detaching the Front Panel
To
detach the front panel, first press the front
panel release button (10) to release the len side
of
the panel. Next, grasp the released side and
pUll
it
offthe chassis. After removing the front
panel, store
it
in
the supplied carrying case to
protect
it
from dirt and damage.
REMOVE FRONT PANEL
Re-attaching the Front Panel
To
re-attach the front panel, make sure the
electrical terminals on the back
of
the panel are
free
of
dust and dirt,
as
debris could cause
intermittent operation or other malfunctions.
Position the right side
of
the panel
in
place
so
that
it
is
correctly engaged, then lightly press
the len side
of
the panel until the mechanism
locks
it
into place.

i;:)C:;:§}~13
LINEAR
Reset Button
The reset button (11) is located on the front
of
the chassis and can only
be
accessed with the
front panel removed. The reset circuitry
protects the microprocessor circuitry. Since
resetting the unit will erase the time and preset
memories,
it
should only
be
activated upon
initial installation after all wiring is complete, or
if
there is amalfunction
of
any
of
the switches
on the unit.
In
these circumstances, pressing
the reset button will clear the system and return
the unit to normal operation.
11
BT1611i
1::::::::1
¢
R'j[T
,cz:,. ~
10

BT1611i
p[;:::§}~[§
LINEAR
Repeat for the remaining five presets on the
current band and for all presets on the other
four bands.
Automatically
Store
/
Preset
Scan
(AS/PS)
Automatically Store
Select six strong stations and store them
in
the
current band using the Automatic Store feature.
To
enable this feature, press and hold AS/PS
(17) for more than two seconds. The radio will
automatically scan the band
in
use and enter
strong stations into the preset memory
rQI
0
BT16111
MP3IWMA
RECEIVER
\J'SUB
1·1"
~
• I I
1.1
i
11.1
Preset
Stations
up
to six stations on each band can be stored
as presets and can then
be
instantly recalled by
pressing the associated preset button on the
front panel (16) or remote control.
To
store a
station, turn the radio on and select the desired
band and station.
Press
and
holdthe desired
preset button (numbered one through six on the
face
of
the radio or remote control) for more
than two seconds. When stored, the preset
number will appear in the display. The station is
now stored and can be recalled at any time by
pressing the corresponding preset button.
TUNER
OPERATION
AM/FM
Band
Selector
(BAND)
Press BAND (5) during radio play to switch
between three FM bands and two AM bands.
"FM1", "FM2", "FM3", "AM1"
or
"AM2" will
appear
in
the display to indicate the band
currently selected.
Tuning
Automatic Tuning
Press the Up Tuning »1 (14) button to tune
upward
ir
frequency and the Down Tuning
1«
(13) button to tune downward in frequency. The
unit will automatically stop at the next strong
station. Ifthe Local mode is active, the radio will
seek the next strong local station when either
button is pressed.
Manual Tuning
Press the Up Tuning (14) or Down Tuning (13)
button for more than two seconds to select
manual tuning mode. "Manual Seek" will appear
in
the display. Press the Up or Down Tuning
buttons to move radio frequency up or down
two digits at atime. Press
and
hold the Up or
Down Tuning buttons to quickly advance
to
a
certain frequency. Release when the desired
frequency is reached. Iftuning is not adjusted
within five seconds
of
entering manual tuning
mode, the radio will revert to automatic tuning
and "AUTO" will appear in the display.
11

positions for that band. After entering the
stations into memory, the unit will automatically
stop at each station for five seconds so each
can
be
heard. When using the Automatically
Store feature, the new stations replace any
stations already stored
in
preset memory for the
selected band.
Preset Scan
Press AS/PS (17)
to
scan the preset stations
in
the current band. The unit will stop at each
station for five seconds before continuing to the
next preset station. The preset number will
flash on the display during the preset scan.
Press AS/PS again
to
stop scanning and listen
to the current station.
Stereo
The unit will automatically pick up astereo
signal, when available. When
in
stereo mode,
the "ST" icon appears
in
the display. When no
stereo signal is available, the unit will
automatically revert
to
mono operation, and
no
icon will
be
displayed.
12
BT1611i

BT1611i
CD
PLAYER
OPERATION
i?1::::§)~
LIN
BAR
7
scan function will also
be
canceled when
activating the repeat or shuffle functions.
Disc
Repeat
(RPT)
Press RPT (25) during disc play to continuously
repeat the selected track. "REPEAT' will appear
in
the display. Press RPT again to stop
repeating. "REPEAT' will disappear from the
display, and regular play will resume. The
repeat function will also
be
canceled when
activating the scan or shuffle functions.
21
C01
0
BT16111
MP3/WMA
RECEIVER
\VSUB
I
__
_.
_>.,.
I
@RECORDLJLJCJ'"."
if:
I ,
ill~
~
L.;,"","
I',"i
...:J
l~I"~B
""
""',"
",."r
II
•
I.
• I
_1-..J
~A55~S=O::=;'=.'
=:":::'S:::=8.=:-~~'
"~'
-~-~~-~"'~-~-~~'=dJ
Play/Pause
Press the play/pause button (23) to suspend
disc play. "PAUSE" will appear
in
the display.
Press the play/pause button again to resume
disc play.
Disc
Scan
(INTRO)
During disc play, press INT (24) to play the first
10 seconds
of
each track on the disc. "INTRO"
will appear
in
the display. When the desired
track is reached, press INT again to end the
scan function and play the selected track. The
Insert
CD
With the label surface facing up, gently insert
the disc into the
CD
slot (21) until the soft-
loading mechanism engages and pulls the disc
in.
Disc play begins, "S-CDP" will appear
in
the
display. The track number and elapsed time
appear
in
the display.
Track
Select
Track select features are used to quickly
access the beginning
of
aparticular track when
adisc is
in
play. Press the Up Tuning button
(14) to move forward or the Down Tuning
button (13) to move backward
on
the disc to
locate the desired track. Track numbers will
appear
in
the display
as
they are accessed.
Press and hold the Up or Down Tuning buttons
to fast forward or fast reverse through adisc.
During either function, the elapsed time will
appear on the display. Release the button to
resume CD play.
NOTE:
The
unit
is
designed
for
play
of
standard
5"
(12 cm.)
compact
discs
only. Do
not
attempt
to
use
3"
(8 cm.)
CD
singles
in
this unit, either
with
or
without
an adaptor,
as damage to the
player
and/or
the disc
may
occur. Such damage
will
not
be covered
by
the warranty
on
this
product.
13

Ph§)~13
LINEAR
Disc
Shuffle
(ROM)
Press ROM (26) during disc play to play all
tracks on aCD
in
random, shuffled order.
"RANDOM" will appear in the display. Press
ROM again
to
stop random play. "RANDOM"
will disappear from the display and regular play
will resume. The shuffle function will also
be
canceled when activating the scan
or
repeat
functions.
Disc
Eject
Press the eject button (12) to stop CD play and
eject the disc. The unit will change to tuner or
AUX operation, depending on which mode was
in
operation prior to disc play. Ifthe disc is not
removed from the unit within 15 seconds, the
disc will
be
reloaded
to
prevent accidental
damage. Disc play can
be
resumed by pressing
MODE (2) to choose the CD player function.
14
BT1611i

BT1611i
MP3/WMA
OPERATION
MP3 and WMA (Windows Media Audio) music
files are digital audio files that are compressed
to allow more files
on
asingle CD. This unit can
play MP3IWMA directly from files contained
on
aCD-R/RW using the buttons on the receiver
(or optional remote) as described below. Many
types
of
software are available for converting
audio files into MP3IWMA formats. Phase
Linear recommends Nero
or
Roxio Easy CD
Creator. Depending
on
the media type and
recording method, some CD-R/RWs may
be
incompatible with this unit. The unit supports
playback
of
MP3IWMA and CODA (CDA),
Mixed-Mode CDs and CD-Extra (including
multi-session discs), but
discs
on
which
the
session
has
not
been
closed
will
not
play.
Notes
on
MP3/WMA
Play
This unit can play MP3 (MPEG1,
2,
2.5 Audio
Layer 3). However, the MP3 recording media
and accepted formats are limited. When writing
MP3IWMA, pay attention to the following
restrictions.
Acceptable
Media
The MP3IWMA recording media acceptable to
this unit are CD-ROM, CD-R and CD-RWdiscs,
USB devices and
SO
cards. When using CD-
RW,
use full format rather than quick format to
prevent malfunction.
Acceptable
Medium
Formats
The following formats are available for the
media used
in
this unit. The maximum number
of
characters used for file name inclUding the
delimiter (".") and three-character extension are
indicated
in
parentheses.
ISO 9660 Level 1
(11
characters)
ISO 9660 Level 2
(31
characters)
Joliet
(31
characters)
Romeo
(31
characters)
Up
to 200 characters can be displayed
in
the
long file name format. For alist
of
available
characters, see the instruction manual
of
the
writing software and the section "Entering File
and Folder Names" below. The media
reproducible on this unit has the following
limitations:
Maximum number
of
nested folders: 8
Maximum number
of
files per disc: 999
•Maximum number
of
files per media
device: 2000
Maximum number
of
folders per disc: 255
MP3IWMA written
in
formats other than those
listed above will not play successfully and their
file names or folder names will not be displayed
properly.
15
MP3/WMA
Encoder
and
CD
Writer
Settings
Use the following settings when compressing
audio data to MP3 data with the MP3 encoder.
Transfer bit rate: 32 -320 kbps
Sampling frequency: 32, 44.1, 48kHz
(WMA) and 16, 22.05, 24, 32, 44.1, 48kHz
(MP3)
When using aCD writerto record MP3IWMA up
to the maximum disc capacity, disable
additional writing.
To
record
an
empty disc up to
the maximum capacity at once, select the "disc
at once" option.

BT1611i
7
--
----
-----.-
--j---
Electronic
Shock
Protection
10 seconds for CODA (COA)
100 seconds for MP3JWMA recorded at
44.1
kHz, 128kbps
Bit
Rates
The unit supports bit rates from 32 -320 kbps.
File
Playing
Order
When selected for play, files and folders (Folder
Search, File Search or Folder Select) are
accessed
in
the order they were written
by
the
CD writer. As aresult, the order
in
which they
are expected to
be
played may not match the
order
in
which they are actually played.
21
(Qi
0
BTl
6 1 1 I
MP3IWMA
RECEIVER
'V'
ue
(jjJJ8
.....
_
••
;
._
I
r~.nerA
I
••
:.:
111
.:
I
.:
II
I
••
,
~
RECORO
'-l!:31301_11 I I •
"I
I I •
I.
I:';
B:cB
L:.:
::'1".
1.1
.L
'.1
.1
1
_I
•
~ ~
(QiSASS
..
'V'
S;JiI.
uss-.
OBI"I"I~
Writing
Files
into
a
Medium
When amedium containing MP3IWMA data is
loaded, the unit checks all data. Ifthe medium
contains many folders or non-MP31WMA files,
MP3JWMA play will be delayed,
it
may take
time for the unit to move to the next file, and
searches may not be performed smoothly.
Loading such amedium may produce loud
noise and cause damage to the speakers.
Do
not
attempt
to
playa
medium
containing
a
non-MP3/WMA file
with
the MP3IWMA
extension
or
a
medium
containing
non
MP31
WMA
files.
3
4
!--l--l--'4--'--
5
6
7
t~
19
I~
I
~
iF
LJOjl
o
1
Entering
103
Tag
This unit supports ID3 tag versions 1.0 and 1.1.
For the character codes, refer to the table
below.
Entering
File
and
Folder
Names
Names using the code list characters are the
only file names and folder names that can be
entered and displayed. Other characterswill not
display correctly. The unit recognizes and plays
only files with the MP3JWMA extension.
NOTE: Afile
name
entered
with
characters
not
on
the
code
list
may
not
play
correctly.
16

BT1611i
For example, amedium with the following
folder/file hierarchy is subject to Folder Search,
File Search or Folder Select as shown below.
You
may
be
able
to
set the order in which MP3/
WMA
are to
be
played
by
writing them onto a
medium such as aCD-R with their file names
beginning with play sequence numbers such as
"01" to "99".
Press RPT again to resume normal playback.
Random
(ROM)
Press the ROM button (26)
to
randomly play all
files.
Press andholdthe ROM button
to
randomly
play all files
in
the current folder.
Press ROM again
to
resume normal playback.
MP3/WMA
File
or
Folder
Search
The unit offers two methods
of
searching for
files or folders:
Direct File
Number
Search
Press the Bbutton (5). The LCD will display
"Number". Turn the AUDIO CONTROL to
select the desired track number, then press the
AUDIO CONTROL to confirm and play the
selected file.
Navigation Search
Press the Bbutton (5)
tWice.
The LCD will
display "Navigate". Turn the AUDIO CONTROL
to navigate through all folders and sub-folders
on
the disc. The folder names will
be
displayed
on
the LCD. Press andholdthe AUDIO
CONTROL for more than three seconds
to
play
the first file in the folder. Press the AUDIO
CONTROL for less than three seconds
to
access the sub-folders or files. Turn the AUDIO
CONTROL
to
navigate, then press the select
knob
to
confirm and begin file play. During
navigation search, turn the AUDIO CONTROL
Navigating
Folders
Press the F Vand F
1\
buttons (27, 28)
to
select
the next or previous folder/directory.
Intro
Scan
(INT)
During playback, press INT (24) to play the first
10 seconds
of
each file on the disc or device.
Press andhold the INT button to play the first
10 seconds
of
all files
in
the current folder. Intro
play will begin with the first song
in
the folder,
repeating the folder until the function is
deactivated.
When the desired file is reached, press INT to
end the scan and play the selected file.
Repeat
(RPT)
Press the RPT button (25) to repeatedly play
the current file.
Press and holdthe RPT button to repeat play
all files
in
the current folder.
Pause
Press the
1/>/11
button (23) to suspend disc
play. Press the play/pause button again
to
resume play.
Track
Select
Press the
Up
Tuning (14) or Down Tuning (13)
button for less than one second to advance to
the next track, or press andholdto fast forward
or fast reverse. Disc play starts when the button
is released.
0;:'
Root
1>
Fil"
DFold",
,
L--.-.
W
~-.--._.
l'
H.
L
__
. .
J'.!J
L"Yal 1Lev..lJ
17

BT1611i
counter-clockwise to return to the preVious
folder level.
Display
Information
During MP3IWMA playback, any available
103
information, including song title, directory
name, artist name, etc., automatically scrolls
across the LCD screen.
ICON DESCRIPTION
./)
TRACK ICON
~,
ARTIST ICON
[Ji]
ALBUM ICON
Press the AS/PS button (17)
to
manually view
available
103
information.
7
I-I
-:"
I
.I
·· ·
.-
'i
•
•••
•
I"
I
I"
I
~~
---.
21
20
(Q1
0
BT16111
MP3IWMA
RECEIVER
'Y'
UB
lii!f8
r:'"
.-.1.-
..
I~
~
RECORD
~~&t2J
I •
.,
••••••
I-I.
•
3:~B
L:J
11.1
=:.= =:.=
J.
@BASS
S~
uss-
18

BT1611i
p~§)~§
LINEAR
USING
A
USB
DEVICE
OR
SD
CARD
players take
longer
to
read than
other
types
of
USB devices, sometimes 20-30 seconds.
Navigating
Files
Please refer to "MP3IWMA Operation" on
page 15 for information regarding directory
navigation and file searching.
Recording
CD
Music
Your
BT1611
iis equipped with aRecord feature
that allows you to record music from adisc to
an SD/MMC card or USB device.
To
record
music, perform the following steps:
1.
Insert adisc and select the track you
would like to record.
2.
Press the RECORD button (20)
to
activate
the Record feature.
3.
Turn the AUDIO
CONTROL
(3) to select
the USB or CARD (SD/MMC) source.
4.
Press the AUDIO
CONTROL
button (4) to
begin recording.
The unit will begin recording the
current file, starting at the beginning
of
the track. The LCD will display
ReC
;;:x.
USB .Recording
will stop at the end
of
the file.
The recorded information is stored
in
afolder named "MY CD" on the
destination source.
Recording will stop and the unit will
display "Memory Full" ifthe selected
storage device is full.
o
REAET
~)
~
I:
::::::
:1
Loading
an
SO
Card
To
insert an
SO
card, you must first remove the
front panel
to
reveal the
SO
card slot (see
"Detaching the Front Panel" on page 9). Insert
your
SD
Card as illustrated below and then
reinstall the front panel.
After inserting
an
SD card containing MP3 or
WMA files, "SD/MMC" appears on the display
and the unit will automatically scan the card for
music files and begin playback.
To
eject the SD card, remove the front panel
and then press
in
on
the SD card to release
it.
Pull the SD card straight and replace the front
panel.
Loading
aUSB
Device
USB devices can
be
played through the USB
connector on the front panel.
To
access files on
aUSB device, insert the USB device as
indicated below:
NOTE: Neverdetach the
front
panel
while aUSB
device
is
inserted.
After inserting
an
USB device containing MP3
or WMA files, "USB Host" appears
on
the
display and the unit will automatically scan the
card for music files and begin playback.
To
eject the USB device, press the MODE
button (2) to select adifferent source. Pull the
USB device straight out and return the cover to
the closed position.
NOTE: Due to
rapid
changes in technology,
the BT1611i
may
not
support
all
USB
devices,
particularly
those thatrequire
driver
installation. Portable
hard
drives are
not
supported. In addition, Flash
music
19

To
stop recording before the file is complete,
press the Record button. The LCD will display
f;:ec.
•
U=::::!t~
(or CARD) and the
incomplete track will be deleted from the
destination folder.
NOTE:
Never
remove
aUSB device
during
recording
or
music
transfer. This
may
damage the
device
or
cause the
system
to
lock
up.
Do
not
switch
modes
or
turn
the
radio
power
or
ignition
off
while
recording.
Transferring
MP3/WMA
Music
Your BT1611 iis equipped with aMusic Transfer
feature that allows you to record music from
various sources to an SD/MMC card or USB
device.
To
Transfer music, perform the
following steps:
1.
Play the media from which you would like
to record.
2.
Press the RECORD button (20) to activate
the Transfer feature.
3.
Turn the
AUDIO
CONTROL
(3) to select
the USB or CARD (SD/MMC) source.
4.
Press the
AUDIO
CONTROL
button (4) to
begin recording.
The unit will begin recording the
current file, starting at the beginning
of
the track. The LCD will display
H~1
~.~
~:;-:::.
USE:
.Recording will
stop at the end
of
the file.
The
ncurded
information is stored
in
afolder named "MY_MP3" or
"MY
wr..,~A"
on the destination
source.
Recording will stop and the unit will
display "Memory Full" if the selected
storage device is full.
To
stop recording before the file is complete,
press the Record button. The LCD will display
~
•
n.y::,t:;
(or CARD) and the
incomplete track will
be
deleted from the
destination folder.
NOTE: When
recording
from
CO
the
song
is
played
from
beginning
to
end. When
copying
aMP3
or
WMA
file from
any
source
the file
is
simply
copied
and
stored,
not
played
like
CD.
Erasing Recorded Files
You can erase recorded files from aUSB
device
or
SD/MMC card while the file is playing,
or after selecting the file
in
Number Search or
Navigation Search mode.
To
erase afile,
perform the following steps:
1.
Press
and
hold
the
BAND
button (5) to
activate the Erase function. The LCD will
display
EFASE
@j~j1E1.
2.
Press the AUDIO CONTROL button (4) to
select Erase mode.
20
BT1611i
3.
Turn the
AUDIO
CONTROL
(3) and select
+Jl
to erase (or select
:x
to cancel ttle
erase function).
4.
Press the
AUDIO
CONTROL
button to
confirm. The file will stop playback
(if
playing) and will
be
erased. When
finished, the system will display
ERASE
b1../.
File
Management
Music recorded or transferred using the
BT1611 iwill be stored
in
the default folders
listed below:
MY_CD: Music Recorded from aCD.
MY MP3: Transferred MP3 files.
MY_\MIlA: Transferred
\MIlA
files.
Recorded/transferred music is stored
in
the
corresponding folder and given the following
naming convention: "XX0001.MP3", where XX
is the name
of
the source (Le. CD0001.MP3).
NOTE: MY_ AUX, MY_FM, MY_iPod,
and
MY_XMare
set
up
on
the
destination
source
(SO,
USB) as
well
as
the
above
mentioned;
however, these
sources
are
not
applicable
for
this
model.
Other manuals for BT1611I - Phase Linear Radio
1
Table of contents
Other Phase Linear Car Receiver manuals

Phase Linear
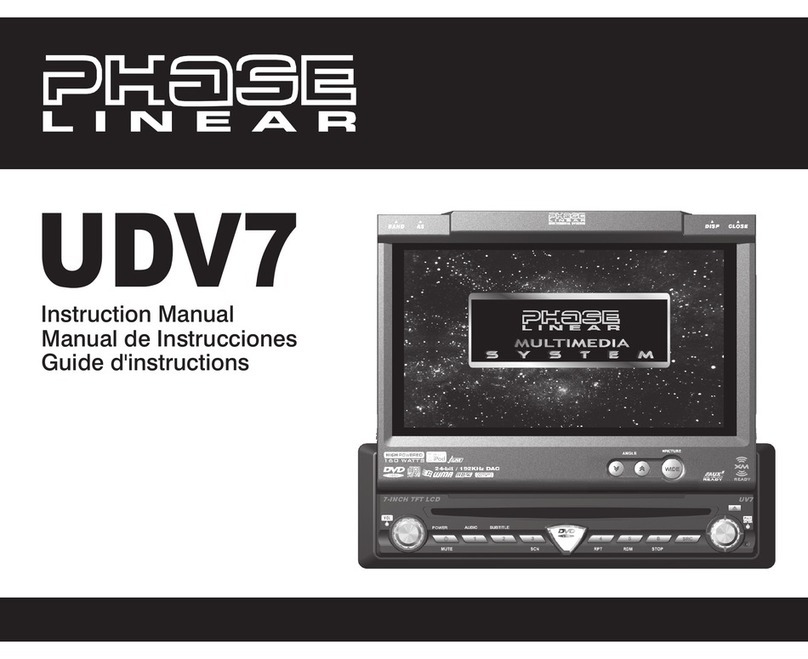
Phase Linear Phase Linear UDV7 User manual

Phase Linear
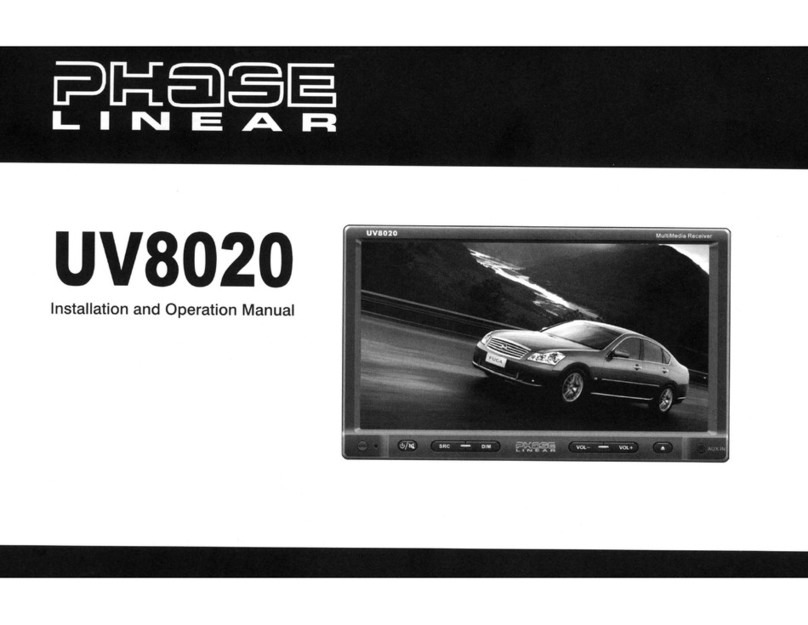
Phase Linear UV8 User manual

Phase Linear
Phase Linear UMP401 - Phase Linear Radio User manual

Phase Linear
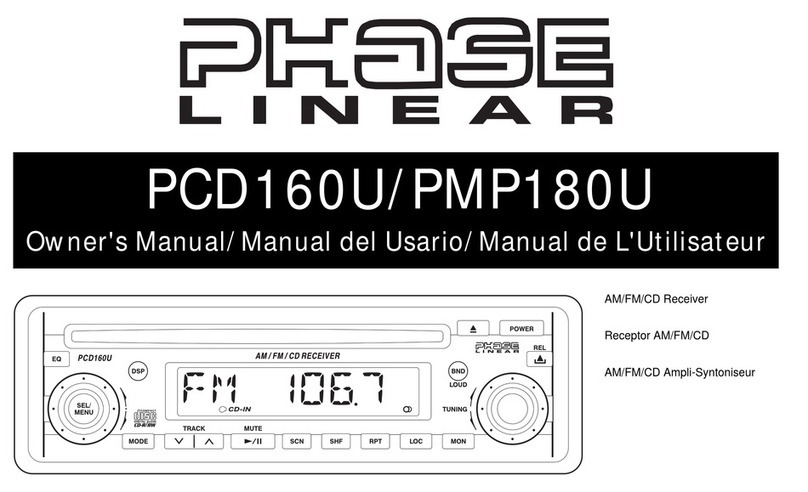
Phase Linear PCD160U User manual

Phase Linear
Phase Linear Phase Linear SD1513 User manual

Phase Linear
Phase Linear UCD300 User manual

Phase Linear
Phase Linear Phase Linear CD1211 User manual

Phase Linear
Phase Linear Phase Linear SD1411 User manual

Phase Linear
Phase Linear MP1311 User manual

Phase Linear
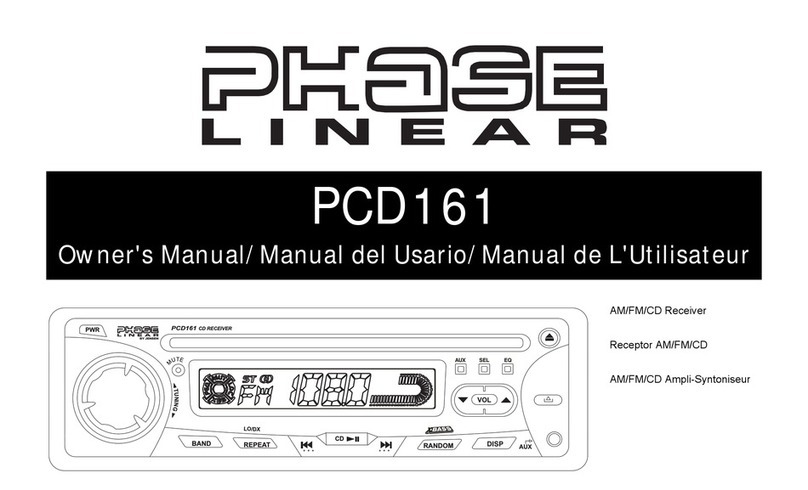
Phase Linear PCD161 User manual