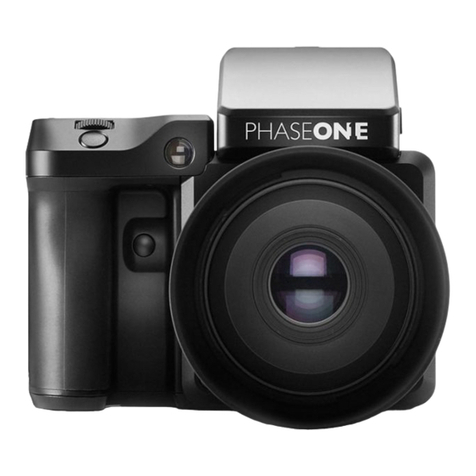
PhaseOne XT User manual

XT Camera System
User Manual

2Table of ContentsXT Camera System Manual |
Primary parts of the XT Camera System 4
XT Camera Body, IQ4 and XT Lens 4
Assembling the XT Camera System 6
XT Camera System Modularity 6
Attaching the IQ4 to the XT Camera Body 6
Rotating the XT Camera 7
Loading and removing the batteries 9
Readying the XT Camera System 9
Charging the batteries 10
Charging a device by USB 10
Setting Date, Time and Language 12
Security Code Protection 12
Ready for Capture Beep 12
Installing an XQD card 13
Installing a SD card 13
Removing an XQD card 13
Removing a SD card 13
Selecting cards for storage 13
Shutter Half Press 13
XT Camera System – Getting Started 15
Turning the XT System On and O 15
Setting the Exposure 15
XT Capture Settings 16
Adjusting the Focus 16
Using Shift 16
Capturing Images 17
Viewing the Image 17
IQ4 Navigation 18
Touch Screen Operation 18
Accessing Tools, Settings and Status 18
Using the Shortcuts Menu 19
Using the Status Bar 19
Status Menu 20
Camera Controls 20
Live View 20
Changing settings in Tools 21
Four Key Navigation 21
Camera Controls 22
Capturing an image 22
Long Exposure 23
Drive modes 23
Choosing the File Format 24
Selecting an IQ Style 24
Exposure Level Increments 24
Display O During Exposure 24
Virtual Horizon Tool 25
Bracketing tool 25
Time Lapse tool 26
Live View 27
Activating Live View 27
Adjusting Exposure in Live View 27
Selecting Exposure Settings 27
Exposure Simulation 28
Using the Exposure Adjustment Aids 28
Live RGB and RAW Histograms 28
Live RAW Clip Warning 28
Using Auto Gain for Automatic Brightness 29
Displaying a Grid 30
Setting a Custom White Balance 30
Virtual Horizon Tool 31
Live View Auto Pause 31
Set Preview Zoom Level 31
Viewing Images 32
Viewing single Images 32
Delete a single image 32
Rating an image 32
Displaying a Histogram 32
Image Info 33
Exposure Masks 33
Exposure Zone 33
Setting a Custom White Balance 34
Viewing Images as thumbnails 34
Deleting multiple images 35
Browser Image Info 35
Browser Exposure Masks 35
Tools Viewer 36
Using the Tools Viewer 36
Histogram 37
Exposure and Clip Warning 37
Exposure Zone 38
File Storage Setup 39
File Storage overview 39
Storage Mode 39
Content | XT Camera System Manual
Jump to
Table of Contents
3Table of Contents 3XT Camera System Manual |
SD card Storage options 40
Saving a jpeg version 40
Saving a RAW backup on the SD card 40
Saving the RAW file on the SD card 40
Using SD Overflow 40
Direct Image Transfer 41
File formats 42
RAW file formats 42
Fast, prerecorded Black Reference Frame 43
Enter your Copyright information 43
Capture One Inside Styles 44
Creating a Custom IQ Style 45
Custom White Balance 47
Saving the Custom White Balance automatically 47
Taking Advantage of Shift movements 48
Using Shift on the XT Camera 48
Lens Image Circle and Useable Movements 49
Using Shift for Perspective Correction 49
Using Shift for Stitching and Panoramas 49
Lens Cast Calibration 51
Automatic Frame Averaging 54
Using Automatic Frame Averaging 54
Electronic Shutter (ES) 56
Enable Antiflickering 57
Using Electronic Shutter (ES) without the
XT Camera Body 58
Self Timer Delay 58
Power Connections 60
Power over Ethernet (PoE) 60
Power over USB-C 60
Using a USB-C Power bank 61
External XF Power Supply 61
Power input priority for the XT Camera System 61
Power Management Options 62
Tethering Connections 63
Gigabit Ethernet connection 63
Ethernet Cables 63
USB-C connection 64
USB-C Cables 64
Wireless connection 65
Connection for WiFi tethering 65
Managing Known WiFi Networks 66
Security Settings 67
Changing Security Level 67
Locking the IQ4 67
Creating a new Security Code 68
Recovering a locked IQ4 68
Tethering Access Code 68
Live View over HDMI 69
Connecting HDMI 69
Enabling HDMI Output 69
Display Histograms and Clip Warning 69
Display Focus Peaking 69
Showing the IQ4 UI over HDMI 70
Capture One Pro 71
System requirements 72
Capture One Tethered Use 74
Shooting Tethered 74
Import Images into Capture One Pro 75
Capture Pilot 76
Using Capture Pilot 77
Backup System Setup 78
System Maintenance 79
Keeping your XT Camera clean 79
Cleaning the Sensor on IQ4 80
Updating the XT IQ4 System Firmware 81
Phase One Information 82
Warranty and Uptime Guarantee 82
General Conditions 83
Notices 84
Content | XT Camera System Manual
Jump to
specific Section

Primary parts of the XT Camera System
XT Camera Body, IQ4 and XT Lens
Tripod Rotation Lock
Rotatable
Tripod Mount
Lens Panel Lock
Lens Panel Lock
Shutter Release
Button
Focus Ring
XT Lens
4Primary parts of the XT Camera SystemXT Camera System Manual |

Shutter Release
Button
Focus Ring
Flash Sync Port IQ4 On/O Button
IQ4 Touch Screen
Horizontal
Shift Dial
Horizontal
Shift Dial
Vertical
Shift Dial
Horizontal
Shift Scale
Back Release Button
Back Lock Slider
XQD and SD card
compartment
Battery Compartment
Gigabit Ethernet Port
HDMI C Port
USB-C Port
12-pin Multi-
connector Port
5Primary parts of the XT Camera System 5XT Camera System Manual |

6Assembling the XT Camera SystemXT Camera System Manual |
XT Camera System Modularity
The XT Camera System is a modular system and consist of a XT Camera
Body, an IQ4 Digital Back and a XT Lens. The IQ4 can also be used on a XF
Camera Body and since the lens mount is compatible with Cambo WRS
lenses, these can be used with the system too.
This chapter will explain how you remove and attach an IQ4 to the XT
Camera Body as well as mounting and removing a lens.
Depending on how you purchased the system, the XT Camera System may
be supplied ready for use with the IQ4 already attached.
Removing the IQ4 from the XT Camera Body
1. Turn the XT Camera System o and remove any interface cables from the
IQ4.
2. Push the IQ4 lock slider toward the XT Camera Body while simultaneously
pressing the IQ4 release button. Note that the lock slider acts as a safety
catch.
3. Tilt the IQ4 slightly backward from the top and gently lift the IQ4 o the
XT Camera Body’s guide rail.
Attaching the IQ4 to the XT Camera Body
1. Gently place the mounting plate of the IQ4 onto the bottom guide rail of
the XT Camera Body.
2. Push the IQ4 lock slider and press the release button simultaneously to
retract the back’s upper locking mechanism, and then push the IQ4 firmly
onto the camera’s twin catches, using the bottom guide rail as a pivot.
After removing the IQ4 from the XT Camera, remember to protect the
sensor by reattaching cover, and to attach the back port cover on the XT
to protect the camera system from dust.
Assembling the XT
Camera System
IQ4 Release Button
IQ4 Lock Slider

7Assembling the XT Camera System 7XT Camera System Manual |
Changing lenses
It is easy to mount and exchange the lens on the XT Camera Body. Note that
the lens mount is compatible with all Cambo WRS lenses.
Mounting the Lens Panel
1. Ensure that both lens panel locks are open.
2. Slide the bottom of the lens plate into the lens panel slot.
3. Slide the safety lock at the top-middle upwards.
4. Tilt the lens panel up against the XT Camera body.
5. Lock both lens panel in place.
Removing the Lens Panel
1. Open both lens panel locks by sliding them upwards.
2. Slide the safety lock at the top-middle upwards.
3. Tilt the lens panel outward at the top
4. Lift the lens free from the lens panel slot at the bottom
5. Remove the lens.
Rotating the XT Camera
The integrated and rotatable tripod mount makes it easy to quickly switch
from landscape to portrait format without having to remove the XT Camera
from the tripod.
Open the silver-colored Rotation Lock on the tripod mount by pressing it
forward to unlock it and rotate the XT Camera System 90 degrees. Then press
the Rotation Lock backwards until it locks into position.
Be aware that any Shift movements that you have applied will obviously
be rotated as well so readjust the vertical and horizontal shifts if
necessary. Please read a later chapter on how to use and take advantage
of the integrated Shift system on the XT Camera System.
Lens Panel Lock
Safety Lock
Lens
Panel
Slot
Rotation Lock
Lens Panel Lock

8Assembling the XT Camera SystemXT Camera System Manual |
Removing the tripod mount system
The integrated tripod mount can be removed from the XT Camera Body if you
want to save weight or size. Removing the tripod foot mount will also make it
more convenient to shoot the XT Camera handheld.
1) Shift the XT Camera horizontally all the way to the right (when looking at
the camera from behind) with the Horizontal Shift Dial.
2) A torx screw is now uncovered. Unscrew it with the supplied torx tool.
3) Remove the top-right corner piece with the XT label by sliding it upwards.
4) Open the silver-colored Rotation Lock on the tripod mount by pressing it
forward. Then rotate the tripod mount system all the way up to the area with
the removed XT plate.
5) Remove the tripod mount system.
6) Slide the XT corner piece back in place and secure it by fastening the torx
screw from step 2.

9Readying the camera system 9XT Camera System Manual |
Loading and removing the batteries
Loading the battery in the IQ4
1. Open the battery cover located on the underside of the IQ4 .
2. Insert the battery, power contacts first.
3. Push the battery up until it locks into position.
4. Close the compartment cover.
Removing a battery from the IQ4
1. Open the battery compartment cover.
2. Push the retaining catch inside the compartment to release the battery
and pull out.
3. Close the battery compartment cover.
Battery life
The actual number of shots possible will vary depending on the shooting
conditions. For instance Image Browsing, Live View and WiFi use will reduce
the number of shots available on a single charge. The age and condition of the
battery also has an eect on battery life.
Readying the XT
Camera System

10Readying the camera systemXT Camera System Manual |
Charging the batteries
When working untethered, the standard power source of the XT Camera
System is the 7.2 V (3400 mAh) BP-911/914/915 type rechargeable Li-ion
battery.
To maximize battery performance, charge the battery before use with the
supplied Pro Cube 2 charger. Approximately 2.5 to 3 hours are required to fully
charge exhausted batteries.
1. Connect the supplied power adapter to the charger and insert the
batteries into the charger slots. If charging only one battery, either slot
can be used.
2. The charge indicator will blink and display the battery’s approximate
capacity as a percentage.
3. Charging is complete when the charge indicator stops blinking and the
capacity level displays “100%”.
4. Remove the batteries and unplug the cable from the charger.
The Pro Cube 2 will display how much the batteries have been charged in mAh
since the charging session started. This can be useful if you are in a hurry and
know from experience that a particular amount of mAh is enough to get you
100 captures, for example. The three dots over a battery icon indicates on the
display which one is currently being measured.
Battery information
The XT Camera System uses a 7.2 V (3400 mAh) BP-911, 914, 915 type
rechargeable Li-ion battery and IQ4 requires the battery to be loaded prior to
use, even when shooting tethered to a computer using a bus-powered
interface cable (Gigabit Ethernet or USB-C).
Charging a device by USB
The XT Pro Cube 2 can also be used to charge a device like a smartphone by
connecting it to the USB port on the charger. The display will show USB when
doing so. Note that the Pro Cube 2 will charge any inserted Li-ion batteries
fully before starting to charge the attached device over USB.

11Readying the camera system 11XT Camera System Manual |
General advice for the battery and charger
Charge the batteries before use
Batteries discharge when not in use. For optimum performance, charge the
batteries before using the XT Camera.
Charge the batteries indoors
Only charge the batteries indoors (and away from moisture) at ambient
temperatures between 5–35 Celsius (41-95 Fahrenheit).
Remove batteries when not in use
Never leave the battery in the charger for an extensive period of time. When
charging is complete, remove the battery and unplug the charger from power
outlet. When the battery is left in the XT Camera a small amount of current is
drawn, resulting in accelerated discharge and shorter battery life. Remove the
batteries when not in use.
Only use approved batteries
Use only 7.2 V BP-915 type batteries. Capacity in excess of 3300 mAh is
recommended. Some third party batteries may not fit into the IQ4’s battery
compartment, due to dierences in the manufacturing tolerances. Do not try
to force a battery into the compartment. When pressing the battery release
button it should slide out without being hindered. If a battery can’t be
removed, levering the battery out may cause damage. Please contact your
Phase One dealer for advice.
Dirt and fingerprints on battery terminals may cause loose connection and
corrosion. Clean the contacts with a soft-cloth before loading the batteries.
Shooting tethered
Always keep a battery in the IQ4 when shooting tethered to a computer via a
Gigabit Ethernet or USB-C connection. Please read the Power Connections
chapter for more information.
Use in foreign countries
The AC power adapter is supplied with several power plug adaptors for
international use. The power adaptor is compatible with 110 to 250 V AC
(50/60 Hz) power sources.
Only use the original power adapter or 12 V DC car adapter (supplied)
It is not recommended to use a portable voltage transformer with the battery
charger. Battery charging from a car’s 12 V electrical socket is possible but the
car battery will discharge if the engine is not running.
Powering the XT Camera System On and O
Powering up the XT Camera is achieved with a short press of the On/O but-
ton on the back of the IQ4. A long press of the same button will power o the
XT.
NOTE:
In low temperatures, keep spare batteries
close to body temperature by storing
in an inside jacket pocket. Li-Ion type
batteries tend to lose eciency under
cold conditions.
NOTE:
There can be a low number of shutter actuations reported on a brand new XT Camera
Body. This is normal behavior as the shutter mechanism has been tested during final
quality check procedures. The shutter count on a new XT Camera Body should never
exceed 99.

12Readying the camera systemXT Camera System Manual |
Setting Date, Time and Language
Setting the Date and Time on the IQ4
Date and time are set and controlled via the IQ4’s menu. When the IQ4 is
initially shipped from factory, or If the IQ4 has been without power for a long
period of time, it will automatically prompt you to set the time and date. Touch
the screen and scroll through the numbers to attain the appropriate date and
time. The time and date is applied to the EXIF data in all files captured with
the IQ4. You can change this later in the Menu under IQ Settings > Date and
Time.
Setting Language on the IQ4
The XT Camera System is delivered with the language set to English by default.
Follow the steps below to change the language of the IQ4 to one of eight
others available, including German, Russian, Korean, Japanese, Chinese
(simplified), Swedish, Italian and Spanish.
Swipe up from the bottom of the screen and tap on the IQ4 Menu icon.
Navigate to the Language menu item and select the preferred language option.
Each choice is displayed using the native language, with English noted in
parentheses.
Note: If you choose a language by mistake, and can no longer read the menu,
look for the menu item with (L) in it.
Security Code Protection
Access to the IQ4 can be protected by a four-digit security code that you will
have to enter on the touch screen after it has been turned on.
The security code protection is a safety measure to ensure that other people
cannot gain access to the IQ4 without your consent. This is of particularly
importance since IQ4 can provide wireless access over a network that other
people might have access to.
You can setup the security code as well as the level of protection by selecting
Menu > Security Settings on the IQ4. Please see the Security Settings chapter
later for full details.
Ready for Capture Beep
You can control whether you would like to get a sound beep from the camera
system whenever it is ready to capture the next image. It is on by default. This
is useful under a busy shot where you need to concentrate on your subject at
hand instead of checking to Capture Ready icon in the Status Bar on the
screen.
This is set by going to the IQ4 Menu and selecting IQ Settings > Ready Beep.
You have three options:
• None (O)
• Single (one beep)
• Multi (longer beep)

13Readying the camera system 13XT Camera System Manual |
Removing the SD card
Installing XQD and SD cards
Using memory cards
The Phase One IQ4 supports both XQD and SD memory cards. Phase One
recommends that you use the supplied Sony XQD G Series 64 GB card or a
similar card with the same 400 MB/s write speed rating for optimal
performance.
If you plan on saving raw files to the SD card, use the supplied Sony SDXC
UHS-II G Series 64GB card. Otherwise, it is recommended to use SD card that
has a write speed of at least 100 MB/s and is marked with speed class U3.
Note: While the XQD card slot in the IQ4 is compatible with CFexpress cards
from a mechanical stand point, CFexpress cards are not supported yet. A
future firmware upgrade for IQ4 is planned to add support for CFexpress
cards.
Installing an XQD card
When inserting the XQD card into its media storage slot in the IQ4, make sure
that the labeling side on the card is facing towards the front of the back so
that the small triangles on the XQD card and the IQ4 XQD slot align. Slide it
straight into the slot until it clicks into place. If resistance is felt, stop
immediately, and check whether the card is oriented correctly.
Installing a SD card
Position the SD card so the label is facing towards the screen on the IQ4 and
slide it straight into the SD marked-slot until it clicks into place. You will need
to push the SD card into the port until it is recessed about 1 mm to ensure it
locks into place. You will hear a click once that point has been reached. If
resistance is felt, stop immediately, and check whether the card is oriented
correctly.
Removing an XQD card
Before removing the XQD card, confirm that the memory card access light is
o. Then press the card in with a finger to release it. The memory card pops
out and can be removed by using two fingertips.
Removing a SD card
Before removing the SD card, confirm that the memory card access light is o.
Then press the card in and let it go. The inserted SD card needs to be pushed
about 1 mm into the port before it will release. Use a small plate or a finger nail
to do so. The memory card will now be released, and you can remove it with
your fingertips.
Selecting cards for storage
You can choose to store the captured raw files on either the XQD or the SD
card. You also have the option to save a raw version to XQD and a jpeg version
to SD. It will be explained in a later chapter how to set this up.
Shutter Half Press
You can decide what the XT Camera System should do when half pressing the
Shutter Button on the XT Camera.
It is possible to either active Live View on the screen, to turn the display on or
to disable any action. This is set by entering the IQ4 Menu and selecting XT
Menu > Shutter Half Press > and choosing one of the options.

14Readying the camera systemXT Camera System Manual |
Restore to Default
LED Lights
The IQ4 feature two main LEDs located below the bottom left corner of the
screen.
A Blue LED will show when you power the IQ4 on. Two Red LEDs indicates
that the back is going through the boot up procedure.
When capturing an image the Green LED will blink rapidly to indicate that the
IQ4 is busy and that there are images in the buer that needs to be cleared to
the XQD card, the SD card and/or the local storage.
A Red LED indicates that the IQ4 is writing to the storage media, and
therefore the buer has not been emptied.
Restoring the defaults
The IQ4 is supplied preconfigured with a number of default settings ready for
use, either when purchased by itself, or with the XT.
After adjustment of these settings, you can restore the back to the factory
defaults from the back’s screen by pressing Menu > System Settings >
Restore to Default.
LED Lights

XT Camera System
– Getting Started
The XT Camera System is controlled from the touch screen on the IQ4 with
regards to exposure, storage and file settings while the Shift functionality and
the Shutter button is found on the XT Camera Body. Finally, focus is adjusted
manually on the XT Lens. This chapter will give a quick overview on how to get
started while the succeeding chapters will explain all the functionality and
options in detail.
Turning the XT System On and O
The XT System is turned on and o by pressing the power button on the IQ4.
The battery in the IQ4 supplies power to both the XT Camera Body and the
XT Lens with the integrated shutter.
Any power source connected to the IQ4 - like USB-C, Power over Ethernet or
an external power supply – will also feed the whole XT System. To turn the XT
Camera System o, press and hold the power button on the IQ4 for 2 seconds.
Setting the Exposure
The Exposure settings are controlled on the IQ4 start screen - called Camera
Controls – were you can set the desired Shutter Speed, Aperture and ISO
value. The chosen Shutter Speed and Aperture will automatically control the
shutter and aperture that are fully integrated into the XT Lens.
The exposure is adjusted manually on the XT Camera System. It is highly
recommended to enter Live View mode as it provides a number of visual aids
such as Exposure Meter, Exposure Simulation, live Histograms and RAW
Clipping Warning that makes it easy to adjust the exposure with sucient
accuracy.
Tap on the Movie icon in Camera Controls to initiate Live View.
There are two ways to select the exposure settings (Shutter Speed, Aperture,
ISO) in order to adjust those. You can either press on the bottom-left key on
the IQ4 to cycle through the options or just tap on the desired setting at the
bottom of the touch screen.
Once ISO, Shutter Speed or Aperture becomes highlighted, you can adjust the
value by pressing on the top-right key or the bottom-right key on the IQ4. The
top key increases the shutter time, ISO and Aperture values while the bottom
key do the reverse.
It is highly recommended to take advantage of the dierent exposure
adjustment aids that Live View provides like the RGB Histogram, RAW
Histogram and RAW Clipping Warnings that are explained below. You enable
these by sliding your finger in from the right of the screen and tap on the
Histogram icon.
Please see the succeeding Camera Controls and Live View chapters for full
detail on adjusting the exposure.
15Getting Started 15XT Camera System Manual |

XT Capture Settings
In addition to adjusting exposure, the Camera Controls also let you change
additional settings like White Balance, File Format and applying an IQ Styles.
These settings are accessed by tapping on the related icon on the Camera
Controls screen.
Adjusting the Focus
Focus is adjusted manually with the Focus Ring on the XT Lens. It is highly
recommended to enter Live View mode when adjusting the focus by tapping
on the Live View icon on Camera Controls.
There are two ways to evaluate the focus when in Live View - Focus Peaking
and zooming into the image. Focus Peaking is a visual aid that mark the sharp
areas green and will update as you change the focus. You can also zoom into
any part of the image by tapping on it and then inspect the sharpness level. It
is possible to combine the two methods as Focus Peaking will update as you
zoom into the image and pan around.
For more information on how to turn Focus Peaking on and o as well as
taking advantage of the other Live View features, please see the Live View
chapter later on.
Using Shift
The XT Camera System provides horizontal as well as vertical (rise/fall)
movements that enables perspective control, image displacement and
stitching of multiple captures. The workflow is greatly improved by that fact
that any movement is automatically detected and recorded as metadata in
each image file for advanced and seamless Lens Cast Correction (LCC) in
Capture One.
The horizontal and vertical (rise/fall) movements is operated by Horizontal
Shift Dial on the top of the XT Camera Body and the Vertical Shift Dial located
at the right-hand side of the camera.
You can check the amount of X movements in millimeters at the top of the
camera body with the Horizontal Shift Scale and the amount of Y movements
in millimeters on the side of the camera body with the Vertical Shift Scale. You
can apply shift in both directions up to +/- 12mm.
The shifted scale will also be visible on the IQ4 screen when using the Live
View and Camera Controls and will – as mentioned – be recorded
automatically in the captured image metadata for Capture One to recognize.
It is recommended to enter Live View when adjusting the Shift values as the
eect of the movements(s) will be clearly visible and easy to review.
16Getting StartedXT Camera System Manual |

Capturing Images
You can either capture an image by pressing the Shutter Release Button on
the XT Camera or by tapping on the Capture Button in the IQ4 touch screen
when in Camera Controls or Live View.
Viewing the Image
The captured image will be shown on the IQ4 screen automatically as a
default behavior. You can view a Histogram to check for proper exposure as
well as zooming into the image to review focus and sharpness.
Please read the Viewing Images chapter for full details on how to browse
through the captured images and how to review, rate and delete them.
17Getting Started 17XT Camera System Manual |

18IQ4 NavigationXT Camera System Manual |
IQ4 Navigation
Touch Screen Operation
The 3.2-inch touch screen on the IQ4 let you use touch gestures like swipe to
browse through images quickly, pinch to zoom in to an image as well as
activating tools and adjusting settings.
The operation of IQ4 is divided into five major modes: Camera Controls,
Browser, Tools Viewer, Viewer and Live View. You cycle through them by
pressing the top-left button on the IQ4 and tapping the button until the
desired mode is chosen in the Mode Bar. If you tap just once on the top-left
key, it goes back to the last used mode. This way you can quickly switch
between Camera Controls and Tools Viewer, for instance, even though they
are not next to each other.
You can also select a mode from the Shortcuts Menu that is accessed by
swiping up from the bottom of the touch screen.
The IQ4 will start up in Camera Controls as default.
Accessing Tools, Settings and Status
While in any of these modes, you can always access the Shortcuts Menu and
the Status Menu. There is also a number of context sensitive Actions and Tools
that you can control while in the Camera Controls, Browser, Viewer, Tools
Viewer or Live View mode.
See next page for a visual guide to the swipe feature.
Changing mode on the touch screen
Swipe up for Shortcuts Menu
Swipe in for Actions (left) and Tools (right)

19IQ4 Navigation 19XT Camera System Manual |
Status Bar
Shortcuts Menu with IQ4 Main Menu selected
There are the four dierent edge gestures where you swipe from the edge on
the screen and inwards.
• Swipe from top edge and downwards activates the Status Menu
• Swipe from bottom edge and upwards activates the Shortcuts Menu
• Swipe from left edge and inwards activates the Actions (like Delete,
Rating, etc.)
• Swipe from right edge and inwards activates the Tools (Histogram, Clip
Warning, Metadata, etc.)
You close the Shortcuts Menu, Status Menu, Actions, and Tools again by
swiping in the opposite direction towards the edges.
Using the Shortcuts Menu
The Shortcuts Menu (swipe up from bottom) have a number of shortcuts to
select modes or the IQ4 Menu. It is similar to the Contextual menu on the older
IQ3.
The features and settings that you can select from the Shortcuts Menu are:
• Camera Controls
• Browser
• Tools Viewer
• Viewer
• Live View
• IQ4 Main Menu
• Lock (if enabled)
Using the Status Bar
The Status Bar area at the top of the screen will show you key information
about battery, memory cards and connections.
The icons for USB-C, Ethernet and WiFi are only displayed in the Status Bar if
there is currently a connection (cables for USB-C and Ethernet, wireless for
WiFi). A gray icon indicates that there is a connection, but no computer host
(Capture One) is currently present. A white icon indicates that there is a host.
If you swipe down from the top of the screen, the Status Menu will reveal more
information (see next page).
Status Menu
ToolsActions
Shortcuts Menu

20IQ4 NavigationXT Camera System Manual |
Status Menu
If an icon is greyed out instead of being white it means that it (like the SD
card) is not currently present or active.
If you tap on one of the icons in the Status Menu, it will take you to the
relevant setting in the IQ4 Menu. The following is a list of the 8 dierent points
of information in the Status Menu and where they will take you in the IQ4
Menu System, if you tap on them:
• Battery Status -> Power Management
• Capture Readiness -> About
• USB-C Connection > Storage Setup
• Ethernet Connection > Network Settings
• XQD card presence > Storage Setup
• SD card presence > Storage Setup
• WiFi Connection > Network Settings
• Sensor Temperature -> Temperature
Swipe up from the bottom of the screen to close the Status Menu.
Camera Controls
The default start screen is the Camera Controls where you can adjust
exposure settings and capture the image. Please see the Camera Controls
chapter on how to use it.
Viewing Images
When you want to review the captured images, select either Viewer or
Browser by pressing the top-left button on the IQ4 until it is highlighted or by
swiping up from the bottom of the screen and select the desired mode.
Once in Viewer, you can browse through the captured images in full screen
mode by swiping on the touch screen with one finger in either direction. You
can also use pinch gestures to zoom in and out.
Please see the next chapter for all the information about viewing, deleting and
rating images as well as enabling workflow features like Highlight and Clip
Warning, adding a Grid overlay or showing file information.
Live View
You initiate Live View by either tapping on the Movie icon in Camera Controls
or by pressing the top-left button on the IQ4 until the Live View icon is
highlighted. You can also swipe up from the bottom of the IQ4 touch screen
and selecting the icon.
Please see the Live View chapter for full information about the available
features and Tools in this mode.
Viewer
Live View icon
Camera Controls
Status Menu
Table of contents
Other PhaseOne Digital Camera manuals

PhaseOne
PhaseOne 645DF User manual

PhaseOne
PhaseOne 645DF User manual

PhaseOne
PhaseOne P 25 User manual

PhaseOne
PhaseOne H 10 C645 User manual

PhaseOne
PhaseOne iXU-RS 1900 User manual

PhaseOne
PhaseOne P 65+ User manual

PhaseOne
PhaseOne 645 AF User manual

PhaseOne
PhaseOne 645DF User manual

PhaseOne
PhaseOne XF User manual

PhaseOne
PhaseOne iXG User manual

PhaseOne
PhaseOne 645 User manual

PhaseOne
PhaseOne iXR User manual

PhaseOne
PhaseOne iXU-RS User manual

PhaseOne
PhaseOne Studiokit User manual

PhaseOne
PhaseOne 645DF User manual

PhaseOne
PhaseOne DJI M600 User manual

PhaseOne
PhaseOne XF User manual

PhaseOne
PhaseOne P 65+ User manual

PhaseOne
PhaseOne 645DF User manual

PhaseOne
PhaseOne XF IQ4 User manual