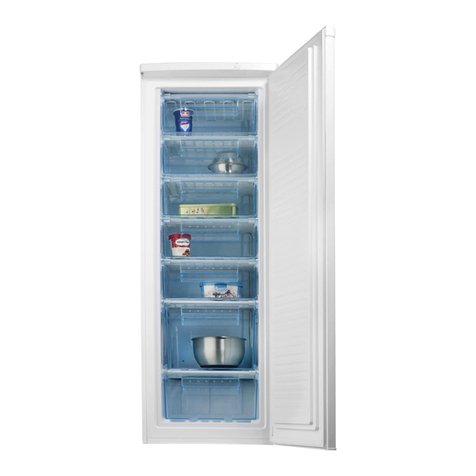
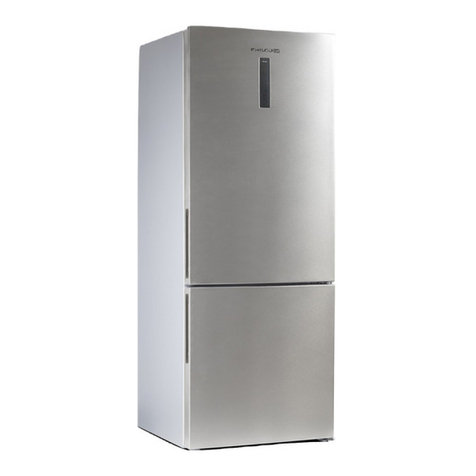
Philco PF 2602 NX User manual

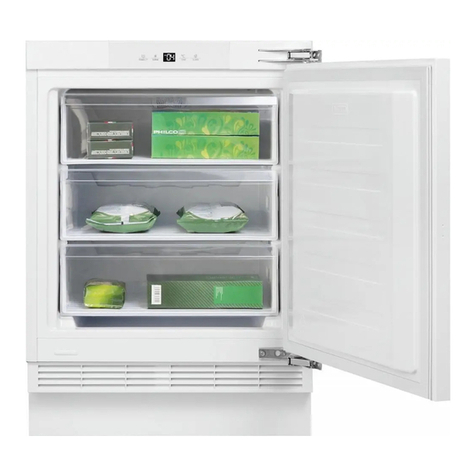
UPRIGHT FREEZER
USER'S MANUAL
PF 2602 NX

Dear customer,
Thank you for buying aPHILCO brand product. So that your appliance serves you well, please read all
the instructions in this user'smanual.

EN - 1
12/2013Copyright © 2013, Fast ČR, a. s.
CONTENTS
PART 1: BEFORE PUTTING INTO OPERATION ................................................................................................ 2
• Safety notices...................................................................................................................................................................................2
• Safety instructions for gas R600a..............................................................................................................................................4
PART 2: DESCRIPTION OF THE DEVICE ........................................................................................................... 5
PART 3: INSTALLATION.................................................................................................................................... 6
• Transport and unpacking ............................................................................................................................................................6
• Placement..........................................................................................................................................................................................7
• Cleaning before use.......................................................................................................................................................................8
• Electrical connection.....................................................................................................................................................................8
• Installing the handles....................................................................................................................................................................9
• Procedure for switching the door opening direction........................................................................................................9
• Installation of freezers as apair .............................................................................................................................................. 16
PART 4: SETTING THE TEMPERATURE........................................................................................................... 17
PART 5: ARRANGEMENT OF FOOD ............................................................................................................... 21
• Storage of frozen food............................................................................................................................................................... 21
• Chart on storing food in the freezer .....................................................................................................................................22
PART 6: DEFROSTING AND REGULAR MAINTENANCE ................................................................................ 23
PART 7: WHAT SHOULD IDO WHEN.............................................................................................................. 26
PART 8: INFORMATION SHEET ...................................................................................................................... 28

EN - 2
12/2013Copyright © 2013, Fast ČR, a. s.
PART 1: BEFORE PUTTING INTO OPERATION
Safety notice
Symbols:
General advice for the optimal operation of the appliance
General dangers
Hot surfaces
Before you put the appliance into operation
• Carefully study the user'smanual and installation instructions before installing and using the appliance!
This user'smanual includes important information regarding the installation, operation and maintenance
of the appliance. Store the user'smanual also for future reference, or for other owners of the appliance if
the appliance is sold.
If the appliance is transported in ahorizontal position the oil from the compressor may leak into the
cooling circuit. For this reason, allow the appliance to rest in avertical position for 12 hours before
turning it on, so that the oil ows back into the compressor.
After unpacking the appliance, carefully inspect that it has in not been damaged in any way. Also
check that the power cord is not damaged. If you discover any defects, turn o the appliance and
contact the vendor or in the case of adamaged power cord contact the service centre. If the appliance
and all its parts are in order, install it according to the instructions in the relevant chapter.
• When installing the appliance in its place, or when moving the appliance, the power cord could be
penetrated or damaged. Check that the power cord is not interfering anywhere.
• Before connecting the appliance to the electricity power source check that the capacity of the system
corresponds to the specications on the appliance'srating label.
• Any kinds of home electric wiring necessary for the connection of the appliance must only be carried out
by aqualied electrician.
If you move the appliance from its usual position, it is necessary to understand, that although you
have disconnected the power cord, the components on the rear side of the appliance may remain very
hot for some time.
This appliance is not designed to be built-in. Do not cover or block the air inow or outow openings.
Insucient ventilation will cause bad operation and damage to the appliance.
Operating the appliance
• Use the appliance only for the purposes for which it has been designed.
• This appliance is designed only for household use, for storing or freezing food and for preparing ice.
• The temperature inside the freezer may rise or fall slightly, and so these appliances are not suitable for
storing products (e.g. medicines), which require astable temperature.
Do not use any other electric appliances (e.g. heating elements, electric ice cream machines, etc.)
inside the appliance. There is adanger of explosion!

EN - 3
12/2013Copyright © 2013, Fast ČR, a. s.
Do not place food inside the freezer containing ammable propulsion gases (e.g. sprays) and no
explosive, contaminating or volatile substances. There is adanger of explosion!
Do not store liquids inside bottles and cans (especially beverages containing carbon dioxide) inside
the freezer compartment. The bottles and cans could crack!
• Store liquor only with armly tightened cap and in avertical position.
• Do not use the base, drawers, doors of the appliance, etc. as astep or as asupport. There is adanger of
injury to persons or damage to the appliance.
• Ensure that the plastic parts of the appliance and the door gasket seals are not soiled with oil or grease.The
plastic parts and the gasket seals would then become porous.
• Do not consume frozen food immediately after taking it out of the freezer compartment. There is adanger
of frost bite!
Avoid prolonged hand contact with frozen food, ice or evaporating pipes. There is adanger of frost
bite and freezing to these objects!
We do not recommend placing hot liquids or food inside the freezer and lling containers all the way
to the rim.
Do not put fragile, heavy or unstable objects on the freezer.
Children in the household
• Never leave packaging and its parts with the children. There is adanger of poisoning or suocation by the
cardboard boxes and plastic sheets!
• This appliance is in no way atoy for children!
• For appliances with door locks: do not leave keys within the reach of children!
• If you will not be using the freezer anymore, remove the doors, gasket seals and store it in asafe place. In
this way you will prevent the danger of children becoming trapped inside the freezer.
Maintenance and cleaning
Before you begin with regular or exceptional maintenance, disconnect the appliance'spower cord or
disengage the fuse or circuit breaker. Never pull the electric power cord, only pull on the power plug.
Do not use mechanical or any other devices, except for devices recommended by the manufacturer
for the purpose of accelerating the defrosting process.
• Do not defrost or clean the appliance using asteam cleaning device! The steam may come into contact
with the electric components inside the appliance, where ashort circuit could occur. There is adanger of
electric shock!
• Do not remove the frozen ice layer and frozen on food using aknife or asharp object. This could damage
the cooling medium pipes.The escape of the cooling medium may cause eye injuries or it may catch on re.
General instructions
• This appliance must not be used by persons (including children) with physical, sensory or psychological
impairments or by inexperienced persons, unless properly trained or schooled in the safe use of the
appliance, or unless they have been properly supervised by aperson who will be responsible for their
safety. Children should be supervised so as not to play with the appliance.
• This appliance has been tested in accordance with the directives in force in the European Union.
• The tightness of the cooling circuit has been veried.
• This appliance conforms to the relevant safety provisions for electrical appliances in force in the European
Union.
EN - 4
12/2013Copyright © 2013, Fast ČR, a. s.
Technical safety
The appliance contains acooling gas, ISOBUTHAN (R600a). Only transport or move the appliance with
the utmost care, prevent excessive impacts and shaking to prevent damaging the appliance. If the
cooling circuit becomes damaged and the cooling gas may be escaping, there is arisk of an explosion,
which may be ignited by aspark or ame. If the appliance shows signs of damage, it must not be put
into operation. In such acase contact the service centre, ventilate the room where the appliance is
located and prevent the spreading of ames or other interference with the appliance.
Safety instructions for gas R600a
Measures in case of an unexpected release
If ventilation is possible, allow the material to evaporate.
Characteristics of the gas
The gas is highly ammable, it is necessary to completely prevent contact with an open ame and hot surfaces.
Because the R600a gas is heavier than air, it may become very concentrated at the level of the ground, where
ventilation is weak.
First aid
Inhalation
Take the aected person from the contaminated area to a warm, well ventilated location. Staying in
a contaminated location for a long time may cause suocation, or potentially loss of consciousness. If
necessary, provide mouth-to-mouth resuscitation and in exceptionally serious situations, under expert
medical supervision, give oxygen.
Contact with the skin
Random contact with the skin will not endanger health, it is better to thoroughly wash the aected area. The
liquid spray or dispersed liquid may cause frost bite, wash the aected area with large amounts of water and
contact amedical doctor.
Contact with the eyes
If eyes have been aected, wash out with large amounts of water, while trying to keep the eyes open, and call
aspecialised doctor as soon as possible.
If contact or inhalation of the R600a gas occurs, contact your medical doctor.

EN - 5
12/2013Copyright © 2013, Fast ČR, a. s.
PART 2: DESCRIPTION OF DEVICE
1
2
3
4
5
6
7
8
9
10
11
12
13
14
15
16
17
18
19
1. Outer case
2. Cover
3. Ice drawer.
4. Drawer with roller wheels
5. Top freezer drawer
6. Middle freezer drawer
7. Handle
8. Freezer door
9. Bottom freezer drawer
10. Door gasket seals
11. Levelling feet
12. LED light
13. Narrow freezer drawer
14. Glass shelf
15. Shelf holder
16. Top compartment
17. Small storage box (inside)
18. Middle shelf
19. Bottom shelf
NOTE:
Due to the continuous innovation of products, the actual appliance may dier from this user'smanual
but the functions and methods of use remain the same. For more room in the freezer, you may remove the
drawers (except for the bottom drawer) and install grates and the ice tray.

EN - 6
12/2013Copyright © 2013, Fast ČR, a. s.
PART 3: INSTALLATION
Transport and unpacking
If the appliance is transported in ahorizontal position the oil from the compressor may leak into the cooling
circuit. For this reason, allow the appliance to rest in avertical position for 12 hours before turning it on, so that
the oil ows back into the compressor.
Remove the external packaging, remove the protective plastic lm from the surface of the appliance (if used)
and clean the external parts of the appliance with an agent designed for this purpose. Do not use steel wool or
any coarse agents, which could irreparably damage the surface of the appliance. Carefully remove all papers
and adhesive tape from the appliance, doors and other parts packed in polystyrene. Remove documents and
accessories from inside the appliance.
The packaging material is recyclable and is marked with a recycling symbol. For disposal follow the local
regulations. Packaging materials (plastic bags, polystyrene parts, etc.) must be kept out of the reach of children,
because they present apossible source of danger.
Carefully inspect the appliance. If you discover any faults, stop the installation and contact the vendor.
Operating conditions
The proper operation of the appliance, the freezing temperatures are guaranteed only when the following
conditions are met:
• The temperature in the room where the appliance is located conforms to the climate class stated on the
appliance'srating label.
• Maximum ambient relative humidity: 90%.
• The appliance must be placed at asucient distance from heat sources (e.g. baking ovens, central heating,
direct sunlight, etc.).
• The appliance must be located in such aplace that it is protected against the eects of weather.
• Regular maintenance is performed according to the instructions in this user'smanual.
• The ventilation openings in the cover of the appliance must not be covered by anything.
• Correct installation (e.g. levelling, the capacity of the system correspond to the specications on the rating
label of the appliance.)
Table – Climatic class
Climatic class Ambient temperature
SN +10°C to +32°C
N +16°C to +32°C
ST +16°C to +38°C
T +16°C to +43°C

EN - 7
12/2013Copyright © 2013, Fast ČR, a. s.
Installation location
The installation location of the appliance must meet the requirements in the paragraph "Operating conditions"
and must have astable oor with aload bearing capacity corresponding to the weight of the appliance.
Furthermore you must maintain distances and dimensions of the appliance, so that correct operation is
ensured:
1. Top part at least 20 cm;
2. Rear part at least 10 cm;
3. The wall on the side where the door opens at least 30 cm.
Level the appliance using the levelling feet, ensure there is agap between the bottom edge of the appliance
and the ground, so that there is sucient circulation of the cooling air, by which you will ensure the optimal
performance of the cooling circuit.
Check whether any cooling circulation pipes have been damaged during the installation.
• Use the appliance only for the purposes for which it has been designed.
• The appliance must be located on arigid and even surface.
In this way you will ensure free circulation of the coolant and eective operation of your appliance.
• If possible, place the appliance into acool, well ventilated and dry room.
• Do not locate the appliance in direct sunlight, or in aroom with ahigh temperature, in the vicinity of any
sources of direct heat, such as heating, an oven, astove, etc. – this would mean that the compressor would
need to work alot harder resulting asubstantially higher power consumption level.
If it is not possible to prevent the installation in the vicinity of aheat source, we recommend the insertion of an
appropriate insulating board (do not use asbestos) between the appliance and the heat source; or at least to
maintain the following minimum distances:
• From agas or electric stove 3 cm;
• From aheater or oven, etc. 30 cm;
• From another cooling appliance 2 cm.
Do not place any appliances on the appliance, which release heat on to the appliance, such as microwave
ovens, toasters, etc.
Never cover the ventilation grill. Pull out the power plug by pulling on the plug itself, never pull on the cord
when disconnecting the appliance.
Before turning on the appliance allow it to stand in its nal location for 12 hours, the coolant circuit
will stabilise in this way and no operating problems will occur. Before connecting the appliance to the
power grid check that it is perfectly dry inside – especially in the corners.
Danger warning
The coolant may be highly ammable, depending on its composition. The coolant circuit was
hermetically closed and sealed and was tested many times for possible leaks. Any unqualied
tampering with the product may cause are hazard. Check that there is no mechanical interruption
or eect on the coolant circulation, namely in the accessible parts around the compressor.
Only professionally qualied persons may work on the cooling system.

EN - 8
12/2013Copyright © 2013, Fast ČR, a. s.
Recommendation: We recommend that sucient space of 135° is kept in the front part for the opening of the
door – see the following picture.
50 mm 50 mm
1025 mm
1220 mm
712 mm
Cleaning before use
Check that you have removed from the appliance all adhesive tape used to hold accessories .Then clean all the
inside parts using lukewarm water with aneutral cleaning agent, vinegar or sodium carbonate – in this way
you will remove the characteristic odour of new parts – then dry carefully. Do not use detergents or aggressive
agents, which could damage the surfaces.
Electrical connection
Before connecting the power plug to the power socket, check that:
• Your hands are completely dry.
• The voltage and frequency shown on the performance label of the appliance corresponds to that in
the home power grid (permitted tolerance from -6% to +6% for nominal voltage, for use with dierent
voltages, use avoltage changer with the corresponding parameters).
• The power cord and the plug are not damaged or caught under heavy objects.
• The power cord is not excessively tensioned, it is not permitted to use an extension cord.
Do not connect the appliance to avoltage rectier (e.g. solar power plant) or use an extension cord.
The appliance must be connected to aworking grounding lead. If the power socket of the home
system is not grounded in accordance with the current legal regulations, connect the appliance
after consulting a specialised technician to the grounding lead itself. The manufacturer takes no
responsibility for injuries caused as aresult of not following these instructions.
If you do not correctly level the freezer during the installation, the door may not close shut and seal
properly, which may cause problems with the cooling, ice build up or moisture. Levelling the freezer is
very important.
Level the freezer using the levelling feet – turn them clockwise to lift the freezer and turn them anticlockwise
to lower the freezer.

EN - 9
12/2013Copyright © 2013, Fast ČR, a. s.
Installing the handles
For easier transport, the handles are supplied separately in aplastic bag and it is necessary to install them.
1. Remove the screw covers on the left side of the door and place them in the plastic bag.
2. Place the handle on to the left part of the door. The axis of the screw holes in the handle and the holes in
the door should be aligned as shown in the picture below.
3. Screw on the handles with the supplied screws found in the plastic bag. Then install the handle covers.
Procedure for switching the door opening direction
You can change the door opening direction - from the left (as supplied by the manufacturer) to the right if the
location of the appliance requires it.
WARNING:
When changing the door opening direction, the appliance must not be connected to the power supply.
Check that you have disconnected the plug of the power cord from the mains power socket.
Tools
8mm socket wrench Narrow at screwdriver
Philips screwdriver 8mm double-ended wrench
NOTE:
Prior to starting with the change, place the appliance on its back so as to gain access to its underside. Lay
the appliance down on to asoft mat or similar material so that the cooling circuit located in the rear of
the appliance is not damaged.

EN - 10
12/2013Copyright © 2013, Fast ČR, a. s.
To change the door opening direction, proceed as follows.
1. Stand the appliance upright.
2. Open part 1in the top part of the appliance from the left side and then remove part 3and nally part 4
from the top part in the same manner. Remove part 2and put it back into the plastic bag.
1Top cover
2Top hinge cover (left)
3Top cover of the top door
4Corner cover

EN - 11
12/2013Copyright © 2013, Fast ČR, a. s.
3. Disconnect electrical connector 1and electrical connector 2and then remove part 3.
4. Remove screws 1, release cables 2and remove part 3.
Special self-tapping
screws
Grounding wire
Top hinge part
NOTE:
During step 4, hold the door with your hand so that it does not fall o.
5. Remove the door and place it on asoft surface with the front part facing upwards. Lift up part 1and part
4, then loosen screws 2as shown in the picture. Change the handle 3to the left side, then insert screw
2, part 1and part 4afterwards. Loosen screws 7, remove part 6and part 5, turn part 6and then
install part 5and part 6on the right side using screws 7.

EN - 12
12/2013Copyright © 2013, Fast ČR, a. s.
Handle covers
Special self-tapping screws
Handle
Screw hole covers
Door holder
Stopper
Self-tapping screws
NOTE:
Remove the handle cover as shown on the picture: bend the top wing and remove the top clip from the
handle and also on the other side, then remove the handle cover.
clip
NOTE:
Install the handle covers as shown in the picture: rst secure the clip, then close the cover from the inner
side until you hear an audible click.

EN - 13
12/2013Copyright © 2013, Fast ČR, a. s.
clip
6. Lay the appliance down at, remove part 3and loosen screw 4. Remove part 2and part 1.
1Bottom hinge (left)
2Fixed plate of the front foot
3Levelling feet
4Self-tapping screws
washer
Note: The washer may
stick to the bottom
door.
7. Screw out the bottom hinge, move it to the other side with the screw holes and then screw it on and then
also the washer.
8. Perform step 6again, change part 1to the right side and part 2to the left side and then secure with
screws 4. Finally install part 3.
Bottom hinge (right)

EN - 14
12/2013Copyright © 2013, Fast ČR, a. s.
9. Screw out the top hinge, turn it over and secure it on the other side. Then put it aside for further use.
10. Exchange the wires on both sides of the appliance.
11. Place the top door in the correct position, set part 1and the top door, move the connecting wire 2into
the holes in the top part of the door from left to right and then secure part 1and wire 2with screws 3.
(Hold the door in place with your hand during the installation.)

EN - 15
12/2013Copyright © 2013, Fast ČR, a. s.
12. Connect the power supply connector 1according to the connection in step 3 and then install part 2(it
is found in the plastic bag).
Top hinge cover (right)
13. Turn part 1by 180° and install it in the left corner of the door, then secure part 2. (both were removed
in step 2.)
14. Disconnect the connecting cable from the connector (part 3in step 3) and install it on to the second
connector, which you will use (it is marked with the letter "L" and is located in the plastic bag). Place the
removed connector into the plastic bag.
NOTE:
Check that the coupling of the connecting cable ts properly into the connector.

EN - 16
12/2013Copyright © 2013, Fast ČR, a. s.
15. Install part 1, connect connector 2and then install part 3.
Installation of freezers as apair
• Your freezer may be installed as apair.
• Install according to the instructions on the picture.

EN - 17
12/2013Copyright © 2013, Fast ČR, a. s.
PART 4: SETTING THE TEMPERATURE
Display and indicator lights on the display
The appliance is controlled by means of the display and the indicator lights on the display; the appliance is
equipped with corresponding functions and modes as shown on the displays on the pictures below. As soon
as the appliance is turned on for the rst time, abacklit icon on the display will remain in operation. If you do
not press any button and the door is closed, the backlight will turn o.
Setting the temperature
We recommend that the temperature inside the freezer is set to -18°C when you turn the appliance on for the
rst time. If you wish to change the temperature, proceed as follows.
CAUTION!
Please remember that the temperature that you set will be the average temperature of the entire freezer.
The temperature inside a compartment may dier from the temperature shown on the display, as it
depends on the amount of stored food and its location in the appliance. Ambient temperature also has
an eect on the nal temperature inside the appliance.
1. Freezer
Press the "Freezer" button to set the temperature in the freezer in the range from -14°C to -24°C as required; the
respective setting will be shown on the control panel.
2. Super Freeze
The "Super Freeze" function makes it possible to freeze inserted food quickly with minimal
power consumption. Rapid freezing retains vitamins and the nutritional values of fresh food
and keeps food fresh for longer.
Press the "Super Freeze" button to activate the "Super Freeze" function. The indicator light is lit
and the temperature is automatically set to -24°C.
Freezing the maximum possible amount that can be frozen using this function may take up to
24 hours.
The "Super Freeze" function automatically turns itself o after 26 hours.
When the "Super Freeze" function is activated, it can be deactivated by pressing the "Super
Freeze" or "Freezer" button and the temperature of the freezer will return to the initially set
value.
3. Eco mode
This function makes it possible to run the freezer in an power saving mode, which is useful, for
example, when going on holiday, by reducing power consumption. Hold down the "Eco Energy"
button for approx. 3 seconds, until the indicator light is lit.
When the "Eco Energy" function is activated, the temperature automatically changes to -15°C to
achieve minimal power consumption.
When the "Eco Energy" function is activated, you can deactivate it by pressing the "Eco Energy"
or "Freezer" button. The temperature of the freezer will automatically return to the previously
set temperature.

EN - 18
12/2013Copyright © 2013, Fast ČR, a. s.
4. Sound alarm
If the sound alarm is activated, the "Alarm" icon will be lit and asignal will be made. Press the
"Alarm" button to cancel the sound alarm and the "Alarm" indicator light will turn o and the
alarm will stop.
Door alarm
If the freezer door is left open for longer than 2 minutes, an alarm will be sounded. The door
alarm will be sounded 3 times every minute and will automatically turn o after 10 minutes.
To save power, do not leave the appliance'sdoor open for too long.The alarm will also be turned
o by closing the door.
Temperature alarm
If the freezer temperature is too high due to a power outage or due to another reason,
atemperature alarm will be sounded and "--" or nothing will appear on the display.
The alarm will be sounded ten times and then it will turn o automatically.
In the event of atemperature alarm, press the "Alarm" button for approx. 3 seconds to check the
highest freezer temperature. The temperature value and the "Alarm" icon will be lit at the same
time for approx. 5 seconds. This function is not available on all models.
Caution!
As soon as the power supply is restored, it is normal for the temperature alarm to sound again;
press the "Alarm" button to cancel it.
5. Power button
If you need to clean the appliance or is you will not be using it for an extended period of time, press the "Power"
button.
If the freezer is in operation, you can turn it o by holding down the "Power" button for approx. 5 seconds and
the display will turn o.
Important!
Do not store any food inside during this time. If the appliance is turned o, turn it on by holding down the
"Power" button for approx. 1 second and the previous settings will be renewed.
6. Child Safety Lock
Press the "Child Lock" button to prevent children
from accidentally changing settings. If the child safety lock function is activated, none of the
buttons will be active, with the exception of the "Alarm" button.
To activate the child safety lock function hold down the "Child Lock" button for approx.
3seconds and the child lock icon will be lit.
To deactivate the child safety lock function hold down the "Child Lock" button for approx.
3seconds and the child lock icon will turn o.
7. Freezer accessories
Slide-out cover
Pull out the slide-out cover upwards when you need to take out food from the top drawer.
Before pulling the cover out or closing it, you must lift it up in the direction of the rails. Then the slide-out cover
will wind up into the top or bottom part of the drawer.
Table of contents
Other Philco Freezer manuals

Philco
Philco PTF 752 User manual

Philco
Philco PCF 1421 User manual

Philco
Philco PSF 302 User manual

Philco
Philco PBU1153A User manual

Philco
Philco PF 1472 User manual

Philco
Philco PTF 802 User manual

Philco
Philco PF 186 ENF User manual

Philco
Philco PCF 142 F JOKER User manual

Philco
Philco PF 1475 ENF User manual

Philco
Philco PCF 246 EFPI User manual

Philco
Philco PCF 142 F JOKER User manual

Philco
Philco PTF 60 F User manual

Philco
Philco PTF 862 User manual

Philco
Philco PTF 8211 BU User manual

Philco
Philco PF 2252 User manual

Philco
Philco PFC-100 User manual

Philco
Philco PF 1602-5 User manual

Philco
Philco PCF 418 F JOKER User manual

Philco
Philco PTF 823 User manual

Philco
Philco PF 2272 User manual