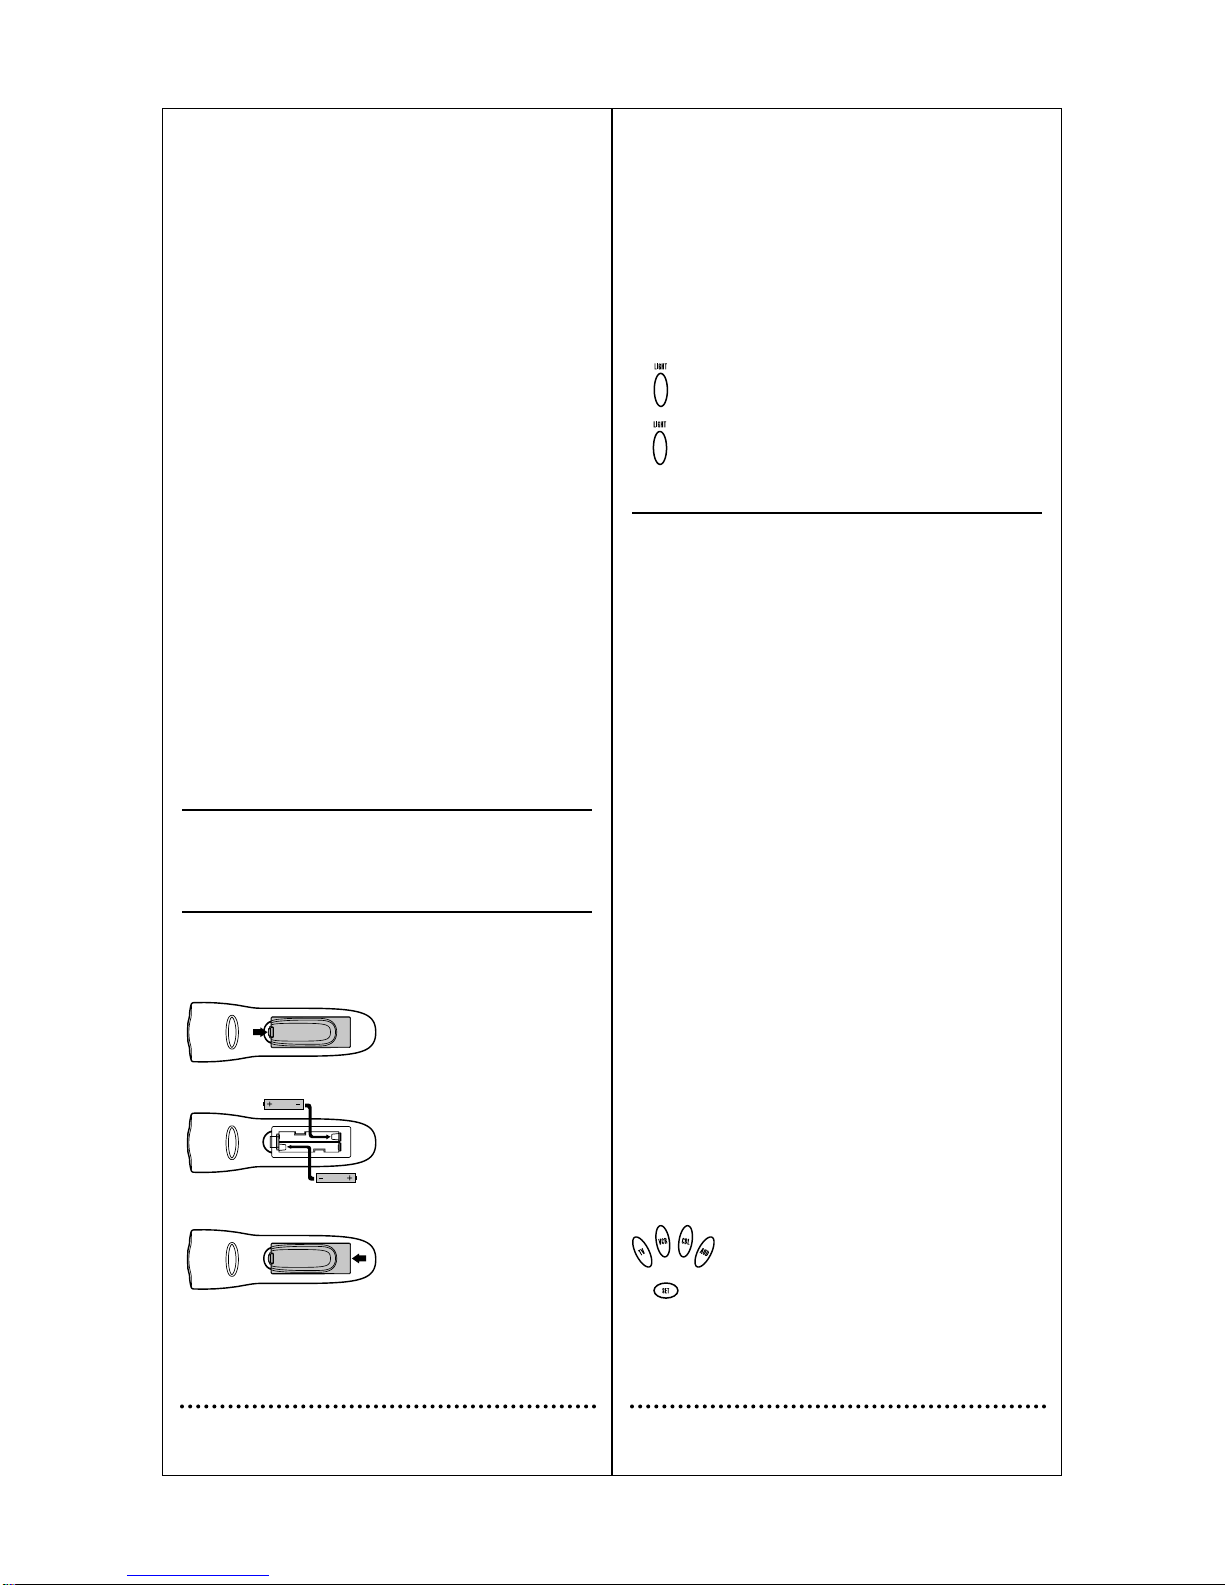
1. Press and hold SET until the red light blinks twice,then
release SET.
2. Enter 9-9-2. The red light will blink twice.
3. Press the Component key (e.g., TV, VCR, etc.) to be
moved once, then press the Component key (e.g.,
AUD, etc.) to be re-assigned once. When re-
assignment is done,the red light will blink twice to
confirm your choice.
4. The re-assigned key is now ready to be programmed for
the component. See ProgrammingYour Remote Control on
page 4.
Example –Re-assigningThe AUD key to be a DVD (OrVCR) key:
For example,to have the remote control aTV,a Cable Converter, and
twoVCRs,you will need to re-assign the unused AUD key to operate
the secondVCR as follows:
1. Press and hold SET until the red light blinks twice,then
release SET.
2. Enter 9-9-2. The red light will blink twice.
3. Press VCR once.
4. Then press AUD once. When re-assignment is done,
the red light will blink twice to confirm your choice.
5. The AUD key is now ready to be programmed for your
DVD (or VCR) player. See Programming Your Remote
Control on page 4.
ABOUT OTHER FEATURES
Volume Lock
The remote control is set at the factory to control the volume inde-
pendently while in theTV,VCR, and CBL modes.
To control the volume from one mode (e. g., TV) while in another
mode (e.g., VCR or CBL), perform the instructions below to lock the
volume setting. This procedure will not affect separate control of your
audio component’s volume in the AUD modes.
NOTE: By pressing AUD before entering the sequence below, the
remote control will operate your home theater volume controls in all
modes.This feature does not apply to component keys that have been
re-assigned.
1. On the remote control, press TV once.
2. Press and hold SET until the red light blinks twice,then
release SET.
3. Press VOL+. The red light will blink twice.
Scan Key
The SCAN key allows the remote control to scan theTV,VCR and
CBL channels. When activated,the remote control will change chan-
nels every 3 seconds.
1. On the remote control, press TV,VCR or CBL once.
2. Press SCAN once. Scanning will start with the current
channel, then proceed to the next channel up, and con-
tinue until all channels of yourTV,VCR or CBL compo-
nent are scanned.
3. To stop scanning channels, press SCAN.
Favorite Channel Scan
The FAV CH Key can be pre-programmed with up to 10 of your
favorite channels and scans these only.
1 On the remote control, press a component key once
(e.g., TV,VCR, CBL) .
6
5. Aim the remote control at the component and press
POWER ONCE. It should turn off. If it does not
respond,repeat steps 2 and 3,trying each code for your
brand until you find one that works. If it still does not
work, try using Auto Scan (see below) on how to pro-
gram your component.
6. Repeat steps 1 through 5 for each component you want
to program into the remote control.
NOTES: Press each key within 10 seconds of the previous entry.
Otherwise, the remote control will exit the programming mode.
If you press SET at any time (except during step 3),the remote con-
trol will exit the programming mode without saving your entries. You
will have to start with step 1 to begin programming again.
Programming With Auto Scan
If your component does not respond to the remote control after try-
ing all codes listed for your brand,or if your brand is not listed at all,
try searching for your code using Auto Scan. For example, to search
for a code for aTV:
1. On the remote control, press TV once.
2. Press and hold SET until the red light blinks twice,then
release SET.
3. Aim the remote control at theTV and press SCAN. The
red light will blink twice.
4. Continue aiming the remote control at the TV (which
may take up to 5 minutes) until it turns off. Immediately
press any key except VOL-, LAST, SCAN, or SET.
If SCAN is pressed again after any key stops Auto Scan,the remote
will continue Auto Scan of the next ID from where it stopped.
If you have passed by the code that turns off theTV,press VOL- one
or more times until theTV turns on again.
5. To lock in the code and exitAuto Scan,press and release
SET the red light will blink twice.
6. To search for codes of other components,repeat steps 2
through 5,but substitute the appropriate key (e.g.,VCR,
CBL) for the (VCR or Cable) component you are search-
ing for.
NOTES: In the search mode, the remote will send IR (infrared)
codes from its library to the selected device, starting with the most
popular code first.
Checking the Auto Scan Codes
If you have set up the remote control using Auto Scan, you can now
find out which four-digit code is operating your component:
1. On the remote control, press a component key once
(e.g., TV,VCR, CBL or AUD).
2. Press and hold SET until the red light blinks twice,then
release SET.
3. Enter 9-9-0. The red light will blink twice.
4. To view the code for the first digit, press 1once. Wait
3 seconds, count the red light blinks (e.g., 3 blinks = 3)
and write down the number.
NOTE: If a code digit is "0" , the red light will not blink.
5. Repeat step 4 three more times for remaining digits. Use
2for the second digit,3for the third digit and 4for the
fourth digit.
6. To find codes of other components, repeat steps 1
through 5,but substitute the appropriate key (e.g.,VCR
or CBL) for the component you are checking. As
before,write down each four-digit code.
Re-Assigning Component Keys
The remote can be set up to control any combination of four home
entertainment components. By following these instructions,you can
re-assign or duplicate a component key onto an unused component
key.
5