manuals.online logo
Brands
  1. Home
  2. •
  3. Brands
  4. •
  5. Philips
  6. •
  7. Hair Removal System
  8. •
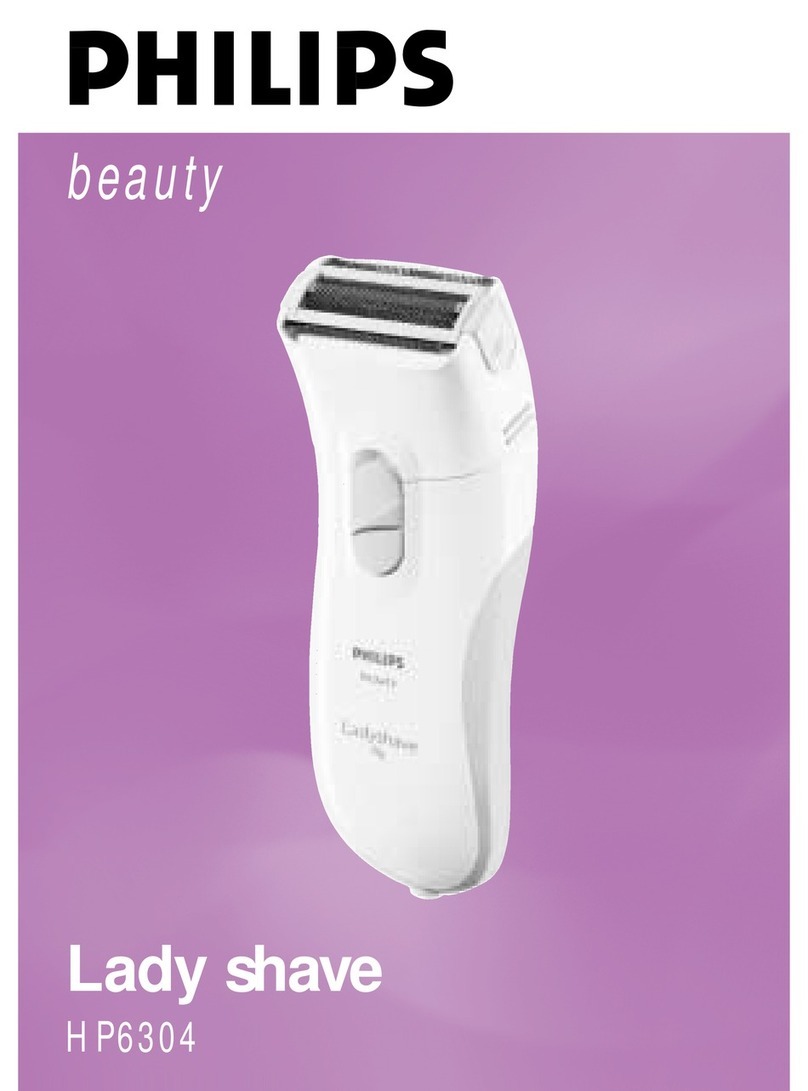
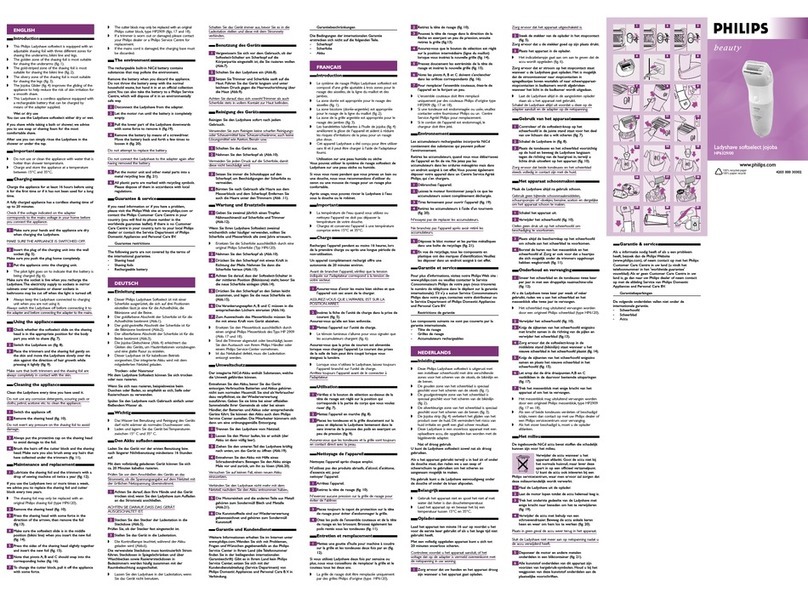
  9. Philips Ladyshave softselect HP6324/01 User manual

Philips Ladyshave softselect HP6324/01 User manual

ENGLISH NEDERLANDS
www.philips.com
u4203 000 50663
Introduction
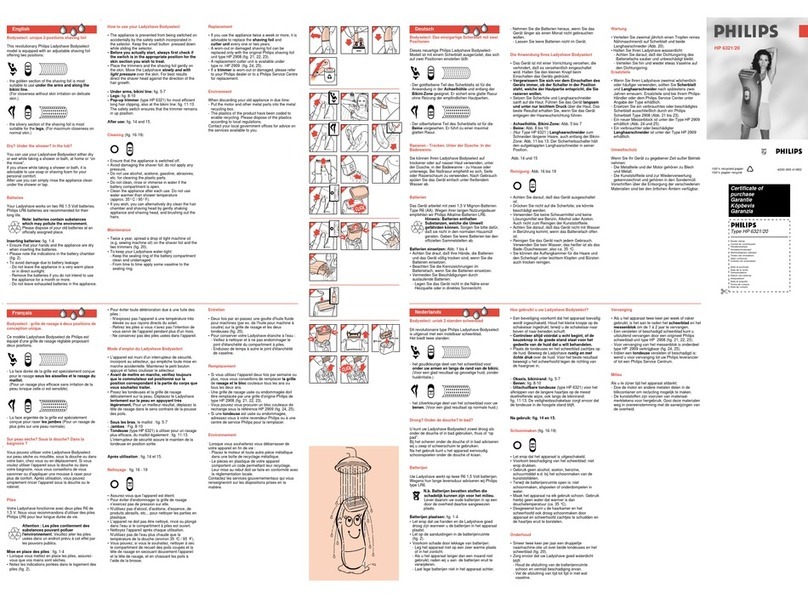
◗This Philips Ladyshave softselect is equipped
with an adjustable shaving foil with three
different zones for shaving the underarms,
bikini line and legs.
◗The golden zone of the shaving foil is most
suitable for shaving the underarms (fig. 1).
◗The gold-striped zone of the shaving foil is
most suitable for shaving the bikini line (fig. 2).
◗The silvery zone of the shaving foil is most
suitable for shaving the legs (fig. 3).
◗This Ladyshave can be operated from the
mains as well on batteries. It is suitable for dry
use only.
◗The Jojoba Glider (fig. 4) improves the gliding
of the appliance to help reduce the risk of skin
irritation for a smooth shave.
The appliance is not rechargeable.
Important
◗Do not use the Ladyshave in the shower or in
the bath.The Ladyshave is not water-resistant.
◗Check if the voltage indicated on the adapter
corresponds to the local mains voltage before
you connect the appliance.
◗Store the appliance at a temperature between
15°C and 35°C.
Preparing the appliance for cordless
use
The Ladyshave runs on 2 R6 AA 1.5 volt
batteries. We strongly advise you to use Philips
LR6 PowerLife batteries.They supply sufficient
energy for approx. 40 minutes of shaving.
1Pull the battery cap downwards with some
force to remove it (fig. 5).
2Put the batteries in the battery holder.
Make sure the + and - poles of the batteries are
pointing in the rightdirection (fig. 6).
Make sure your hands and the appliance are dry
when inserting the batteries.
3Push the battery cap back onto the appliance.
Preparing the appliance for corded
use
1Insert the small plug into the Ladyshave
(fig. 7).
Make sure you push the plug home completely.
2Put the adapter plug in the wall socket
(fig. 8).
It is not necessary to remove the batteries if you
are going to use the Ladyshave on mains power.
Using the appliance
1Check whether the softselect slide on the
shaving head is in the appropriate position for
the body part you wish to shave (fig. 9).
2Switch the Ladyshave on (fig. 10).
3Place the trimmers and the shaving foil
gently on the skin and move the Ladyshave
slowly over the skin against the direction of hair
growth while pressing it lightly (fig.11).
Make sure that both trimmers and the shaving foil
are always completely incontact with the skin.
Cleaning the appliance
Clean the Ladyshave every time you have used it.
Do not use any corrosive detergents, scouring
pads or cloths, petrol acetone etc. to clean
the appliance.
1Switch the appliance off.
2Remove the shaving head (fig.12).
Do not exert any pressure on the shaving foil to
avoid damage.
3Always put the protective cap on the shaving
head to avoid damage to the foil.
4Brush the hairs off the cutter block and the
shaving head. Make sure you also brush away any
hairs that have collected under the trimmers
(fig. 13).
Maintenance and replacement
1Lubricate the shaving foil and the trimmers
with a drop of sewing machine oil twice a year
(fig. 14).
If you use the Ladyshave two or more times a
week, we advise you to replace the shaving foil
and cutter block every two years.
◗The shaving foil may only be replaced with an
original Philips shaving foil (type HP6120).
Inleiding
◗Deze Philips Ladyshave softselect is uitgerust
met een instelbaar scheerhoofd met drie
verschillende zones voor het scheren van de
oksels, de bikinilijn en de benen.
◗De gouden zone van het scheerblad is speciaal
geschikt voor het scheren van de oksels
(fig. 1).
◗De goudgestreepte zone van het scheerblad is
speciaal geschikt voor het scheren van de
bikinilijn (fig. 2).
◗De zilverkleurige zone van het scheerblad is
speciaal geschikt voor het scheren van de
benen (fig. 3).
◗Deze Ladyshave werkt zowel op netspanning
als op batterijen en is alleen geschikt voor
droog gebruik.
◗De Jojoba strip (fig. 4) verbetert het glijden
van het product over de huid. Dit vermindert
het risico van huid irritatie en geeft een glad
scheer resultaat.
Het apparaat is niet oplaadbaar.
Belangrijk
◗Gebruik de Ladyshave niet in bad of onder de
douche, omdat het apparaat niet waterdicht is.
◗Controleer of het voltage dat op de adapter
staat aangegeven overeenkomt met de
plaastelijke netspanning voordat u de stekker
in het stopcontact steekt.
◗Bewaar het apparaat bij een temperatuur
tussen 15°C en 35°C.
Het apparaat klaarmaken voor
snoerloos gebruik
De Ladyshave werkt op twee R6 AA 1,5 volt
batterijen. We raden u sterk aan Philips LR6
PowerLife batterijen te gebruiken. Deze bevatten
voldoende energie voor ongeveer 40 minuten
snoerloos scheren.
1Trek de kap van de batterijhouder met enige
kracht naar beneden om hem te verwijderen
(fig. 5).
2Plaats de batterijen in de batterijhouder.
Zorg ervoor dat de + en - polen van de
batterijen in de juiste richting wijzen (fig. 6).
Zorg ervoor dat uw handen en het apparaat
droog zijn wanneer u de batterijen plaatst.
3Duw de kap van de batterijhouder terug in
het apparaat.
Het apparaat klaarmaken voor
gebruik met snoer.
1Steek het kleine stekkertje in de Ladyshave
(fig. 7).
Zorg ervoor dat u het stekkertje goed op zijn
plaats drukt.
2Steek de stekker van de adapter in het
stopcontact (fig. 8).
U hoeft de batterijen niet te verwijderen wanneer
u de Ladyshave op netspanning gebruikt.
Gebruik van het apparaat
1Controleer of de softselect-knop op het
scheerhoofd in de juiste stand staat voor het
deel van uw lichaam dat u wilt scheren (fig. 9).
2Schakel de Ladyshave in (fig. 10).
3Plaats de tondeuses en het scheerblad
voorzichtig op de huid en beweeg de Ladyshave
langzaam tegen de richting van de haargroei in,
terwijl u lichte druk uitoefent op het apparaat
(fig. 11).
Zorg ervoor dat beide tondeuses en het
scheerblad steeds volledig in contact zijn met de
huid.
Het apparaat schoonmaken
Maak de Ladyshave altijd na gebruik schoon.
Gebruik geen bijtende schoonmaakmiddelen,
schuursponsjes of -doekjes benzine, aceton en
dergelijke om het apparaat schoon te maken.
1Schakel het apparaat uit.
2Verwijder het scheerhoofd (fig. 12).
Oefen geen druk uit op het scheerhoofd om
beschadiging te voorkomen.
3Plaats altijd de beschermkap op het
scheerhoofd om schade aan het scheerblad te
voorkomen.
4Borstel de haren van het messenblok en het
scheerhoofd af. Zorg er ook voor dat u haartjes
die zich mogelijk onder de trimmers opgehoopt
hebben wegborstelt (fig. 13).
Onderhoud en vervanging
1Smeer het scheerblad en de tondeuses twee
keer per jaar in met een druppeltje naaimachine-
olie (fig. 14).
Al u de Ladyshave twee keer per week of vaker
gebruikt, raden we u aan het scheerblad en het
messenblok elke twee jaar te vervangen.
◗Het scheerblad mag uitsluitend vervangen
worden door een origineel Philips scheerblad
(type HP6120).
2Verwijder het scheerhoofd (fig. 12).
3Knijp de zijkanten van het scheerhoofd
enigszins met kracht samen in de richting van de
pijlen en verwijder het scheerblad (fig.15).
4Zorg ervoor dat de softselect-knop in de
middelste stand (bikinilijn) staat wanneer u het
nieuwe scheerblad in het scheerhoofd plaatst
(fig.16).
5Knijp de zijkanten van het scheerhoofd
enigszins samen en plaats het nieuwe scheerblad
in het scheerhoofd (fig. 17).
6Let erop dat de drie draaipunten A,B en C
vastklikken in de daarvoor bestemde
uitsparingen (fig. 18).
◗Het messenblok mag uitsluitend vervangen
worden door een origineel Philips
messenblok, type HP2909 (fig. 19 en 20).
Trek het messenblok met enige kracht van het
apparaat af om het te vervangen.
◗Als een of beide tondeuses versleten of
beschadigd is/zijn, neem dan contact op met
uw Philips dealer of een Philips
servicecentrum voor vervanging.
◗Indien de adapter beschadigd is, laat hem dan
altijd vervangen door een van het
oorspronkelijke type om gevaar te
voorkomen.
Het milieu
Batterijen bevatten stoffen die schadelijk kunnen
zijn voor het milieu. Gooi lege batterijen niet bij
het normale huisvuil, maar lever deze apart in op
een officieel verzamelpunt (fig. 21).
◗Zorg ervoor dat de batterijen helemaal leeg
zijn wanneer u ze weggooit.
◗Deponeer de motor en andere metalen
onderdelen in een blikbak wanneer u het
apparaat afdankt.
◗Alle kunststof onderdelen van dit apparaat zijn
voorzien van hergebruik-symbolen. Houd u bij
het weggooien van deze kunststof onderdelen
aan de plaatselijke voorschriften.
Service & informatie
Als u informatie nodig heeft of als u een
probleem heeft, bezoek dan de Philips Website
(www.philips.com), of neem contact op met het
Philips Customer Care Centre in uw land (u vindt
het telefoonnummer in het 'worldwide guarantee'
vouwblad).Als er geen Customer Care Centre in
uw land is, ga dan naar uw Philips dealer of neem
contact op met de afdeling Service van Philips
Domestic Appliances and Personal Care BV.
2Remove the shaving head (fig.12).
3Press the shaving head with some force in
the direction of the arrows,then remove the foil
(fig. 15).
4Make sure the softselect slide is in the
middle position (bikini line) when you insert the
new foil (fig. 16).
5Press the sides of the shaving head slightly
together and insert the new foil (fig. 17).
6Note that pivots A, B and C should snap into
the corresponding holes (fig. 18).
◗The cutter block may only be replaced with
an original Philips cutter block, type HP2909
(figs. 19 and 20).
To change the cutter block, pull it off the appliance
with some force.
◗If a trimmer is worn out or damaged, please
contact your Philips dealer or a Philips Service
Centre for replacement.
◗If the adapter is damaged, always have it
replaced by one of the original type in order
to avoid a hazard.
The environment
Batteries contain substances that may pollute the
environment. Do not throw empty batteries away
with the normal household waste, but hand them
in at an official collection point.(fig. 21).
◗Make sure the batteries are completely empty
when you dispose of them.
◗When discarding the appliance in due course,
put the motor unit and other metal parts into
a metal recycling box.
◗All plastic parts are marked with recycling
symbols. Please dispose of them in accordance
with local regulations.
Information & service
If you need information or if you have a problem,
please visit the Philips Web site at
www.philips.com or contact the Philips Customer
Care Centre in your country (you will find its
phone number in the worldwide guarantee
leaflet). If there is no Customer Care Centre in
your country, turn to your local Philips dealer or
contact the Service Depar tment of Philips
Domestic Appliances and Personal Care BV.
DEUTSCH
FRANÇAIS
Einleitung
◗Dieser Philips Ladyshave Softselect ist mit
einer Scherfolie ausgerüstet, die sich auf drei
Positionen einstellen lässt: je eine für die
Achselhöhle, für die Bikinizone und für die
Beine:
◗Der goldfarbene Abschnitt der Scherfolie ist
für die Achselhöhle bestimmt (Abb. 1).
◗Der zum Teil goldfarbene Abschnitt der
Scherfolie ist für die Bikinizone bestimmt
(Abb. 2).
◗Der silberfarbene Abschnitt der Scherfolie ist
für die Beine bestimmt (Abb. 3).
◗Dieser Philips Softselect ist sowohl am Netz
zu betreiben wie über Batterien
◗Die Jojoba-Gleitschiene (Abb. 4) erleichtert
das Gleiten des Geräts, um Hautirritationen
vorzubeugen und eine glatte Rasur zu erzielen.
Das Gerät ist nicht für den Betrieb über
aufladbare Akkus bestimmt.
Wichtig
◗Verwenden Sie dieses Gerät nicht unter der
Dusche oder beim Baden in der Wanne. Das
Gerät ist nicht wasserdicht.
◗Prüfen Sie vor dem Gebrauch, ob die
Spannungsangabe auf dem Gerät mit der
örtlichen Netzspannung übereinstimmt.
◗Bewahren Sie das Gerät beiTemperaturen
zwischen 15° C und 35° C auf.
Vorbereitung des Geräts zum
kabelfreien Gebrauch
Das Gerät arbeitet mit 2 Batterien Type R6 AA
1,5 V. Wir empfehlen Ihenn nachdrücklich den
Gebrauch von Philips LR6 PowerLife Batterien.
Ihre Energie reicht für ca. 40 Minuten Rasieren.
1Nehmen Sie die Batteriekappe ab (Abb. 5).
Dazu ist ein wenig Kraft nötig.
2Setzen Sie die Batterien im Batteriehalter
ein.
Achten Sie auf die richtige Polung (+ und -) der
Batterien (Abb. 6).
Ihre Hände müssen beim Einsetzen der Batterien
völlig trocken sein.
3Setzen Sie die Batteriekappe wieder auf.
Introduction
◗Le système de rasage Soft Select de Philips
Ladyshave est composé d'une grille ajustable à
trois zones pour le rasage des aisselles, de la
ligne du maillot et des jambes.
◗La zone dorée est appropriée pour le rasage
des aisselles (fig. 1).
◗La zone bicolore (dorée-argentée) est
appropriée pour le rasage de la ligne du
maillot (fig. 2).
◗La zone de la grille argentée est appropriée
pour le rasage des jambes (fig. 3).
◗Cet appareil fonctionne sur piles aussi bien
que sur secteur. Il peut être utilisé uniquement
sur une peau sèche.
◗Les bandelettes lubrifiantes à l'huile de jojoba
(fig. 4) améliorent la glisse de l'appareil et
aident à réduire les risques d'irritations de la
peau pour un rasage plus doux.
L'appareil n'est pas rechargeable.
Important
◗N'utilisez pas l'appareil pendant que vous
prenez une douche ou un bain. Le Ladyshave
n'est pas étanche.
◗Avant de brancher l'appareil, vérifiez que la
tension indiquée sur celui-ci corresponde à la
tension de votre secteur.
◗Conservez l'appareil à une température
comprise entre 15°C et 35°C.
Préparation de l'appareil à l'emploi
sans fil
Le Ladyshave fonctionne avec deux piles de type
R6 AA de 1,5V. Nous vous recommandons
d'utiliser les piles Philips Powerlife LR6. Elles
offrent une autonomie d'environ 40 minutes de
rasage.
1Poussez le couvercle du compartiment à
piles en exerçant un peu de pression pour le
retirer (fig. 5).
2Insérez les piles dans le compartiment à
piles.
Vérifiez si les pôles + et - sont correctement
dirigés vers la direction correcte (fig. 6).
Assurez-vous d'avoir les mains bien sèches avant
de mettre les piles.
3Remettez le couvercle du compartiment à
piles.
Préparation d1e l'appareil à l'emploi
sur secteur
1Mettez la fiche de l'appareil dans le
Ladyshave (fig. 7).
Assurez-vous qu'elle est bien enfoncée.
2Insérez l'adaptateur dans la prise de courant
(fig. 8).
Il n'est pas nécessaire de retirer les piles de
l'appareil.
Utilisation
1Vérifiez si le bouton de sélection au-dessus
de la tête de rasage est réglé sur la position qui
corresponde à la partie du corps que vous
voulez raser (fig. 9).
2Mettez l'appareil en marche (fig. 10).
3Placez les tondeuses et la grille doucement
sur la peau et déplacez le Ladyshave lentement
dans le sens inverse de la pousse des poils en
exerçant un peu de pression (fig. 11).
Assurez-vous que les tondeuses et la grille soient
toujours en contact direct avec la peau.
Nettoyage de l'appareil
Nettoyez l'appareil après chaque emploi.
N'utilisez pas des produits abrasifs, d'alcool,
d'acétone, d'essence etc. pour nettoyer l'appareil.
1Arrêtez l'appareil.
2Retirez la tête de rasage (fig. 12).
N'exercez aucune pression sur la grille de rasage
pour éviter de l'abîmer.
3Placez toujours le capot de protection sur la
tête de rasage pour éviter d'endommager la
grille.
4Otez les poils de l'ensemble couteaux et de
la tête de rasage en les brossant. Brossez
également les poils restés sous la tondeuse
(fig. 13).
Entretien et accessoires
1Mettez une goutte d'huile pour machine à
coudre sur la grille et les tondeuses deux fois
par an (fig. 14).
Si vous utilisez Ladyshave deux fois par semaine
ou plus, nous vous conseillons de remplacer la
grille et le couteau tous les deux ans.
◗La grille de rasage doit être remplacée
uniquement par des grilles Philips d'origine
(type HP6120).
2Retirez la tête de rasage (fig. 12).
3Poussez la tête de rasage dans la direction
de la flèche en exerçant un peu de pression,
ensuite retirez la grille (fig.15).
4Assurez-vous que le bouton de sélection est
réglé sur la position intermédiaire (ligne du
maillot) lorsque vous insérez la nouvelle grille
(fig.16).
5Pressez doucement les extrémités de la tête
de rasage et insérez la nouvelle grille (fig. 17).
6Note: les pivots A, B et C doivent
s'enclencher dans les orifices correspondants
(fig. 18).
◗L'ensemble couteaux doit être remplacé
uniquement par des couteaux Philips d'origine
type HP2909 (fig. 19 et 20).
Pour remplacer l'ensemble couteaux, ôtez-le de
l'appareil en le forçant un peu.
◗Si une tondeuse est endommagée ou usée,
veuillez contacter votre fournisseur Philips ou
un Centre Service Agréé Philips pour
remplacement.
◗Si l'adaptateur ou le cordon d'alimentation est
endommagé, pour plus de sécurité et pour
éviter tout accident, il ne doit être remplacé
que par un adaptateur ou cordon d'origine.
Environnement
Les piles contiennent des substances qui peuvent
polluer l'environnement. Ne jetez pas les piles
avec les ordures ménagères, mais déposez-les
dans un endroit prévu à cet effet (fig. 21).
◗Assurez-vous que les piles sont complètement
vides lorsque vous les jeter.
◗Lorsque vous vous séparerez de votre
appareil en fin de vie, déposez le bloc moteur
et les parties métalliques dans une boîte de
recyclage.
◗En vue de recyclage, tous les composants en
plastique ont des marques d'indentification.
Veuillez les déposer dans un endroit assigné à
cet effet.
Garantie et service
Pour plus d'informations, visitez notre Philips Web
site : www.philips.com ou veuillez contacter le
Service Consommateurs Philips de votre pays
(vous trouverez le numéro de téléphone dans le
dépliant sur la garantie internationale). S'il n'y a
aucun Service Consommateurs Philips dans votre
pays, contactez votre distributeur ou le Ser vice
Department of Philips Domestic Appliances and
Personal Care BV.
Vorbereitung des Geräts zum
Gebrauch am Netz
1Stecken Sie den kleinen Gerätestecker in
den Ladyshave (Abb.7).
Achten Sie darauf, dass der Stecker ganz hinein
gesteckt wird.
2Stecken Sie das Steckernetzgerät in die
Steckdose (Abb. 8).
Sie brauchen beim Betrieb am Netz die Batterien
nicht aus dem Gerät zu nehmen.
Der Gebrauch des Geräts
1Vergewissern Sie sich vor Gebrauch, ob der
Softselect-Schalter am Rasierkopf auf den
Hautbereich geschaltet ist, den Sie anschließend
rasieren wollen (Abb. 9).
2Schalten Sie das Gerät ein (Abb. 10).
3Setzen Sie den Trimmer und die Scherfolie
sanft auf die Haut. Führen Sie das Gerät langsam
und unter nur mäßigem Druck über die Haut
gegen die Haarwuchsrichtung (Abb. 11).
Achten Sie darauf, dass sich sowohl die Trimmer
als auch die Scherfolie stets in vollem Kontakt zur
Haut befinden.
Reinigung des Geräts
Reinigen Sie das Gerät nach jedem Gebrauch.
Verwenden Sie zum Reinigen keine scharfen
Wasch-, Spül- oder Scheuermittel bzw.
Scheuerschwämme, auch keine Lösungsmittel wie
Alkohol, Azeton, Benzin usw.
1Schalten Sie das Gerät aus.
2Nehmen Sie den Scherkopf ab (Abb. 12).
Vermeiden Sie jede Berührung der Scherfolie; sie
ist sehr empfindlich.
3Behalten Sie stets die Schutzkappe auf dem
Scherkopf, solange Sie das Gerät nicht
verwenden.
4Bürsten Sie nach Gebrauch stets alle Haare
aus dem Messerblock und dem Scherkopf.
Vergessen Sie nicht die Haare unter den
Trimmern (Abb. 13).
Wartung und Ersatzteile
1Verteilen Sie zweimal jährlich einen Tropfen
reines Nähmaschinenöl auf der Scherfolie und
auf beiden Trimmern (Abb.14).
Wenn Sie Ihren Ladyshave Softselect zweimal
wöchentlich oder häufiger verwenden, sollten Sie
Scherfolie und Messerblock spätestens alle zwei
Jahren erneuern.
◗Ersetzen Sie eine verbrauchte oder
beschädigte Scherfolie ausschließlich durch
eine original Philips Scherfolie Type HP6120.
2Nehmen Sie den Scherkopf ab (Abb. 12).
3Drücken Sie den Scherkopf mit leichter
Kraftaufwendung in Richtung der Pfeile, und
nehmen Sie die Scherfolie ab (Abb. 15).
4Achten Sie darauf, dass der Softselect-
Schalter in der mittleren Position (Bikini-Zone)
steht, bevor Sie die neue Scherfolie einlegen
(Abb. 16).
5Drücken Sie den Scherkopf ein wenig
zusammen, und legen Sie die neue Scherfolie ein
(Abb. 17).
6Achten Sie darauf, dass die
Verankerungszapfen A, B und C in die
entsprechenden Löcher einrasten (Abb. 18).
◗Ersetzen Sie den Messerblock ausschließlich
durch einen original Philips Messerblock Type
HP 2909 (Abb. 19 und 20).
Sie brauchen etwas Kraft, um den Messerblock
vom Gerät abzuziehen.
◗Wegen verbrauchter oder beschädigter
Trimmer wenden Sie sich bitte an Ihren
Philips Händler oder das Philips Service
Center in Ihrem Lande.
◗Wenn das Netzteil defekt oder beschädigt ist,
darf es aus Sicherheitsgründen nur von einem
Philips Service-Center oder einer von Philips
autorisierten Werkstatt durch ein Original-
Ersatznetzteil ausgetauscht werden.
Umweltschutz
Batterien enthalten Substanzen, welche die
Umwelt gefährden können.Verbrauchte Batterien
gehören nicht zum normalen Hausmüll. Sie sind
als Verbraucher dazu verpflichtet, sie der
Wiederverwer tung zuzuführen. Geben Sie sie
bitte bei einer offiziellen Sammelstelle Ihrer
Gemeinde ab oder bei einem Händler, der
Batterien und Akkus oder entsprechende Geräte
führt (Abb. 21).
◗Achten Sie darauf, dass die Batterien völlig
leer sind, wenn Sie sie entsorgen.
◗Die Motoreinheit und die anderenTeile aus
Metall gehören zum Sondermüll Blech und
Metall.
◗Die Kunststoffteile sind zur
Wiederverwertung gekennzeichnet und
gehören zum Sondermüll Kunststoff.
Garantie und Service
Wenden Sie sich mit Ihren Fragen,Wünschen und
Problemen bitte an das Philips Service Center in
Ihrem Lande. Sollte sich in Ihrem Lande kein
solches Center befinden, so wenden Sie sich bitte
an das Service Depar tment von Philips Domestic
Appliances and Personal Care BV. Entnehmen Sie
die Telefonnummern bitte der beigefügten
Garantieschrift. Besuchen Sie uns auch auf der
Homepage www.philips.com.
17 18
A
B
C
20 21
19
123
456
789
10 11 12
13
OIL
14 15
16
Ladyshave softselect
HP6324/01
ESPAÑOL
ITALIANO
TÜRKÇE
PORTUGUÊS
Introducción
◗Esta Ladyshave Soft Select de Philips está
equipada con una lámina de depilación de
corte ajustable, con tres diferentes zonas para
depilar las axilas, la línea del bikini y las
piernas.
◗La zona dorada de la lámina depiladora es la
más adecuada para depilar las axilas (fig. 1).
◗La zona a franjas doradas de la lámina
depiladora es la más adecuada para depilar la
línea del bikini (fig. 2).
◗La zona plateada de la lámina depiladora es la
más adecuada para depilar las piernas (fig. 3).
◗Esta Ladyshave puede funcionar tanto
enchufada a la red como con pilas. Es
adecuada para ser usada solamente en seco.
◗El Jojoba Glider (fig. 4) se adapta mejor al
contorno de la piel reduciendo la irritación y
consiguiendo, de esta forma, una depilación
suave.
El aparato no es recargable.
Importante
◗No use la Ladyshave en la ducha o en el baño.
La Ladyshave no es a prueba de agua.
◗Antes de enchufar el aparato, compruebe si el
voltaje indicado en la clavija adaptadora se
corresponde con el voltaje de la red local.
◗Guarde el aparato a temperaturas entre 15°C
y 35°C.
Cómo preparar el aparato para usarlo
sin cable de red
La Ladyshave funciona con dos pilas R6 AA de 1'5
voltios. Le aconsejamos que use pilas LR& Power
Life de Philips, las cuales le proporcionarán
suficiente energía para unos 40 minutos de
depilación.
1Para abrirla tire de la tapa de las baterias
hacia abajo con algo de fuerza (fig. 5).
2Ponga las pilas en el soporte de las pilas.
Asegúrese de que los polos + y - de las pilas
estén orientados en la dirección correcta (fig. 6).
Asegúrese de que sus manos y el aparato estén
secos cuando inserte las pilas.
3Vuelva a colocar la tapa de las pilas en el
aparato.
Cómo preparar el aparato para usarlo
con el cable de red
1Inserte la clavija pequeña en la Ladyshave
(fig. 7).
Asegúrese de que la ha introducido
completamente
2Enchufe la clavija adaptadora a la red (fig. 8).
Si va a usar la Ladyshave enchufada a la red, no es
necesario quitar la pilas.
Cómo usar el aparato
1Compruebe si el selector de suavidad del
cabezal depilador está en la posición adecuada
para la zona del cuerpo que desea depilar (fig. 9).
2Ponga la Ladyshave en marcha (fig. 10).
3Coloque cuidadosamente los peines
recortadores y la lámina depiladora sobre la piel,
y mueva la Ladyshave lentamente sobre la piel
en dirección contraria a la del crecimiento del
vello mientras ejerce una ligera presión (fig.11).
Asegúrese de que tanto los peines recortadores
como la lámina depiladora estén siempre
completamente en contacto con la piel.
Cómo limpiar el aparato
Limpie la Ladyshave después de cada uso.
No use ningún detergente o agente de limpieza
corrosivo o abrasivo gasolina, acetona, etc. para
limpiar el aparato.
1Apague el aparato.
2Quite el cabezal depilador (fig. 12).
Para evitar deterioros, no ejerza ninguna presión
sobre la lámina depiladora.
3Para evitar deterioros de la lámina, ponga
siempre la tapa protectora en el cabezal
depilador.
4Elimine con el cepillo el pelo que haya
quedado en el bloque de corte y en el cabezal
depilador. Asegúrese también de cepillar el pelo
que se haya acumulado bajo los peines
recortadores (fig. 13).
Mantenimiento y sustitución
1Lubrique la lámina depiladora y los peines
Introduzione
◗Il nuovo Philips Ladyshave softselect è
provvisto di una lamina di rasatura regolabile,
per radere tre diverse parti del corpo: ascelle,
inguine e gambe.
◗La parte dorata della lamina di rasatura è
particolarmente indicata per la depilazione
delle ascelle (fig. 1).
◗La parte parzialmente dorata della lamina di
rasatura è la più indicata per la depilazione
dell'inguine (fig. 2).
◗La parte color argento della lamina di rasatura
è particolarmente indicata per la depilazione
delle gambe (fig. 3).
◗Questo Ladyshave funziona a corrente oppure
a batteria, e può essere usato solo sulla pelle
asciutta.
◗Il Jojoba Glider (fig. 4) migliora lo scorrimento
dell'apparecchio e aiuta a ridurre il rischio di
irritazioni, per una rasatura ancora più
delicata.
L'apparecchio non è ricaricabile.
Importante
◗Non usate Ladyshave sotto la doccia o mentre
fate il bagno: l'apparecchio non è
impermeabile.
◗Prima di collegare l'apparecchio, controllate
che la tensione indicata corrisponda a quella
della rete locale.
◗Riponete l'apparecchio ad una temperatura
compresa fra 15°C and 35°C.
Come preparare l'apparecchio per
l'uso cordless.
Ladyshave funziona con 2 batterie R6 AA da 1,5
volt.Vi raccomandiamo di usare batterie Philips
LR6 PowerLife, che consentono un'autonomia di
rasatura di circa 40 minuti.
1Premete il coperchio delle batterie verso il
basso con una certa forza, per poterlo estrarre
(fig. 5).
2Inserite le batterie nel porta-batterie.
Controllate che i poli + e - delle batterie siano
rivolte nella giusta direzione (fig. 6).
Controllate che le mani e l'apparecchio siano
perfettamente asciutti prima di inserire le batterie.
3Rimettete a posto il coperchio delle batterie.
Come preparare l'apparecchio per
l'uso a corrente.
1Inserite lo spinotto nel Ladyshave (fig. 7).
Controllate di averlo spinto bene in fondo.
2Inserite la spina dell'adattore nella presa di
corrente (fig. 8).
Non è necessario togliere le batterie quando
usate Ladyshave collegato alla presa.
Come usare l'apparecchio
1Controllate che l'interruttore-softselector
posto sulla testina di rasatura sia nella posizione
corretta in base alla parte del corpo che volete
radere (fig. 9).
2Accendete il Ladyshave (fig. 10).
3Appoggiate il trimmer e la lamina di rasatura
sulla pelle e muovete lentamente l'apparecchio
esercitando una leggera pressione, nel senso
opposto alla crescita dei peli (fig. 11).
Assicuratevi che il trimmer e la lamina di rasatura
siano sempre a contatto della pelle.
Pulizia
Pulite il Ladyshave subito dopo l'uso.
Per pulire l'apparecchio non usate detergenti
corrosivi, spugnette abrasive benzina, acetone ecc.
1Spegnete l'apparecchio.
2Togliete la testina di rasatura (fig. 12).
Non esercitate nessuna pressione sulla lamina di
rasatura per evitare di danneggiarla.
3Rimettete sempre il cappuccio di protezione
sulla testina di rasatura per evitare di
danneggiare la lamina.
4Eliminate tutti i peli dall'unità di taglio e dalla
testina di rasatura. Ricordate di eliminare anche i
peli sotto il trimmer (fig. 13).
Manutenzione e sostituzione
1Lubrificate la lamina di rasatura e il trimmer
con una goccia di olio per macchina da cucire
due volte all'anno (fig. 14).
Se usate il Ladyshave due o più volte alla
settimana, vi consigliamo di sostituire la lamina di
rasatura e l'unità di taglio ogni due anni.
◗La lamina di rasatura deve essere sostituita
esclusivamente con una lamina originale
Philips (mod. HP6120).
2Togliete la testina di rasatura (fig. 12).
3Premete la testina di rasatura con una certa
forza nel senso indicato dalle frecce, poi togliete
la lamina (fig. 15).
4Controllate che l'interruttore-softselector
sia nella posizione intermedia (zona bikini) prima
di inserire la nuova lamina (fig.16).
5Premete leggermente la testina di rasatura e
inserite la nuova lamina (fig. 17).
6Nota: i perni A, B e C devono infilarsi negli
appositi fori (fig. 18).
◗L'unità di taglio deve essere sostituita
esclusivamente con un ricambio originale
Philips, mod. HP2909 (fig. 19 e 20).
Per sostituire l'unità di taglio, estrarla con una
certa forza.
◗Nel caso il trimmer fosse consumato o
rovinato,rivolgetevi al vostro rivenditore
Philips o a un Centro Assistenza Philips per la
sostituzione.
◗Nel caso l'adattatore fosse danneggiato,dovrà
essere sostituito esclusivamente con un
adattatore originale, per evitare situazioni a
rischio.
Introdução
◗Esta Ladyshave Philips Softselect está equipada
com uma lâmina ajustável com três posições
diferentes para fazer a depilação das axilas, da
linha do biquini e das pernas.
◗A zona dourada da lâmina é mais adequada
para depilar as axilas (fig. 1).
◗A zona dourada às riscas da lâmina é própria
para a linha do biquini (fig. 2).
◗A zona prateada da lâmina é mais indicada
para a depilação das pernas (fig. 3).
◗Esta Ladyshave pode funcionar a corrente ou
a pilhas. Só pode ser usada a seco.
◗O Deslizador Jojoba (fig. 4) melhora o deslizar
do aparelho para ajudar a reduzir o risco de
irritações e permitir uma depilação suave.
Esta máquina não é recarregável.
Importante
◗Não use a Ladyshave no duche nem no banho.
A Ladyshave não é resistente à água.
◗Verifique se a voltagem indicada no adaptador
corresponde à corrente eléctrica local antes
de ligar a máquina.
◗Guarde a máquina numa temperatura entre
15°C e 35°C.
Preparação para funcionamento sem
fio
A Ladyshave funciona com 2 pilhas R6 AA 1.5
Volts.Aconselha-se vivamente o uso de pilhas
Philips LR6 PowerLife. Estas pilhas oferecem um
funcionamento autónomo durante cerca de 40
minutos.
1Puxe a tampa das pilhas para baixo com
alguma força para a retirar (fig. 5).
2Coloque as pilhas no compartimento.
Certifique-se que os pólos + e - das pilhas ficam
colocados na posição certa (fig. 6).
Quando introduzir as pilhas deve ter as mãos
secas. A máquina também deve estar seca.
3Empurre a tampa das pilhas para o interior
da máquina.
Preparação para funcionamento a
corrente
1Introduza a ficha pequena na Ladyshave
(fig. 7).
A ficha deve ficar bem encaixada na máquina.
2Ligue a ficha do adaptador à tomada
eléctrica (fig. 8).
Não é preciso retirar as pilhas quando usar a
Ladyshave ligada à corrente.
Utilização da máquina
1Verifique se o interruptor 'softselect' da
cabeça de corte está na posição correcta para a
zona do corpo que pretende tratar (fig. 9).
2Ligue a Ladyshave (fig. 10).
3Coloque os aparadores e a lâmina
suavemente sobre a pele e movimente a
Ladyshave lentamente sobre a pele, na direcção
contrária ao crescimento dos pêlos, fazendo
uma ligeira pressão (fig. 11).
Os dois aparadores e a lâmina devem estar
sempre em contacto com a pele.
Gırış
◗Philips Ladyshave Softselect modeli üç ayrı
bölge ayarını aynı tıraş folyosu üzerinde
bulundurmaktadır Tıraş folyosu koltuk altı,
bikini bölgesi ve bacaklar için ayrılmıştır
◗Tıraş folyosunun altın renkli kısmı koltuk altı
için tasarlanmıştır (şekil 1)
◗Tıraş folyosunun altın renkli şeritli bölgesi
bikini bölgesi için tasarlanmıştır (şekil 2)
◗Tıraş folyosunun gümüş renkli kısmı bacaklar
için tasarlanmıştır (şekil 3)
◗Bu model Ladyshave pille ve elektrik ile
çalışmaktadır Sadece kuru kullanım içindir
◗Jojoba Glider (şekil 4), deri tahrişi riskini
azaltmak için, cihazın kayganlığını arttırır
Cihaz şarjlı kullanım için tasarlanmamıştır.
Önemli
◗Cihazı kesinlikle duşta veya banyo yaparken
kullanmayınız Ladyshave su geçirmez özelliğe
sahip değildir
◗Cihazı kullanmadan önce, cihazın üzerinde
belirtilen voltajın ülkenizdeki voltajla
uygunluğunu kontrol ediniz
◗Cihazı 15°C ve 35°C dereceleri arasında
muhafaza ediniz
Cihazın pilli kullanıma hazırlanması
Ladyshave Bayan Tıraş Makinesi 2 adet R6 AA
.5Volt pille çalışmaktadır. Uzun ömürlü oldukları
için Philips Powerlife LR6 pillerini kullanmanızı
tavsiye ediriz. 40 dakika kullanım ömrü
sağlayacaktır.
1Pil bölümünün kapağını aşağı doğru iterek
yerinden çıkartınız (şekil 5)
2Pilleri pil bölümüne yerleştiriniz
Pillerin ve pil yuvasının üzerindeki "+" ve "-"
işaretlerinin aynı yöne gelmesine dikkat
ediniz.(şekil 6)
Pilleri yerleştirirken cihazınız ve elleriniz kuru
olmalıdır.
3Pil bölümünün kapağını iterek tekrar yerine
takınız
Cihazı elektriğe bağlı kullanıma
hazırlanması
1Adaptör fişini Ladyshave'e yerleştiriniz
(şekil 7)
Fişin yerine doğru yerleştiğinden emin olunuz.
2Adaptörün fişini prize takınız (şekil 8)
Cihazı elektriğe bağlı olarak kullanırken içerisindeki
pilleri çıkarmanıza gerek yoktur.
Cihazın Kullanımı
1Cihazı kullanmadan önce, kullanacağınız
bölgeye göre tıraş başlığının vücut bölge ayarının
doğru seçilmiş olduğuna dikkat ediniz (şekil 9)
2Ladyshave'i çalıştırınız (şekil 10)
3Düzeltme bıçağı ve tıraş folyosunu cildiniz
üzerinde yavaşça ve hafif bir basınç uygulayarak
gezdiriniz Daha iyi sonuç almak için cihazı
kılların uzama doğrultusunun tersine doğru
hareket ettiriniz (şekil 11)
Düzeltme bıçağının ve tıraş folyosunun cildiniz ile
doğru temas ettiğinden emin olunuz.
Cihazın temizliği
Cihazı her kullanımdan sonra temizleyiniz.
Cihazı temizlerken asla alkol, aseton vs. gibi
maddeler kullanmayınız.
1Cihazı kapatınız
2Tıraş başlığını çıkartınız (şekil 12)
Tıraş folyosunun zarar görmemesine dikkat ediniz,
hiç bir şekilde basın uygulamayınız.
3Tıraş folyosunun zarar görmesini önlemek
için tıraş başlığına koruyucu kapağını takınız
4Kıl haznesini ve tıraş başlığını fırçalayarak
temizleyiniz Mutlaka düzelticinin altında biriken
kılları da temizleyiniz (şekil 13)
Bakım ve Değiştirme
1Senede iki kere, iki düzeltme bıçağı ve tıraş
folyosunu bir damla ince makina yağı(dikiş
makinası yağı) ile yağlayınız (şekil 14)
Eğer cihazı haftada iki veya daha fazla
kullanıyorsanız, tıraş folyosunu ve kesici üniteyi iki
yılda bir değiştiriniz.
◗Yıpranmış veya zarar görmüş bir tıraş folyosu
sadece HP6120 kod no 'lu orijinal Philips tıraş
folyosu ile değiştirilebilinir
2Tıraş başlığını çıkartınız (şekil 12)
3Ok yönünde tıraş başlığına basarak folyoyu
yerinden çıkartınız (şekil 15)
4Yeni folyoyu takmadan önce Softselect ayar
düğmesinin orta (bikini bölgesi)pozisyonunda
olmasına dikkat ediniz (şekil 16)
5Tıraş başlığının iki yanını aynı anda bastırarak
yeni folyoyu yerine yerleştiriniz (şekil 17)
6A,B ve C pivot uçlarının doğru yerlerine
yerleştiğinden emin olunuz (şekil 18)
◗Kesici ünite HP 2909 kod no 'lu orijinal kesici
ünite ile değiştirilmelidir (şekil 19 ve 20)
Kesici üniteyi yerinden çıkartırken hafifçe
dışarı doğru çekiniz.
◗Eğer düzeltici yıpranmış veya zarar görmüşse
lütfen Yetkili Philips Servislerine müracaat
ediniz
◗Cihazın adaptörü hasarlıysa, daha fazla hasara
yol açmamak için mutlaka orjinal modeli ile
değiştirilmelidir
Çevre
Piller içerdikleri maddeler dolayısıyla, şarj pilleri
çevreyi kirletebilirler. Pillerin ömrü dolduğunda
özel bir çöp toplama alanına atınız. Normal ev
çöpünüzün içerisine atmayınız (şekil 2 ).
◗Pilleri çöpe atarken tamamen boşaldıklarından
emin olunuz
◗Cihazı çöpe atacağınızda metal kısımlarını ve
motor ünitesini ayırarak özel geri dönüşümlü
metal toplama kutularına atınız
◗Cihazın tüm plastik parçaları geri dönüşüm
için kodlanmıştır Bulunduğunuz yerdeki
uygulamalara göre parçaları imha ediniz
Garanti ve Servis
Eğer bir probleminiz olursa, servise veya bilgiye
ihtiyacınız olursa Philips internet sayfasına
www philips com tr veya ülkenizde bulunan Philips
Tüketici Danışma Merkezini arayabilirsiniz. Telefon
numarasını garanti belgeleri içerisinden
bulabilirsiniz.0800 26 33 02
Limpeza da máquina
Limpe a Ladyshave sempre que se servir dela.
Não use detergentes corrosivos, esfregões ou
panos abrasivos, petróleo acetona, etc. para limpar
a máquina.
1Desligue a máquina.
2Retire a cabeça de corte (fig. 12).
Não faça demasiada pressão sobre a lâmina para
evitar danos.
3Coloque sempre a tampa de protecção na
cabeça de corte para evitar estragos na lâmina.
4Escove os pêlos acumulados na unidade de
corte e na cabeça da máquina. Limpe,
igualmente, os pêlos que se tenham introduzido
debaixo dos aparadores (fig. 13).
Manutenção e substituição
1Duas vezes por ano lubrifique a lâmina e os
aparadores com uma gota de óleo para
máquinas de costura (fig. 14).
Se usar a Ladyshave duas ou mais vezes por
semana, é aconselhável substituir a lâmina e a
unidade de corte de dois em dois anos.
◗A lâmina só pode ser substituída por uma
peça Philips de origem (tipo HP6120).
2Retire a cabeça de corte (fig. 12).
3Fça alguma pressão sobre a cabeça de corte
na direcção das setas e retire a lâmina (fig.15).
4Certifique-se que o comutador 'softselect'
está posicionado no meio (linha do biquini)
quando colocar a nova lâmina (fig. 16).
5Aperte ligeiramente ambos os lados da
cabeça de corte e introduza a nova lâmina
(fig. 17).
6Note que os pivots A, B e C devem encaixar
nos orifícios correspondentes (fig. 18).
◗A unidade de corte só deve ser substituída
por uma peça Philips original, tipo HP2909
(figs. 19 e 20).
Para trocar a unidade de corte, puxe-a com força
para fora da máquina .
◗Se um aparador estiver gasto ou estragado,
por favor contacte o seu agente Philips ou um
Centro de Assistência Philips para proceder à
sua substituição.
◗Se o adaptador se estragar, deverá sempre ser
substituído por uma peça de origem para
evitar situações gravosas para o utilizador.
Protecção do meio ambiente
As pilhas contêm substâncias que podem poluir o
ambiente. Não deite as pilhas vazias para o lixo
doméstico normal. Coloque-as nos contentores
próprios - ecopontos (fig. 21).
◗As baterias devem estar completamente vazias
quando as deitar fora.
◗Quando, em devido tempo, se desfizer da
máquina, deite a unidade do motor e outras
peças metálicas num contentor de material
reciclável.
◗Todas as peças em plástico estão marcadas
com o símbolo de 'reciclável'. Por favor,
desfaça-se delas de acordo com a lei local.
Garantia e assistência
Se necessitar de assistência ou de informações ou
se tiver qualquer problema, por favor visite o
endereço da Philips em www.philips.com ou
contacte o Centro de Informação ao Consumidor
Philips do seu país (os números de telefone
encontram-se no folheto da garantia mundial). Se
não existir um desses Centros no seu País, dirija-
se a um agente Philips ou contacte o
Departamento de Service da Philips Domestic
Appliances and Personal Care BV.
recortadores dos veces al año con una gota de
aceite de máquina de coser (fig. 14).
Si usa la Ladyshave dos veces por semana o más,
le aconsejamos que sustituya la lámina depiladora
y el bloque de corte cada dos años.
◗La lámina depiladora sólo puede ser sustituida
por una lámina depiladora original de Philips
(tipo HP6120).
2Quite el cabezal depilador (fig. 12).
3Presione el cabezal depilador con un poco
de fuerza en la dirección de las flechas y luego
quite la lámina (fig. 15).
4Asegúrese de que el selector de suavidad
esté en la posición central (línea del bikini)
cuando inserte la nueva lámina (fig.16).
5Presione ligeramente los lados del cabezal
depilador e inserte la nueva lámina (fig. 17).
6Los pivotes A, B y C deben fijarse (a presión)
en los correspondientes agujeros (fig. 18).
◗El bloque de corte sólo puede ser sustituido
por un bloque de corte original de Philips
(tipo HP2909) (figs. 19 y 20).
Para cambiar el bloque de corte, tire de él con
algo de fuerza para sacarlo del aparato.
◗Si un peine recortador está gastado o
deteriorado, contacte con su distribuidor
Philips o con un Servicio de AsistenciaTécnica
de Philips para sustituirlo.
◗Si el adaptador estuviera dañado, sustitúyalo
siempre por otro del modelo original para
evitar situaciones de peligro.
Medio ambiente
Las pilas contienen substancias que pueden
polucionar el medio ambiente. No tire las pilas
junto con la basura normal del hogar. Llévelas a un
punto de recogida oficial (fig. 21).
◗Cuando se deshaga de las pilas, asegúrese de
que estén completamente descargadas.
◗Cuando, a su debido tiempo, se deshaga del
aparato, tire la unidad motora y las demás
piezas metálicas en un contenedor para
reciclar metales.
◗Todas las piezas plásticas están marcadas con
símbolos de reciclado. Deshágase de ellas de
acuerdo con las disposiciones locales.
Garantía y Servicio
Si necesita información o si tiene algún problema,
visite la página Web de Philips en
www.philips.com o contacte con el Servicio
Philips de Información al Consumidor de su país
(hallará los números de teléfono en el folleto de
Garantía Mundial). Si en su país no hay Servicio
Philips de Información al Consumidor, consulte a
su distribuidor local Philips o contacte con el
Service Depar tment of Philips Domestic
Appliances and Personal Care BV.
L'ambiente
Le batterie contengono sostanze che possono
inquinare l'ambiente. Non gettate le batterie
insieme ai normali rifiuti domestici ma
depositatele presso un centro di raccolta
differenziata (fig. 21).
◗Controllate che le batterie siano
completamente scariche prima di buttarle.
◗Smaltite il motore e le altre parti in metallo
negli appositi contenitori per il riciclaggio dei
metalli.
◗Tutte le parti in plastica riportano i simboli
utili per il riciclaggio.Vi preghiamo di smaltirle
conformemente alle norme in vigore.
Garanzia e Assistenza
Se avete bisogno di assistenza o di ulteriori
informazioni, vi preghiamo di visitare il nostro sito
web: www.Philips.com oppure di contattare il
Centro Assistenza Clienti Philips del vostro Paese
(per conoscere il numero di telefono, vedere
l'opuscolo della garanzia).
Qualora nel vostro Paese non ci fosse un Centro
Assistenza Clienti, rivolgetevi al rivenditore
autorizzato Philips oppure contattate il Service
Department of Philips Domestic Appliances and
Personal Care BV.
17 18
A
B
C
20 21
19
123
456
789
10 11 12
13
OIL
14 15
16

This manual suits for next models

1

Other Philips Hair Removal System manuals

Philips SC2005/00 User manual

Philips

Philips SC2005/00 User manual

Philips Ladyshave HP6302/01 User manual

Philips

Philips Ladyshave HP6302/01 User manual

Philips HP6340/03 User manual

Philips

Philips HP6340/03 User manual

Philips Lumea Essential SC1991 User manual

Philips

Philips Lumea Essential SC1991 User manual

Philips Lumea SC2001/01 User manual

Philips

Philips Lumea SC2001/01 User manual

Philips HP6320/62 Operating instructions

Philips

Philips HP6320/62 Operating instructions

Philips BRI950/00 User manual

Philips

Philips BRI950/00 User manual

Philips Lumea BRI955 User manual

Philips

Philips Lumea BRI955 User manual

Philips Lumea SC1995 User manual

Philips

Philips Lumea SC1995 User manual

Philips LUMEA SC1997 User manual

Philips

Philips LUMEA SC1997 User manual

Philips SC1996 User manual

Philips

Philips SC1996 User manual

Philips TT3000/01 User manual

Philips

Philips TT3000/01 User manual

Philips Lumea BRI861 User manual

Philips

Philips Lumea BRI861 User manual

Philips Lumea Prestige User manual

Philips

Philips Lumea Prestige User manual

Philips Lumea SC1994/00 User manual

Philips

Philips Lumea SC1994/00 User manual

Philips HP6315/12 User manual

Philips

Philips HP6315/12 User manual

Philips Lumea SC1999/80 User manual

Philips

Philips Lumea SC1999/80 User manual

Philips Lumea SC2001/01 User manual

Philips

Philips Lumea SC2001/01 User manual

Philips Lumea SC1997/00 User manual

Philips

Philips Lumea SC1997/00 User manual

Philips HP6305/30 User manual

Philips

Philips HP6305/30 User manual

Philips Lumea precision plus User manual

Philips

Philips Lumea precision plus User manual

Philips Ladyshave Skin Comfort HP6340/PB User manual

Philips

Philips Ladyshave Skin Comfort HP6340/PB User manual

Philips HP2704/61 User manual

Philips

Philips HP2704/61 User manual

Philips SC2008 User manual

Philips

Philips SC2008 User manual

Popular Hair Removal System manuals by other brands

ESTELLE ESIPLHARMVA user guide

ESTELLE

ESTELLE ESIPLHARMVA user guide

Smoothskin pure mini user guide

Smoothskin

Smoothskin pure mini user guide

Remington IPL6550 manual

Remington

Remington IPL6550 manual

HoMedics duo instruction manual

HoMedics

HoMedics duo instruction manual

Braun Silk-expert BD 5001 manual

Braun

Braun Silk-expert BD 5001 manual

Remington IPL6500 Use and care guide

Remington

Remington IPL6500 Use and care guide

Braun Silk-epil FG 1100 manual

Braun

Braun Silk-epil FG 1100 manual

Spa Sciences LEXI user guide

Spa Sciences

Spa Sciences LEXI user guide

Silk'n Infinity Smooth user manual

Silk'n

Silk'n Infinity Smooth user manual

Silk'n Silkn 7 user manual

Silk'n

Silk'n Silkn 7 user manual

Home Skinovations Silk'n BellaFlash Pro user manual

Home Skinovations

Home Skinovations Silk'n BellaFlash Pro user manual

Tanda ICE TOUCH user manual

Tanda

Tanda ICE TOUCH user manual

ILUMINAGE PRECISE TOUCH user manual

ILUMINAGE

ILUMINAGE PRECISE TOUCH user manual

Norelco HP6328/82 Important safety instructions

Norelco

Norelco HP6328/82 Important safety instructions

Panasonic ES-WH80 operating instructions

Panasonic

Panasonic ES-WH80 operating instructions

manuals.online logo
manuals.online logoBrands
  • About & Mission
  • Contact us
  • Privacy Policy
  • Terms and Conditions

Copyright 2025 Manuals.Online. All Rights Reserved.