ENGLISH
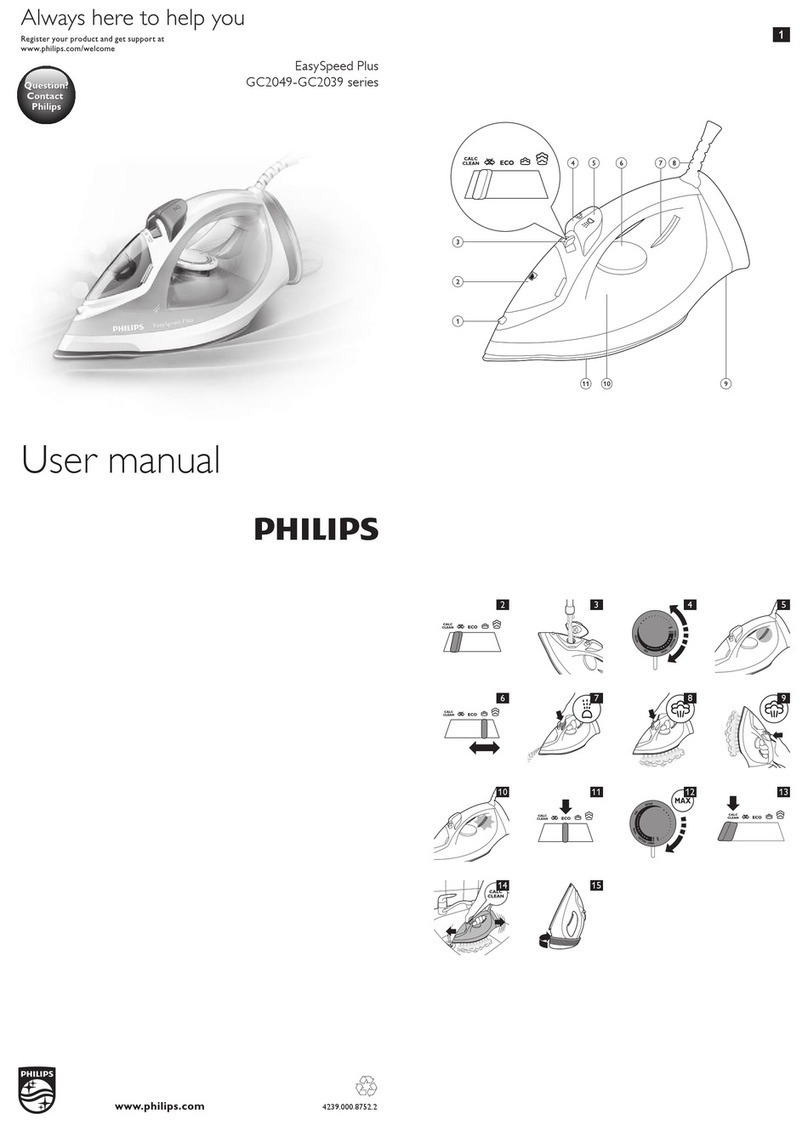
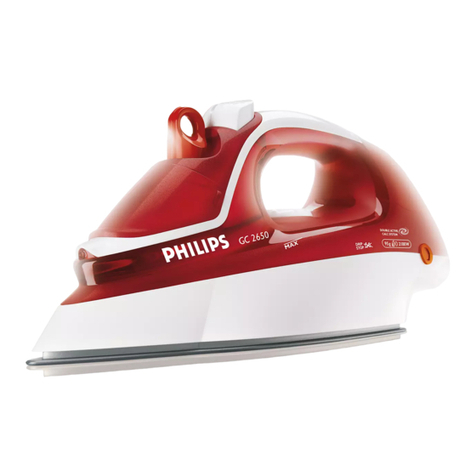
General description (Fig. 1)
1 Spray nozzle
2 Capofllingopening
3 Steam control
- CALC CLEAN=Calc-Cleanfunction
- t=dryironing
- ECO=optimalsteam
- ;=maximumsteam
- = turbo steam
4 Steam boost button
5 Spray button
6 Temperaturedial
7 Temperaturelight(specictypesonly:withsafety-autooffindication)
8 Mainscord
9 Type plate
10 WatertankwithMAXwaterlevelindication
11 Soleplate
Using the appliance
Filling the water tank
Note:Your appliance has been designed to be used with tap water. If you live
in an area with very hard water, fast scale build-up may occur. In this case, it is
recommended to mix 50% distilled water and 50% tap water to prolong the
lifetime of your appliance.
Note: Do not put perfume, vinegar, starch, descaling agents, ironing aids,
chemically descaled water or other chemicals in the water tank.
1 Set the steam control to position t(dry ironing). (Fig. 2)
2 Fill the water tank up to the MAX indication (Fig. 3).
3 Closethecapofthellingopening.
Selecting temperature and steam setting
Table 1
Fabric type Temperature
setting
Steam
setting
Steam
boost
Spray
Linen MAX ;, Ye s Yes
Cotton 3;, Ye s Ye s
Wool 2ECO No Ye s
Silk 1tNo No
Syntheticfabrics
(e.g.acrylic,
nylon,polyamide,
polyester).
1tNo No
1 Consult table 1 to set the temperature dial to the appropriate setting
for your garment (Fig. 4).
2 Put the iron on its heel and plug it in.The temperature light goes on
to indicate that the iron is heating up (Fig. 5).
3 When the temperature light goes out, the iron has reached the
correct temperature.
4 Consult table 1 to select a steam setting that corresponds to the
temperature you have set (Fig. 6).
Note:To use turbo steam , keep the steam control pressed to the turbo
steam position continuously.
Caution: Do not set the steam control to a steam setting if the set
temperature is below 2or when the iron is still heating up (when the
temperature light is on). Otherwise water may leak from the iron.
Features
Spray function
- Pressthespraybuttontomoistenthearticletobeironed.Thishelps
removestubborncreases(Fig.7).
Steam boost function
- Pressandreleasethesteamboostbuttonforapowerfulboostofsteam
toremovestubborncreases(Fig.8).
Vertical steam
- Youcanusethesteamboostfunctionwhenyouholdtheironinvertical
positionforremovingcreasesfromhangingclothes,curtainsetc(Fig.9).
Safety auto-off function (specic types only)
- Theironswitchesoffautomaticallyifithasnotbeenmovedfor
30secondsinhorizontalpositionor8minutesinverticalposition.
Theauto-offlightstartsashing(Fig.10).
- Tolettheironheatupagain,pickuptheironormoveitslightlyuntilthe
auto-offlightgoesout.
ECO steam setting
- SelecttheECOsteamsettinginsteadofthemaximumsteamsetting
;tosaveenergy,yettoachievesatisfactoryironingresults.(Fig.11)
Dry ironing
- Setthesteamcontroltot(dryironing)toironwithoutsteam.(Fig.2)
Cleaning and maintenance
Cleaning
1 Set the steam control to t(dry ironing), unplug the iron and let it
cool down. (Fig. 2)
2 Pour any remaining water out of the water tank.
3 Wipeakesandanyotherdepositsoffthesoleplatewithadamp
cloth and a non-abrasive (liquid) cleaning agent.
Caution:To keep the soleplate smooth, avoid hard contact with metal objects.
Never use a scouring pad, vinegar or other chemicals to clean the soleplate.
Note: Regularly rinse the water tank with tap water. Empty the water tank after
rinsing it.
Calc-Clean function
IMPORTANT:To prolong the lifetime of your appliance and
to maintain good steaming performance, use the Calc-Clean
function once every two weeks. If the water in your area is very
hard (i.e. when akes come out of the soleplate during ironing),
use the Calc-Clean function more frequently.
1 Make sure the appliance is unplugged and the steam control is set to
t(dry ironing). (Fig. 2)
2 Fill the water tank to the MAX indication (Fig. 3).
Do not pour vinegar or other descaling agents into the water tank.
3 Plug in the iron and set the temperature dial to MAX (Fig. 12).
4 Unplug the iron when the temperature light goes out.
5 Hold the iron over the sink. Push the steam control to the Calc-Clean
position and hold it (Fig. 13).
6 Gently shake the iron until all water in the water tank has been used
up (Fig. 14).
Caution:Whilescaleisushedout,steamandboilingwateralsocome
out of the soleplate.
7 Set the steam control back to t(dry ironing). (Fig. 2)
Note: Repeat the Calc-Clean process if the water that comes out of the iron still
contains scale particles.
After the Calc-Clean process
1 Plug in the iron. Let the iron heat up to let the soleplate dry.
2 Unplug the iron when the temperature light goes out.
3 Move the iron gently over a piece of cloth to remove any water stains
on the soleplate.
4 Let the iron cool down before you store it.
Storage
1 Unplug the iron and set the steam control to t(dry ironing). (Fig. 2)
2 Wind the mains cord round the cord storage facility and store the
iron on its heel (Fig. 15).
Troubleshooting
Thischaptersummarisesthemostcommonproblemsyoucouldencounter
withtheappliance.Ifyouareunabletosolvetheproblemwiththe
informationbelow,visitwww.philips.com/supportforalistoffrequently
askedquestionsorcontacttheConsumerCareCentreinyourcountry
(seetheworldwideguaranteeleaetforcontactdetails).
Problem Possible cause Solution
Waterdripsfrom
thesoleplateor
wetspotsappear
onthegarment
duringironing.
Theset
temperatureis
toolowforsteam
ironing.
Setanironingtemperature
thatissuitableforsteam
ironing.Seetable1.
Youhaveputan
additiveinthewater
tank.
Rinsethewatertankanddo
notputanyadditiveinthe
watertank.
Thesteam
boostfunction
doesnotwork
properly(water
leaksoutofthe
soleplate).
Youhaveused
thesteamboost
functiontoooften
withinaveryshort
period.
Waitawhilebeforeyou
usethesteamboost
functionagain.
Youhaveused
thesteamboost
functionatatoo
lowtemperature.
Setanironingtemperature
atwhichthesteamboost
functioncanbeused
(2toMAX).
Flakesand
impuritiescome
outofthesoleplate
duringironing.
Hardwaterforms
akesinsidethe
soleplate.
UsetheCalc-Cleanfunction
(seechapter‘Cleaningand
maintenance’,section‘Calc-
Cleanfunction’).
Waterdripsfrom
thesoleplateafter
theironhascooled
downorhasbeen
stored.
Youhaveputthe
ironinhorizontal
positionwhilethere
wasstillwaterinthe
watertank.
Emptythewatertankand
setthesteamcontrolto
position‘dry’afteruse.Store
theirononitsheel.
Water leaks from
thecapofthelling
opening.
Youhaveoverlled
thewatertank. Donotllthewatertank
beyondtheMAXindication.
Pourexcesswateroutof
thewatertank.
WhenIpushthe
steam control to
theturbosteam
position,thesteam
controljumpsback.
Youdidnotkeep
thesteamcontrol
intheturbosteam
position.
Ifyouwanttouseturbo
steam,youhavetokeepthe
steamcontrolintheturbo
steampositioncontinuously.
Forothersteamsettings,this
isnotnecessary.
PORTUGUÊS
Descrição geral (fig. 1)
1 Bocaldepulverização
2 Tampadaaberturaparaenchimento
3 Controlodovapor
- CALC CLEAN=FunçãoCalc-Clean
- t= passar a ferro a seco
- ECO=vaporoptimizado
- ;=vapormáximo
- =supervapor
4 Botãodojactodevapor
5 Botãodepulverização
6 Botãodatemperatura
7 Luzdatemperatura(apenasmodelosespecícos:comindicaçãode
desactivaçãoautomáticadesegurança)
8 Cabodealimentação
9 Placadeidenticação
10 ReservatóriodaáguacomindicaçãodonívelMAXdaágua
11 Base
Utilizar o aparelho
Encher o depósito da água
Nota: O seu aparelho foi concebido para ser utilizado com água canalizada. Se
viver numa área com água muito dura, pode ocorrer uma acumulação muito
rápida de calcário. Neste caso, recomendamos uma mistura de 50% de água
destilada e 50% de água canalizada para prolongar a vida útil do seu aparelho.
Nota: Não deite perfume, vinagre, goma, agentes descalcicantes, aditivos, água
descalcicada quimicamente ou outros produtos químicos no reservatório da água.
1 Denaocontrolodovaporparaaposiçãot(passar a ferro a
seco).(g.2)
2 EnchaodepósitocomáguaatéàindicaçãoMAX(g.3).
3 Feche a tampa da abertura de enchimento.
Seleccionar a denição de temperatura e vapor
Tabela 1
Tipo de tecido Regulaçãoda
temperatura
Regulação
do vapor
Jacto de
vapor
Borrifador
Linho MÁX ;, Sim Sim
Algodão 3;, Sim Sim
Lã 2ECO Não Sim
Seda 1tNão Não
Tecidossintéticos
(p.ex.:acrílico,
nylon,poliamida,
poliéster).
1tNão Não
1 Consulteatabela1paradenirobotãodatemperaturaparaa
regulaçãoapropriadaparaasuapeçaderoupa(g.4).
2 Coloqueoferrosobreoseudescansoeliguearespectivacha.
A luz da temperatura acende-se para indicar que o ferro está a
aquecer(g.5).
3 Quandoaluzdatemperaturaseapaga,oferroalcançoua
temperatura correcta.
4 Consulteatabela1paraseleccionarumaregulaçãodevaporque
correspondaàtemperaturaquedeniu(g.6).
Nota: Para utilizar o super turbo , mantenha o controlo do vapor premido
continuamente na posição de super vapor .
Atenção:Nãodenaocontrolodovaporparaumaregulaçãocomvapor,
quandoatemperaturadenidaforinferiora2nem quando o ferro
ainda estiver a aquecer (quando a luz de temperatura está acesa). Caso
contrário, o ferro pode verter água.
Funções
Função de borrifador
- Podeutilizarobotãodoborrifadorparahumedecerapeçaaengomar.
Istoajudaaeliminarosvincosmaisdifíceis(g.7).
Função de jacto de vapor
- Primaesolteobotãodojactodevaporparaumjactopotentede
vaporparaeliminarvincosdifíceis(g.8).
Vapor vertical
- Afunçãodejactodevaporpodeserutilizadaquandotemoferrona
posiçãoverticalpararemovervincosderoupapendurada,cortinados,
etc(g.9).
Função de desactivação automática de segurança (apenas
em modelos especícos)
- Oferrodesliga-seautomaticamentesenãoformovidodurante
30segundosnaposiçãohorizontalou8minutosnaposiçãovertical.
Aluzdadesactivaçãoautomáticacaintermitente(g.10).
- Paradeixaroferroaquecernovamente,levanteoferrooumovimente-o
ligeiramenteatéaluzdadesactivaçãoautomáticaseapagar.
Regulação de vapor ECO
- SeleccionearegulaçãodovaporECOemvezdaregulaçãodevapor
máximo;parapouparenergia,continuandoaobterresultadosde
engomarsatisfatórios.(g.11)
Passar a ferro a seco
- Reguleocontrolodovaporparat(passaraferroaseco)parapassar
aferrosemvapor.(g.2)
Limpeza e manutenção
Limpeza
1 Regule o controlo do vapor para t(passar a ferro a seco), desligue a
chadoferrodatomadaedeixe-oarrefecer.(g.2)
2 Despeje a água que restar no depósito de água.
3 Limpe os resíduos de calcário e outros da base do ferro com um
panohúmidoeumprodutodelimpeza(líquido)nãoabrasivo.
Atenção:Paraconservarabasedoferromacia,deveevitarocontacto
com objectos metálicos. Nunca utilize esfregões, vinagre ou produtos
químicos para limpar a base do ferro.
Nota: Enxagúe regularmente o depósito de água com água canalizada. Esvazie
o depósito depois de o limpar.
Função Calc-Clean (limpeza do calcário)
IMPORTANTE: Para prolongar a vida útil do seu aparelho e
para manter um bom desempenho de produção de vapor, utilize
a função Calc-Clean a cada duas semanas. Se a água na sua área
for muito dura (ou seja, se saírem ocos de calcário pela base
do ferro quando estiver a passar), utilize a função Calc-Clean
com maior frequência.
1 Certique-sedequeachadoaparelhoestádesligadaeque
o controlo de vapor está regulado para t(passar a ferro a
seco).(g.2)
2 EnchaodepósitocomáguaatéàindicaçãoMAX(g.3).
Nãodeitevinagrenemoutrosprodutosdescalcicantesnodepósito
de água.
3 Ligueachadoferroereguleobotãodatemperaturapara
MAX(g.12).
4 Desligue o ferro quando a luz da temperatura se apagar.
5 Segureoferrosobreolava-loiça.Coloqueocontrolodovaporna
posiçãoCalc-Cleanesegure(g.13).
6 Agite suavemente o ferro até acabar toda a água no depósito de
água(g.14).
Atenção:Enquantocalcárioéexpelido,tambémsaemvaporeáguaa
ferver pela base.
7
Volte a colocar o controlo do vapor em t(passaraferroaseco).(g.2)
Nota: Repita o procedimento Calc-clean se a água que sair do ferro ainda tiver
resíduos de calcário.
Após o processo Calc-Clean
1 Ligueachadoferro.Deixe-oaquecerparaabasesecar.
2 Desligue o ferro quando a luz da temperatura se apagar.
3 Mova o ferro suavemente sobre um pano para retirar quaisquer
manchas de água da base.
4 Deixeoferroarrefecerantesdeoarrumar.
Arrumação
1 Desligueachadoferroereguleocontrolodevaporparat
(passaraferroaseco).(g.2)
2 Enroleocabodealimentaçãoàvoltadaarrumaçãodocaboeguarde
oferropousadosobreoseudescanso(g.15).
Resolução de problemas
Estecapítuloresumeosproblemasmaiscomunsquepodemsurgirno
aparelho.Senãoconseguirresolveroproblemacomasinformações
fornecidasaseguir,visitewww.philips.com/supportparaconsultarumalista
deperguntasfrequentesoucontacteoCentrodeApoioaoClientenoseu
país(consulteosdetalhesdecontactonofolhetodagarantiamundial).
Problema Possível causa Solução
Abaseliberta
gotasdeáguaou
surgemmanchas
molhadasnapeça
de roupa durante
oengomar.
Atemperatura
seleccionadaé
demasiadobaixa
paraengomarcom
vapor.
Denaumatemperatura
adequadaparaengomarcom
vapor.Consulteatabela1.
Colocou um
aditivonodepósito
daágua.
Enxagúeoreservatórioda
águaenãovolteadeitar
nenhumaditivonaágua.
Afunçãode
jactodevapor
nãofunciona
correctamente(a
base apresenta
fugasdeágua).
Utilizouafunção
dejactodevapor
comdemasiada
frequêncianum
curtoespaçode
tempo.
Aguardeumpoucoantesde
utilizarnovamenteafunçãode
jactodevapor.
Utilizouafunção
dejactodevapor
a uma temperatura
demasiadobaixa.
Denaumatemperatura
deengomaràqualafunção
dejactodevaporpodeser
utilizada(2aMAX).
Saemresíduos
decalcárioe
impurezasdabase
do ferro durante o
engomar.
Aáguaduraforma
acumulaçõesde
calcárionointerior
dabasedoferro.
UtilizeafunçãoCalc-Clean
(consulteocapítulo“Limpeza
emanutenção”,secção
“FunçãoCalc-clean”).
Pingaáguada
basequandoo
ferro arrefece ou
quandosearruma.
Oferroesteve
colocado na
posiçãohorizontal
eodepósitoainda
tinhaágua.
Esvazieodepósitodaáguae
reguleocontrolodovapor
paraaposição“seco”depois
deutilizaroferro.Guarde
o ferro pousado sobre o
descanso.
Saiáguaatravésda
tampa da abertura
deenchimento.
Encheudemasiado
odepósitodaágua. Nãoenchaodepósitode
águaacimadaindicaçãoMAX.
Vertaaáguaemexcessodo
depósitodeágua.
Quando coloco
o controlo do
vapornaposição
desupervapor,o
controlodovapor
voltaàposição
anterior.
Nãosegurouo
controlodovapor
naposiçãode
supervapor.
Sequiserutilizarosupervapor,
tem de manter o controlo
devaporcontinuamentena
posiçãodesupervapor.Paraas
outrasregulaçõesdevapor,isto
nãoénecessário.
1
2 3 4 5
67 8 9
10 11 12 13
14 15
4239_000_8758_1_DFU_Leaflet_A6_v2.indd 2 10/14/13 1:33 PM

