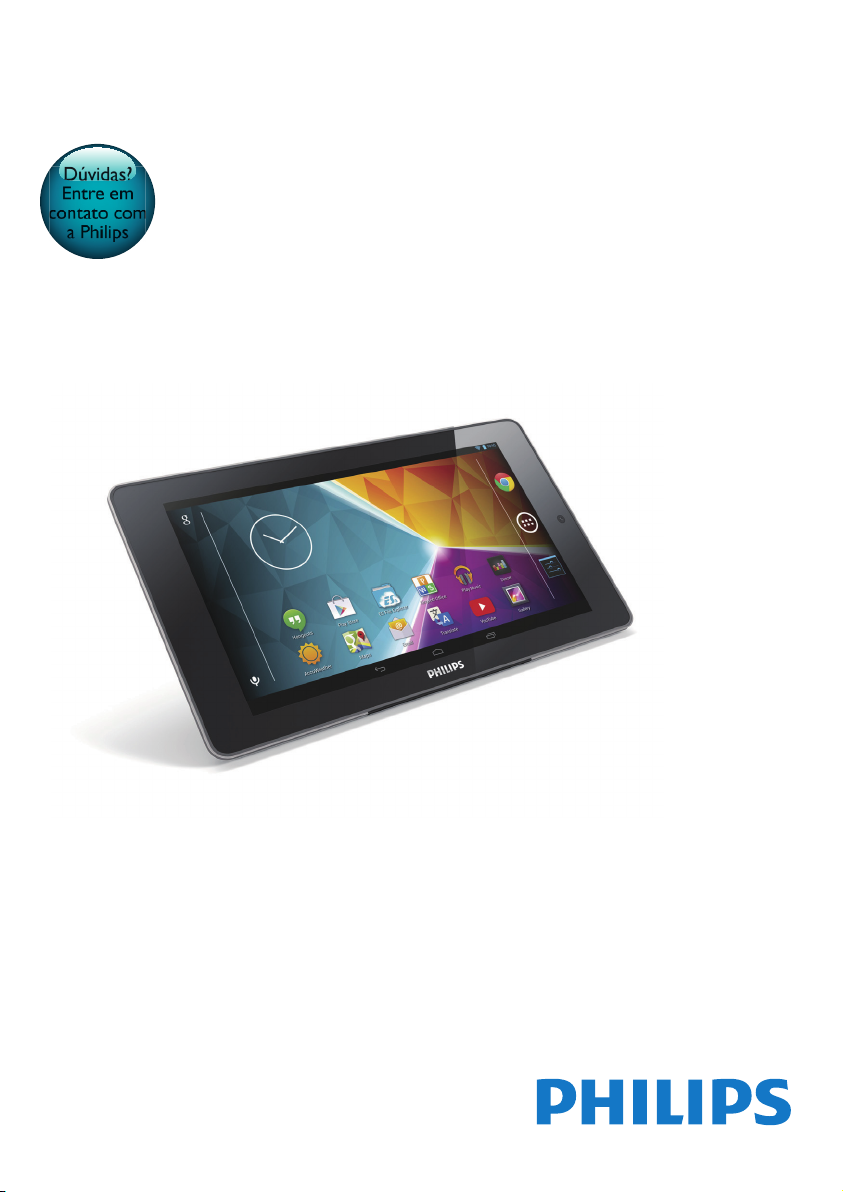
Philips PI3910B2/55 User manual

www.philips.com/welcome
User manual
Always there to help you
Register your product and get support at
PI3910B2/55
Dúvidas?
Entre em
contato com
a Philips


1EN
Contents
1 Important safety instructions 3
Safety 3
Compliance 3
Care of the environment 3
Notice 4
Written Offer 4
2 Overview 5
Controls 5
Home screen 5
Use the drag-down menu of setup options6
3 Get started 7
Charge power 7
Conserve battery power 7
Switch the device on or off 7
4 Basics 8
Find apps 8
Use the screen 9
Switch screen rotation on or off 9
Lock/ unlock the screen 9
Customize the Home screen 10
Add app icons and widgets 10
Delete items 10
Relocate items 10
Add wallpapers 10
Text entry 10
Select input methods 10
Enter text 11
Use the Android keyboard 11
Edit text 12
5 Connections 13
Connect to the Internet 13
Connect to your computer 13
Use a Micro SD card 14
Connect to an HDTV 14
Connect to Bluetooth 15
Connect with Bluetooth devices 15
Bluetooth 16
Listen to music through stereo
Bluetooth headphones and
speakers 16
6 Apps 17
Install apps 17
Play Store 17
Other sources 17
Manage apps 17
7 Browser 19
Add a bookmark 19
8 Email 20
Set up your email account 20
Select account settings 20
Check your email messages 20
Compose email messages 21
Organize email messages 21
9 Tools 22
Camera 22
T
ake photos or record videos 22
Calendar 23
10 Use the device in corporate
networks 24
Install secure credentials 24
Set up your Microsoft Exchange account 24
Add VPN 24
11 Settings 26
WIRELESS & NETWORKS 26
Wi-Fi 26
Airplane mode 26
VPN settings 26
DEVICE 26
Sound 26
Display 26
HDMI 27
Screenshot Setting 27
Storage 27
Battery 27
Apps 27
Location access 27

2EN
Security 27
Screen lock 27
Visible passwords 28
Device administrators 28
Unknown sources 28
Verify apps 28
Trusted credentials 28
Install from SD card 28
Language & input 28
Language 28
Personal dictionary 28
Voice Search 29
Text-to-speech output 29
Reset 29
ACCOUNTS 29
Date & time 29
Automatic setting 29
Manual setting 29
Accessibility 29
Auto-rotate screen 30
About tablet 30
System updates 30
Status and information about the
device 30
31
13 Technical data 32
14 Warranty 34
Need help?
Please visit
www.philips.com/welcome
where you can access a full set of supporting
materials such as the user manual, the latest
software updates, and answers to frequently
asked questions.

3EN
1 Important safety
instructions
Safety
the manufacturer.
Use only power supplies listed in the user
manual.
The product shall not be exposed to dripping
or splashing.
Do not place any sources of danger on the
candles).
Batteries (battery pack or batteries installed)
shall not be exposed to excessive heat such as
Where the plug of the Direct Plug-in Adapter
is used as the disconnect device, the disconnect
device shall remain readily operable.
Warning
Never remove the casing of this apparatus.
Never lubricate any part of this apparatus.
Never place this apparatus on other electrical
equipment.
Keep this apparatus away from direct sunlight, naked
Ensure that you always have easy access to the power
cord, plug or adaptor to disconnect the apparatus from
the power.
Compliance
Note
The type plate is located on the back of the product.
Care of the environment
Environmental information
All unnecessary packaging has been omitted.
We have tried to make the packaging easy to
separate into three materials: cardboard (box),
polystyrene foam (buffer) and polyethylene
(bags, protective foam sheet.)
Your system consists of materials which can
be recycled and reused if disassembled by a
specialized company. Please observe the local
regulations regarding the disposal of packaging
materials, and old equipment.
Your product is designed and manufactured
with high quality materials and components,
which can be recycled and reused.
Please inform yourself about the local separate
collection system for electrical and electronic
products.
Please act according to your local rules and
do not dispose of your old products with your
normal household waste. Correct disposal of
your old product helps to prevent potential
negative consequences for the environment and
human health.Please inform yourself about the
local rules on separate collection of batteries
because correct disposal helps to prevent
negative consequences for the environmental
and human health.
Always bring your product to a professional to
remove the built-in battery.

4EN
Notice
Written Offer
WOOX Innovations hereby offers to deliver,
upon request, a copy of the complete
corresponding source code for the copyrighted
open source software packages used in this
product for which such offer is requested by
the respective licenses.
This offer is valid up to three years after
product purchase.To obtain source code,
please contact open.source@woox.com. If you
prefer not to use email or if you do not receive
to this email address, please write to Open
Source Team, 6/F, Philips Electronics Building, 5
Science Park East Avenue, Hong Kong Science
Park, Shatin, NewTerritories, Hong Kong. If you
letter, please email to the email address above.
This product is partly based on Open
Source software.The license text and
acknowledgment can be retrieved from
the device under > About tablet > Legal
information.
notice. Philips and the Philips’ Shield Emblem
N.V. and are used by WOOX Innovations
N.V..WOOX Innovations reserves the right
to change products at any time without being

5EN
2 Overview
Controls
a Power/ lock button
Press and hold: switch on or off the
device.
Press: lock/unlock the screen;To unlock
the screen, drag the lock to an icon.
b Rear camera lens
c RESET
Press the hole by using the tip of a
paper clip when the screen does not
respond to the pressing of keys.
d Micro HDMI
Connector for the audio/ video output
e
3.5-mm headphone connector
f
Slot for Micro SD card
g
Microphone
h
a
d
e
f
g
b
c
k
i
j
h
USB connector for data transfer and
power charging
i Speaker
j ,
Press: increase/decrease the volume.
Press and hold: increase/decrease fast.
k Front camera lens
Home screen
a Chrome:Web browser of Google
APPS/WIDGETS: List all apps or
widgets.
Settings: Customize the settings of
PI3910B2/55.
b :Tap to return to the Home screen.
: Go back one level.
: Display recent applications that you
have accessed.
(for some apps):View the options menu.
c Google Search
: Use the quick search box to search
on PI3910B2/55 or the Web.
: Google voice search
d
Drag down the bar to check events.
e Time, setup options
Drag down the bar to select setup
options.
a
de
b
c

6EN
Use the drag-down menu of
setup options
1 Drag down the top bar as shown.
2 Tap the icon to select your options.
Change the screen brightness
Switch to the settings menu
Switch on or off Wi-Fi
/
Switch screen rotation on or off
Battery charging underway
Switch on or off the airplane mode.
When the airplane mode is on, the
access to wireless connection is
disabled.
Switch on or off Bluetooth

7EN
3 Get started
Charge power
PI3910B2/55 has a built-in battery that can be
charged through the USB connector of the
supplied USB power adapter.
PI3910B2/55, charge
PI3910B2/55 for more than 5 hours.
By using the USB cable, connect
PI3910B2/55 to the supplied USB
power adapter.
Note
Rechargeable batteries have a limited number of charge
cycles. Battery life and number of charge cycles vary by
use and settings.
Conserve battery power
To conserve battery power and increase
the play time, do the following:
Use the sleep mode
After the selected time duration, PI3910B2/55
goes to the sleep mode, and the screen
switches off automatically.To save battery
power, do the following:
Go to > Display > Sleep to set the
screen-off timer to a low value.
To switch off Wi-Fi during the sleep mode,
a Go to > Wi-Fi.
b At the top bar, select > Advanced
> Keep Wi-Fi on during sleep. Select
Never.
Switch the device on or off
Press and hold the power/ lock button until the
device is switched on or off.

8EN
4 Basics
Find apps
Swipe left/ right to select a page;
Alternatively, tap to open the list of
apps. Swipe left/ right to scroll through
the list;
Use the navigation buttons /
to switch between screens.Tap to
go to the apps that you have accessed
recently.
Tip
On PI3910B2/55, you can install apps from the Play
Store or other sources.
Play Store:
Download different apps, games, and
others.
Settings:
Customize the settings of PI3910B2/55.
Play Music:
Play music that you store on
PI3910B2/55.
Online music service of Google
Gallery:
View pictures and videos that you
store or make on PI3910B2/55.
Photos:
Photo-sharing service of Google
YouTube:
Online video service of Google
Play Movies & TV:
Online movie &TV service of Google
(available in some countries)
Deezer:
Online music service (available in some
countries)
Play Books:
Online book service of Google
(available in some countries)
Play Games:
Online games service of Google
Chrome:
Web browser of Google
Browser:
Browse Web pages.
Google Search:
Search on PI3910B2/55 or the Web.
Voice Search
Voice search and voice action services
of Google
Maps:
Maps service of Google
Local:
Quick access to the place search
function in Google Maps
Navigation:
Quick access to the navigation function
in Google Maps
Earth:
Satellite view of maps (available in
some countries)
Email:Set up your email account on
PI3910B2/55.
Gmail:
Mail service of Google
Hangouts:

9EN
Chat service of Google
People:
List of your contacts, including those in
your Gmail
/
Google+/ Orkut:
Social networking service of Google
Blogger:
Blogger service of Google
Google Settings:
Select your settings for Google
services.
Downloads:
View the list of your downloads from
the Web.
ES File Explorer:
PI3910B2/55, install apps, and manage
:
Create and manage your document,
Drive:
Cloud storage service of Google
Camera:
Take photos or record videos.
Translate
Online language translation service of
Google
Calendar:
Add events, and set reminders for your
events.
Keep:
Keep quick notes.
Clock:
use the timer, alarm clock, and
stopwatch.
Calculator
Sound Recorder:
Record and listen to voice messages.
AccuWeather
Online weather forecast service
Use the screen
Switch screen rotation on or off
1 Drag down the top bar.
2 In the drag-down menu, tap / to
switch screen screen rotation on or off.
Lock/ unlock the screen
By locking the screen, you can lock the touch
controls on the screen (except for some apps
or widgets).Thus, undesired operations are
prevented.
Auto lock
After a time duration, the screen dims and is
locked automatically.To set the time duration,
go to > Display > Sleep.
To lock the screen manually
Press the power/ lock button.
To unlock the screen
1 If necessary, press the power/ lock button
to display the lock.
2 Drag the lock to an icon.

10 EN
Customize the Home screen
To access functions quickly from the Home
screen, you can add and rearrange items.
Add app icons and widgets
1 Swipe left/ right to select a page.
If necessary, tap to return to the
Home screen.
Tap .Tap APPS or WIDGET to open
the list of apps or widgets.
2 Tap and hold an icon or widget until the
page is displayed.
» The icon or widget is added to the
selected page.
Delete items
1 Tap and hold an item to unlock.
2 Drag the item to .
Relocate items
1 Tap and hold an item to unlock.
2 Drag the item to a space on the page.
3 Release the item.
» The item moves to the space.
Add wallpapers
1 From the Home screen, go to > Display
> Wallpaper.
2 Select your options.
Text entry
With the onscreen keyboard, you can enter
text in multiple languages.
Select input methods
1 From the Home screen, select Settings
> Language & input.

11EN
2 Select your input methods:
Android Keyboard: for multiple languages
Google voice typing: for text input through
voice
3 To select your input options, tap next to
the input method.
Enter text
1 Tap the text box to show the onscreen
keyboard.
2 Tap on the keys to enter text.
To delete the entry before the cursor,
Select .
To move to the next line,
Select .
Use the Android keyboard
Select keyboard settings or input
languages
On the onscreen keyboard, tap .
Switch between selected input
languages
Language&input
A
...
Android keyboard
1 Add to the option list the languages that
you often use.
a On the onscreen keyboard, tap
>Input languages.
b Tap the checkbox to select languages.
2 On the onscreen keyboard, tap and hold
to select a language.
Switch between letters and numbers/
symbols
Tap or .
Tip
On the numeric/symbol keyboard, tap ~\{ to switch
between numbers/symbols and more symbol choices.
Switch between upper and lower cases
Tap repeatedly to switch between
and .
:The next letter you enter is in upper
case.
: All letters you enter are in lower case.
To switch to the input mode of all upper
cases,
1 Tap and hold or .
» The button changes to blue.
2 When a click sounds, release the button.
» is displayed.
» All letters you enter are in upper case.
Switch to other options on a button
Tap and hold the button that is marked
with a symbol at the lower/upper right
corner.

12 EN
» A pop-up screen is displayed.
Edit text
You can cut, copy, and paste the text that you
have entered.
Copy or cut the selected text
1 Tap and hold the text until the pop-screen
is displayed.
» Current word is selected, with marks
for start and end positions.
2 Drag the marks to select or change the
start/ end positions.
Tap Select all to select all the text.
3 Tap Copy or Cut.
» The selected text is copied or cut.
Paste the selected text
1 Put the cursor in a position.
2 Tap and hold the position until the pop-
screen is displayed.
» In the pop-up screen, the option Paste
is displayed.
» Tap Paste.The text is pasted in the
selected position.

13EN
5 Connections
Connect to the Internet
Connect PI3910B2/55 to a wireless router
(Access Point).You can connect PI3910B2/55 to
the network that is built around the router.
To connect to the Internet, make sure that the
router connects to the Internet directly and no
dial-up is required on the computer.
1 From the Home screen, tap Settings >
Wi-Fi.
2 Select the option to switch on the Wi-Fi
function.
» You see a list of Wi-Fi networks in
range.
3 Connect PI3910B2/55 to a network:
a Tap to select a network.
b On the pop-up screen, enter the
password to the network.
» is displayed in the status bar
when the Wi-Fi connection is
completed successfully.
» Next time you switch on
PI3910B2/55, PI3910B2/55
connects to the previously
connected network automatically.
Note
the MAC address of PI3910B2/55 to the list of devices
MAC address, go to Settings > About tablet >
Status on the Home screen.
To refresh the list of networks, select > Scan at the
upper-right corner of the screen.
If you have disabled SSID broadcasting or hidden the
enter the SSID or public name for the network. Go to
Settings > Wi-Fi. On the top bar, select .
is unavailable or disabled on the router, manually enter
the IP address of PI3910B2/55.
Connect to your computer
Connect PI3910B2/55 to a computer through
the USB cable.

14 EN
PC to PI3910B2/55,the internal storage or SD
card.
Use a Micro SD card
Insert a Micro SD card (up to 32 GB) into
PI3910B2/55.You can expand the memory size
of PI3910B2/55.
Connect to an HDTV
Connect PI3910B2/55
TV (HDTV).You can watch on the HDTV the
photos and videos that play on PI3910B2/55.
1 On PI3910B2/55,
Connect an HDMI cable (sold separately)
to:
the Micro HDMI socket on PI3910B2/55,
and
the HDMI input socket on the TV.
2 On the TV, switch to the input source of
PI3910B2/55:
On the remote control of yourTV,
use the source button to select the
input connector that connects to
PI3910B2/55.
HDMI IN
SOURCE
TV
AV
HDMI 1
HDMI 2
HDMI 3
Side HDMI
Side AV

15EN
3 On PI3910B2/55, tap Settings > HDMI.
Select the output resolution that yourTV
supports.
On PI3910B2/55, when the Micro
HDMI connector is in use, press the
Power/ lock button to return to the
previous screen.
Tip
As a compact audio/video interface, HDMI transmits
uncompressed digital data.With the HDMI connection,
optimum video and audio quality on an HDTV.
Connect to Bluetooth
Through Bluetooth, you can do the following
wirelessly on PI3910B2/55:
another connected Bluetooth device;
Listen to music through stereo
Bluetooth headphones;
Listen to music through Bluetooth
speakers, like Philips SHOQBOX.
Connect with Bluetooth devices
You can connect PI3910B2/55 with Bluetooth
devices in the following ways:
Connect another Bluetooth device;
Get connected by another Bluetooth
device.
Tip
Before the connection, consult the user manual of the
Bluetooth device to get its Bluetooth pairing passcode.
Or, try 0000 or 1234.
Connect another Bluetooth devices
1 Make sure that the device is discoverable
by another Bluetooth device.
Consult the user manual of the
Bluetooth device for information.
2 On PI3910B2/55, search for the Bluetooth
device:
a From the Home screen, tap
Settings > Bluetooth.
b Select the option to switch on
Bluetooth.
» is displayed on the status bar.
c Tap SEARCH FOR DEVICES.
» The device is displayed under
AVAILABLE DEVICES after it is
discovered.
3 Pair with the device:
On PI3910B2/55, tap the device, and
enter the passcode as prompted;
On the device, enter the passcode as
prompted.
» A message is displayed when the
pairing is complete.
Get connected by another Bluetooth
devices
1 Make sure that PI3910B2/55 is
discoverable by another Bluetooth device:
a From the Home screen, tap
Settings > Bluetooth.
b Select the option to switch on
Bluetooth.
c Tap PI3910B2/55.
» *PI3910B2/55 is discoverable for
two minutes.

16 EN
2 On the Bluetooth device, search for and
pair with PI3910B2/55.
For information about the steps,
consult the user manual of the
Bluetooth device.
Tip
* To change the device name of PI3910B2/55, go to
Settings > Bluetooth, tap and select Rename tablet.
Bluetooth
1 Make sure that
you have paired PI3910B2/55 with the
Bluetooth device;
on PI3910B2/55 and Bluetooth device,
Bluetooth is on.
2 On PI3910B2/55
Bluetooth:
a In Gallery, play a photo.Tap >
Bluetooth.
b Tap the paired device to start sending.
» When sending or receiving is in
progress, is displayed at the top
of the screen.
3
1 Make sure that
you have paired PI3910B2/55 with the
Bluetooth device;
on PI3910B2/55and Bluetooth device,
Bluetooth is on.
2
PI3910B2/55 through Bluetooth.
3 On PI3910B2/55
At the top of the screen, tap .
»
Settings> Bluetooth.Tap
and select .
Listen to music through stereo
Bluetooth headphones and speakers
Connect the stereo Bluetooth headphones or
speakers
» Follow the steps under"Connect
another Bluetooth device" (see
'Connect another Bluetooth
devices' on page 15).After successful
connection, is displayed .
» Next time you switch on Bluetooth on
the devices, the Bluetooth connection
is established automatically.
Listen to music through the stereo Bluetooth
headphones or speakers
Play music on PI3910B2/55.
» You listen to the music through the
connected Bluetooth headphones
or speakers.

17EN
6 Apps
With apps, you can access functions, services,
and different audio/ video content on
PI3910B2/55.
Install apps
On PI3910B2/55, you can install apps from
(Play Store) over the Internet; or
other sources, such as
other online sources,
the internal storage of PI3910B2/55,
and
the Micro SD card that you have
inserted into PI3910B2/55.
Play Store
1 Log in to or create your Google account
to access Google services.
To add a Google account, do the following:
a Go to (Play Store).Tap >
Accounts.
b Select Add account.
c Follow onscreen instructions to add
an account.
2 Search for apps as needed.
Tap for keyword search.
3 Download the app:
» When the downloading is
complete, installation starts
automatically.
»
status. If necessary, tap the icon to
start installation as prompted.
Tip
To manage your accounts, go to Settings >
ACCOUNTS.Tap an account to select your options.
Other sources
Allow the installation from unknown sources
From the Home screen, go to >
Security.Tap to switch on Unknown
sources.
» If the function is enabled, the tick
box is selected.
Download/ transfer apps
To download apps from online sources,
follow the onscreen instructions;
To transfer apps to the internal
memory or SD card of the device, use
the USB cable to connect PI3910B2/55
to your PC.
Start installation
The downloaded apps start installation
automatically;
transferred to the internal memory or
SD card, go to . Find the apps and
tap the option to start installation.
Manage apps
You can manage the apps on PI3910B2/55, for
example, install/ uninstall apps, stop running
apps, or select other options.
1 From the Home screen, select Settings
> Apps:

18 EN
In DOWNLOADED
that you have downloaded from the
Play Store or other sources.
In RUNNING
running on PI3910B2/55.
In ALL
installed on PI3910B2/55.
2 Tap an app.
» Options and information are displayed.
3 Tap to select an option.
Table of contents
Other Philips Tablet manuals

Philips
Philips Pi3100 User manual

Philips
Philips PI3900B2 User manual

Philips
Philips Pi3100 User manual

Philips
Philips PI3205G User manual

Philips
Philips PI3100W2/85 User manual

Philips
Philips PI3000/93 User manual

Philips
Philips Pi3900 User manual

Philips
Philips Pi3800 User manual

Philips
Philips Pi3900 User manual

Philips
Philips Pi3800/93 User manual

Philips
Philips PI3910 User manual

Philips
Philips Pi3100 User manual

Philips
Philips PI3110B2/56 User manual

Philips
Philips Pi7000 User manual

Philips
Philips PI4010G User manual

Philips
Philips PI3100W2 User manual

Philips
Philips Pi3900 User manual

Philips
Philips PI7100 User manual

Philips
Philips PI3210G/58 User manual

Philips
Philips PI3110 User manual