manuals.online logo
Brands
  1. Home
  2. •
  3. Brands
  4. •
  5. Philips
  6. •
  7. Webcam
  8. •
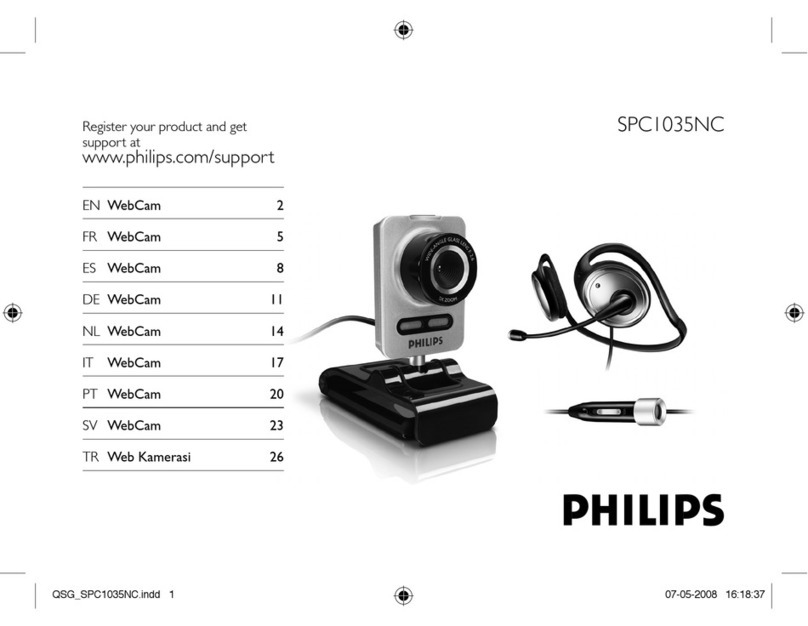
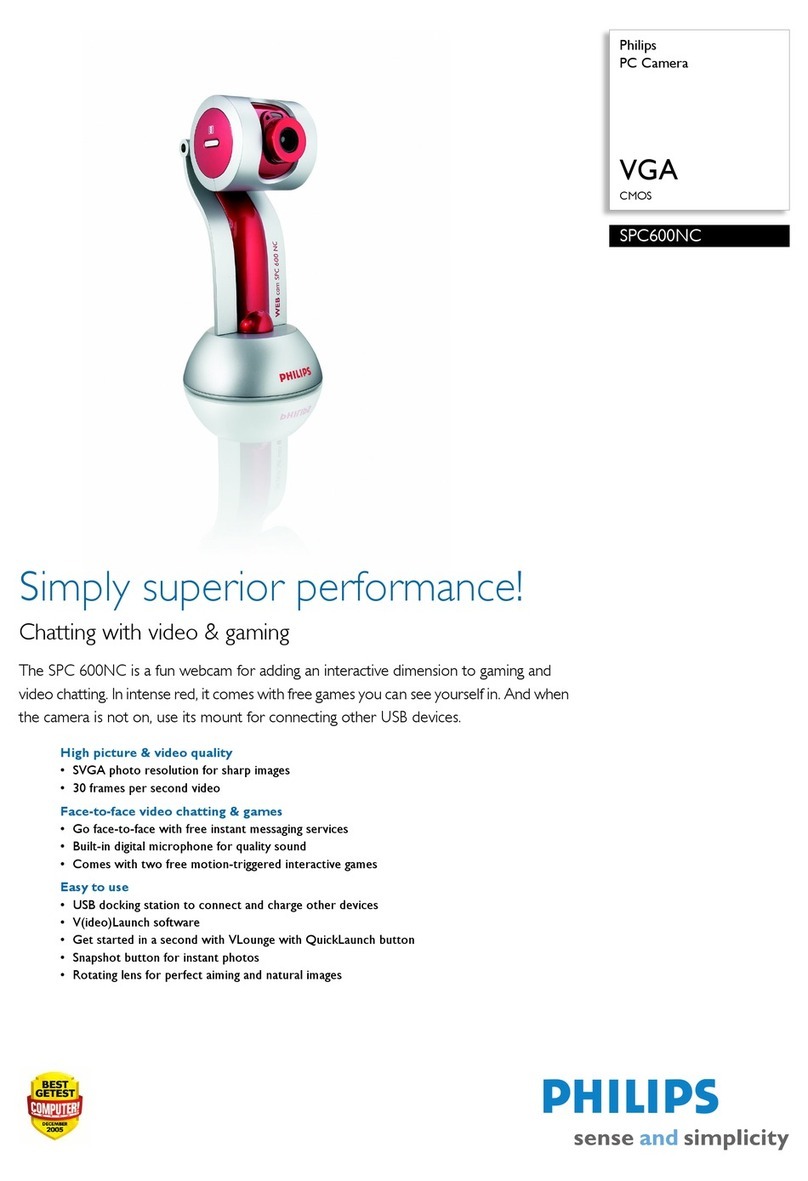
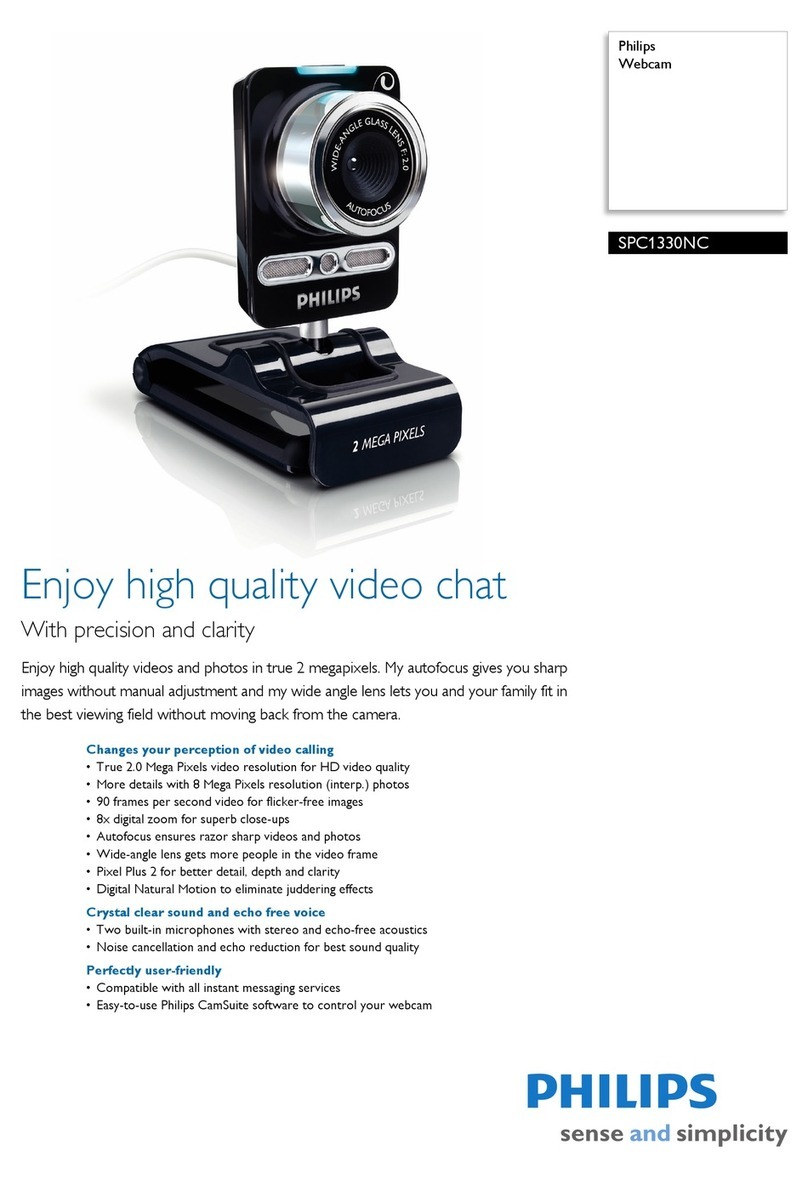
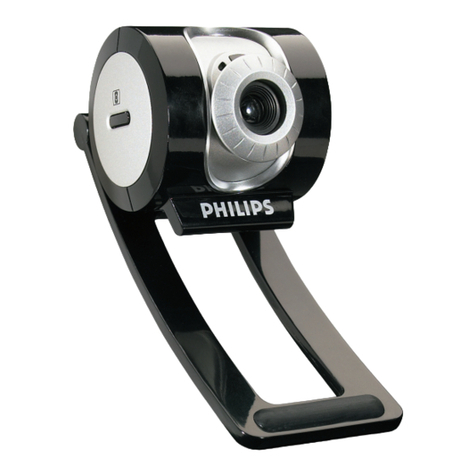
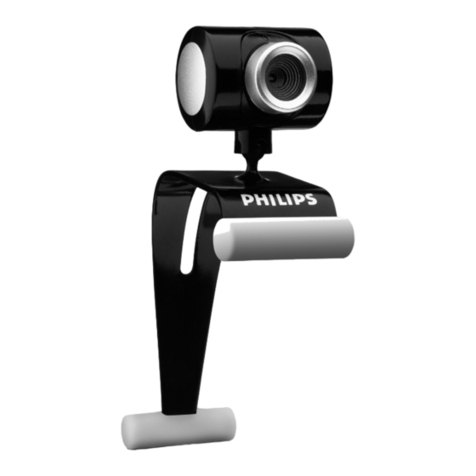
  9. Philips PCVC720K/40 User manual

Philips PCVC720K/40 User manual

,QWURGXFWLRQ
Brilliant images and blazing colours. That’s what you get with the Philips USB PC Camera. Forget about installing grabber cards and
separate power supplies. You don’t need them. Power is supplied direct to the camera through the USB cable and the camera returns
video straight to your PC!
This USB PC Camera has several unique features:
•The universal camera base supports both free-standing and hanging use (for laptops), with perch included for stable footing
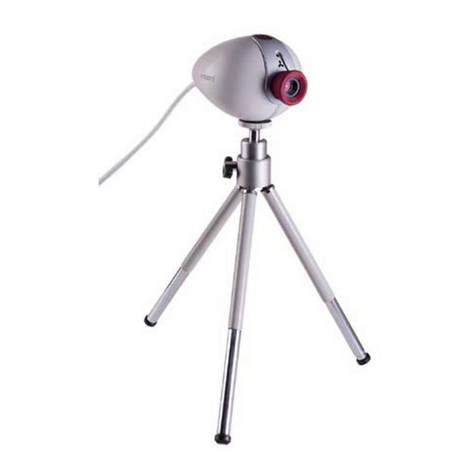
on top of your monitor. It also features a 1/4" UNC screw thread for tripod mounting
•Full Auto mode automatically optimizes your camera settings for you
•Option for high frame rates, up to 30 fps
•Full Plug & Play use of the USB port
•Video images in CIF resolution of 352x288 pixels, ideally suited for communication over the Internet
•Detailed still images in resolutions of up to 640x480 pixels
•Several top-of-the-line software packages included on CD-ROM, so you can start using the camera straightaway
Congratulations on purchasing the Philips USB PC Camera. This new digital camera is the most advanced means of recording high
quality movies or still pictures quickly and easily on your PC or laptop computer. After installation, the new camera can be used for all
sorts of applications, such as:
•9LGHRHPDLO9LGHRFDSWXUH Create your own video presentations, video mail, product demonstrations, training videos,
Internet clips etc.
•:HEFDPZHEDOEXP Show yourself on the web. Be out there for everybody to enjoy...
•6QDSVKRWLPDJHV Use images in presentations, create postcards, or send them via e-mail or on diskette. The camera works
with all applications that use the TWAIN interface to acquire an image.
•9LGHR*DPHV Amazing gaming interaction using your camera as a game controller.
•9LGHRFRQIHUHQFLQJ Use the camera for network video conferencing or Internet video conferencing.
•(GLWLQJDQGVSHFLDOHIIHFWV After recording the images you want with the Philips USB PC Camera, the images can be easily
edited using image or video editing programs.
The next sections of this manual give a step-by-step description of the installation process and explain how to use the USB PC
Camera.
8S _ +RPH  _ 1H[W
3UHSDUDWLRQ
This section describes how to install the hardware and software and how to get started in a few easy steps.
&RQWHQWVRIWKHER[
Check that the box contains the following items:
•The Philips USB PC Camera;
•Base to support the camera on (including monitor perch);
•A CD-ROM containing the Philips installation software, application software packages and electronic software manuals;
•Quick Install Guide.
Contact your supplier immediately if any item is missing.
*HWWLQJVWDUWHGLQIRXUHDV\VWHSV
The best way to quick results is as follows:
1. Unpack the box.
2. Place the Philips installation CD-ROM in your CD-ROM player, let the Philips installation program install the driver software
and the application software, and connect the camera to the USB port (marked with the USB-logo: ) when asked by the
installation program.
3. Start the central camera application VLounge using its icon on your desktop.
4. Have fun !
&DPHUDSDUWVDQGXVHRIWKHFDPHUDEDVHDQGSHUFK
1. Camera
2. Perch (See below for instructions)
3. Base
4. Lens ring (turn to focus the image)
5. Indicator LED
6. USB cable
7. Snapshot button
or suspend the camera from your laptop
Put the camera on top of the monitor, or on a table or desk... screen !
* = Sticky tape
©+RZWRPRXQWWKHSHUFK
(Ensure that the supporting
surface is free of grease and dirt.)
1. Remove backing from
one side of the adhesive
tape, and fix under the
disc.
2. Place perch on top of
monitor, remove backing
from other side of the
adhesive tape, and push
disc with adhesive tape
down through central
perch hole.
The camera base can be removed by turning
it through 90 degrees (1) and pulling it down
out of the camera (2).
* The camera features a 1/4" UNC screw
thread for tripod mounting.
8S _ +RPH _ 1H[W
&DPHUDDQGVRIWZDUHLQVWDOODWLRQ
In order to maximize the video performance offered by your camera, we have included a Philips installation program on CD-ROM.
Please follow these directions for the camera installation exactly, and make sure that you have your Windows CD-ROM to hand.
1. 'RQRWSOXJLQ\RXU86%FDPHUD\HW3OHDVHIROORZWKHLQVWUXFWLRQVDVWKH\DSSHDURQ\RXUVFUHHQ<RXZLOOKDYHWR
UHVWDUW\RXUFRPSXWHUDIWHULQVWDOOLQJQHZFRPSRQHQWV
2. Insert the Philips installation CD-ROM into the CD-ROM drive.
3. The installation program should start automatically. If not, click the Windows ’Start’ button, then click ’Run’, and type:
’X:\Setup.exe’, where X stands for the drive name of your CD-ROM drive.
4. Let the Philips installation program guide you through the setup procedure. Mark the different components you want to install
(including the applications). You can always re-run this setup at a later time to add components to your installation or to re-
install the camera drivers.
5. When asked for the Windows CD-ROM, insert it into the drive and click ’OK’. Exit the Windows Setup screen if it appears.
6. After copying the camera software and the application software to your hard disk, the installation program will install the
selected applications and then launch the camera configuration program VCheck to install the camera drivers.
VCheck will ask you to connect the camera to the USB port at the appropriate time.
A test will then be performed. This test window confirms the correct installation by showing you the first ’live’ pictures from
your USB PC Camera. The camera settings can be shown by clicking the ’Settings’ button.
VCheck also gives tips for maximizing the camera’s performance.
7. Exit VCheck. You should now have:
- Program Group called ’Philips ToUcam Camera’ in your Windows Start menu.
- One camera settings icon on your taskbar. (VProperty)
- One VLounge icon on the Windows QuickLaunch menu on your taskbar.
- One VLounge icon on your desktop.
- Installed applications, as selected by the user during this installation procedure.
You are now ready to start working with your Philips USB Camera. Go to the central camera application VLounge and... Have
fun!
8S _ +RPH _ 1H[W
8VLQJWKHDSSOLFDWLRQV
7KLVVHFWLRQJLYHVDEULHIGHVFULSWLRQRIKRZWRXVHWKHYLGHRVRIWZDUHSDFNDJHVLQFOXGHGRQ&'520,I\RXKDYHQWLQVWDOOHG
WKHVHDSSOLFDWLRQV\HWSOHDVHUHDG&DPHUDDQGVRIWZDUHLQVWDOODWLRQIRULQVWDOODWLRQLQVWUXFWLRQV
*HQHUDO
VLounge is the central application for easy access to your Philips USB PC Camera and all video applications installed during setup,
together with access to one application of your choice. You can start VLounge using the Windows QuickLaunch menu on your taskbar,
through the program group ’Philips ToUcam Camera’, or by double-clicking the VLounge icon on the desktop.
&OLFNREMHFWVLQWKHLPDJHEHORZWRILQGRXWPRUHDERXWWKHVSHFLILFIXQFWLRQVRI9/RXQJH
The buttons to the right in the VLounge windows will start the applications. If you did not install all of the applications, some of these
buttons will be greyed out and will not activate when the cursor moves over them, indicating that the application is not available. Please
re-run the Philips installation program ’Setup’ from the CD-ROM to install any missing applications.
The other buttons and the menus offer access to other useful camera options.
:KHUHWRJHWKHOSRQWKHDSSOLFDWLRQV"
For detailed information about the use of these software packages, please read the information accompanying the individual software
packages. Each software package usually creates its own program group in the Windows Start Menu which is activated by clicking on
the Windows Start button. These program groups contain the application program icon and other items (Help files, Electronic Manuals,
Uninstall Wizards, Readme files, etc.) for that specific software package. All available information is usually accessible via the
software’s program group, or through the Help options within the program.
8S _ +RPH _ 1H[W
$SSOLFDWLRQV
9LGHRHPDLODQGYLGHRFDSWXUH9LGHR/LQN0DLOE\6PLWK0LFUR6RIWZDUH
+RZWRUHFRUGDQGVHQGDYLGHRPDLO
1. Start VideoLink Mail. The main window appears.
2. Wait for your camera to initialise, and place the camera and
microphone in an appropriate position.
3. Click the Record button. VideoLink Mail will begin recording.
4. When you have finished recording, click the Stop button.
5. You can now review your recording, save your recording in compressed
SMV video mail format or in general AVI format, mail your recording as
an e-mail or discard the recording. Persons receiving your e-mail do not
need any special software because the video mail has a player built in
and will be an executable file in EXE format.
More info: Click ’Help’ within the application for help or go to: www.smithmicro.com
%DFNWR9/RXQJH
:HEFDP6SRW/LIHE\6SRW/LIH
+RZWRVHQGPRYLHVDQGSLFWXUHVRYHUWKH,QWHUQHW
1. Your own IUHH SpotLife account will be created during installation or when uploading your first images to SpotLife.
2. Click the ’WebCam’ tab to send camera pictures to your SpotLife account periodically.
3. Adjust the preview image if necessary, then click the Start button to start uploading your live webcam pictures. When the
upload is complete, your browser will open with a preview of your show on SpotLife.
4. Similarly, click the ’Live Webcast’ tab to broadcast your PC Camera images and audio ’live’ over the World Wide Web.
5. Or create your own ’Web Album’ of stored videos and pictures for people to view at their convenience.
NOTE: You can make your shows public, for anyone to see, or choose to create a password so that only friends and family can view
them.
More info: Click ’Help’ within the application for assistance or go to: www.spotlife.com
%DFNWR9/RXQJH
9LGHRFRPPXQLFDWLRQVRIWZDUH1HW0HHWLQJE\0LFURVRIW
+RZWRFRQQHFWWRDSHUVRQRQWKH,QWHUQHWRURQD7&3,3QHWZRUN
1. Click the telephone icon.
2. Type the name of the person you want to call, or the name of the
computer you want to reach.
3. If NetMeeting does not have enough information for the connection, the
Advanced dialog box appears automatically.
4. Only two computers in a NetMeeting conference can use audio for
communication. All other participants must communicate through other
options, like Chat or the shared Whiteboard.
More info: Click ’Help’ within the application for assistance or go to: www.microsoft.com
%DFNWR9/RXQJH
9LGHRFDSWXUHVRIWZDUH95HFRUGE\3KLOLSV
+RZWRUHFRUGDQ$9,PRYLHWR\RXUKDUGGLVN
1. Choose a file name in the File menu using ’Set Capture File’.
2. Click ’Devices’ to set the video and audio source you want to
use.
3. Enable ’Preview’ in the Options menu to see the live camera
preview, then adjust your audio and video settings if
necessary. E.g. the Frame Rate setting in the Options - Video
Format menu, which determines the frame rate the camera
hardware should deliver to VRecord.
4. Use the Capture menu to start or stop capturing a video.
Enable ’Capture Audio’ if you want to record sound together
with the camera pictures.
(See below for other capture options.)
5. You can replay the recording by opening the AVI file you
selected for your capture file name in the File - Set Capture
File menu. Double click this AVI file in Windows Explorer and
Windows Media Player will show you the recording.
Other capture options are:
•The ’Master Stream’ option determines the preferred synchronisation between the video stream and the recorded sounds.
Choose ’Audio’ if you want to make sure that the video rate adapts to the sound recording rate. Choose ’Video’ if you want to
make sure that the sound recording rate adapts to the video recording rate. If ’None’ is enabled, VRecord will adapt both
streams to one another whenever necessary.
•If ’Use Frame Rate’ is enabled in Capture - Set Frame Rate... it determines the software frame rate at which VRecord
captures the movie, independently of the hardware frame rate delivered by the camera according to the Frame Rate setting
in the Options - Video Format menu.
More info: Go to: www.pc-cameras.philips.com
%DFNWR9/RXQJH
,PDJH&DSWXUHDQG3KRWR(GLWLQJVRIWZDUH3KRWR([SORUHUE\8OHDG
7RFDSWXUHIUDPHVIURP\RXUFDPHUD
1. First, click ’TWAIN Acquire’ in the File menu at the top left of your screen.
2. Next, click ’Select Source...’ in this menu and select the Philips USB PC Camera as your TWAIN source.
3. Once you’ve set your capture options, click the Acquire button in the toolbar to start the View Finder.
4. Finally, point your camera at the object or person you want to capture and click on the Capture button in the View Finder
windowor press the Snapshot button on top of the camera to capture the image displayed in the View Finder.
5. Edit the images after capturing them. Then print them, save them or share them with your friends over the Internet. Send them
an email or create your own picture albums on the web. Or use them for slide shows, wall paper, screensavers, and other fun
things.
More info: Click ’Help’ within the application for assistance or go to: www.ulead.com
%DFNWR9/RXQJH
9LGHR*DPH*DPH&DPE\5HDOLW\)XVLRQ
This game uses groundbreaking new technology to enable your PC to see you in front of it - via the PC Camera - and to ’understand’
where you are and how you’re moving.
+RZWRSOD\DFDPHUDFRQWUROOHGJDPH
1. Select one of the games by clicking one of the buttons. Control the game by moving in front of the camera and performing the
necessary physical actions. The game will react to your moving in front of the camera.
2. Please close the window after exiting the games to resume VLounge.
NOTE: Please check beforehand that you have enough room to make the necessary movements in front of your camera without
causing any damage.
More info: Click ’?’ within the application for assistance or go to: www.realityfusion.com
%DFNWR9/RXQJH
3HUVRQDO9LGHR<RXUIDYRXULWHXVHUDSSOLFDWLRQ
The Philips USB PC Camera not only works with the video applications included on CD-ROM with this camera, but with any video
application that uses DirectX or Video for Windows or the TWAIN interface.
We have therefore equipped VLounge with one application launch button which you can assign yourself. Right-clicking this button will
cause the ’Application configuration’ dialog to pop-up.
+RZWRDGGDQDSSOLFDWLRQWR9/RXQJH
1. Right-click the ’Personal Video’ button in
Vlounge to open the Application configuration
menu.
2. Click the ’Details’ button to access the
Application details menu in which you can
specify the full program name including its
extension (path not required). Fill out the other
options as required by your application.
3. Click OK to start searching for the specified
application on your system.
4. Select your application by clicking it on the list
of search results displayed in the ’New
application’ window (providing that any were
found). If not displayed, please check the
program name entered previously at Details
(step 2).
5. If the specified application has been found on
your system, you will now be able to start this
(video) application by clicking the ’Personal
Video’ button in VLounge.
%DFNWR9/RXQJH
9/RXQJHIXQFWLRQVRWKHUWKDQWKHDSSOLFDWLRQODXQFKEXWWRQV
VLounge offers you several buttons and menus for central control over your camera. A description of all these functions is given below.
To find out more about a function, simply click on that function in 9/RXQJH.
7KH6XSSRUWWRROVEXWWRQ
Use this button to pull down more buttons for support functions.
VCheck
This program checks whether the correct camera drivers
have been installed on your computer. It opens a test
window confirming the correct installation by showing you
’live’ pictures from your USB PC Camera.
VDownload VDownload checks for the availability of newer drivers
through the Internet and installs them for you if you wish.
Print Manual
Prints a copy of the user manual. Since it uses Acrobat
Reader to print the file, you should install Acrobat Reader on
your computer first. Insert the Philips Installation CD-ROM
into your CD-ROM drive and allow the Setup program to
install Acrobat Reader on your computer.
PC Cameras Site The web page for more information about PC cameras.
%DFNWR9/RXQJH
7KH3KLOLSV3&6WXII6LWHEXWWRQ
This is the Internet link for information about PC Peripherals from Philips.
%DFNWR9/RXQJH
7KH+HOSEXWWRQ
This opens the HTML manual file in your HTML browser.
%DFNWR9/RXQJH
7KH9LGHR2Q2IIEXWWRQDQGWKHSUHYLHZZLQGRZZLWKWKH3KLOLSVORJR
Use the ’Video On’ button to start showing the live camera image on your screen (instead of the stationary Philips logo). If it is not
possible to show a live camera preview, the preview window will display a snowy Philips logo indicating errors in ’receiving’ images
from your camera. This might occur if an independently started video application is still using your camera.
If you suspect other trouble, run VCheck to diagnose your system.
Press the same button again (when it says: Video Off) to close the preview window.
%DFNWR9/RXQJH
7KH)LOHDQG&RQILJXUDWLRQPHQX
Use ’File’ to exit VLounge or to display VLounge version information.
Use ’Configuration - Icons’ to activate or deactivate the various camera icons on your system. Use ’Configuration - Updates’ for
enabling or disabling the automatic driver update check every two months. Use ’Configuration - Select device’ to select the source
device (i.e. which camera) VLounge should use for displaying video images, and for camera updates !!
%DFNWR9/RXQJH
+LQWVDQG7LSV
This bar automatically shows you hints and tips for the various functions of VLounge whenever you move your cursor over the relevant
button. Please pay careful attention to this text, since it may contain valuable information as to why specific functions are not available
at certain times.
%DFNWR9/RXQJH
<RXU'\QDPLF3&&DPHUDDQLPDWLRQ
In this little corner of the screen your camera gives you feedback on your actions and button selections. And it just loves a good
workout!
%DFNWR9/RXQJH
6HWWLQJV
The camera properties can be changed from within an application, or independently by clicking the VProperty icon which can be
found in the right hand part of the Windows taskbar at the bottom of your screen. Most applications can show a ’live preview’ video
image on your monitor. Always use this option to see the effect of changed settings on your screen.
,PDJH&RQWUROV
The first property tab is marked ’Image Controls’.
)UDPHUDWH
The frame rate setting determines the number of images per second in the video stream.
The set of frame rates from which the user can choose depends on the currently selected video format (resolution) and the available
bandwidth on the USB bus (the number of devices connected to your USB port and the amount of data they transport). The buttons for
invalid frame rates will be greyed out automatically and cannot be selected. To enable higher frame rates choose a smaller video
image format in your application. Applications will usually offer resolution switching (image format setting) under menu items within the
applications themselves.
,PDJH&RQWUROV
Here you will find the slider controls for brightness, hue, contrast, saturation and sharpness. Note that the Brightness control is not
available when the Full auto setting is enabled. The Hue control is only available when the Full auto setting is enabled or when the Auto
White balance on the Camera controls tab is turned on.
0RGHV
The )XOO$XWRPRGHprovides a very easy way to get the best out of your camera. Or you can choose to have maximum manual
control over the camera settings by switching the Full Auto mode off. Full Auto ’on’ is the preferred setting for normal use as it provides
automatic exposure control and automatic white balance control, to provide the best video possible.
The checkbox %ODFNDQGZKLWH is used to switch from colour images to black & white and back.
By clicking the checkbox 0LUURU,PDJH, the image flips horizontally. This feature can be applied in order to use the camera and
monitor as a mirror, or for taking pictures of mirrored images.
Turn on theEDFNOLJKWFRPSHQVDWLRQ to improve the image quality when you have a scene where the background has a high
illumination level (for instance when you are sitting in front of a bright light).
&DPHUD&RQWUROV
The next tab is marked ’Camera Controls’.
:KLWH%DODQFH
In Auto mode the camera automatically controls the different colour components in the picture to obtain the most natural colour
reproduction. This setting is the preferred setting for normal use.
Deselect the Auto mode and use the ’Red’ and ’Blue’ sliders to set a white balance manually.
The range of your Auto mode control will be influenced by your Environment setting (Indoor / FL / Outdoor). The Environment setting
compensates for the specific colour spectrum of these types of lighting.
Only switch off the automatic white balance control when you have a colourful scene and stable lighting conditions. The current colour
setting will remain frozen and will not be influenced by the camera’s internal controls.
([SRVXUH
The exposure setting determines the amount of light that will fall onto the video sensor chip by controlling the gain and shutter speed.
In Auto exposure mode the camera automatically adjusts the gain and shutter speed.
In manual mode (no check mark in the Auto checkbox) you can control the setting for gain and shutter speed manually.
'HIDXOWV
If you like a particular setting for particular lighting conditions, you can use the Save and Restore buttons to save and restore this
preferred setting. Should you wish to restore all standard settings, then click the Default button under Factory.
0DLQVIOLFNHUOHVV
The Flickerless control will be switched on automatically if you have chosen to engage Auto White Balance in combination with
fluorescent light conditions (the option FL under Environment) to prevent flickering or strangely coloured video images. Please indicate
under Mains whether your mains power frequency is 50 Hz (Europe) or 60 Hz (USA) so the Flickerless control will work correctly.
6RXQG6HWWLQJV
Access to the sound settings is dependent on the application software. But usually it will look something like this when you open a
’Sound Settings’ option.
The camera has no built-in microphone, so a microphone (not included) connected to your sound card will be used as a sound input for
your video application. Check your sound recording capabilities with a recording application, e.g. Sound Recorder from Windows. If you
can record sound through your sound card with such an application, you should also be able to record sound and camera images
together in any video application.
)UHTXHQF\6L]H&KDQQHOV
These are the standard parameters of the audio data. You can change these parameters to suit your application in the same way as
the resolution setting, for example.
&DSWXUH$XGLR
Determines whether or not you want to record sound with your video stream.
&DSWXUHVRXUFH
Some applications may offer you an extra tab marked ’Capture source’. Usually this setting has only one option when the USB PC
Camera is the only video source connected to your computer. However, if more than one video source is connected to your system,
then this is where you switch between them. Applications that don’t show this extra tab will offer video source switching under a
different menu item within the application itself.
NOTE: If you have two or more Philips USB cameras connected to your computer, these cameras can only be used one at a time.
8S _ +RPH _ 1H[W
7:$,1DSSOLFDWLRQV
The Philips USB PC Camera is TWAIN-compatible (like a scanner), so you can use the camera as an input device for any application
software that uses TWAIN as a data source (e.g. photo editing software).
&DSWXULQJLPDJHVIURPZLWKLQDSSOLFDWLRQV
In TWAIN-compatible applications you will see the Philips USB PC Camera listed as an available TWAIN data source among your
other TWAIN sources (e.g. scanners). Just pick the USB PC Camera as your source to acquire camera pictures directly into your
application. Then choose ’Acquire’ to launch the camera viewfinder which displays the moving video picture.
6QDSVKRW
Click the ’Snapshot’ button to capture a still image or push the snapshot button on top of the camera to do the same. The captured
image will be displayed to the right of the ’Live View’ and will be added to the film roll at the top of the window.
3URSHUWLHV
Under the ’Snapshot’ button you will find the ’Properties’ button, which is used to change the camera settings. Clicking the ’Properties’
button will bring up the camera setting tabs as described under ’Camera Settings’.
)RUPDW
Here you can select the size of the still image to be captured. The streaming image format will always be the size of the ’Live View’
window independently of the still image format.
7UDQVIHU
Click one of the captured images in the film roll, it will be displayed above the buttons. If you then click ’Transfer’ it will be send to the
application from which you launched the TWAIN interface. You may transfer more than one picture to the application by selecting
another picture in the film roll and clicking ’Transfer’ once again to send that picture to the application. (Only if the application can
handle multiple pictures.)
+HOS
Click ’Help’ to see the appropriate part of the manual.
([LW
Click ’Exit’ to close the PC Camera TWAIN interface.
8S _ +RPH _ 1H[W
7LSVDQG)UHTXHQWO\$VNHG4XHVWLRQV)$4V
7,36
,QVWDOOLQJWKHFDPHUD
•Always use the Philips installation CD-ROM to install the correct camera drivers as described below. Do not connect the
camera to a USB port before installing the Philips drivers. If you do this, Windows will try to install its own drivers, which might
be less compatible with the camera than the Philips drivers. You must have Windows running and have the Windows CD-
ROM to hand.
•Your USB controller should be working correctly. You can check this in the Windows Device Manager (Click on the My
Computer icon on your desktop, right-click Properties, then click on the Device Manager tab). An icon with the name
’Universal serial bus controller’ should be visible. Click on this icon and Windows will tell you if this part of your computer
system is operating correctly.
8QLQVWDOOLQJWKHFDPHUD
•Uninstall the driver software by using the Add/Remove option in the Start - Settings - Control Panel - Software window.
•For the Windows 2000 operating system you will get a message to delete the camera within the Device Manager manually
before you will be able to reinstall the ’ToUcam Drivers and Tools’ by using the Setup program from the installation CD-ROM.
The reason for this is that the InstallShield cannot remove certain registry entries.
,03257$17127(
If the installation program asks you to place a different CD-ROM in the CD-ROM drive, for instance the
installation CD-ROM or the Windows CD-ROM, always wait until:
•the ’busy’ cursor icon (usually an hour-glass icon) has disappeared from your screen, and
•the ’busy’ LED on your CD-ROM drive extinguishes,
before you press the eject button on the CD-ROM drive.
This prevents the appearance of a blue screen Windows error message prompting you to replace the last
CD-ROM into the drive.
Should you encounter this Windows error message, correct the blue screen error by replacing the CD-
ROM you just removed and wait for Windows to stop reading from the CD-ROM.
&DPHUDSHUIRUPDQFHDQGV\VWHPUHTXLUHPHQWV
In CIF resolution this digital USB PC Camera provides a large data stream that needs to be processed in real-time by the application
you are using. Although the camera will perform satisfactorily on a Pentium I at the lower resolutions, we recommend a more powerful
computer, e.g. a Pentium II with 32 MB RAM, for optimum performance at the highest resolution. We regret that optimum camera
performance cannot be guaranteed if the computer meets only the minimum system requirements.
8VLQJPRUHWKDQRQHFDPHUD
If two or more Philips cameras of the same type are connected to your computer, only one of these cameras can be used at any one
time.
86%
You can connect the camera to any USB port on your computer. You do not have to switch off the computer. USB ports are ’hot-
swappable’, which means that you do not have to restart Windows every time you connect a new USB device. The USB driver will
detect the camera as new hardware. It can be used within a few seconds without the need to restart the computer.
If you unplug the camera while it is actively providing a video stream to an application on your computer, the computer may crash. To
avoid problems, first close all applications that use video from the camera before unplugging your Philips USB PC Camera.
'ULYHUVRIWZDUHFKHFN
You can determine if the camera is installed correctly, and if it is being recognized by the operating system by checking the Device
Manager menu in the System Properties.
1. Access this menu by right-clicking the ’My Computer’ icon in the top left-hand corner of your desktop, then click Properties.
Alternatively, click Start / Settings / Control Panel, then double-click System to access this menu.
2. Click the Device Manager tab to see the list of installed devices.
If the USB PC Camera has been installed correctly and it is plugged into a USB port, you should see the Philips ToUcam XS listed
under the Imaging Device type in this window (double-click on the device to see its specifications):
If you unplug the camera from the USB port, these
devices will disappear from the list (and can therefore
not be used by any application on your computer until
you reconnect the USB camera).
:(%6,7(
If you have any other questions or problems, please
visit our web site www.pc-cameras.philips.com for new
or updated information.
)$4V
4:K\FDQW,FKRRVHKLJKHUIUDPHUDWHVIRUWKH
86%&DPHUD"
A: As the digital camera is a USB device, it shares the
bandwidth of the USB port with all other USB
peripherals. If these USB devices are active (speakers
providing sound or scanners performing a scan), the
remaining bandwidth may be restricted to frame rates
lower than those listed in the ’Technical specifications’
as the maximum frame rate for that resolution.
40\3&ZLOOQRWVWDUWZKHQWKHFDPHUDLV
FRQQHFWHG
A: It is highly likely that your BIOS is not compatible with
the USB standard. Contact your PC supplier for an
updated BIOS.
4:LWKDGGLWLRQDO86%SHULSKHUDOVLQVWDOOHGP\3&
VHHPVWREHXQVWDEOHEOXHVFUHHQV
A: Check if Phoenix Plugworks is one of your
applications. You need to have version 1.1 or higher for proper operation with Windows.
41R86%'HYLFH0\:LQGRZV'HYLFH0DQDJHUUHSRUWV1R86%GHYLFHHYHQWKRXJK,KDYHDSK\VLFDO86%SRUW,QWKH
:LQGRZV'HYLFH0DQDJHU0\&RPSXWHUFOLFNRQWKHULJKWPRXVHEXWWRQ3URSHUWLHV'HYLFH0DQDJHUWDEQRVHFWLRQZLWK
WKHQDPH8QLYHUVDOVHULDOEXVFRQWUROOHULVYLVLEOH
A: Check whether your BIOS enables the USB port as follows: reboot your computer, enter your BIOS setup and look for a text such as
’USB function’. This should be enabled.
41R9LGHR0\DSSOLFDWLRQGRHVQWGLVSOD\DQ\YLGHR
A: There are several reasons for not having video:
1. Check whether the USB PC camera is connected to a USB port
2. Check whether ’Microsoft WDM Image Capture’ is the current capture source. On systems with other devices, this other
device may be the selected capture source.
3. If more than one USB capture device is connected to the PC, check whether the correct USB capture device has been
selected.
41R0LFURVRIW:'0,PDJH&DSWXUH0LFURVRIW:'0,PDJH&DSWXUHLVQRWDYDLODEOHDVLPDJHFDSWXUHVRXUFH
A: All USB Image devices need Microsoft WDM Image Capture’ as the capture source. Check whether this capture source is enabled.
(Start, Settings, Control Panel, MultiMedia, Device tab, Video Capture Devices entry. Double click the ’Microsoft WDM Image Capture’
entry. A property page will pop up. The option ’Use the video capture device’ should be selected).
4:K\GRHVP\DSSOLFDWLRQFUDVKZKHQ,XQSOXJWKHFDPHUDIURPWKH86%SRUW"
A: If you unplug the camera while it is providing a video stream to an application on your computer, the computer may crash. Always
close applications that use video from the camera before unplugging your Philips USB PC Camera to avoid problems.
49LGHRZRUNVEXWQRDXGLRLVUHFRUGHG0\DSSOLFDWLRQGRHVQWSURGXFHDQ\DXGLR
A: Check whether your microphone is selected as the current recording device. (Start, Settings, Control Panel, MultiMedia, Audio tab.
In the recording section, your microphone should be selected as the input source.)
46\VWHPORFNXS0\FDPHUDVWRSVUHVSRQGLQJEODFNRUIUR]HQSLFWXUHRU/('RIIIRUQRREYLRXVUHDVRQ
A: Switch off the Hardware Accelerator for your video card (click on: My Computer, right mouse button, Properties, Performance tab,
Graphics button, Set ’Hardware Acceleration’ to ’None’). Contact your video display card manufacturer to obtain the latest video card
drivers. See the video display card’s documentation for more information.
43LFWXUH)OLFNHU0\YLGHRSLFWXUHLVIOLFNHULQJ
A: This may happen in office environments with 50 or 60 Hz fluorescent lighting when certain frame rates are used. There are two
solutions:
1. Select the ’TL’ environment option together with Auto White Balance. These options are located in the ’Image Controls’
property page. This property page is accessible from within the application you are using.
2. Select the correct Mains frequency, 50 Hz or 60 Hz.
48QDEOHWRGUDZWKLVGDWDIRUPDW7KHPHVVDJH8QDEOHWRGUDZWKLVGDWDIRUPDWDSSHDUV
A: This can happen when the selected data stream format could not be processed due to a missing codec. Re-install the camera driver
software to install the missing codec.
4:K\DUHIUDPHVGURSSHGGXULQJWKHUHFRUGLQJRIDVWUHDPLQJYLGHR"
A: If a video clip is created at a high resolution such as CIF and at a high frame rate, a tremendous amount of data is generated. Hardly
any computer system and/or hard drive is capable of handling this kind of data stream. This effect results in dropping a number of
frames to be able to match the data stream to the capabilities of your computer. This effect can be reduced or completely eliminated by
applying the following measures:
1. changing to a lower resolution such as 320x240 or lower
2. changing to a lower frame rate
3. putting the hard drive in DMA mode
4. using a new file instead of overwriting an existing one
Please bear in mind that the majority of the video applications do not require high resolutions in combination with high frame rates. In
most cases you will therefore not encounter this phenomenon at all.
8S _ +RPH _ 1H[W

This manual suits for next models

10

Other Philips Webcam manuals

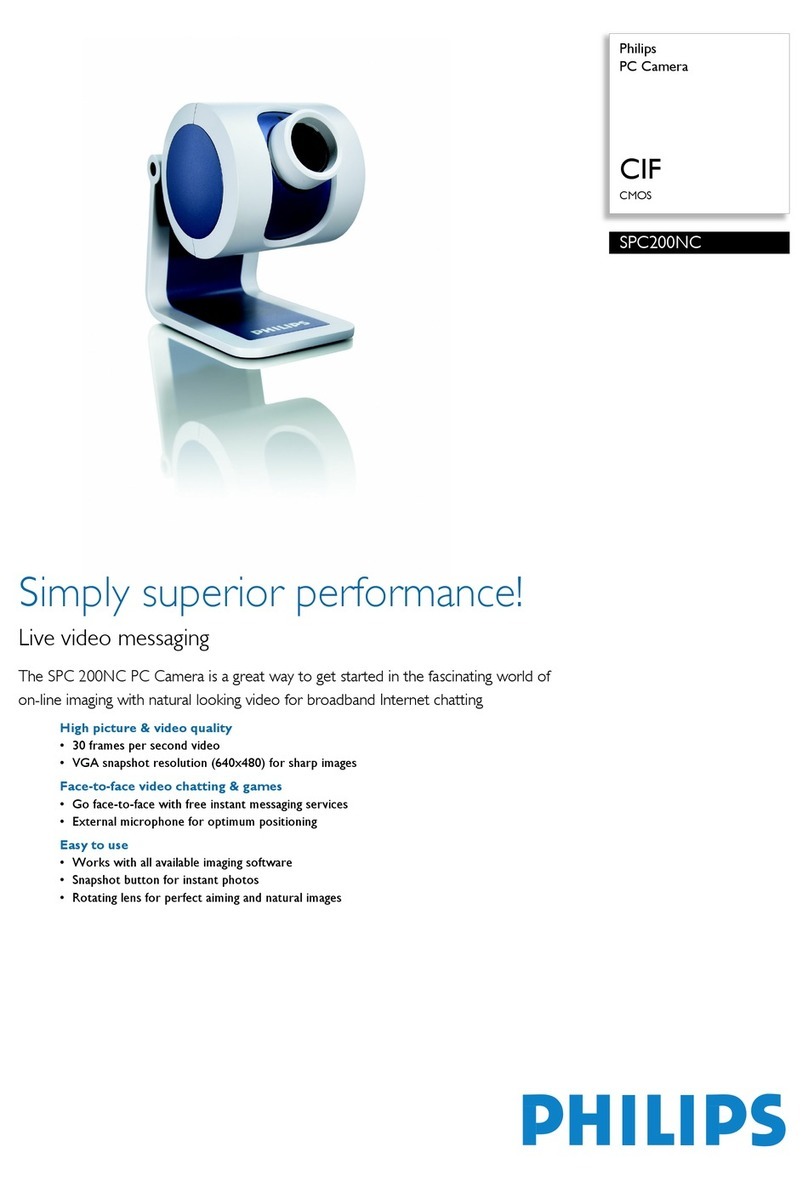
Philips SPC 200NC User manual

Philips

Philips SPC 200NC User manual

Philips SPC1330NC/00 User manual

Philips

Philips SPC1330NC/00 User manual

Philips SPC611NC User manual

Philips

Philips SPC611NC User manual

Philips SPC210NC - SPC Web Camera User manual

Philips

Philips SPC210NC - SPC Web Camera User manual

Philips SPC620NC User manual

Philips

Philips SPC620NC User manual

Philips SPC650NC User manual

Philips

Philips SPC650NC User manual

Philips SPZ5000 User manual

Philips

Philips SPZ5000 User manual

Philips SPZ2000/00 User manual

Philips

Philips SPZ2000/00 User manual

Philips SPC1290NC/17 User manual

Philips

Philips SPC1290NC/17 User manual

Philips SPC640NC/00 User manual

Philips

Philips SPC640NC/00 User manual

Philips SPC300N User manual

Philips

Philips SPC300N User manual

Philips SIC4750/27 User manual

Philips

Philips SIC4750/27 User manual

Philips SPC220NC Instruction sheet

Philips

Philips SPC220NC Instruction sheet

Philips SPC505NC User manual

Philips

Philips SPC505NC User manual

Philips SPC710NC User manual

Philips

Philips SPC710NC User manual

Philips SPZ3000 User manual

Philips

Philips SPZ3000 User manual

Philips CAM102 User manual

Philips

Philips CAM102 User manual

Philips SPC315NC User manual

Philips

Philips SPC315NC User manual

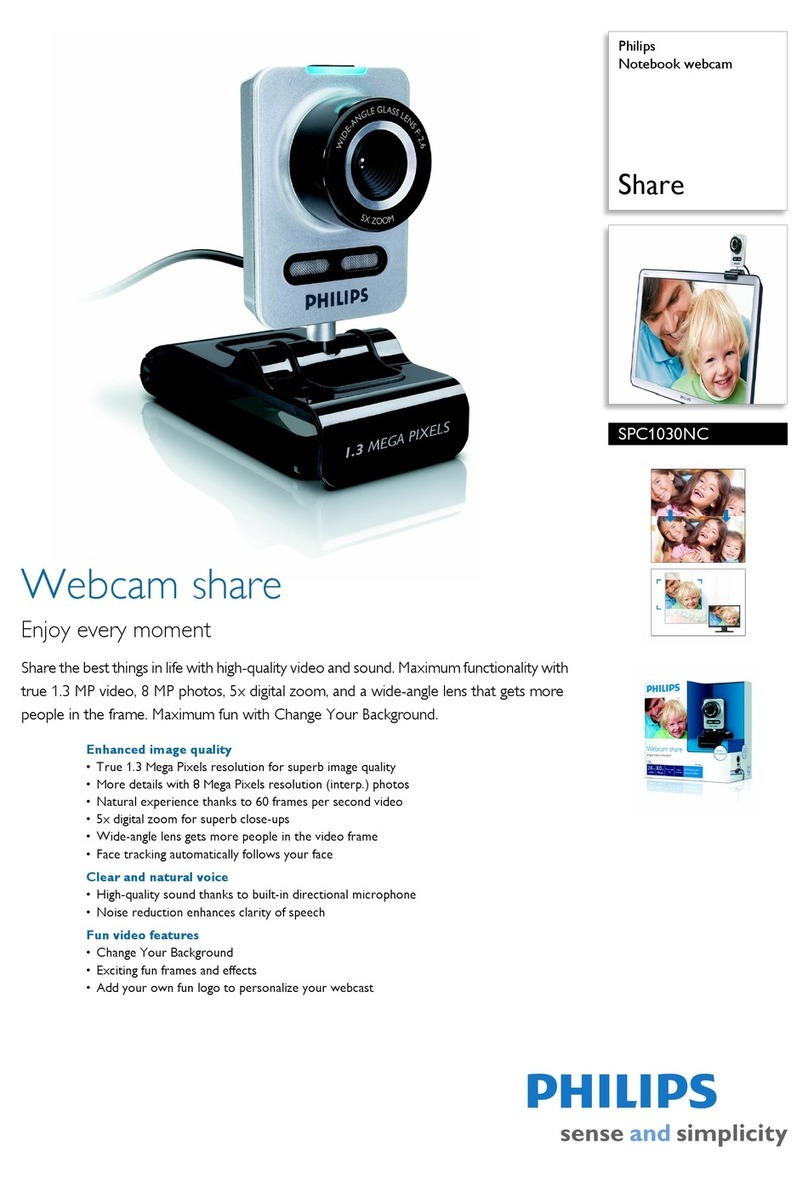
Philips Share SPC1030NC/27 User manual

Philips

Philips Share SPC1030NC/27 User manual

Philips SPZ2000 User manual

Philips

Philips SPZ2000 User manual

Philips SPZ2500/00 User manual

Philips

Philips SPZ2500/00 User manual

Philips PCVC675K99 User manual

Philips

Philips PCVC675K99 User manual

Philips SPC325NC User manual

Philips

Philips SPC325NC User manual

Philips SPC530NC User manual

Philips

Philips SPC530NC User manual

Popular Webcam manuals by other brands

Logitech QuickCam Orbit AF quick start guide

Logitech

Logitech QuickCam Orbit AF quick start guide

Hama CM-2021 AF operating instructions

Hama

Hama CM-2021 AF operating instructions

Creative WEBCAM LIVE ULTRA FOR NOTEBOOKS manual

Creative

Creative WEBCAM LIVE ULTRA FOR NOTEBOOKS manual

ausdom AF660 user manual

ausdom

ausdom AF660 user manual

Adesso CyberTrack V10 user manual

Adesso

Adesso CyberTrack V10 user manual

birddog EYES P100 user guide

birddog

birddog EYES P100 user guide

Sony IPELA PCS-TL33 operating instructions

Sony

Sony IPELA PCS-TL33 operating instructions

HP LASERJET 3100 quick start guide

HP

HP LASERJET 3100 quick start guide

Genius LOOK 316 manual

Genius

Genius LOOK 316 manual

MSI StarCam Genie supplementary guide

MSI

MSI StarCam Genie supplementary guide

Avidsen 123980 quick start

Avidsen

Avidsen 123980 quick start

Depstech D12 user manual

Depstech

Depstech D12 user manual

Ricoh R Guide book

Ricoh

Ricoh R Guide book

Acer ACR010 quick start guide

Acer

Acer ACR010 quick start guide

Logitech Pro C920 Complete Setup Guide

Logitech

Logitech Pro C920 Complete Setup Guide

Logitech C615 Getting started guide

Logitech

Logitech C615 Getting started guide

IBM ThinkPad UltraPort Camera II User reference guide

IBM

IBM ThinkPad UltraPort Camera II User reference guide

Logitech C922 Setup guide

Logitech

Logitech C922 Setup guide

manuals.online logo
manuals.online logoBrands
  • About & Mission
  • Contact us
  • Privacy Policy
  • Terms and Conditions

Copyright 2025 Manuals.Online. All Rights Reserved.