Quick Reference Guide to System
OKIMAT 8 RF 433,92MHz/ External RF-receiver 1 - channel /
DELUXE N RF / CLASSIC N RF
07/2011
ID-Nr. 70836
07/2011
ID-Nr. 70836
4.2.
?
Programming the DELUXE N RF / CLASSIC N RF transmitter for operating a
double bed with continuous mattress (2 drives + 1 RF transmitter)
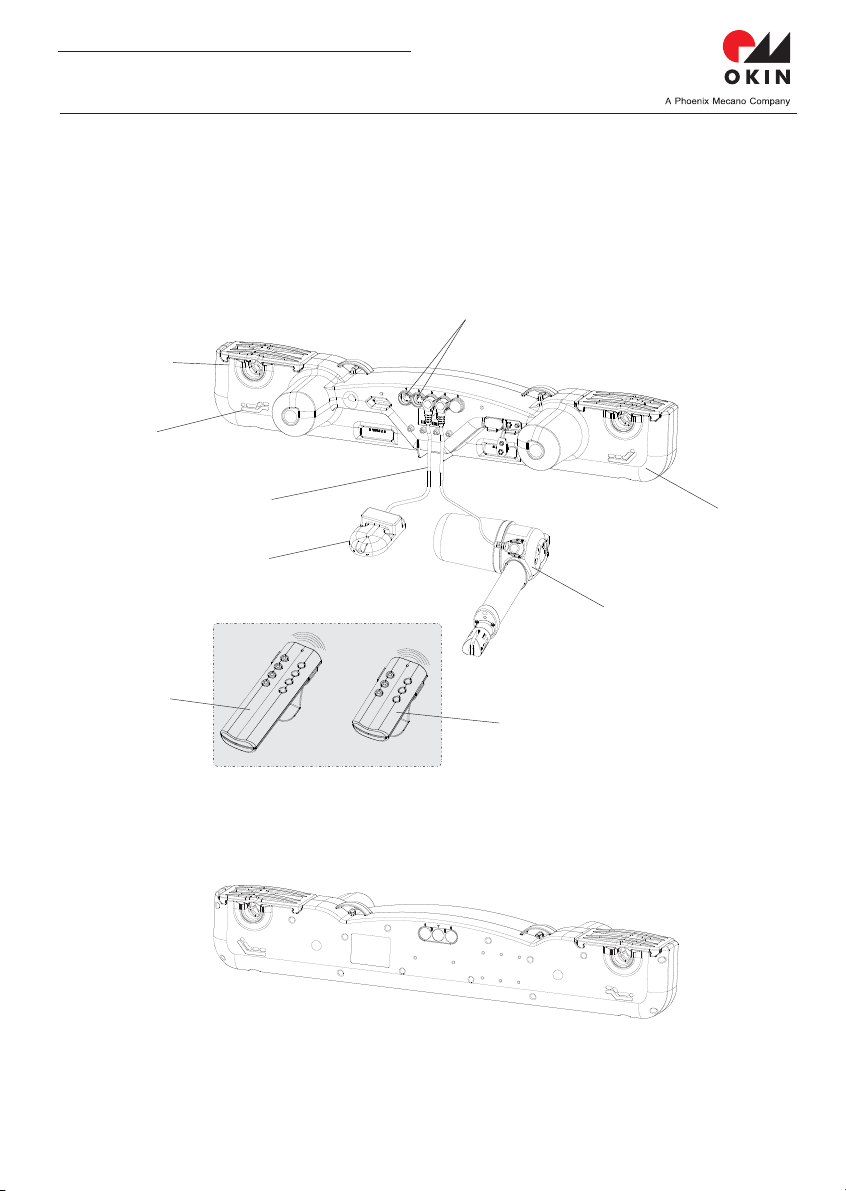
connection cable external RF-receiver
OKIMAT 8
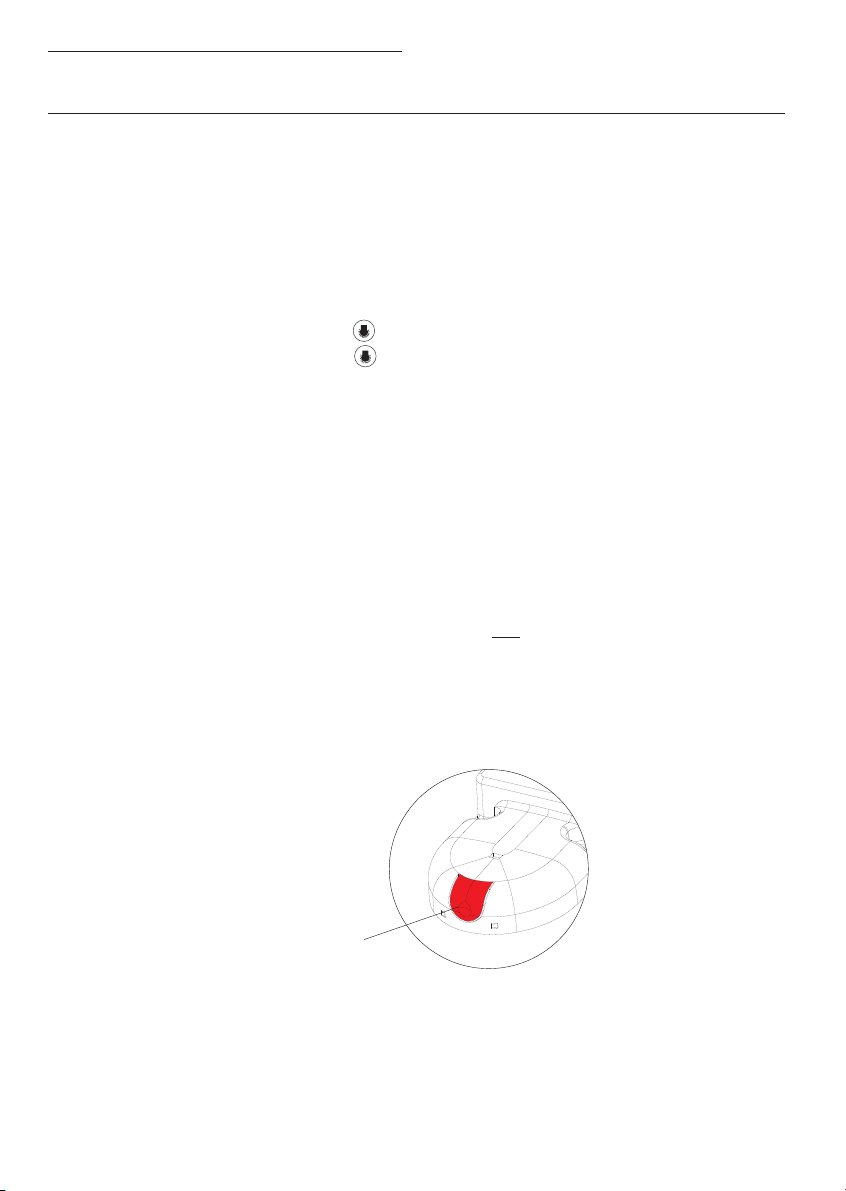
learning mode approx. 20 seconds
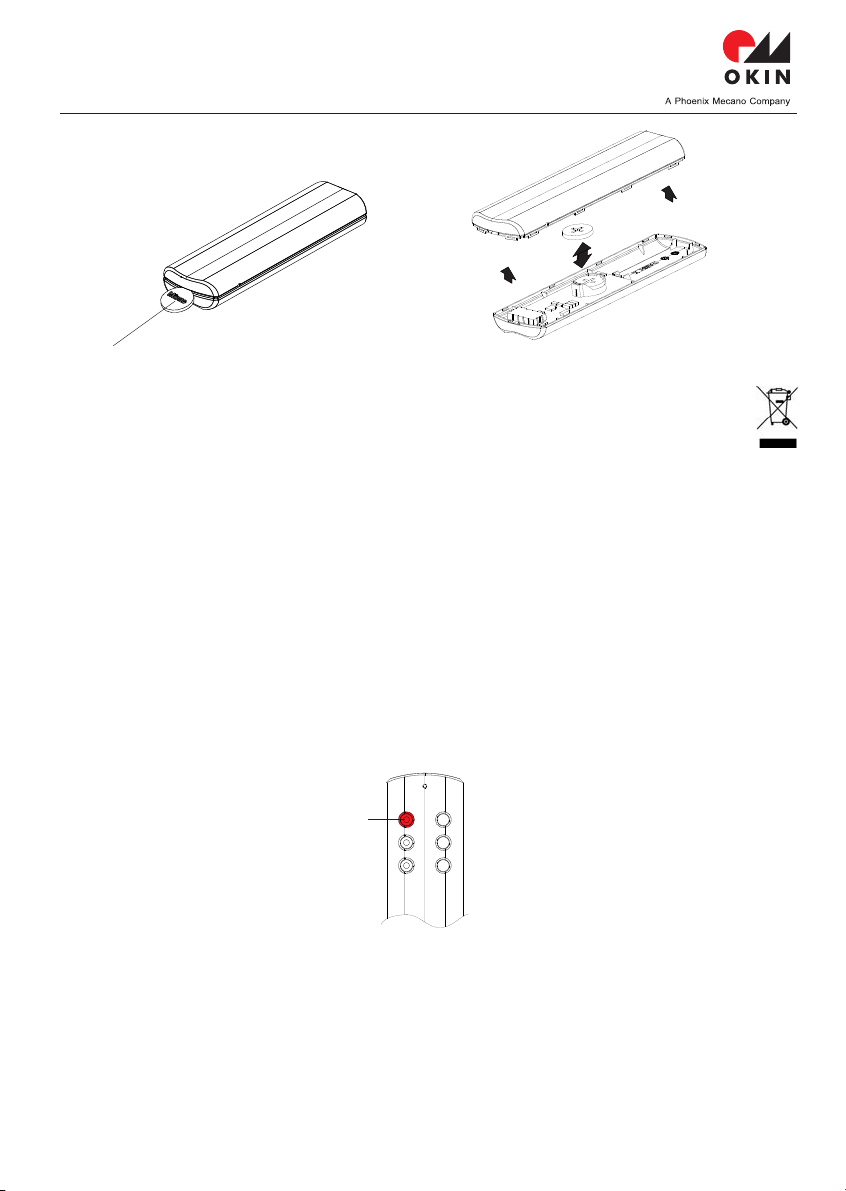
button 1
approx. 5 seconds
DELUXE N RF CLASSIC N RF
?
?
?
?
Connect the of the both with the handset
socket (see 1. system overview) of the .
Plug the mains plugs into the wall socket.
The drive switches to the " " for .
During the learning phase press the of the
for .
The or transmitter is ready for operation.
RF transmitter DELUXE N RF
or CLASSIC N RF
Button 1
If the drive does not start up when the button is pressed, briefly release the button and then
press it again. If necessary, repeat the learning procedure after a waiting period of approx. 2
minutes. Start with the position, „Plug the mains plug into the wall socket“.
Put the drive systems into service one after the other. attempt to put several
drive systems into service simultaneously. otherwise the drives will be unable to
assign the or transmitters precisely.
Proceed with every drive system, one after the other, as described under .
If the drive does not start up when the button is pressed, briefly release the button and then
press it again. If necessary, repeat the learning procedure after a waiting period of approx. 2
minutes, as described under . Start with the position, „Plug the mains plug into the wall
socket“.
Programming the DELUXE N RF / CLASSIC N RF transmitter for operating a
double bed with separate mattresses (2 drives + 2 RF transmitters)
Do not
DELUXE N RF CLASSIC N RF
4.1)
4.1)
4.3.