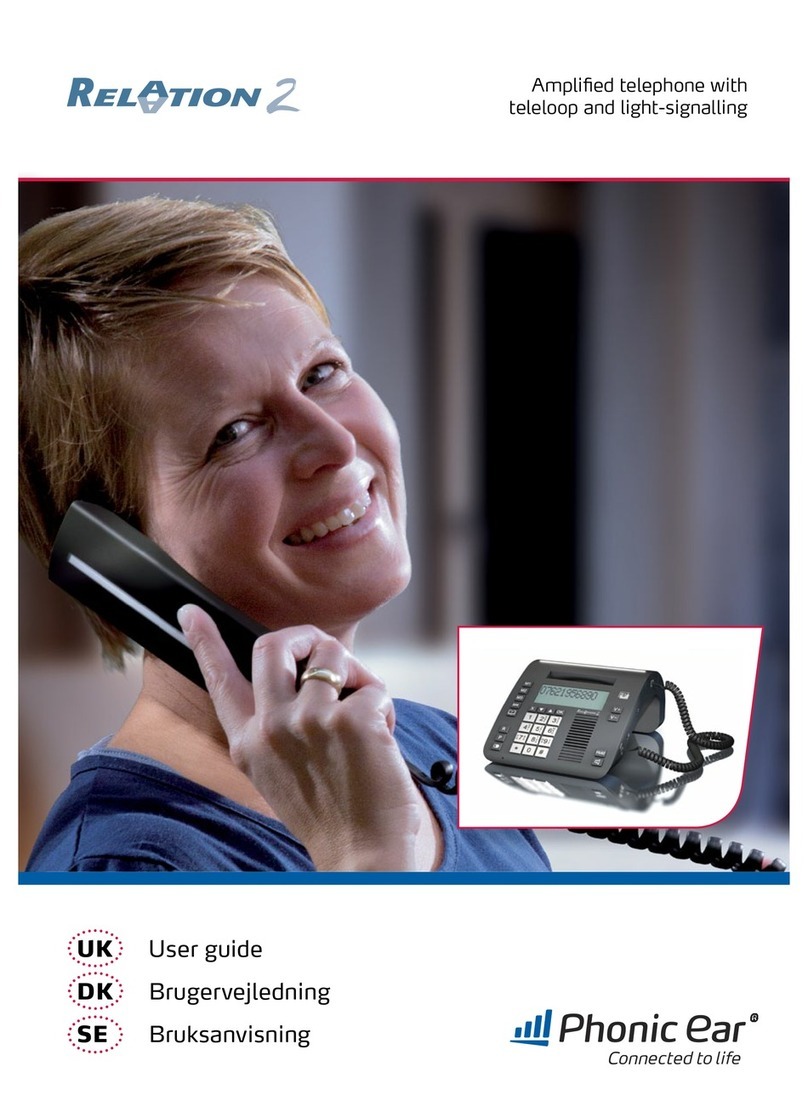
Phonic Ear Relation 2 User manual

Amplified telephone with
teleloop and light-signalling
UK User guide
DK Brugervejledning
SE Bruksanvisning

3
English
Table of contents
Relation user guide (English)
Relation brugervejledning (Dansk)
Relation bruksanvisning (Svenska)

4
Safety instructions
To enable you to get your telephone working quickly and to use it safely, it is
essential that you read the following safety instructions and the section on
“Getting started“.
• Attention:
Your telephone can be set to a high volume. To protect your hearing or
the hearing of people with normal hearing, particularly of children, from any
damage caused by excessively loud volume, please observe the following
information:
. Set the volume to a low level before you place the telephone handset on
your ear.
. While using the device, set the volume to a level that is comfortable for you.
• Place the telephone on a non-slip surface.
• Place the connecting cable safely in order to avoid the risk of accidents.
• Never expose the telephone to any of the following influencing factors:
sources of heat, direct sunlight or moisture.
• Protect your telephone from damp, dust, aggressive liquids and steam.
• Only insert the connecting cable to the designated sockets/jacks.
• Only connect approved accessories to it.
• Never
- open the telephone casing yourself!
- carry the telephone by the connecting cables!
Pacemaker safety
The Relation is equipped with a permanent magnet for the “Autodetect”
function of hearing aids.
Attention:
. Before using the Relation with a pacemaker or other medical device,
consult your physician or the manufacturer of your pacemaker or other
medical device.
. If you have a pacemaker or other medical device, make sure that you are
using this product in accordance with safety guidelines established by your
physician or the pacemaker manufacturer.

5
English
Getting started
Pack content
Telephone connection
Installing the batteries
Controls
Controls on the front
Controls on the left / back / right
Buttons and their functions
Using the telephone
Making calls
Answering calls
Using the telephone speaker during a call
Setting the tone
Last number redial
Redial for the last telephone numbers dialed
Store one of the last telephone numbers dialed
Deleting the last telephone number dialed
Deleting all telephone numbers dialed
Handset volume
Switching the microphone on/off
Hold
Inserting a dialing pause (PABX)
Inquiry button (Recall time)
Support for hearing aid users
Hearing aid compatibility
Autodetect function
Table of contents

6
Table of contents
Telephone book
Using the telephone book
Storing name/number
Placing a call with the telephone book
Editing an entry in the telephone book
Deleting an entry in the telephone book
One-touch dial keys
Allocating telephone numbers to one-touch dial keys
Using the one-touch dial keys
Deleting one of the one-touch dial keys
Calling number display
How it works
Reading and calling entries
Storing an entry
Deleting an entry
Deleting all entries
Settings
Setting the language
Setting the date format
Setting the time format
Setting the date & time
Setting the ring volume
Setting the ring melody
Setting the key tone
Setting the contrast
Setting the recall time
Setting the dynamic font

7
English
Table of contents
Setting the dialing mode
Setting the call waiting
Setting the Auto On Hook
Setting the AUTO AMP function
Setting the MIC AMP function
Additional ports
Connection jack for vibrating pillow and/or modules
Headset port
Headphone port
Resetting the telephone to the factory settings
Power failure operation
If your telephone doesn’t work
General information
No number appears when the phone rings
The telephone doesn’t work
Warranty
Appendix
Environmental note / Waste disposal 28
Maintenance and care 29
Technical data 29
Test and approvals 29

8
Getting started
Pack content
Please check if all following components are included:
• Telephone base unit
• Telephone handset
• Handset cord
• Telephone cable
• . V plug-in PSU
• pcs. Alkaline .V AA
• User guide
If any parts are missing please immediately contact your dealer or the
manufacturer directly.
Telephone connection
. Insert the handset cord (spiral-shaped cable) into the jack marked with a
receiver symbol on the left or right side of the base unit and into the
handset.
. Insert the smaller plug for the telephone cable into the “LINE” jack (back of
the base unit). Insert the larger plug into the socket for your telephone line.
. Insert the plug-in mains adapter cable into the “DC . V” jack. Plug the
mains adapter into a V mains socket.
Warning!
Don’t place the telephone close to televisions, fans, etc. so as to minimize the
risk of interference. Don’t place the telephone in direct sunlight or close to a
source of heat. Only use the original telephone cable or a comparable cable
with an international configuration.
Installing the batteries
. Remove the battery compartment
cover by unscrewing the screw and
sliding the cover off.
. Insert fresh Alkaline .V AA batteries
while observing the +/- polarity marks
in the battery compartment.
. Replace the battery compartment cover
and secure it with the screw.
. Connect the telephone cable to the wall
outlet for telephone.
Battery
compartment
cover
Batteries
Screw

9
English
Controls on the front
Controls
LCD display
Speed-dial
buttons
Tone control
P-button
R-button
Redial
Microphone
(handsfree) Dialing
buttons Function
keys Speaker
(handsfree)
Flashing
area Handset Amplification
on/off Volume control
buttons
Handset cord
Headset button
Speaker button

10
Controls
Controls on the left
Jack for the
handset cord
Controls on the back
Connection jack for special accessories
like a vibrating pillow and/or other
additional modules
Plug-in mains
adapter jack
Telephone cable
socket
Controls on the right
Headset port
(. mm)
Headphone
port (. mm)
Jack for the
handset cord
Jack for the
handset cord

11
English
Controls
Buttons and their functions
Speed-dial buttons
Tone control during a phone call
Pause key: Insert pause while dialing a number
Inquiry button, e.g. for putting calls through if the
telephone is connected to a telephone system
Redial
Back/delete last entry/phonebook/switching the
microphone on/off
Arrow keys down/up: Scroll through menu
OK button: Confirm selection, select menu and hold button
To enter the digits
To enter
To enter
Amplification on/off
Volume control buttons
Headset speaker:
- Making a phone call over a connected headset
- Engage the line, hang up
Speaker button:
– “Handsfree talking“: engage the line, hang up
– Enable/disable “conference“ mode during a call
...
#
*
#
*
-

12
Using the telephone
Making calls
. Lift up the handset or press the button. If you would like to make a
phone call over a connected headset press .
. Dial the telephone number.
. In order to end the call, replace the handset or press either the button
or the button.
Answering calls
. The telephone rings.
. Lift up the handset or press the button. If you would like to answer a
phone call over a connected headset press .
. In order to end the call, replace the handset or press either the button
or the button.
Using the telephone speaker during a call
. Press the button to activate the telephone speaker during a call.
. You can now replace the handset and continue the call over the telephone
speaker and integrated microphone.
. To deactivate the telephone speaker again lift up the handset.
Note: A call is ended if you press the button while the handset is on the cradle.
Setting the tone
. Press the button to adjust the tone during a phone call.
. The tone can be adjusted in four steps by pressing the button.
Note: The setting of the tone works only if the handset is lifted up or with a
connected headset. During a call over the telephone speaker the tone
can not be adjusted.
Last number redial
. Press the button. The last dialed number will be shown on the display.
. Lift up the handset or press either the button or the button if a
headset is connected. The number is redialed.

13
English
Using the telephone
Redial for the last 10 telephone numbers dialed
The last telephone numbers dialed will be stored in the telephone
automatically.
. Press .
. Use or to page between the entries.
. Once the number you are looking for appears in the display, lift the
handset or press either the button or the button if a headset is
connected. The number you have selected will be dialed automatically.
Note: The handset must be on the cradle while you are selecting the
telephone number you want to redial.
Store one of the last 10 telephone numbers dialed
. Press .
. Use or to page between the entries.
. Once the number you are looking for appears in the display, press .
Use or to page to “Store”.
. Choose “Store” to store the chosen entry and press .
. “Number:” and the phone number will be shown in the display. Press
to confirm.
. Now “Name:” will be shown and you can enter a name for the telephone
number.
. After you have entered the name, press .
. Now you can select a ringtone for your entry.
. Press to confirm and save your entry.
Deleting the last telephone number dialed
. Press .
. Use or to page between the entries.
. Once the number you are looking for appears in the display, press .
“Erase” will appear in the telephone display.
. Press to delete the chosen entry.
Deleting all the telephone numbers dialed
. Press .
. Press and use or to page between “Erase”, “Erase all” and “Store”.
. Choose “Erase all” if you want to delete all entries and press .
. “Erase all?” will appear in the display and press to confirm.

14
Using the telephone
Handset volume
The handset volume can be adjusted during a call with the and push
buttons on the front side of the telephone.
Additional amplification can be switched on by pressing the button. When
additional amplification is activated, the handset volume can be raised to up
to dB. If the amplification is switched on, the button will light up. The
additional amplification will be switched off by pressing the button again.
Switching the microphone on/off
You can switch the microphone on your telephone on and off during a
telephone call. Procedure for switching off the microphone:
. Press the button . The microphone is now deactivated.
. Press the button again to switch the microphone back on.
Hold
This function enables you to interrupt a conversation temporarily without
ending the call. Press the button to interrupt the conversation temporarily.
Inserting a dialing pause (PABX)
Press the button to interrupt dialing for seconds.
Inquiry button (Recall time)
This function is required in order to activate certain T-Net features. If you press
the button, the telephone line is interrupted for a certain length of time.

15
English
Hearing aid compatibility
Relation is an HAC telephone, which means it is Hearing Aid Compatible.
It is designed with the hearing-impaired user in mind although it works well
for anyone who wants exceptionally clear sound reception.
Relation has a built-in teleloop in the handset and works with hearing aids
with a telecoil programme (programme T). When you set the hearing aid
to programme T (telecoil), the hearing aid’s microphone is switched off and
background noise is automatically excluded.
When your hearing aid is set to programme M (microphone), it is important
to hold the handset close to the hearing aid’s microphone (please note
that background noise will not be excluded when the hearing aid is set to
programme M). To avoid feedback, you might need to turn the handset a
little.
Some hearing instruments are also equipped with an MT programme, which
means that the microphone and the telecoil can be used at the same time.
Various types of assistive listening devices such as FM transmitters can be
connected using the headphone port.
Autodetect function
The telephone handset is equipped with a permanent magnet for the
autodetect function of hearing aids. If the hearing aid is equipped with the
autodetect function it will automatically switch to telephone mode if the
hearing aid comes in close proximity to the handset speaker.
Support for hearing aid users

16
Telephone book
Using the telephone book
Names and numbers can be stored in the telephone book. Once a telephone
number is stored, you can call that number by pressing a minimum number
of keys. Up to telephone numbers can be stored in the telephone book.
Each telephone number can contain up to digits.
Storing name/number
To make new entries in the telephone book, proceed as follows:
. Enter the desired telephone number on the keypad. Press to delete
the last digit entered.
. Press . “Number:” and the entered telephone number will be shown in
the display.
. Press
again and enter the desired name of the telephone number on
the keypad
.
. Press the corresponding key as frequently as necessary to select the
desired letter (see table below). Press to delete the last letter entered.
. Press
to confirm your name entry and switch to the selection of the
ringtone for the entry.
. Use or to page between the ringtones.
. Press
to complete the programming process.
Key Letter / character
0 0
1 1 . , : ; ” &
2 a b c 2 å æ ä ß ç
3 d e f 3 é
4 g h i # 4
5 j k l / 5
6 m n o ‘ 6 ñ ó ö ø
7 p q r s 7
8 t u v ? 8 ü
9 w x y z 9
# [Space]
Note: If you would like to shift the case between upper and lower, while
entering letters, press the *key.

17
English
Telephone book
Placing a call with the telephone book
. Press .
. Use or to select the desired entry.
. Lift the handset or press either the button or the button to dial
the number you have selected.
Editing an entry in the telephone book
.
Press . The first entry in the telephone book will be shown.
. Use or to select the desired entry you would like to edit.
. Press after you have selected the desired entry.
“Edit” will be shown in the telephone display.
. Press and the number of the entry will be shown on the telephone
display.
. Press to delete a number or press the desired number on the keypad.
. Press to confirm your number entry and switch to the entry of the
name.
. Press to delete a letter or press the corresponding key as frequently
as necessary to select the desired letter (see table on page ).
. Press to confirm your name entry and switch to the selection of the
ringtone for the entry.
.
Use or to page between the ringtones.
.
Press
to complete the programming process.
Deleting an entry in the telephone book
.
Press . The first entry in the telephone book will be shown.
. Use or to select the desired entry you would like to delete.
. Press after you have selected the desired entry.
“Edit” will be shown in the telephone display.
. Use or to select “Erase”.
. Press and the selected entry will be deleted.

18
One-touch dial keys
Allocating telephone numbers to one-touch dial keys
The speed-dial keys can be programmed with any telephone number.
. Enter the desired telephone number on the keypad. Press to delete the
last digit entered if necessary.
. Press the desired one-touch dial key for longer than seconds.
“Number:” and the entered telephone number will be shown in the display.
. Press
and enter the desired name of the telephone number on the
keypad.
. Press the corresponding key as frequently as necessary to select the desired
letter (see table on page ). Press to delete the last letter entered if
necessary.
. Press
to confirm your name entry and switch to the selection of the
ringtone for the entry.
. Use or to page between the ringtones
.
.
Press
to assign the selected number to the corresponding location.
Using the one-touch dial keys
Take the handset from the cradle or press either the button or the button.
If you press one of the keys marked ... the telephone number stored for
that key will be dialed automatically.
Deleting one of the one-touch dial keys
. Press . The first entry in the telephone book will be shown.
. Use or to page to the desired one-touch dial entry in the phonebook
.
.
Press .
. “Edit”
will be shown in the telephone display.
. Use or to page between “Edit” and “Erase”.
. Press
after you have chosen “Erase”
.
.
The telephone number is deleted from the one-touch dial key and from the
telephone book
.

19
English
Calling number display
How it works
The number of the person calling you will appear in the telephone display.
The telephone supports both DTMF and FSK. Your telephone will store the
last calling numbers automatically. If the memory is full, the oldest entry
will be deleted.
Important! Calling number display will only work if this service is supported
by your telecom supplier. Please inquire with your telephone company.
Reading and calling entries
The last numbers recognized will be automatically stored in the phone.
. Press or to enter the calling number display. The last entry will be
shown in the display.
. Use or to page between the entries. The first digits of
the telephone number or a stored name will appear in the display.
Additionally the date and the time of the call record will be shown.
. Once the desired telephone number appears in the display, lift the
handset or press either the button or the button. The number you
have selected will be dialed.
Note: The handset must be resting on the cradle when you select the
telephone number.
Storing an entry
. Press or to enter the calling number display. The last entry will be
shown in the display.
. Use or to page between the entries.
. Press if the desired entry will be shown. “Store” will be shown in the
telephone display.
. Press . ”Number:” and the telephone number will be shown in the display.
. Press again and enter the desired name of the telephone number on
the keypad.
. Press the corresponding key as frequently as necessary to select the
desired letter (see table on page ). Press to delete the last letter
entered.
. Press to confirm your name entry and switch to the selection of the
ringtone for the entry.
. Use or to page between the ringtones.
. Press to complete the programming process.

20
Calling number display and settings
Deleting an entry
. Press or to enter the calling number display. The last entry will be
shown in the display.
. Use or to page between the entries.
. Press if the desired entry will be shown.
“Store” will be shown in the display.
. Use or to page between “Store”, “Erase” and “Erase all”.
. Choose “Erase” and press to delete the chosen entry.
Deleting all entries
. Press or to enter the calling number display. The last entry will be
shown in the display.
. Press . “Store” will be shown in the display.
. Use or to page between “Store”, “Erase” and “Erase all”.
. Choose “Erase all” and press . “Erase all?” will be shown in the display.
. Press again to confirm and delete all entries.
Setting the language
.
Press . “Set Display” will be shown in the display.
. Press again. “Set Language” will be shown in the display.
. Press to enter the language selection.
. Use or to page to the desired language.
. Press to confirm your selection.
Setting the date format
.
Press . “Set Display” will be shown in the display.
. Press again to enter the display setting menu.
. Use or to page to “Date Format”.
. Press to enter the date format selection.
. Use or to page between “MM/DD” (MonthMonth-DayDay) and
“DD/MM” (DayDay-MonthMonth).
. Press to confirm your selection.

21
English
Settings
Setting the time format
.
Press . “Set Display” will be shown in the display.
. Press again to enter the display setting menu.
. Use or to page to “Hour Format”.
. Press to enter the time format selection.
. Use or to page between “ hour clock” and “ hour clock”.
. Press to confirm your selection.
Setting the date & time
.
Press . “Set Display” will be shown in the display.
. Use or to page to “Date & Time”.
. Press
to enter the date and time menu. “Time:” will be shown in the
display and the first number of the hours blinks.
. Use the keypad to enter the hours
.
.
The telephone switches to the minutes after the enter of the hours and
the first digit blinks.
. Use the keypad to enter the minutes
.
.
Press .The telephone switches to the date entry and the first digit
blinks.
. Use the keypad to enter the numbers for the date. It depends on the
setting of the date format if you start with the day followed by the
month or vise versa. The telephone switches to the next digit after each
keypad entry.
.
Press .“YEAR:” and the set number of the year will be shown on the
display. Additionally the third digit blinks.
.
Use the keypad to enter the desired number of the year
.
.
Press
to confirm your entries
.
Other manuals for Relation 2
1
Table of contents
Languages:
Other Phonic Ear Telephone manuals
