Photonic HPRL User manual

Bedienungsanleitung
High Power Ringlicht
HPRL

2 | 28
1..................Linker Drehencoder (Segmentauswahl)
2..................Rechter Drehencoder (Helligkeitsregler)
3..................Ein/Ausschalter
4..................Klemmschraube für Befestigung
5..................Ringlinse
6..................DC Buchse für Versorgung
7..................ESD Buchse
8..................USB Typ C Stecker (optional)
9..................Buchse für Fußschalter (optional)

3 | 28
Bestimmungsgemäßer Gebrauch
Dieses Produkt ist für Beleuchtungsaufgaben im Bereich der Stereomikroskopie für den Industrie- und
Laboreinsatz entwickelt und vorgesehen. Die angewandten Normen und Richtlinien sind im Kapitel
"Technische Daten" angeführt.
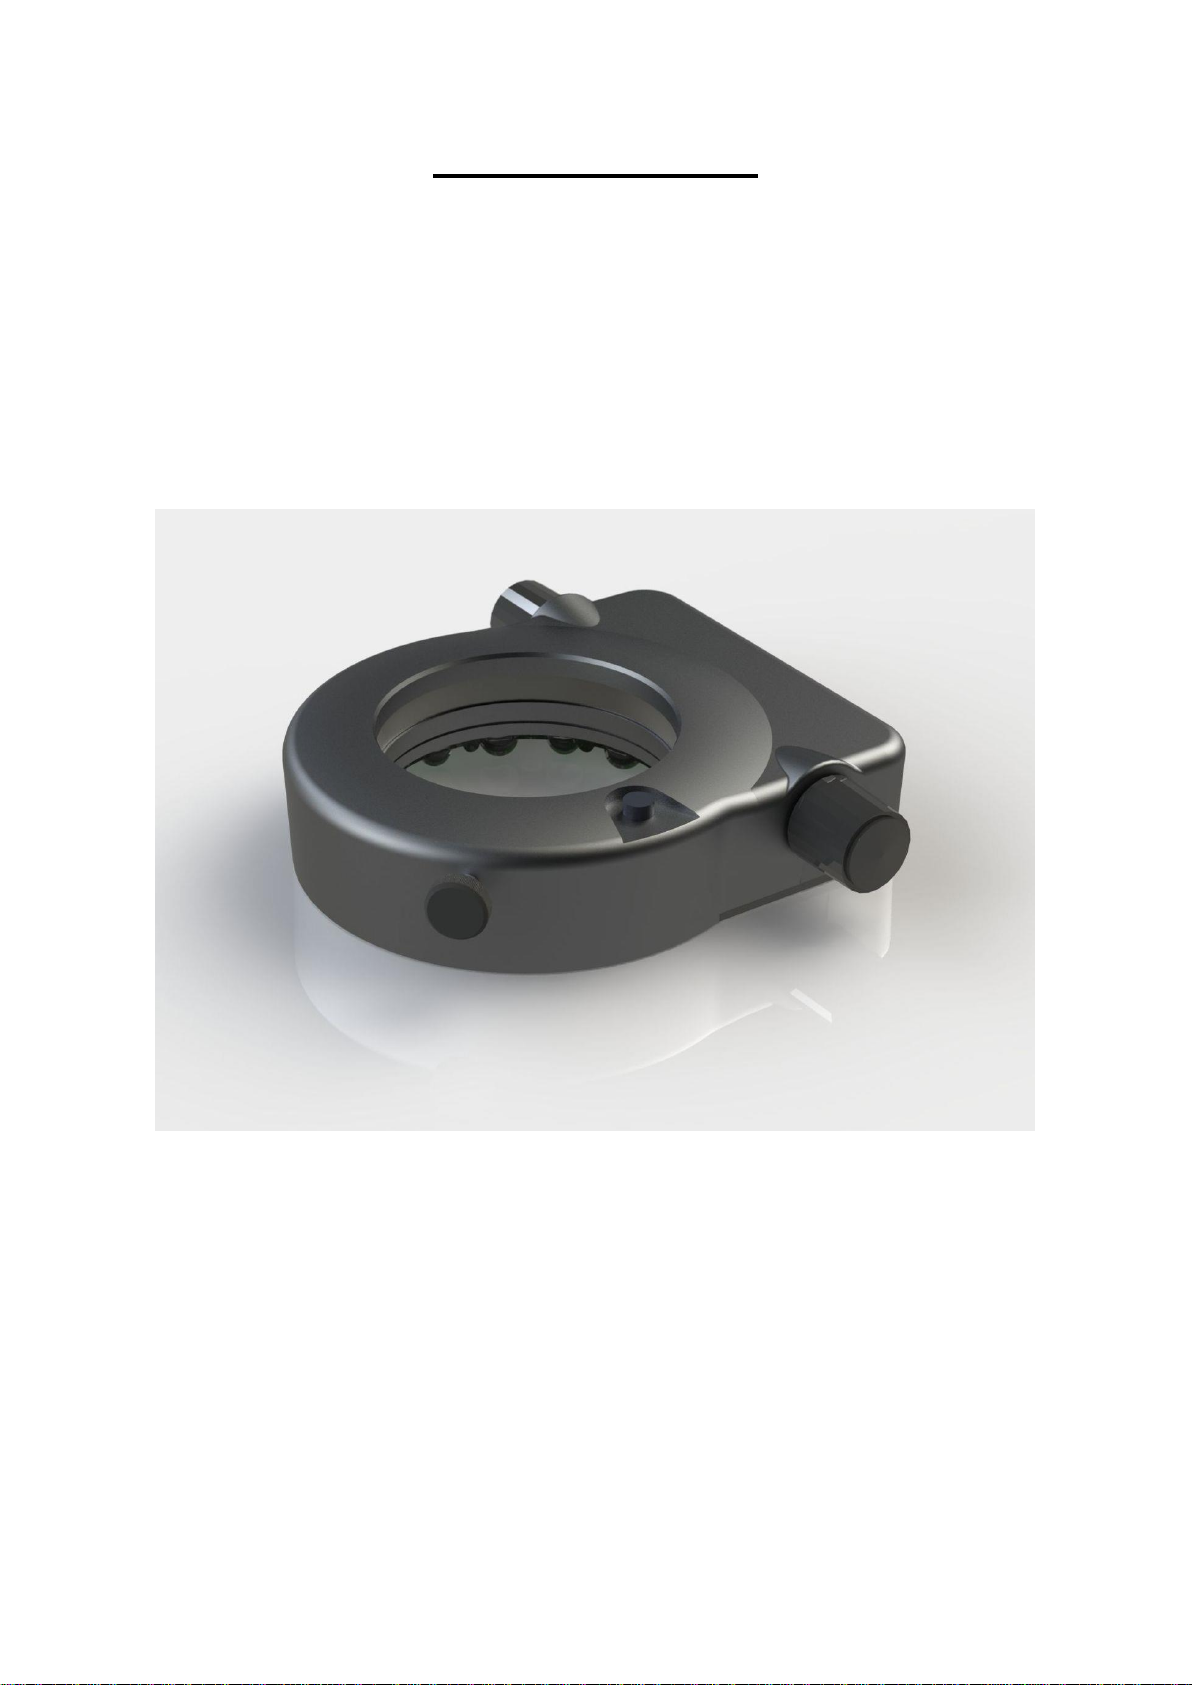
Dieses Produkt wird am Objektiv des Mikroskops befestigt und beleuchtet so darunterliegende Objekte.
Eine Linse fokusiert das Licht in den gewünschten Arbeitsabstand.
Wir bedanken uns, dass Sie sich für den Kauf dieses hochwertigen Produktes entschieden haben und
wünschen Ihnen damit viel Erfolg bei der Anwendung.
Hinweise zu Ihrer Sicherheit
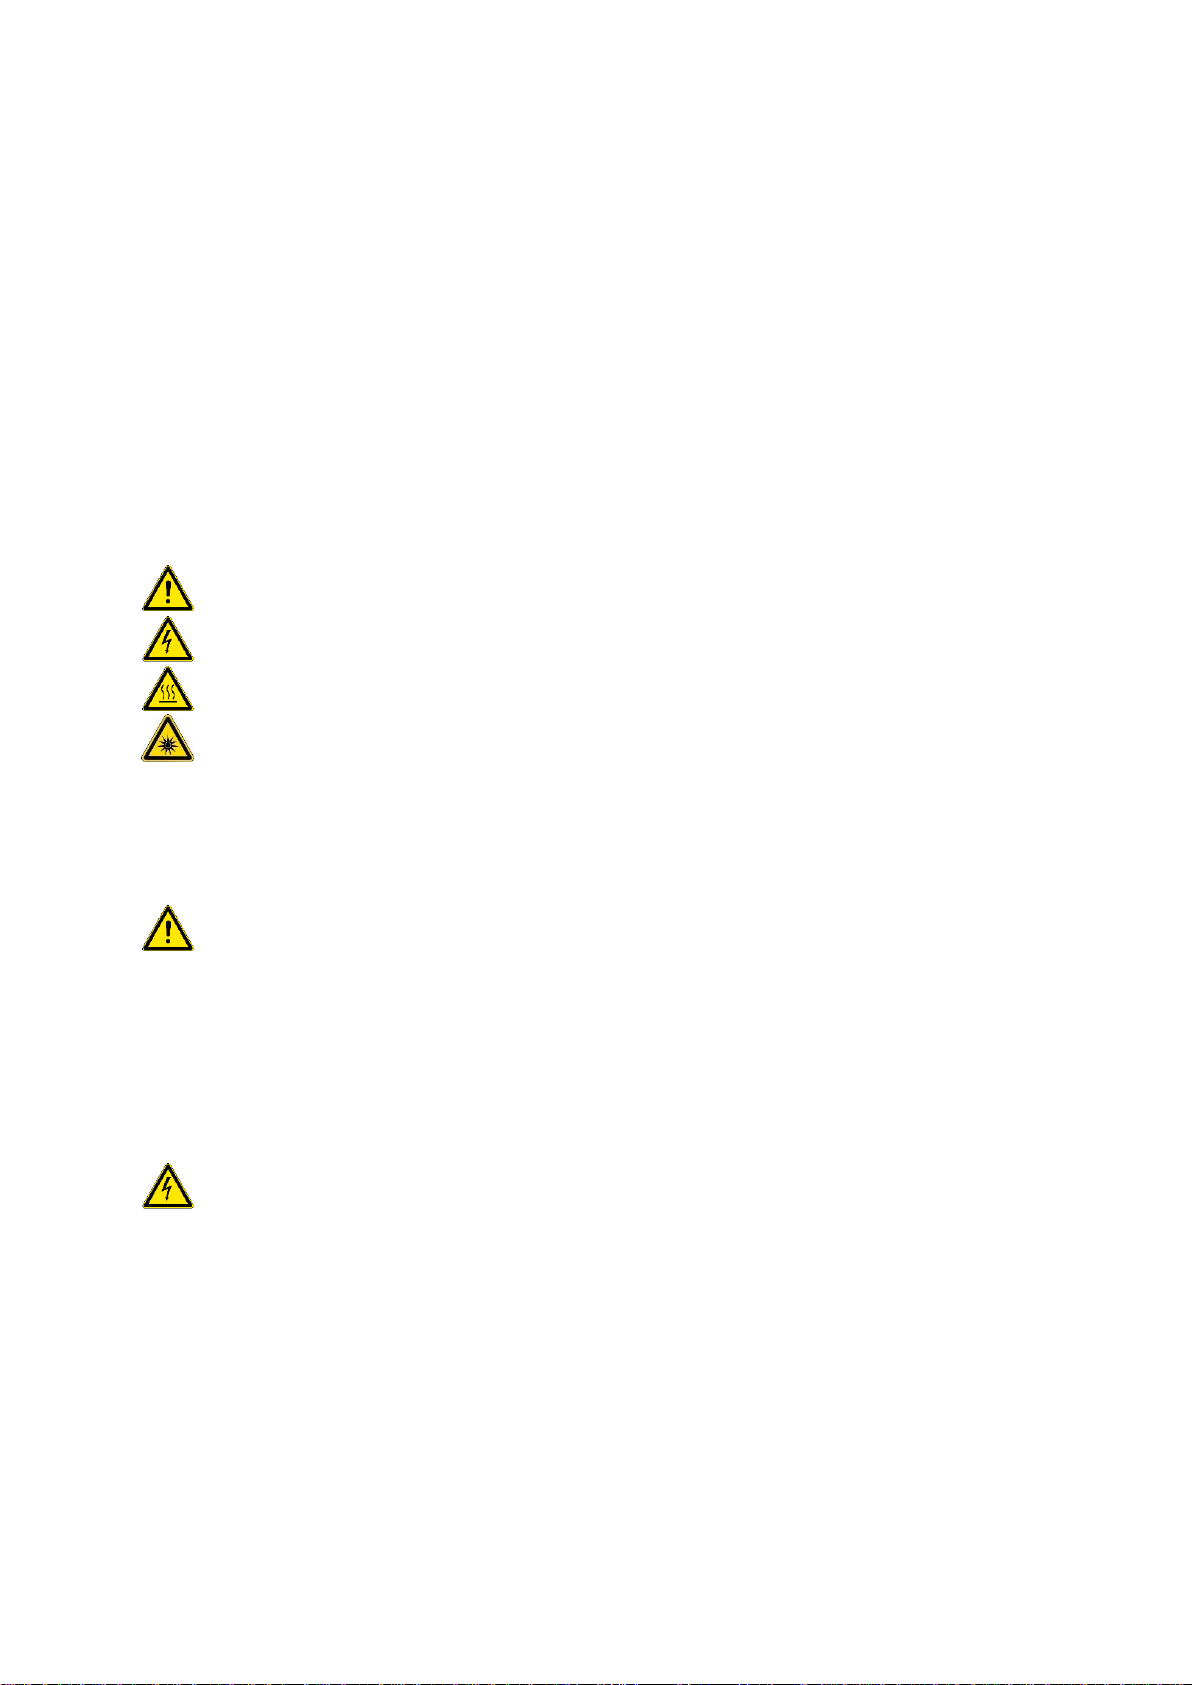
In dieser Betriebsanleitung werden folgende Gefahrensymbole verwendet:
Warnung vor einer Gefahrenstelle! Achtung, Dokumentation beachten!
Warnung vor gefährlicher elektrischer Spannung!
Warnung vor heißer Oberflächen!
Gefährliche optische Strahlung! Nicht in den Lichtstrahl blicken!
Dieses Kapitel behandelt die Sicherheitshinweise, die beim Einsatz des Gerätes unbedingt einzuhalten
sind. Beachten Sie in Ihrem eigenen Interesse alle Sicherheitshinweise, die auf dem Gerät und in dieser
Anleitung angeführt werden.
Vor Gebrauch des Gerätes ist unbedingt die Gebrauchsanweisung zu lesen. Es wird empfohlen,
die Gebrauchsanweisung in unmittelbarer Nähe des Geräts aufzubewahren, um sicherzustellen, dass
sie im Bedarfsfall sofort vom Anwender eingesehen werden kann. Der Anwender muss Veränderungen
im Betriebsverhalten oder an sicherheitsrelevanten Geräteteilen sofort einer zuständigen Person oder
dem Hersteller melden. Der Betreiber ist verantwortlich für die bestimmungsgerechte Verwendung des
Produkts und für die Einschulung der Anwender. Die allgemein gültigen gesetzlichen nationalen
Sicherheits- und Unfallverhütungsvorschriften sind ebenso einzuhalten wie die ergänzenden
Benutzerrichtlinien des Betreibers. Der Hersteller haftet nicht für Schäden durch Fehlbedienung oder
Nichtbeachtung der Gefahrenhinweise!
Öffnen Sie niemals das Gerät oder Komponenten, außer es wird in dieser Anleitung ausdrücklich
darauf hingewiesen, da Sie sonst Personen- oder Sachschäden riskieren. Im Bedarfsfall wenden Sie
sich an Ihren Händler. Technische Änderungen am Gerät sind in jedem Fall zu unterlassen und
Reparaturen dürfen nur vom Hersteller oder von ihm autorisierte Servicestellen durchgeführt werden.
Es dürfen nur Originalersatzteile verwendet werden. Verwenden Sie nur Originalzubehör, das vom
Hersteller für dieses Produkt freigegeben ist. Betreiben Sie dieses Produkt ausschließlich mit dem
mitgelieferten Netzteil und stellen Sie das Netzteil so auf, dass es rasch vom Netz getrennt werden
kann.
Betreiben Sie das Gerät nicht in der Nähe von Wasser oder in Räumen mit extremer Luftfeuchtigkeit.
Verschütten Sie niemals Flüssigkeiten auf dem Gerät, und schieben Sie keine Fremdkörper in das
Produkt, Sie könnten dadurch Elektroschocks erleiden oder Geräteschäden auslösen. In unmittelbarer
Nähe des Gerätes dürfen keine brennbaren Materialien platziert sein. Das Gerät ist von jeglichen
Hitzequellen fernzuhalten und ist nicht für den Einsatz in explosionsgefährdeten Bereichen zugelassen!
Das Gerät darf nur in geschlossenen Räumen verwendet werden.

4 | 28
Betreiben Sie das Gerät niemals unbeaufsichtigt! Das Gerät darf nur mit der vorgeschriebenen
Versorgungsspannung und dem mitgelieferten Netzteil betrieben werden. Stellen Sie nur soviel
Helligkeit ein, wie es zum Arbeiten unbedingt nötig ist. Eine höhere Helligkeitseinstellung kann die
Augen reizen, belastet das Objekt und reduziert dazu die Lebensdauer des Gerätes.
Halten Sie die Lüftungsöffnungen des Gerätes stets frei, um keine Überhitzung zu verursachen.
Stellen Sie sicher, dass die freie Luftumwälzung durch nichts beeinträchtigt wird und dass ein
ausreichend großer Abstand zwischen den Lüftungsöffnungen und anderen Gegenständen eingehalten
wird. Halten Sie die Umgebung des Gerätes sauber (vorallem staub- und fusselfrei), damit etwaige
Gerätelüfter keinen Schmutz ansaugen können.
ACHTUNG: möglicherweise gefährliche optische Strahlung. Bei Betrieb nicht in die Lampe
blicken. Kann für die Augen schädlich sein.
Das Gerät emittiert Licht mit hoher Intensität! Blicken Sie niemals direkt in das Leuchtmittel oder in
lichtemittierende Geräteöffnungen, da Sie sonst Augenverletzungen riskieren. Austretendes Licht wird
von Materialen absorbiert und in Wärme umgewandelt. Bedecken Sie daher niemals die
Lichtaustrittsöffnung des Gerätes mit der Hand, mit anderen Körperteilen oder mit anderen Materialien.
Wählen Sie bei der bestimmungsgemäßen Beleuchtung von Gegenständen einen geeigneten Abstand
um thermische Schädigungen oder Brand zu vermeiden.
Trennen Sie das Produkt vor der Reinigung vom Stromnetz und lassen es mindestens 15 Minuten
auskühlen. Verwenden Sie zur Reinigung ein trockenes Tuch, ein mit Wasser oder 5%igem Ethyl- oder
Isopropylalkohol befeuchtetes Tuch, aber auf keinen Fall brenn- oder entflammbare Flüssigkeiten.
Lassen Sie das Gerät vor Inbetriebnahme gut trocknen. Falls versehentlich Flüssigkeit in das Innere
des Geräts gelangt, Gerätestecker sofort abziehen und Gerät zur Servicestelle bringen. Wenn sich
Staub an den Lüftungsöffnungen angesammelt hat, sollte dieser vorsichtig entfernt werden. Ein zu
intensives Reinigen oder die Verwendung von zu hohen Konzentrationen kann Kratzer, Verfärbungen
oder andere Schäden an den Oberflächen hervorrufen.

5 | 28
Betrieb
Packen Sie dieses Produkt aus und entfernen Sie alle eventuell vorhandene Schutzfolien. Bewahren
Sie die Verpackung auf.
Lesen Sie sorgfältig diese Bedienungsanleitung und beachten Sie dabei bitte unbedingt die
Sicherheitshinweise!
Achtung: Sollten sich die Encoder nicht wie hier beschrieben verhalten, dann ist vielleicht der
Linkshändermodus aktiviert worden, wie im Kapitel "Einstellungen" beschrieben (S3), wodurch die
Funktionen der beiden Encoder vertauscht werden. Sollten Sie einmal nicht mehr weiter wissen, können
Sie einen Werksreset durchführen, welcher ebenfalls im Kapitel "Einstellungen" beschrieben ist.
Verwenden Sie nur das mitgelieferte Netzteil und prüfen Sie, ob dieses für Ihre
Spannungsversorgung geeignet ist.
Montage der Ringlinse
Wählen Sie den für Ihre Anwendung geeigneten Arbeitsabstand aus, in dem Sie die Linsen A oder B
über die LEDs platzieren. Ab Werk sind die Linsen A voreingestellt.
Linsen A (links vom Trennsteg C) für Arbeitsabstände von 45-130mm.
Linsen B (rechts vom Trennsteg C) für Arbeitsabstände von 80-300mm.
Die Bereiche überlappen sich, wobei ab 80mm Arbeitsabstand die Linsen B mehr Helligkeit erzeugen.
Bevor Sie die Ringlinse versetzen beachten Sie sämtliche Sicherheitshinweise. Trennen Sie das
Ringlicht vom Netz. Stellen Sie sicher, dass die LEDs nicht leuchten können.
Lösen Sie die 4 Schrauben D mittels Inbusschlüssel SW2,5 und heben Sie die Ringlinse vorsichtig an.
Berühren Sie dabei keine LEDs oder andere elektronische Bauteile. Platzieren Sie nun die gewünschten
Linsen A oder B über die LEDs und schrauben die 4 Schrauben D wieder vorsichtig fest. Achten Sie
dabei darauf, dass die Schrauben nicht zu fest angezogen werden.
Ein bloses Verdrehen der Ringlinse ohne diese anzuheben kann die LEDs zerstören.
ESD Arbeitsplatz
Bei Arbeiten mit ESD-sensiblen Bauteilen muss an der ESD Buchse (7) ein geeignetets Kabel
angeschlossen werden. Dieses dient zum Ausgleich des Arbeitsplatzpotentiales.

6 | 28
Ein/Ausschalten
Wählen Sie den benötigten Länderadapter und stecken Sie das mitgelieferte Netzteil an die
Netzsteckdose. Versorgen Sie das Produkt mit dem mitgelieferten Netzteil an Buchse (6). Durch kurzes
Betätigen des Tasters (3) kann das Produkt ein- und wieder ausgeschaltet werden.
Helligkeitsregelung
Durch drehen des rechten Encoders (2) kann die Helligkeit verändert werden. Durch kurzes Drücken
des selben Encoders kann ein zuvor eingespeicherter Helligkeitswert abgerufen werden. Zur
Programmierung des Speicherwertes stellen Sie zunächst die gewünschte Helligkeit und das
Leuchtmuster ein und halten dann den Encoder (2) ca. 2 Sekunden lang gedrückt bis die LEDs kurz
aufblinken.
Segmentauswahl
Durch Drücken des linken Encoders (1) kann man folgende LED Muster auswählen:
Vollkreis | Halbkreis | Viertelkreis | Einzel-LED | 2 Viertelkreise gegenüber
Durch Drehen des selben Encoders (1) wird das ausgewählte LED-Leuchtbild in 1/8 Kreisschritten
rotiert. Es kann in beide Richtungen rotiert werden.
Autorotation
Ist ein Leuchtbild ausgewählt, so startet ein ca. 2 Sekunden langer Druck auf den Encoder (1) die
Autorotation. Die Rotationsgeschwindigkeit kann in diesem Modus durch Drehen des Encoders (1)
verändert werden. Die Autorotation wird durch einen kurzen Druck auf (1) wieder beendet.
Montage und Verwendung des Polfilters (optional)
Um Polarisationsfilter oder Diffusor anzubringen, schrauben Sie das entsprechende Zubehör von unten
in das Gewinde des Ringlichtes. Prüfen Sie, dass sich der Polfilter durch verdrehen des Analysators
nicht vom Ringlicht lösen kann.
USB (optional)
Optional erhältlich ist eine USB Schnittstelle (08) vom Typ C für die Integration in Systeme. Die
zugehörigen Steuerbefehle entnehmen Sie bitte dem beigelegten Dokument.
Fußschalter (optional)
An die optionale 2,5mm Klinkenbuchse (09) kann ein Fußschalter zum ein/ausschalten angeschlossen
werden.

7 | 28
Einstellungen
Durch ca. 4 Sekunden langes Drücken beider Encoder (1+2) gelangt man ins Setup Menü.
Es gibt 4 Einstellungspunkte, für die jeweils eine LED (S1-S4) steht. Durch Drehen des Encoders (1)
kann man den gewünschten Einstellungspunkt ansteuern, durch Drücken des selben Encoders (1) wird
der Wert dieser Einstellung geändert. Den eingestellten Wert erkennt man am Blinken oder Leuchten
der jeweiligen LED.
Setup
LED leuchtet konstant (Vorgabe)
LED blinkt
S1
Sicherheitsmodus: Licht AUS nach
Anschluss an Versorgung. Nach
Einschalten folgt letztes Beleuchtungs-
Szenario
Steckerleistenmodus: Licht EIN nach
Anschluss an Versorgung. Automatischer
Start mit dem gespeichertem Beleuchtungs-
Szenario
S2
Logarithmische Helligkeitsregelung
Lineare Helligkeitsregelung von 1-100%
S3
Helligkeitsencoder rechts und
Segmentauswahl links
Helligkeitsencoder links und
Segmentauswahl rechts
S4
Helligkeitsregelung durch analoge
Stromeinstellung
Helligkeitsregelung über Tastverhältnis
eines PWM Signals
Standardeinstellungen sind in der ersten Spalte definiert ("LED leuchtet konstant").
Durch langes Drücken beider Encoder (1+2) werden die Einstellungen gespeichert und das Setup Menü
verlassen.
Werksreset
Ziehen Sie dafür den Versorgungsstecker (6), drücken Sie den Ein/Ausschalter (3) und halten Sie
diesen gedrückt während Sie den Versorgungsstecker wieder anstecken. Halten Sie den
Ein/Ausschalter solange gedrückt, bis die LEDs einige Male kurz aufblinken.

8 | 28
Technische Daten
HPRL
Maße (BxTxH)
ca. 107x128x31mm ohne hervorstehender Teile
Gewicht
ca. 300g (ohne Netzteil und Zubehör)
Leuchtmittel
8 Highpower LEDs
Farbtemperatur CCT
ca. 5800K
Mittenhelligkeit
ca. 210kLux bei Arbeitsabstand 50mm für Linsen A
ca. 170kLux bei Arbeitsabstand 90mm für Linsen B
Lebensdauer L70
ca. 25.000h
Kühlung
passiv (ohne Lüfter)
Versorgung
24VDC | 300mA
Leistungsaufnahme
ca. 8 Watt
Betriebsbedingungen
10-40°C, max 75% nicht kondensierend, max. 2000m Seehöhe,
800-1060hPa
Lagerung in Verpackung
10-40°C, max 75% relative Luftfeuchte bei 35°C nicht kondensierend
Transport in Verpackung
-40 bis +70°C
Rückseitige Anschlüsse
DC Buchse
ESD Anschluss
2,5mm Klinke (optional)
USB Typ C (optional)
Befestigung
Klemmung auf Objektivdurchmesser 66mm
Zulassung (CE)
EMV Richtlinie 2014/30/EU
NSpRL 2014/35/EU für Netzteil
RoHS 2011/65/EU
Risikogruppe 0 nach EN62471 (kein Risiko)
Entsorgung
Entsorgen Sie Ihr Produkt nicht im Hausmüll, sondern bringen Sie es zu dafür vorgesehene Sammel-
und Entsorgungsstellen. Beachten Sie die nationalen und örtliche Entsorgungsrichtlinien und Gesetze.
Helfen Sie bitte mit, unsere Umwelt sauber zu halten.
Die Entwicklung dieses Produktes ist einer laufenden Weiterentwicklung unterworfen. Obwohl wir uns
bemühen, diese Bedienungsanleitung auf dem aktuellsten Stand zu halten, behalten wir uns vor,
Gerätedaten jederzeit ohne vorherige Ankündigung zu ändern. Die Erstellung der Bedienungsanleitung
erfolgt vorbehaltlich Irrtümern und Druckfehlern.

9 | 28
Operating manual
High Power Ring Light
HPRL

10 | 28
1 ...........Left rotary encoder (segment selection)
2 ...........Right rotary encoder (brightness control)
3 ...........On/off switch
4 ...........Clamping screw for fastening
5 ...........Ring lens
6 ...........DC socket for power supply
7 ...........ESD connector
8 ...........USB type C port (optional)
9 ...........Socket for foot switch (optional)

11 | 28
Designated use
This product has been developed and is intended for illumination purposes in the sector of stereo
microscopy for industry and laboratory use. The applicable standards and guidelines are listed in the
Chapter "Technical data".
This product is attached to the microscope lens and illuminates the underlying objects. A lens focuses
the light to the desired working distance.
We would like to say thank you for choosing to purchase this high-quality product and wish you lots of
success whilst using it.
Instructions for your safety
The following danger symbols are used in this operating manual:
Warning of a danger area! Caution, please refer to documentation!
Warning of dangerous electrical voltage!
Warning of hot surfaces!
ATTENTION: Dangerous optical radiation! Do not look into the light!
This chapter deals with safety instructions that must be complied with when using the device. In your
own interests, please comply with all safety instructions that are listed on the device and in this manual.
The operating instructions must be read before using the device. It is recommended to store the
operating instructions close to the device to ensure that it can be read immediately by the user in case
of need. The user must inform a responsible person or the manufacturer immediately if there are any
changes in the operating behaviour or to any safety-relevant device components. The operator is
responsible for the correct use of the product and for the training of the user. The generally application
legal national safety and accident prevention regulations must be complied with in addition to the
supplementary user guidelines of the operator. The manufacturer is not liable for any damages due to
incorrect operation or non-compliance with the danger instructions!
Never open the device or its components, unless specifically indicated in this manual as you
could otherwise risk physical injury or damage. If necessary, contact your retailer. Technical
modifications to the device are not permitted under any circumstances and repairs should only be carried
out by the manufacturer or authorised service points. Only original spare parts must be used. Only use
original spare parts approved by the manufacturer for this product. Operate this product only with the
supplied power supply adapter and place the adapter so that it can be quickly disconnected from the
mains.
Do not operate the device in the vicinity of water or in rooms with extreme humidity. Do not spill any
liquids onto the device and do not push any foreign bodies into the product, you could be electrocuted
or cause damage to the device. Do not position any flammable materials in the direct vicinity of the
device. The device must be kept away from all sources of heat and is not approved for use in explosion
hazard areas! The device may only be used in closed rooms.

12 | 28
Never allow the device to operate unsupervised! The device may only be operated with the specified
supply voltage and the power supply adapter included in the scope of delivery. Only use as much
brightness as required for working. A higher brightness setting can irritate the eyes, stresses the object
and also reduces the service life of the device.
Always keep the ventilation openings of the device free to avoid causing any overheating. Ensure
that the free air circulation is not hindered by anything and that there is a sufficiently large gap between
the ventilation openings and other objects. Keep the environment of the device clean (above all, dust
and lint-free), so that any device fans cannot suck in any dirt.
ATTENTION: dangerous optical radiation, do not look into the light, can injure your eyes
The device emits light with a high intensity! Never look directly into the lamp or any light-emitting device
openings as you will risk injury to the eyes. The emitted light is absorbed by materials and converted
into heat. Never cover the light emission aperture of the device with the hand, any other parts of the
body or any materials. To illuminate objects correctly, always ensure there is a distance appropriate to
avoid thermal damage or fire.
Before cleaning, disconnect the product from the mains and allow it to cool for at least 15 minutes. Use
a dry cloth for cleaning or a cloth moistened with water or a 5% ethyl or isopropyl alcohol solution, but
do not use combustible or flammable liquids under any circumstances. Allow the device to dry thoroughly
before use. If any liquid penetrates the device accidentally, pull the plug immediately and bring the
device to a service point. If dust has collected on the ventilation openings, it must be removed carefully.
Excessively intensive cleaning or the use of solutions that are too concentrated can lead to scratches,
discoloration or other damage to the surfaces of the device.

13 | 28
Operation
Unpack this product and remove any protective film. Save the packaging.
Carefully read the complete operating instructions and observe the safety instructions under all
circumstances!
Attention: If the encoders do not behave as described here, then perhaps the left-handed mode
has been activated as described in the "Settings" chapter (S3), whereby the functions of the two
encoders are interchanged. If at any point you are not sure, you can perform a factory reset, which is
also described in the "Settings" chapter.
Use only the supplied power supply adapter and check if it is suitable for your voltage supply.
Assembly of the ring lens
Select the working distance suitable for your application by placing the lenses A or B above the LEDs.
Lense A is factory preset.
Lense A (left of divider C) for working distances between 45-130 mm.
Lense B (right of divider C) for working distances between 80-300 mm.
The areas overlap, whereby from an 80 mm working distance the B lense produces more brightness.
Observe all safety instructions before moving the ring lens. Disconnect the ring light from the
mains. Make sure the LEDs cannot illuminate.
Loosen the 4 D screws using the SW2.5 Allen key and lift the ring lens gently. Do not touch any LEDs
or other electronic components. Now place the desired lenses A or B over the LEDs and tighten the 4
D screws carefully again. Make sure that the screws are not tightened too tightly.
Simply rotating the ring lens without lifting it can destroy the LEDs.
ESD workplace
When working with ESD-sensitive components, an appropriate cable must be connected to the ESD
socket (7). This serves to compensate the workplace potential.

14 | 28
On/off switch
Select the required country adapter and plug the supplied power supply adapter into the mains outlet.
Plug the supplied adapter to the socket (6) to switch on the power supply. The lamp can be switched on
and off by briefly pressing the button (3).
Brightness control
The brightness can be changed by turning the right encoder (2). By briefly pressing the same encoder,
a previously stored brightness value can be recalled. To set the memory value, first set the desired
brightness and the illumination pattern and then press the encoder (2) for approx. 2 seconds until the
LEDs flash briefly.
Segment selection
Press the left encoder (1) to select the following LED patterns:
Full circle | Semicircle | Quarter circle | Single LED | 2 Quarter circles opposite
Rotating the same encoder (1) rotates the selected LED light image in 1/8th circular steps. It can be
rotated in both directions.
Autorotation
If a luminous image is selected, an approx. 2 second long press on the encoder (1) starts the
autorotation. The rotation speed can be changed in this mode by turning the encoder (1). The
autorotation is terminated by briefly pressing (1) once.
Mounting and using the polarising filter (optional)
To attach polarisation filters or diffusers, screw the corresponding accessories from below into the thread
of the ring light. Make sure that the accessories are not screwed too tightly. Check that the polarising
filter cannot come loose from the ring light from twisting the analyser.
USB (optional)
Optional USB type C is available for remote control and integration into systems. For the commands
please see the attached document.
Foot switch (optional)
A connection for a footswitch is available as an option. The lamp can be switched on and off with this.

15 | 28
Settings
You can enter the setup menu by pressing both encoders (1 + 2) approx. 4 seconds long.
There are 4 setting points for which one LED (S1-S4) is available for each. By turning the encoder (1),
you can control the desired setting point. Pressing the same encoder (1) changes the value of this
setting. The set value is indicated by the flashing or lighting of the respective LED.
Setup
LED constantly lit (default)
LED flashes
S1
Safety mode: Light OFF after
connecting to the power supply. After
power on the last lighting scenario
follows
Connector strip mode: Light ON after
connecting to the power supply. Automatic
start with the saved lighting scenario
S2
Logarithmic brightness control
Linear brightness control from 1-100%
S3
Brightness encoder right and segment
selection left
Brightness encoder left and segment
selection right
S4
Brightness control by analogue current
setting
Brightness control over the duty factor of a
PWM signal
The default settings are defined in the first column ("LED constantly lit")
By prolonged pressing of both encoders (1 + 2) the settings are saved and the setup menu is exited.
Factory reset
To do so, pull the power supply (6) and then press and hold the on/off switch (3) while you plug the
power supply back in. Press and hold the on/off switch until the LEDs flash briefly several times.

16 | 28
Technical data
HPRL
Dimensions (WxDxH)
approx. 107x128x31mm without protruding parts
Weight
approx. 300g (without power supply adapter and accessories)
Illumination source
8 high power LEDs
Colour temperature
Approx. 5800 K
Centre brightness
approx. 210kLux at 50mm working distance for lenses A
approx. 170kLux at 90mm working distance for lenses B
Lifespan L70
approx. 25,000 hrs.
Cooling
passive (without fan)
Power supply
24VDC | 300 mA
Power consumption
approx.8 Watt
Operating conditions
10-40°C, max 75% non-condensing humidity, max. 2000 m altitude
800-1060hPa
Storage in the packaging
10-40°C, max 75% relative humidity at 35° non-condensing
humidity
Transport in the packaging
-40 to +70°C
Rear connections
DC socket
ESD port
USB type C (optional)
2,5mm stereo jack for footswitch (optional)
Mounting
Clamping to lens diameter 66 mm
Approval (CE)
EMC Directive 2014/30/EC
LVD 2014/35/EC (Low Voltage Directive for power supply adapters)
RoHS 2011/65/EC (Restriction of Hazardous Substances Directive)
Risk group 0 according to EN62471 (exempt, no risk)
Disposal
Do not dispose of the product in household waste, take it to the appropriate collection and disposal
points. Comply with the national and local disposal guidelines and laws. Please help to keep our
environment clean.
The development of this product is subject to continuous development. Although we try to keep this
operating manual up to date, we reserve the right to change device data at any time without prior notice.
The operating manual is produced subject to errors and printing errors.

17 | 28
Mode d’emploi
Éclairage circulaire haute puissance
HPRL

18 | 28
1..................Encodeur rotatif gauche (sélection du segment)
2..................Encodeur rotatif droit (réglage de la luminosité)
3..................Marche/arrêt
4..................Vis de serrage pour la fixation
5..................Lentille annulaire
6..................Prise DC pour l‘alimentation
7..................Prise ESD
8..................Prise USB (en option)
9..................Prise pour commutateur à pédale (en option)

19 | 28
Conditions normales d’emploi
Ce produit a été développé et prévu pour les projets d’éclairage dans les domaines de la
stéréomicroscopie et de l’endoscopie industrielles et en laboratoire. Les normes et directives appliquées
sont indiquées dans le chapitre "Spécifications techniques".
Ce produit est fixé à l’objectif du microscope et illumine ainsi les objets se trouvant sous celui-ci. Une
lentille focalise la lumière à la distance de travail souhaitée.
Nous vous remercions de votre décision en faveur de l’achat de ce produit de haute qualité et nous
vous souhaitons beaucoup de succès lors de l’utilisation.
Consignes pour votre sécurité
Dans le présent manuel d’utilisation figurent les symboles de danger suivants:
Signalisation de danger: Attention, veuillez observer la documentation!
Tension dangereuse!
Surface chaude!
Rayonnement optique! Ne pas regarder dans le faisceau!
Ce chapitre traite les consignes de sécurité à observer impérativement lors de l’utilisation de l’appareil.
Dans votre propre intérêt, veuillez observer toutes les consignes de sécurité signalées sur l’appareil et
dans le présent manuel d’utilisation.
Avant la mise en marche de l’appareil, lisez attentivement le manuel d’utilisation. Nous vous
recommandons de garder ce manuel à proximité de l’appareil afin que l’utilisateur puisse le consulter à
tout moment. En cas d’altération du comportement en service de l’appareil ou des composants touchant
à la sécurité, l’utilisateur doit sans délai en informer une personne compétente ou bien le producteur.
L’exploitant est responsable de l’utilisation du produit conforme à l’usage prévu ainsi que de l’instruction
des utilisateurs. Il est indispensable d’observer les consignes nationales de sécurité et de prévention
des accidents ainsi que les directives d’utilisation spécifiques de l’exploitant. Le producteur décline toute
responsabilité pour des dégâts dus à la fausse manipulation ou la non-observation des indications de
danger.
N’ouvrez jamais l’appareil ou des composants sauf sur indication expresse dans ce manuel. Vous
risquez des dommages corporels ou matériels. Au besoin, adressez-vous à votre revendeur. Veuillez
impérativement vous abstenir de toute modification technique de l’appareil; des réparations ne doivent
être exécutées que par le producteur ou par un service après-vente autorisé par celui-ci. N’utilisez que
des pièces de rechange d’origine ainsi que des accessoires d’origine admis pour ce produit par le
producteur. N’utilisez exclusivement ce produit qu’avec le bloc secteur inclus dans la livraison et
disposez le bloc secteur de telle manière que celui-ci puisse être rapidement coupé du secteur.
N’opérez pas l’appareil à proximité d’eau ou à des conditions d’humidité atmosphérique extrême. Veillez
à ne jamais déverser des liquides sur l’appareil et n’y insérez pas de corps étrangers; vous risqueriez
d’endommager l’appareil, voire de vous électrocuter. Veillez à ne pas placer des substances
inflammables à proximité immédiate de l’appareil. L’appareil doit être placé à l’écart de toute source de
chaleur; il n’est pas admis pour l’utilisation en atmosphère explosible. N’utilisez l’appareil que dans des
espaces clos.

20 | 28
Ne laissez jamais l’appareil sans surveillance tant qu’il est en marche! N’opérez l’appareil qu’avec la
tension d’alimentation prescrite et avec le bloc d’alimentation inclus dans la livraison. Ne réglez la
luminosité qu’au niveau absolument nécessaire pour le travail. Une luminosité trop élevée pourrait
provoquer une irritation des yeux, solliciter l’appareil et en réduire la durée de vie.
Veillez à maintenir les ouvertures de ventilations dégagées en tout temps afin de ne pas
provoquer de surchauffe. Veillez à ce que rien n’empêche la circulation d’air et gardez une distance
suffisante entre les ouvertures de ventilation et d’autres objets. Assurez la propreté de l’environnement
de l’appareil, surtout par rapport à la poussière et aux peluches, afin que les ventilateurs n’aspirent pas
de salissures.
ATTENTION: risque de rayonnement optique dangereux. Évitez de regarder directement la lampe
pendant que l’appareil est en marche, ceci pourrait être nuisible pour vos yeux.
L’appareil émet de la lumière à haute intensité! Ne regardez jamais directement l’agent lumineux, les
orifices de sortie de lumière afin d’éviter des lésions oculaires. La lumière émise est absorbée par les
matériaux à proximité et transformée en chaleur. Ne couvrez donc jamais l’orifice de sortie de la lumière
de l’appareil par la main, par d’autres parties du corps ou par des matériaux quelconques. Pour
l’éclairage d’un objet conforme à sa destination, choisissez une distance appropriée afin d’éviter une
détérioration thermique ou un incendie.
Débranchez et laissez refroidir pendant 15 minutes au moins l’appareil avant de le nettoyer. Pour le
nettoyage, utilisez un chiffon sec ou bien humidifié d’alcool éthylique ou isopropylique à 5%. N’utilisez
en aucun cas des liquides combustibles ou inflammables. Laissez bien sécher l’appareil avant de le
remettre en marche. Au cas où un liquide pénétrerait accidentellement dans l’appareil, retirez
immédiatement la fiche secteur et apportez l’appareil au service après-vente. Au cas d’accumulation de
poussière aux ouvertures de ventilation, dégagez-les délicatement. Un nettoyage trop intense ou
l’utilisation d’un agent trop concentré peut causer des rayures, des décolorations et d’autres dégâts sur
les surfaces.
Table of contents
Languages:
Other Photonic Lighting Equipment manuals
Popular Lighting Equipment manuals by other brands

EuroLite
EuroLite LED PLL-384 user manual

NETO
NETO COLORFLEX Series user manual

Golight
Golight Stryker ST Series Quick troubleshooting guide

Dialight
Dialight Reliant Operation & installation instructions

HungaroFLASH
HungaroFLASH QUASAR SILENT PRO Setup & quick start guide

TOBIAS GRAU
TOBIAS GRAU XT-A TABLE PLUS 120 USM instruction manual

Somogyi
Somogyi home SLL 500 quick start guide

Home Decorators Collection
Home Decorators Collection Ryland Balsam Fir quick start guide

CristalRecord
CristalRecord LAXITY quick start guide

Ryger
Ryger Defender DMX Range instruction manual

CLD
CLD CLDBAR12D Install Instruction

Northern
Northern Birdy user manual