Printed in China
1. 2. 3. 4. 5. 6.
Printed in China
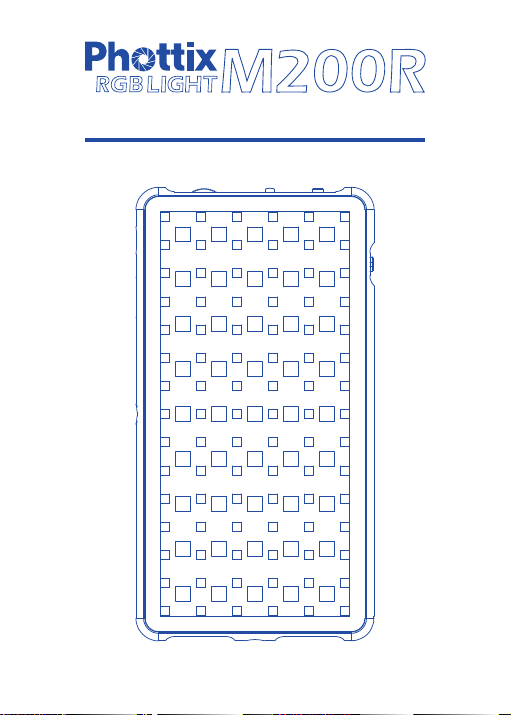
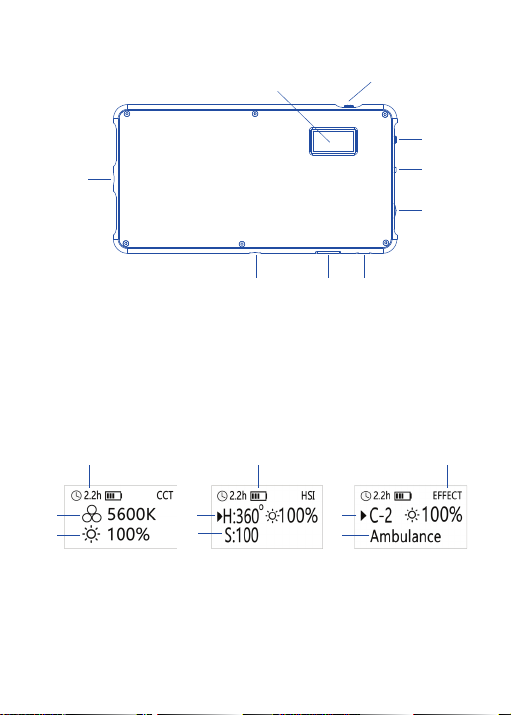
Parts
Display Interface
Back
• 1. OLED Display
• 3. Mode Button
• 5. Brightness Knob
• 7. USB-C Charging Port
• 2. Power Switch
• 4. Select / Adjustment Knob
• 6. ¼”threaded mounting lug
• 8. USB Output Port
12
3
4
5
6
6
78
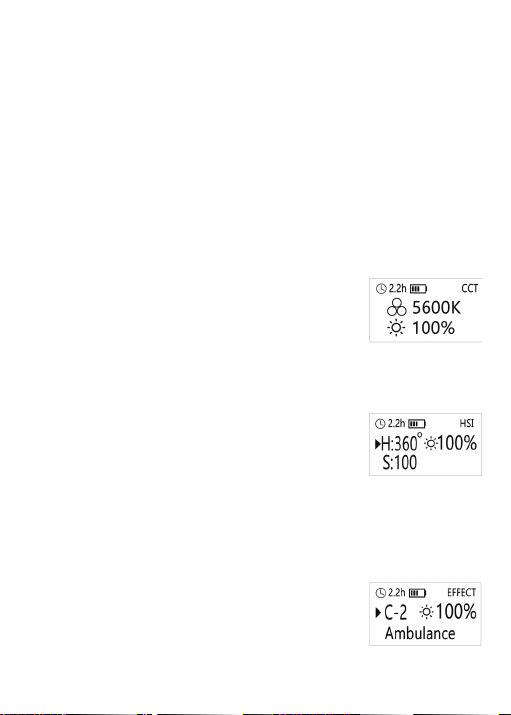
• 9. Estimated Time Remaining
• 10. Battery Capacity
• 11. Mode Selected (CCT / HSI / Eect)
• 12. Color Temperature Display (CCT)
• 13. Brightness Display (CCT)
• 14. Color Hue (HSI)
• 15. Color Saturation (HSI)
• 16. Scenario Eect Group (Eect)
• 17. Eect Name (Eect)
Tech Specs
Color temperature:
Color model:
Brightness range:
Max. brightness / illuminance:
Max. Power:
Color rendering index:
Battery Capacity:
Charging / Input power:
External Output power:
Dimension:
Weight:
3200K - 5600K
0-360º full color control (HSI)
1% - 100%
1200 Lux @ 0.5m (5600K)
10W
96+
3.7V 4000mAh
5V 2A USB-C
5V 2A USB
151 x 80 x 11.5mm
200g
What’s included:
1. M200R LED Panel unit
2. USB-C recharge cable
3. Cold shoe adaptor.
4. Pouch bag
5. Hand strap
6. Printed user manual
Scenario Eect List
Group A: Flash / Flash Fast / TV screen
Group B: Candle / Flame 1 / Flame 2
Group C: Police / Ambulance / Fire truck
Group D: Strobe Lights 1 / Strobe Lights 2 / Strobe Lights 3
Group E: Chase slow / Chase mid / Chase fast
Group F: Fire work 1 / Fire work 2 / Fire work 3
Group G: Club 1 / Club 2 / Romantic
Cold Shoe Adapter Installation
1. Align the Cold Shoe Adapter with the threaded lug on Phottix M200R RGB Light.
2. Turn the lock screw clockwise to attach the Adapter to the Phottix M200R
RGB Light.
Mounting on a camera /cold shoe /light stand
1. Turn o the LED Light
2. Slide the Cold Shoe adapter into a camera hot shoe or cold shoe mount.
3. Turn the locking ring clockwise to secure the adapter
Warranty Card
Phottix oers warranty service and / or
replacements that comply with local regulations.
For full information see: phottix/warranty
Keep this card - DO NOT LOSE.
Instruction Manual
Features
The Phottix M200R RGB Light is a compact and powerful light source for still
and video photography. It uses the latest in icker-free LED technology, making
it more ecient and durable. The Phottix M200R RGB Light features:
• Long-life, Low-Heat LEDs
• Long-Life Built-In Battery
• Adjustable brightness and color temperature
• Full 0-360ºcolor hue and saturation adjustment
• 21 preset scenario eects
• Use as a power bank to charge other devices
Please note:
• Do not shine the LED directly at people’s eyes at short distances.
This can cause short-term vision issues. Use at distances of at least 1m from
subject – or use a diuser to soften the light.
• Do not place the LED close to alcohol or ammable objects.
• Do not place liquids on or near the LED. The product is not water, splash or
dust resistant.
• Use a soft cloth and neutral cleaner to clean the LED Light.
• Do not use strong cleaning agents or solvents such as thinner gasoline or
alcohol to clean the LED Light.
• Do not store the LED at temperatures of +40C as high temperatures may
damage the product components.
• Do not use the LED in outdoors in direct sunlight for an extended period of
time to prevent the product from overheating and possible damage.
• Because of the built-in Lithium-Ion Battery - do not disassemble, crush
or incinerate.
• Please use the specied charger within the specied voltage and temperature
range.
• To keep the battery in proper working order use the product and charge the
battery at least once per month.
• If left unused for a long period of time recharge before using.
• Lithium-ion battery cells lose capacity over a product’s lifetime. Performance
will be reduced.
• In non-emergency situations, it is not recommended to use the LED while
charging. It will cause rapid heat generation, the product will work improperly
or automatically power o.
Turning Power On / O
Slide Power knob to power on / o the LED.
Mode Selection
Press Mode button to change mode between CCT / HSI / EFFECT.
CCT Mode
1.Turn Brightness knob to set the desired brightness
level from 1%-100%.
2.Turn Set / Adjustment Knob to set the desired color
temperature from 3200K – 5600K.
HSI Mode
EFFECT Mode
1. Press Select / Adjustment Knob to select Scenario
Eect Group from A - G.
2. Turn Select / Adjustment Knob to set the desired
Scenario Eect. Each group has 3 dierent eects
and will display the eect name on OLED.
3. Turn Brightness knob to set the desired brightness
level from 1%-100%.
Notes on temperature warning Removing from a camera /light stand
1. Turn o the Phottix M200R RGB Light
2. Turn the locking ring counterclockwise and remove
Charging the Phottix M200R RGB Light
The Phottix M200R RGB Light will charge from 5V USB-C input.
1. Attach the appropriate cable to the Phottix M200R RGB Light
2. Attach the cable to a power source
3. The OLED display will display ashing battery icon while being charged.
4. Charging time varies depending on power source
Charging External Devices
The Phottix M200R RGB Light has a 5V USB Output port. This can be used to
charge other portable devices such as smart phones, headphones, etc.
1. Attach the USB cable to the Phottix M200R RGB Light. The connected device
will start to charge.
2. The Phottix M200R RGB Light does not need to be powered on to charge
external devices.
910 11
12
13
14 16
17
15
• Phottix M200R RGB Light is used in an environment with a high ambient
temperature, or if the product is used continuously for a long period of time.
This will automatically turn of the product until it cools down.
• Phottix M200R RGB Light is used in an environment with a low ambient
temperature. In such environments, the product may not operate properly.
1. Press Select / Adjustment Knob to select between
H (Hue) and S (Saturation).
2. Turn Select / Adjustment Knob to set the desired
Color Hue from 0-360º
3. Turn Select / Adjustment Knob to set the desired
Color Saturation from 0-100.
4. Turn Brightness knob to set the desired brightness
level from 1%-100%.