manuals.online logo
Brands
  1. Home
  2. •
  3. Brands
  4. •
  5. Pierce
  6. •
  7. Nail Gun
  8. •
  9. Pierce PRC-RF 64254 Assembly instructions

Pierce PRC-RF 64254 Assembly instructions

Popular Nail Gun manuals by other brands

Metabo HPT NR 3675DD Instruction and safety manual

Metabo HPT

Metabo HPT NR 3675DD Instruction and safety manual

EXTOL PREMIUM 8894580 Translation of the original user manual

EXTOL PREMIUM

EXTOL PREMIUM 8894580 Translation of the original user manual

DeWalt XR Li-Ion DCN680D2 Original instructions

DeWalt

DeWalt XR Li-Ion DCN680D2 Original instructions

Performance Tool M643 owner's manual

Performance Tool

Performance Tool M643 owner's manual

Hitachi VH650 - Fencing Nailer, Full Head instruction manual

Hitachi

Hitachi VH650 - Fencing Nailer, Full Head instruction manual

Parkside PET 25 B1 Operation and safety notes

Parkside

Parkside PET 25 B1 Operation and safety notes

Senco Fusion Technology F-35XP operating instructions

Senco

Senco Fusion Technology F-35XP operating instructions

Grizzly G1847 instruction manual

Grizzly

Grizzly G1847 instruction manual

Freeman P50LSLW manual

Freeman

Freeman P50LSLW manual

Ryobi R18N18G Original instructions

Ryobi

Ryobi R18N18G Original instructions

Black & Decker 492848-00 instruction manual

Black & Decker

Black & Decker 492848-00 instruction manual

HOLZMANN MASCHINEN TN90 user manual

HOLZMANN MASCHINEN

HOLZMANN MASCHINEN TN90 user manual

Metabo HPT NR 3690DC Instruction and safety manual

Metabo HPT

Metabo HPT NR 3690DC Instruction and safety manual

Surtek CN650 User manual and warranty

Surtek

Surtek CN650 User manual and warranty

Makita GF600 instruction manual

Makita

Makita GF600 instruction manual

Aicon PRO DAC4507 instruction manual

Aicon PRO

Aicon PRO DAC4507 instruction manual

Parkside PET 25 B1 Operation and safety notes

Parkside

Parkside PET 25 B1 Operation and safety notes

Senco AirFree 25 operating instructions

Senco

Senco AirFree 25 operating instructions

manuals.online logo
manuals.online logoBrands
  • About & Mission
  • Contact us
  • Privacy Policy
  • Terms and Conditions

Copyright 2025 Manuals.Online. All Rights Reserved.

!"#"$%&'(%)*+#"$*%,$-%.$$/-00)))1.,(+&(2(*"3.$14&5
65,"7%&'(%$*4.8"4,7%#'//&($%,$-%/(&9'4$#'//&($:.,(+&(2(*"3.$14&5
Owner’s Manual & Safety Instructions
Save This Manual Keep this manual for the safety warnings and precautions, assembly,
operating, inspection, maintenance and cleaning procedures. Write the product’s serial number in the
back of the manual near the assembly diagram (or month and year of purchase if product has no number).
Keep this manual and the receipt in a safe and dry place for future reference. 21d
When unpacking, make sure that the product is intact
and undamaged. If any parts are missing or broken,
please call 1-888-866-5797 as soon as possible.
Copyright© 2021 by Harbor Freight Tools®. All rights reserved.
No portion of this manual or any artwork contained herein may be reproduced in
any shape or form without the express written consent of Harbor Freight Tools.
Diagrams within this manual may not be drawn proportionally. Due to continuing
improvements, actual product may differ slightly from the product described herein.
Tools required for assembly an d se rv ic e may n ot b e in cl uded.
Read this material before using this product.
Failure to do so can result in serious injury.
SAVE THIS MANUAL.
Page 2 ;&(%$*4.8"4,7%<'*#$"&8#=%/7*,#*%4,77%>?@@@?@AA?BCDC1 Item 64254
EF;6GH IJ6KFGLIM NFLMG6MFMO6E6GPJ
G,+7*%&2%O&8$*8$#
Safety ........................................................................2
Specifications ............................................................8
Setup .........................................................................9
Operation ..................................................................12
Maintenance .............................................................16
Parts List and Diagram .............................................18
Warranty ...................................................................20
QFKMLMR%EHNSITE%FMU%U6;LMLGLIME
This is the safety alert symbol. It is used to alert you to potential
personal injury hazards. Obey all safety messages that
follow this symbol to avoid possible injury or death.
Indicates a hazardous situation which, if not avoided,
will result in death or serious injury.
Indicates a hazardous situation which, if not avoided,
could result in death or serious injury.
Indicates a hazardous situation which, if not avoided,
could result in minor or moderate injury.
Addresses practices not related to personal injury.
Page 3;&(%$*4.8"4,7%<'*#$"&8#=%/7*,#*%4,77%>?@@@?@AA?BCDC1Item 64254
EF;6GHIJ6KFGLIMNFLMG6MFMO6 E6GPJ
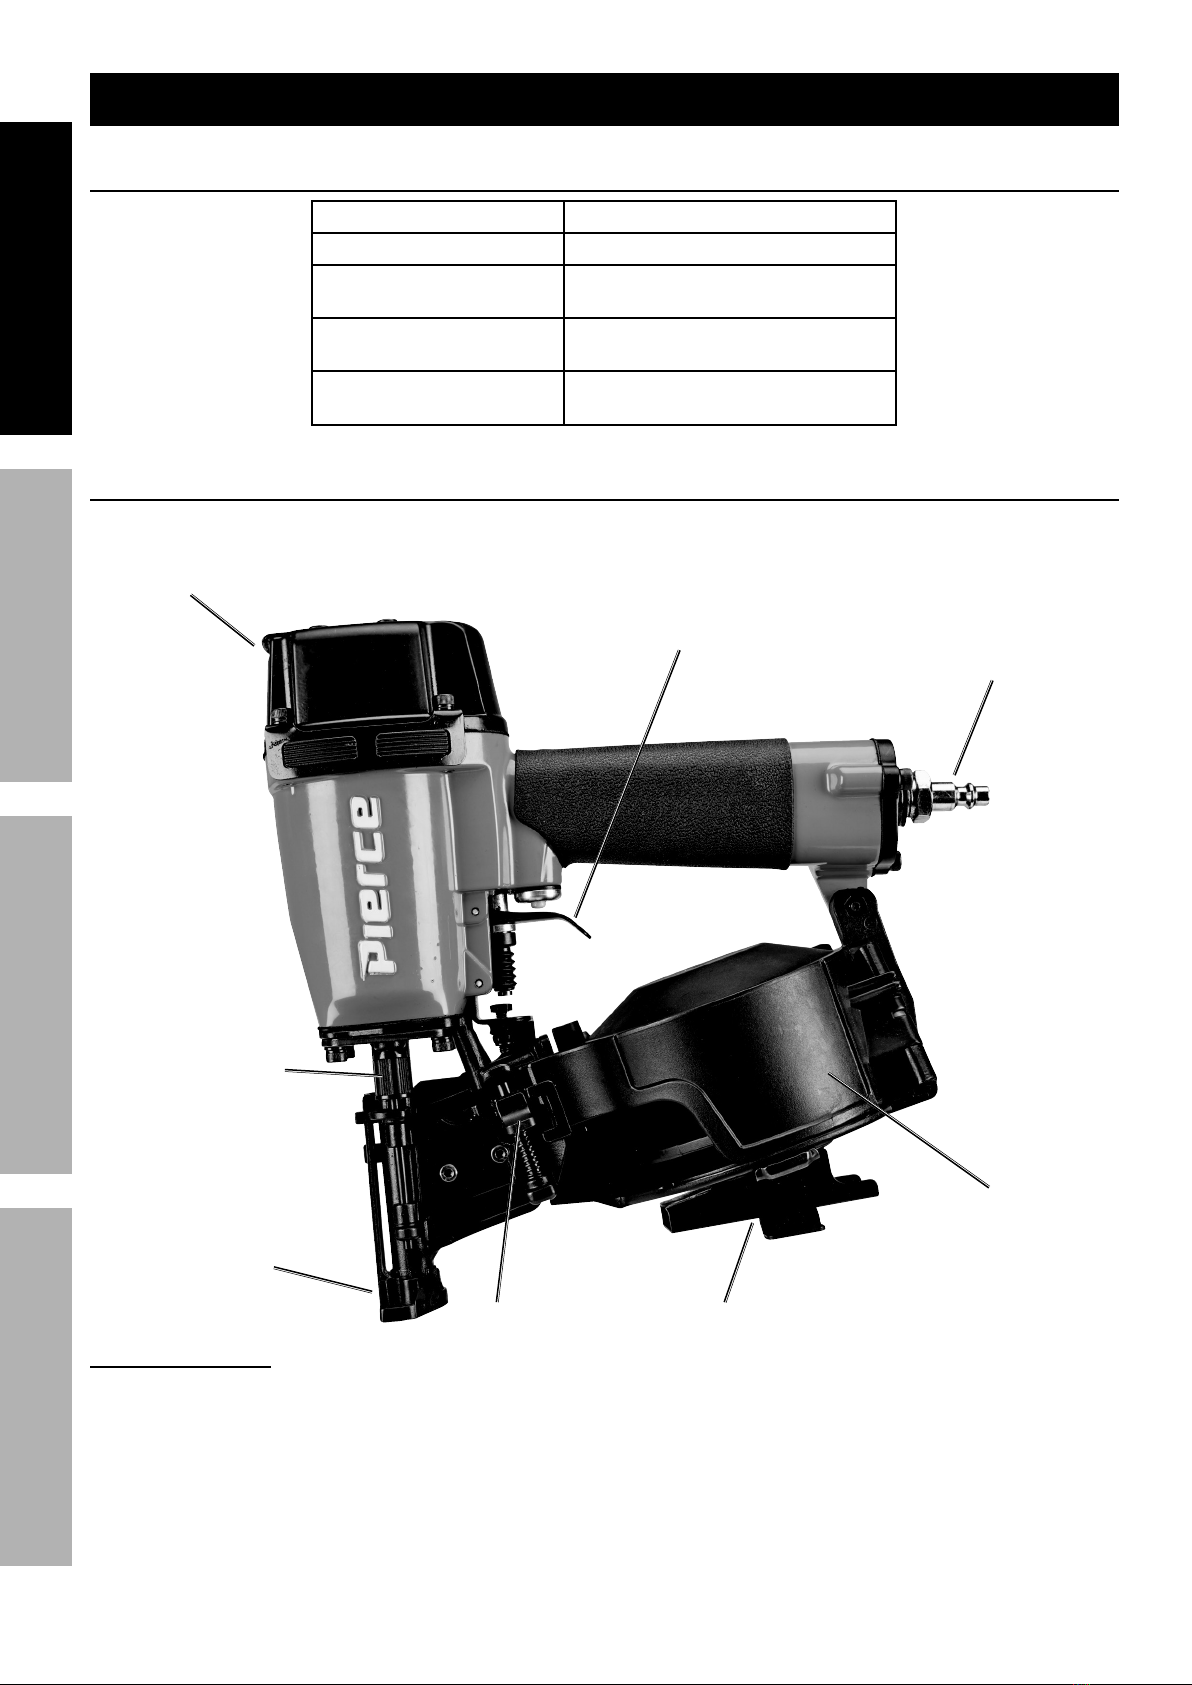
LNJIKGFMG%EF;6GH%LMEGKPOGLIME
LMEGKPOGLIME%J6KGFLMLMR%GI%F%KLEV%I;%;LK6=%
6T6OGKLO%EWIOV=%IK%LMXPKH%GI%J6KEIME
QFKMLMR – When using tools, basic precautions should always be followed, including the following:
R*8*(,7
G&%(*9'4*%$.*%("#Y#%&2%*7*4$("4%#.&4Y=%2"(*=%,89%"8Z'([%$&%/*(#&8#=%%
(*,9%,77%$.*%"8#$('4$"&8#%+*2&(*%'#"83%$.*%$&&71
Q&(Y%F(*,
a. V**/%$.*%)&(Y%,(*,%47*,8%,89%)*77%7"3.$*91
Cluttered benches and dark areas increase the
risks of electric shock, fire, and injury to persons.
b. U&%8&$%&/*(,$*%$.*%$&&7%"8%*\/7&#"]*%
,$5&#/.*(*#=%#'4.%,#%"8%$.*%/(*#*84*%
&2%27,55,+7*%7"<'"9#=%3,#*#=%&(%9'#$1
The tool is able to create sparks resulting
in the ignition of the dust or fumes.
c. Keep bystanders, children, and visitors away
while operating the tool. Distractions are able
to result in the loss of control of the tool.
J*(#&8,7%E,2*$[
a. Stay alert. Watch what you are doing and
use common sense when operating the tool.
Do not use the tool while tired or under the
influence of drugs, alcohol, or medication.%
A moment of inattention while operating the
tool increases the risk of injury to persons.
b. U(*##%/(&/*(7[1%U&%8&$%)*,(%7&&#*%47&$."83%
&(%Z*)*7([1%O&8$,"8%7&83%.,"(1%V**/%.,"(=%
47&$."83=%,89%37&]*#%,),[%2(&5%5&]"83%
/,($#1%Loose clothes, jewelry, or long hair
increases the risk of injury to persons as a
result of being caught in moving parts.
c. F]&"9%'8"8$*8$"&8,7%#$,($"831%%
S*%#'(*%$.*%G("33*(%"#%(*7*,#*9%+*2&(*%
4&88*4$"83%$&%$.*%,"(%#'//7[1%%Do not carry the
tool with your finger on the Trigger or connect the
tool to the air supply with the Trigger pressed.
d. U&%8&$%&]*((*,4.1%V**/%/(&/*(%
2&&$"83%,89%+,7,84*%,$%,77%$"5*#1%
Proper footing and balance enables better
control of the tool in unexpected situations.
e. P#*%#,2*$[%*<'"/5*8$1
A dust mask, non-skid safety shoes
and a hard hat must be used for the
applicable conditions. Wear heavy-
duty work gloves during use.
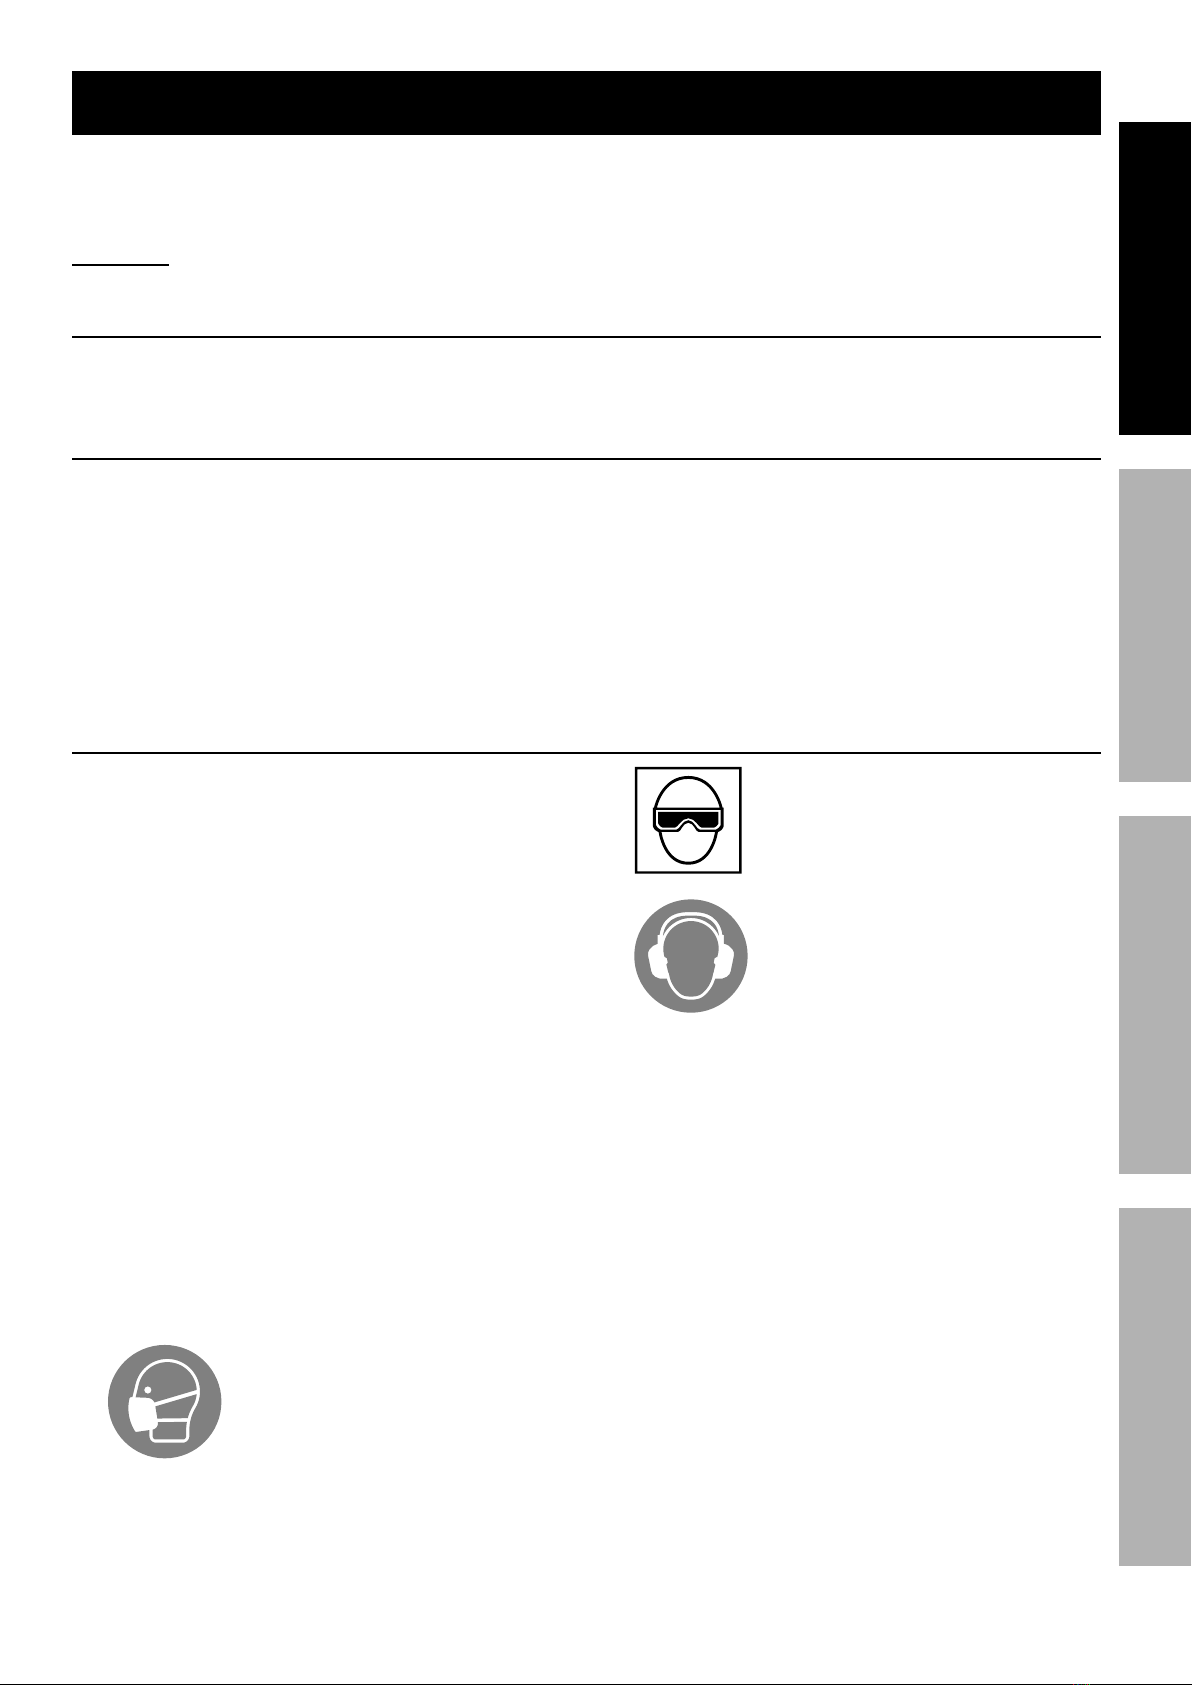
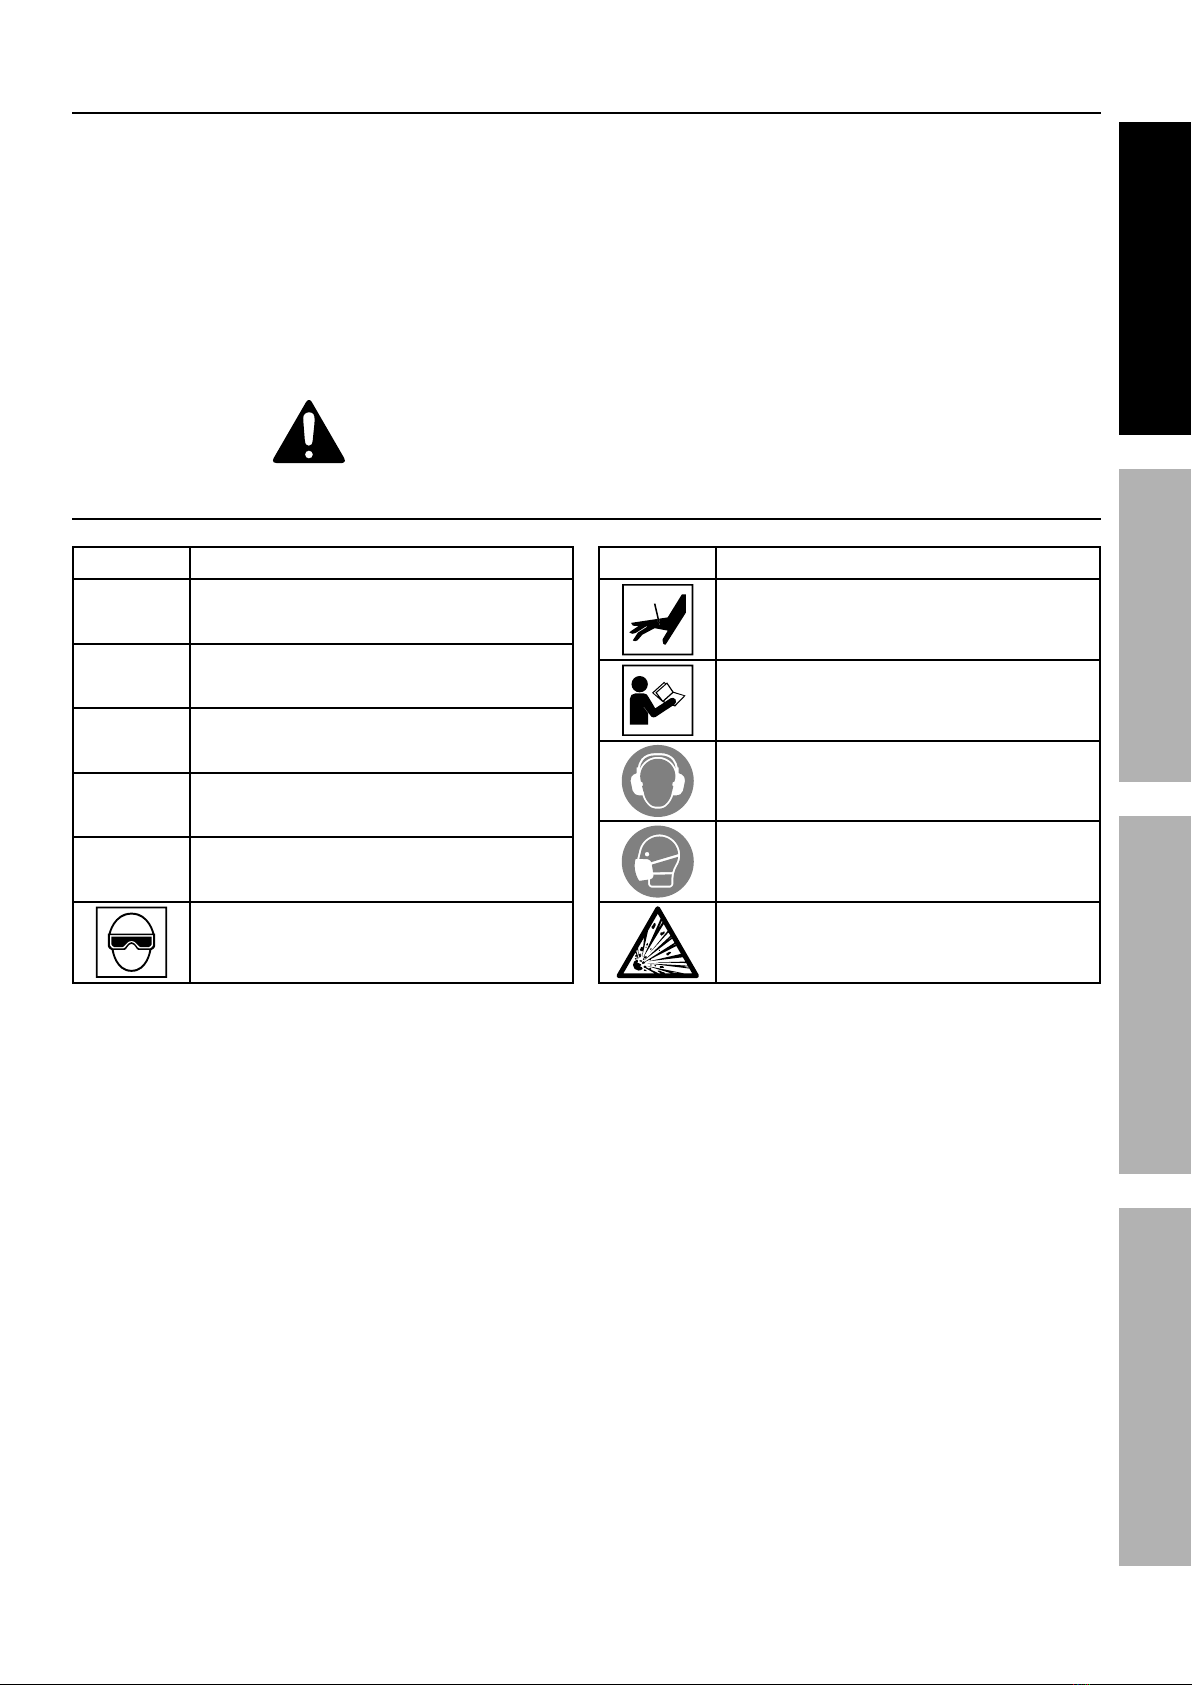
f. F7),[#%)*,(%*[*%/(&$*4$"&81
Wear ANSI-approved safety goggles
with side shields.
g. F7),[#%)*,(%.*,("83%/(&$*4$"&8%
).*8%'#"83%$.*%$&&71
Prolonged exposure to high intensity
noise is able to cause hearing loss.
h. U&%8&$%,$$,4.%$.*%.&#*%&(%$&&7%$&%[&'(%+&9[1
Attach the hose to the structure to reduce the
risk of loss of balance if the hose shifts.
i. F7),[#%,##'5*%$.,$%$.*%$&&7%4&8$,"8#%2,#$*8*(#1
Do not point the tool toward yourself or anyone
whether it contains fasteners or not.
j. QFKMLMR%^%U&%8&$%9("]*%2,#$*8*(%&8%$&/%&2%
,8&$.*(%2,#$*8*(1 This is able to cause the fastener
to be deflected and hit someone, or cause the Tool
to react and result in a risk of injury to persons.
k. QFKMLMR%^%K*5&]*%2"83*(%2(&5%$.*%
G("33*(%).*8%8&$%9("]"83%2,#$*8*(#1
Never carry the%Tool with finger on Trigger,
the Tool is able to discharge a fastener.
Page 4 ;&(%$*4.8"4,7%<'*#$"&8#=%/7*,#*%4,77%>?@@@?@AA?BCDC1 Item 64254
EF;6GH IJ6KFGLIM NFLMG6MFMO6E6GPJ
G&&7%P#*%,89%O,(*
a. Use clamps or another practical way to secure
and support the workpiece to a stable platform.
Holding the work by hand or against the body
is unstable and can lead to loss of control.
b. U&%8&$%2&(4*%$.*%$&&71 Use the correct tool for the
application. The correct tool will do the job better
and safer at the rate for which the tool is designed.
c. U&%8&$%'#*%$.*%$&&7%"2%$.*%G("33*(%9&*#%8&$%
$'(8%$.*%$&&7%&8%&(%&221 Any tool that cannot
be controlled with the Trigger is dangerous
and must not be used until repaired.
d. U"#4&88*4$%$.*%$&&7%2(&5%$.*%,"(%#&'(4*%
+*2&(*%5,Y"83%,9Z'#$5*8$#=%9&"83%$&&7%
5,"8$*8,84*=%47*,("83%Z,5#=%$&'4."83%$.*%
Q&(Y/"*4*%O&8$,4$=%7*,]"83%)&(Y%,(*,=%7&,9"83=%
&(%'87&,9"83%$.*%$&&71 Such precautionary
measures reduce the risk of injury to persons.
e. Store the tool when it is idle out of reach
of children and other untrained persons.
A tool is dangerous in the hands of untrained users.
f. N,"8$,"8%$.*%$&&7%)"$.%4,(*1
A properly maintained tool reduces the
risk of binding and is easier to control.
g. O.*4Y%2&(%5"#,7"385*8$%&(%+"89"83%&2%5&]"83%
/,($#=%+(*,Y,3*%&2%/,($#=%,89%,8[%&$.*(%4&89"$"&8%
$.,$%,22*4$#%$.*%$&&7_#%&/*(,$"&81 If damaged, have
the tool serviced before using. Many accidents
are caused by poorly maintained tools.
There is a risk of bursting if the tool is damaged.
h. P#*%&87[%,44*##&("*#%$.,$%,(*%"9*8$"2"*9%+[%$.*%
5,8'2,4$'(*(%2&(%$.*%#/*4"2"4%$&&7%5&9*71 Use of
an accessory not intended for use with the specific
tool model, increases the risk of injury to persons.
i. P#*%&87[%$.&#*%2,#$*8*(#%7"#$*9%"8%$.*%
E/*4"2"4,$"&8#%4.,($%&2%$."#%5,8',71
Fasteners%not identified for use with this tool by the
tool manufacturer are able to result in a risk of injury
to persons or tool damage when used in this tool.
E*(]"4*
a. Tool service must be performed only
by qualified repair personnel.
b. Q.*8%#*(]"4"83%,%$&&7=%'#*%&87[%"9*8$"4,7%
(*/7,4*5*8$%/,($#1%P#*%&87[%,'$.&("`*9%/,($#1
c. P#*%&87[%$.*%7'+("4,8$#%#'//7"*9%)"$.%$.*%
$&&7%&(%#/*4"2"*9%+[%$.*%5,8'2,4$'(*(1
F"(%E&'(4*
a. M*]*(%4&88*4$%$&%,8%,"(%#&'(4*%$.,$%
"#%4,/,+7*%&2%*\4**9"83%abb%JEL1
Over pressurizing the tool may cause
bursting, abnormal operation,
breakage of the tool or serious injury
to persons. Use only clean, dry, regulated
compressed air at the rated pressure or within the
rated pressure range as marked on the tool. Always
verify prior to using the tool that the air source has
been adjusted to the rated air pressure or within the
rated air-pressure range.
b. Never use oxygen, carbon dioxide, combustible
gases or any bottled gas as an air source
for the tool. Such gases are capable of
explosion and serious injury to persons.
%EF!6%GW6E6%LMEGKPOGLIME1
Page 5;&(%$*4.8"4,7%<'*#$"&8#=%/7*,#*%4,77%>?@@@?@AA?BCDC1Item 64254
EF;6GHIJ6KFGLIMNFLMG6MFMO6 E6GPJ
E/*4"2"4%E,2*$[%L8#$('4$"&8#
1. I/*(,$&(#%,89%&$.*(#%"8%)&(Y%,(*,%NPEG%
)*,(%FMEL?,//(&]*9%#,2*$[%3&337*#%)"$.%
#"9*%#."*79#%9'("83%'#*1%%The employer is
responsible to enforce the use of eye protection
by the operator and others in the work area.
2. V**/%2"83*(#%,),[%2(&5%G("33*(%).*8%8&$%9("]"83%
2,#$*8*(#%$&%,]&"9%,44"9*8$,7%9"#4.,(3*1
3. O.&"4*%&2%$("33*("83%5*$.&9%"#%"5/&($,8$1%%
O.*4Y%5,8',7%2&(%$("33*("83%&/$"&8#1
4. Always assume the Tool contains fasteners.
5. Do not point the Tool toward yourself or anyone
whether it contains fasteners or not.
6. Do not actuate the Tool unless the Tool is
placed firmly against the workpiece.
7. Respect the Tool as a working implement.
8. No horseplay. This Tool is not a toy
and can be deadly if misused.
9. Do not load the Tool with fasteners when any
one of the operating controls, such as the
Trigger or Workpiece Contact, is activated.
10. Do not remove, tamper with, or otherwise cause
the Tool operating controls to become inoperable.
11. Do not operate the Tool if any portion of
the Tool operating controls is inoperable,
disconnected, altered, or not working properly.
12. Disconnect the Tool from the air supply when:
a. Unattended.
b. Performing any maintenance or repair.
c. Clearing a jam.
d. Moving the Tool to a new location.
13. Do not make any modifications to this Tool.
14. Refer to the Tool maintenance instructions
for detailed information on the proper
maintenance of the Tool.
15. Drive fasteners into an appropriate
work surface only. Do not attempt to discharge
fasteners into surfaces too hard to penetrate.
Do not drive fasteners on top of other fasteners,
or at too steep of an angle. Fasteners
can ricochet causing personal injury.
16. Do not drive fasteners too close to the edge
of a workpiece. They may split the workpiece
and fly free, causing personal injury.
17. Keep clear of the workpiece near the area being
fastened. Fasteners may bend sideways during
driving, causing them to exit the workpiece at
an unexpected point, causing personal injury.
18. Transport Tool safely. Always disconnect air
supply when moving the Tool. Carry the Tool by
the handle and avoid contact with the Trigger.
19. Hold Tool away from head and body.
During operation the Tool may
kick back causing injury.
20. Do not drive fasteners into a workpiece
that has people, utility lines, or other
objects behind or inside it.
21. Keep balance while using this Tool.
Keep area below clear if working in an elevated
location, and secure air hose to prevent falls
from bystanders accidentally pulling on it.
22. Obey the manual for the air compressor
used to power this Tool.
23. Install an in-line shutoff valve to allow
immediate control over the air supply in an
emergency, even if a hose is ruptured.
24. Do not engrave or stamp anything into
the housing to avoid weakening it.
25. The warnings and precautions discussed in this
manual cannot cover all possible conditions and
situations that may occur. It must be understood
by the operator that common sense and caution
are factors which cannot be built into this
product, but must be supplied by the operator.
Page 6 ;&(%$*4.8"4,7%<'*#$"&8#=%/7*,#*%4,77%>?@@@?@AA?BCDC1 Item 64254
EF;6GH IJ6KFGLIM NFLMG6MFMO6E6GPJ
!"+(,$"&8%J(*4,'$"&8#
This tool vibrates during use.
Repeated or long-term exposure to vibration may
cause temporary or permanent physical injury,
particularly to the hands, arms and shoulders.
To reduce the risk of vibration-related injury:
1. Anyone using vibrating tools regularly or for
an extended period should first be examined
by a doctor and then have regular medical
check-ups to ensure medical problems are not
being caused or worsened from use. Pregnant
women or people who have impaired blood
circulation to the hand, past hand injuries,
nervous system disorders, diabetes, or
Raynaud’s Disease should not use this tool.
If you feel any symptoms related to vibration (such
as tingling, numbness, and white or blue fingers),
seek medical advice as soon as possible.
2. Do not smoke during use. Nicotine reduces
the blood supply to the hands and fingers,
increasing the risk of vibration-related injury.
3. Wear suitable gloves to reduce the
vibration effects on the user.
4. Use tools with the lowest vibration when there
is a choice between different processes.
5. Include vibration-free periods each day of work.
6. Grip tool as lightly as possible (while still keeping
safe control of it). Let the tool do the work.
7. To reduce vibration, maintain tool as explained
in this manual. If abnormal vibration occurs,
stop immediately.
Page 7;&(%$*4.8"4,7%<'*#$"&8#=%/7*,#*%4,77%>?@@@?@AA?BCDC1Item 64254
EF;6GHIJ6KFGLIMNFLMG6MFMO6 E6GPJ
K&&2"83%J(*4,'$"&8#
;,77"83%&(%+*"83%."$%+[%,%2,77"83%&+Z*4$%4,8%4,'#*%#*("&'#%"8Z'([=%/,(,7[#"#=%,89%U6FGW1
1. Post warning signs and barriers
to keep the area below the work area clear.
Do not allow anyone under 18 years old
in or under the work area.
2. Do not climb while holding Tool in your hand or
transport Tool to roof with air supply attached.
Disconnect air supply and use a tool belt, holster,
or pull Tool up using a rope after climbing.
3. Use appropriate safety equipment, such as,
but not limited to: fall arrest systems,
safety net systems, roof jacks, and
guard rails with toeboards.
4. Follow OSHA requirements for working on roofs.
%EF!6%GW6E6%LMEGKPOGLIME1
E[5+&7&3[
E[5+&7 J(&/*($[%&(%#$,$*5*8$
JEL Pounds per square inch of pressure
O;N Cubic Feet per Minute flow
EO;N Cubic Feet per Minute flow
at standard conditions
MJG National pipe thread, tapered
MJE National pipe thread, straight
WARNING marking concerning
Risk of Eye Injury. Wear ANSI-approved
safety goggles with side shields.
E[5+&7 J(&/*($[%&(%#$,$*5*8$
Warning marking concerning
Risk of Puncture Injury.
Wear heavy-duty work gloves.
Read the manual before
set-up and/or use.
WARNING marking concerning
Risk of Hearing Loss.
Wear hearing protection.
WARNING marking concerning
Risk of Respiratory Injury. Wear
NIOSH-approved dust mask/respirator.
WARNING marking concerning
Risk of Explosion.
Page 8 ;&(%$*4.8"4,7%<'*#$"&8#=%/7*,#*%4,77%>?@@@?@AA?BCDC1 Item 64254
EF;6GH IJ6KFGLIM NFLMG6MFMO6E6GPJ
;'84$"&8,7%U*#4("/$"&8
E/*4"2"4,$"&8#
Maximum Air Pressure 120 PSI
Air Inlet 3/8"–18 NPT
Air Consumption 2.4 CFM @ 90 PSI and
60 cycles per minute
Actuation System Contact Actuation as shipped
Single Sequential Valve available
Nail Type 0.120″ Diameter, 7/8"–1-3/4" Long,
15° Angle, Wire Collated
O&5/&8*8$#%,89%O&8$(&7#
F"(%L87*$%J7'3
Q&(Y/"*4*%
O&8$,4$
E."837*%R'"9*
T,$4.
N,3,`"8*
G("33*(
6\.,'#$
U*/$.%
F9Z'#$5*8$%
V8&+
Q&(Y/"*4*%O&8$,4$ - The Workpiece Contact helps prevent the Tool
from discharging unless it is pressed against an object.
Page 9;&(%$*4.8"4,7%<'*#$"&8#=%/7*,#*%4,77%>?@@@?@AA?BCDC1Item 64254
EF;6GHIJ6KFGLIMNFLMG6MFMO6 E6GPJ
L8"$",7%G&&7%E*$%P/0F##*5+7[
%K*,9%$.*%6MGLK6%LNJIKGFMG%EF;6GH%LM;IKNFGLIM%#*4$"&8%,$%$.*%+*3"88"83%&2%$."#%
5,8',7%"847'9"83%,77%$*\$%'89*(%#'+.*,9"83#%$.*(*"8%+*2&(*%#*$%'/%&(%'#*%&2%$."#%/(&9'4$1
M&$*- For additional information regarding the parts listed in the following pages,
refer to the Assembly Diagram near the end of this manual.
F"(%E'//7[
%
GI%JK6!6MG%6cJTIELIM-%
P#*%&87[%47*,8=%9([=%(*3'7,$*9=%4&5/(*##*9%,"(%$&%/&)*(%$."#%G&&71%%U&%8&$%'#*%&\[3*8=%
4,(+&8%9"&\"9*=%4&5+'#$"+7*%3,#*#=%&(%,8[%&$.*(%+&$$7*9%3,#%,#%,%/&)*(%#&'(4*%2&(%$."#%G&&71
1. Incorporate a filter, regulator with pressure gauge,
oiler, in-line shutoff valve, and quick coupler for
best service, as shown on Figure A on page 10
and Figure B on page 11. %F8%"8?7"8*%#.'$&22%
+,77%],7]*%"#%,8%"5/&($,8$%#,2*$[%9*]"4*%+*4,'#*%
"$%4&8$(&7#%$.*%,"(%#'//7[%*]*8%"2%$.*%,"(%.&#*%
"#%('/$'(*91%%G.*%#.'$&22%],7]*%#.&'79%+*%,%
+,77%],7]*%+*4,'#*%"$%4,8%+*%47&#*9%<'"4Y7[1
M&$*-%If an automatic oiler system is not used,
add a few drops of Pneumatic Tool Oil into
the airline connection before operation.
Add a few more drops after each hour of continual use.
M&$*- This air Tool may be shipped with a protective plug
covering the air inlet. Remove this plug before set up.
2. Attach an air hose to the compressor’s air outlet.
Connect the air hose to the air inlet of the Tool.
Other components, such as a coupler plug
and quick coupler, will make operation
more efficient, but are not required.
QFKMLMRd%%GI%JK6!6MG%E6KLIPE%LMXPKH%
;KIN%FOOLU6MGFT%ULEOWFKR6-%
U&%8&$%"8#$,77%,%2*5,7*%<'"4Y%4&'/7*(%&8%$.*%G&&71
Such a coupler contains an air valve that will
allow the air Tool to retain pressure and operate
accidentally after the air supply is disconnected.
M&$*-%Air flow, and therefore Tool performance,
can be hindered by undersized air supply components.
3. The air hose must be long enough to reach
the work area with enough extra length to
allow free movement while working.
4. Release the Tool’s Trigger and empty its Magazine.
5. Close the in-line safety valve between
the compressor and the Tool.
6. Turn on the air compressor according to
the manufacturer’s directions and allow it
to build up pressure until it cycles off.
7. Adjust the air compressor’s output regulator
so that the air output is enough to properly
power the Tool, but the output will not exceed
the Tool’s maximum air pressure at any time.
Adjust the pressure gradually, while checking the
air output gauge to set the right pressure range.
8. The air pressure setting must not exceed job site
regulations/restrictions. The air pressure setting
must not exceed 90 PSI when being used with
workpieces that have a thickness of less than 1-3/4″.
9. Inspect the air connections for leaks.
Repair any leaks found.
10. If the Tool will not be used at this time,
turn off and detach the air supply,
safely discharge any residual air pressure, and
release the Trigger to prevent accidental discharge.
M&$*- Residual air pressure should not be present
after the Tool is disconnected from the air supply.
However, it is a good safety measure to attempt to
discharge the Tool in a safe fashion after disconnecting
to ensure that the Tool is disconnected and unpowered.
Page 10 ;&(%$*4.8"4,7%<'*#$"&8#=%/7*,#*%4,77%>?@@@?@AA?BCDC1 Item 64254
EF;6GH IJ6KFGLIM NFLMG6MFMO6E6GPJ
;"3'(*%F-%%J&($,+7*%F"(%E'//7[%E*$'/
G
A
E
E
H
F
B
Non-lubricated
Tools
Lubricated
Tools
A
B
C
C
DA
U*#4("/$"&8 ;'84$"&8
A Air Hose Connects air to Tool
B Filter Prevents dirt and condensation from damaging Tool or workpiece
C Regulator Adjusts air pressure to Tool
D Lubricator (optional) For air Tool lubrication
E Coupler and Plug Provides quick connection and release
F Leader Hose (optional) Increases coupler life
G Air Cleaner / Dryer (optional) Prevents water vapor from damaging workpiece
H Air Adjusting Valve (optional) For fine tuning airflow at Tool