Pinnacle Technology CS3X User manual

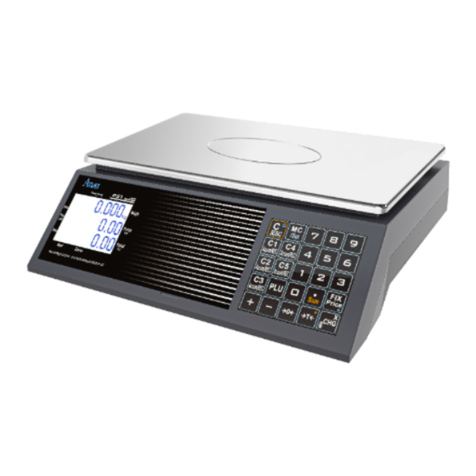
CS3X Cash Register Scale
Quick Start
Pinnacle Technology Corp.


Important Safety Information
1. Please read these safety instructions carefully.
2. For safety of SD card and USB data ,When pulling out SD or USB,please firstly press power button slightly
for standby mode and then pull it out .
3. Keep this user manual for later reference.
4. Before turning on the machine, please make sure that the electric power meets the requirements, (such as the
electrical pressure and frequency), and that your electrical outlet is really connected to the ground.
5. This product meets the relative requirements of the national standard IEC 60950:2001 “Safety of information
technical equipment”.
6. Thunder can hurt this product and even your personal safety, so please pull out the network cable, electrical
cable and other conductor connecting external attachment in thunder days.
7. The non-experts or non-authorized people please don’t open the machine shell.
8. Please don’t spatter any sundries or liquid into the machine; please don’t stuff anything inside this product,
otherwise it may cause short circuit and therefore may lead to fire or get an electric shock.
9. Please do not plug or unplug with wet hand.
10. Make sure the switch is off when plug or unplug the power.
11. Incorrectly changing the lithium battery on the main board and the UPS lithium battery in the machine may
cause a blast, so please make sure installing and changing the lithium batteries under the instruction of the
expert service personnel.
12. Please be sure not to change the battery with a wrong type one, otherwise there is danger of explosion. Be sure
to deal with used battery with the way of dealing with waste battery.
13. Please charge the lithium battery about every three Months, in case it would discharge over time and lead to
useless.
14. Please lay this product packed in the 10-40℃environment for at least 2 hours before turning on if it was
stored in less than 10℃temperature environment during the transportation, so as to avoid the damage on the
product due to a big change of environmental temperature.
15. For PLUGGABLE EQUIPMENT, the socket-outlet shall be installed near the equipment and shall be easily
accessible.
16. Please don’t throw anything on this product or hit against it.

17. Please do not disconnect the line cord while its working, if not the product would be broken.
18. Please be sure use our line cord only.
19. If there is abnormal noisy, burnt smell or smoke given out from the product, please cut off the power and
disconnect the plug immediately. And contact the service center. Or there is danger of electric shock or fire.
20. Please do not allow children to climb up on the product, in case the product drops and hurt them.
21. Please do not disconnect any parts or lines except USB equipment while using.
22. Switch off the product if you will not use it in a long time.

CONTENT
1Summarization and Precaution...............................................................................................................1
1.1 Display Device Installation..............................................................................................................1
1.2 Paper Installation .............................................................................................................................1
1.3 Battery Replacement (Optional)......................................................................................................3
1.4 Hotkey Sheet Installation.................................................................................................................6
1.5 User-Defined Key............................................................................................................................7
2Power on Operation................................................................................................................................8
2.1 Power on/off ....................................................................................................................................8
2.2 Tare ..................................................................................................................................................8
2.3 Zeroing Operation............................................................................................................................9
3Basic Operation ......................................................................................................................................9
3.1 Clerk Manage...................................................................................................................................9
3.2 Non-transaction................................................................................................................................9
3.3 Change Mode...................................................................................................................................9
3.4 Sales Operation in MODE 1............................................................................................................9
3.4.1 Check Price.............................................................................................................................10
3.4.2 Basic Sale Operation...............................................................................................................10
3.4.3 Sell PLU without Presetting ...................................................................................................10
3.4.4 Change Price...........................................................................................................................11
3.4.5 Fixed-price Sale......................................................................................................................11
3.4.6 Discount..................................................................................................................................11
3.4.7 Void /Return Operation...........................................................................................................13
3.5 PLU Sales in Barcode....................................................................................................................14
3.6 Sales Operation in Mode 2 ............................................................................................................14
3.7 The Floating Cashier Mode (Online Only)....................................................................................14
3.8 Pay by Member Card.....................................................................................................................15
3.9 Hold/Recall Operation/Settle Accounts.........................................................................................15
3.10 X/Z REPORT MODE.................................................................................................................16
4Basic Set ...............................................................................................................................................16
4.1 Transition between Training Mode and User Mode......................................................................16
4.2 Discount Set...................................................................................................................................17
4.3 Payment .........................................................................................................................................17
4.4 Member and Member Card Set......................................................................................................18
4.5 Set Rounding Table........................................................................................................................18
4.6 Set IP (With Ethernet Port Type)...................................................................................................18
5Appendix-Bar Code Type Table ...........................................................................................................19
1
1Summarization and Precaution
1.1 Display Device Installation
Note: the non-pole scale can skip this chapter’s contents.
Before normally using the cash register scale, users should first install the display device when they
open the package. During the sale, display device can display the goods’ related information, such as
price and weight and so on.
Please install the display device as follows:
Note: DO plug the leadwire terminals into the pole, or it may destroy the lead wire.
1. Take out the display pole
Lead wire terminal
2. Joint two lead wire terminals and put them into
the pole. Then plug the pole into the bottom seat.
Finally lock the four screws.
Four screws

2
1.2 Paper Installation
Thermal Paper Installation Steps
Note: Clean tear the gummed paper on the roll paper and do not leave any foreign matters to protect
print head.
The Choice of Thermal Paper Receipt
We suggest to choose thermal paper receipt that has smooth surface and can be printed clearly with low
energy. Do not select the paper that has rough surface (easy to wear print head) or paper with low
thermal sensitivity (cause unclear printing under the same density). It takes more energy to print with
low thermal sensitivity paper, will make thermal print head bolt early (burned) and cause the reduction
1. Unclose the paper compartment
cover from central position circled
as the above picture shows.
2.Remove any paper residue,
foreign matter and dust from the
roll housing. Place paper roll in
their housings.
3.Press the cover from two sides or
press on central position till you hear a
“ka”sound which means the cover has
been closed.

3
of print head. Therefore, you’d better use specified thermal paper (Pinnacle DJ03, PD-160R, etc.).
1.3 Battery Replacement (Optional)
Battery Replacement (the type with battery)
Note: This chapter only applies for battery replacement (the type with battery).
We use sealed lead-acid battery for our ECR. Generally, new battery can be used for two years. If
battery’s working time is shortened apparently after charging, you need to replace a new one.
In order to keep safeness of the data, you’d better not put the scales on the condition of “Power
On/Off with Button”. Power On/Off with Button only used to replace battery or certain special
maintenance. Although the data will be kept over 15 minutes after taking the battery away, we still
suggest you to install the battery as soon as possible.
This scale has two level battery voltage warnings. When battery voltage is lower than 6.0V, the scale
will send the first level warning and it will emit vocal alarm every five second without working. When
the battery voltage is lower than 5.8V, the scale will emit the second level of warning and it cannot work.
You must charge it, or cause the reduction of the battery. Without charging the scale over time, the data
will lose.
Attention:
1. Do not replace the battery of wrong model, or it will cause explosion. Please deal with waste
battery on the basis of the treatment methods of waste battery.
2. Use “Power On/Off with the Button”to dump power when place the battery.
3. Pay attention to the polarity, red for anode and black for cathode.
4. Replace the battery cover after replacement to prevent the improperly working of the scale from
the disturbing caused by certain pest (like cockroach).
5. Though the data can be stored for a long time after battery is removed, you had better replace a
new one as soon as possible to prevent stored data from losing.
6. When battery is not in use for a long time, it will self-discharge gradually. Charge the battery twice
a year at least when it is not in use and each time for about 6 hours.
The steps of installing battery module (UPS module)(the type without battery module
originally)
Note: if the machine type you purchased is without battery module (UPS module), and now you want to
add battery module (UPS module), please contact our franchiser and then follow below steps to install
battery module.
Install new battery. Pay
attention to the polarity
(red for anode, black for
cathode). Screw the bolt
and replace the cover.
Unscrew the 2 screws

4
(1)Unscrew the four screws
and then took off the battery
cover.
(2)Insert UPS to the part
that the dot line circled.
The board with line part
should be toward left as
the left picture shows.

5
(4) Screw the bolt .
(5)Replace the cover.
(3) Install new battery.
Pay attention to the
polarity (red for anode,
black for cathode).

6
1.4 Hotkey Sheet Installation
Note:Please refer to “PC software management/File column/chapter Programming hotkey” in attached
CD.
Cut the hotkey sheet down and insert the hotkey sheet into the keyboard. Please take below pictures for
your references:
Cut the hotkey sheet down
along the dotted line.
Push the hotkey pad up from bottom
according to the arrow head.
Insert the hotkey sheet into the
hotkey pad.
Note: Do not over lift hotkey
pad when insert the hotkey
sheet so as to protect the pad.

7
1.5 User-Defined Key
There are 3 user-defined functions key and all the hot keys which can be defined as one of the following
function.
User-defined key steps:
E.g. Define [V2] as the function of -% discount named 1.
1. Press key [V2] for 3 seconds.
2. The system prompts all the above functions,then use key [↑] and [↓] to select “-%PRM” item.
Then press [CASH] to confirm. Now V2 has the function of -% discount.
Now, we can confirm key V2 of -% discount at the following example.
Steps
Operation Introduction
Explanation
1
Press [1] [PLU]key
Input PLU barcode 1
2
Put PLU on the scale,
Press [V1] key
Confirm
3
Press [2] [PLU] key
Input PLU barcode 2
4
Put PLU on the scale
Weighing
5
Press [V2] key
User-defined -% key
6
Press [1][0] key
Input discount rate
7
Press [CASH] [V1] key
Comfirm
8
Press [CASH] key
Settle accounts
RECEIPT
INV. NO.:123121109
DATE: 22/09/11 10:04 NO: 000002
NAME DIS PRICE QTY AMOUNT
plu0313.00 0.635kg 8.26
plu0416.00 -%10 1.03kg 16.48
-$1.65
TOTAL 2 ITEMS $23.09
CASH $23.09
MC: 36000316 CLERK: 1
SNO:00000059
FUNTION DESCRIPTION:
1. Default
2. %PRM
3. +%PRP
4. SubAmt
5. AddAmt
6. 1/2 price
7. 1/4 price
8. Fix Price
9. MEM. Card
10. STOCK CTRL
11. CardFun
12. Tare1
13. Tare 2
14. Tare 3
15. V1
16. V2
17. V3
18. OTHER FUN
19. P/O
20. R/A
21. SALE BY CLASS
22. RECORD WORKF TIME
23. ZERO
24. TARE
25. TAKEAWAY
26. Null
27. FORMFEED

8
2Power on Operation
2.1 Power on/off
Hard turning on/off
Method 1:
1. Connect the power wire to charger.
2. Put power switch to on position to turn on the switch.
3. Put power switch to off position to turn off the switch. Before turning off the switch,please switch
to soft turning off mode.
Method 2: Press [CL/ESC] to turn off the switch.
Soft turning on/off
Long press key to switch to off mode when the scale is on. Press key to switch to on mode when the
scale is in soft turn-off mode.
Sleep: Press [Set Cashier] key to choose “Sleep”and press [Cash] key to turn the scale to sleep mode.
2.2 Tare
This key is the function of net deducting weight calculation. For example, purchase a box of apple,
need to use this function to deduct the weight of the box and calculate the net weight of the apple. When
the package and the commodity are not able to separate, this function is needed. And, the tare weight
must below 6 kilogram.
Method 1:
1. Put the wrap page on the scale when the LCD prompt < 0 >, and press key [Tare]. The LCD will
prompt the tare weight.
2. Put the wrap page on the scale continuously and press key [Tare] to fulfill continuous tare operation.
3. Put the packaged PLU on the scale. The LCD will prompt the net weight.
4. Take off the packaged PLU and press [Tare] to exit.
Method 2:
1. Input the tare value and press key [Tare] when the LCD prompt < 0 >. The LCD will prompt the tare
weight.
2. Put the packaged PLU on the scale. The LCD will prompt the net weight.
3. Take off the packaged PLU and press key [0] [Tare] to exit.
Method3:
1. Set tare weight .
Steps: press [CL/ESC] --- “SET”--- “key [Cash]”--- input manager and password and press key
[Cash] --- input tare number (1-3) accordingly --- press key [Cash] to confirm --- input tare value
and press key [Cash] to confirm.
2. Define user-define key as Tare 1/Tare 2/Tare 3. (Follow chapter 1.5 User-Defined Key)
3. Press key [Shift] and then user-defined key when the LCD prompt < 0 >. The LCD will prompt the
tare weight.
4. Put the packaged PLU on the scale. The LCD will prompt the net weight.
5. Take off the packaged PLU and press key [0] and [Tare] to exit.

9
2.3 Zeroing Operation
Sometimes the display will not show “0”when there is not thing on the scale. Maybe the reason of
this is that the scale loses balance. Beside adjusting the balance of scale,during selling you can press
[PLU ZERO] to return to zero level of weight which saves time and avoid weight mistakes.
Operating as below:
Press key [PLU Zero]. The LCD prompts < 0 >.
3Basic Operation
3.1 Clerk Manage
In this function, the clerk number, password and purview can be set.
Press key [Set Cashier] to enter clerk manage mode, input manager code and password, and press
[CASH]. You can add, delete or change password of cashiers.
3.2 Non-transaction
Put money into drawer or draw money out of the drawer during non-transaction
Receive On Account Operation : Put money into drawer during non-transaction.
Operation: input sum of money --- press [PRICE] key --- press [SHIFT] + [RA] ---choose ‘R/A
Amount’ --- press [CASH] to confirm, and then the drawer will open automatically.
Paid Outside Operation: Draw money out from drawer during non-transaction.
Operation: input sum of money --- press [PRICE] key --- press [SHIFT] + [PO] ---choose ‘P/O Amount’
--- press [CASH] to confirm, and then the drawer will open automatically.
3.3 Change Mode
Note: The default manager of this scale is No.1 manager with the password 0. When you use the scale
ECR for the first time, enter SET mode with N0.1 manager to change password and set other manager’s
right.
Change MODE steps: press “Set Cashier”key--- press [SHIFT] to choose “Set”---“CASH”key---
input manager number and password and input password --- choose “OTHER”---“CASH”key ---
choose “Change mode”---press “CASH”key to change mode.
3.4 Sales Operation in MODE 1
Clerk Login in/ out
When several clerks are needed at the same time,you can login in Mode 1. Take No. 1 clerk V1 as an
example.
Clerk login in
:
Press [V1] key --- Input clerk number and password --- press [CASH] key (At that time,
the clerk log in the mode and all related operation is available.).
Clerk login out
:
Press [Set Cashier] --- choose “clear report”--- [CASH] --- Input clerk number and
password --- press [CASH] key --- select ‘Z-Report’and press [CASH] to confirm and the clerk exit
automatically.
Clerk starting:
This operation is fit for starting clerks who have log in.
It is workable when pressing related keys (V1, V2, V3), and at that time, the left side signal of the clerk

10
number will be twinkling.
If you want to log out, please press numerical key [0] first and then press the clerk number you want.
After weighing the PLU, press V1 to confirm the sales and press [CASH] to settle accounts.
The Methods of Selling PLU
1) Press [BARCODE] + [PLU]
2) Press [Hotkey]
3.4.1 Check Price
Press defined [OTHER FUN], choose price search and press [CASH] to enter. The system will prompt “input PLU
searching barcode”, input or scan the PLU barcode and press [CASH] to confirm. The LCD will prompt the PLU price
and CYN.
3.4.2 Basic Sale Operation
Weight cargo:
Press hotkey PLU1 (or input PLU barcode 1 and then press [PLU] key)--- put on PLU 1 item, and press
[V1]--- press hotkey PLU2 (or input PLU barcode 2 and then press [PLU] key)--- put on PLU 2 item,
and press [V1]--- press [CASH] to settle accounts.
PCS type:
Note: Before selling PCS type PLU, please set the “CLERK OPERATION/MANUAL INPUT
QTY?” to “YES” in “SET” mode. That is press [Set Cashier] to choose “SET”, press [↑] or [↓] to
choose “CLERK OPERATION”, press [CASH] to enter the menu, choose “MANUAL INPUT
QTY”, press [CASH], press [↑] or [↓] to choose “YES”, and press [CASH] to confirm.
Method 1:Press hotkey PLU1 (or input PLU barcode and then press [PLU] key) --- input number 2 and
press [Quantity] key --- press [V1] key --- press hotkey PLU2 (or input PLU barcode 2 and then press
[PLU] key) --- input number 3 and press [Quantity] key --- press [V1] key--- press [CASH] to settle
accounts.
Method 2:Press hotkey PLU1 (or input PLU barcode and then press [PLU] key) --- press [Quantity]
key--- input number 2 and press [CASH]+ [V1] key to confirm --- press hotkey PLU2 (or input PLU
barcode 2 and then press [PLU] key)--- press [Quantity] key--- input number 3 and press [CASH]+ [V1]
key to confirm--- press [CASH] to settle accounts.
3.4.3 Sell PLU without Presetting
Follow the following steps when you sell the PLU which isn’t set in the scale.
Weight cargo sale
Method 1:Input number “10”--- press [PRICE] key --- Put PLU on the scale --- press [V1] key to
confirm--- press [CASH] to settle accounts.
Method 2:Press [PRICE] key --- input number “10”--- press [CASH] to confirm--- Put PLU on the
scale --- press [V1] key to confirm---press [CASH] to settle accounts.
PCS type
Note: Before selling PCS type PLU, please set the “CLERK OPERATION/MANUAL INPUT
QTY?” to “YES” in “SET” mode. That is press [Set Cashier] to choose “SET”, press [↑] or [↓] to
choose “CLERK OPERATION”, press [CASH] to enter the menu, choose “MANUAL INPUT

11
QTY”, press [CASH], press [↑] or [↓] to choose “YES”, and press [CASH] to confirm.
Method 1: Input number “20”--- press [PRICE] key --- Input number “3”--- press [Quantity] --- press
[V1] key to confirm---press [CASH] to settle accounts.
Method 2: Press [PRICE] key --- input number “20”--- press [CASH] to confirm--- Input number “3”---
press [Quantity] --- press [V1] key to confirm---press [CASH] to settle accounts.
3.4.4 Change Price
Note: the scale has short-time memory function when settle accounts with the same receipt:
continuously sell PLU after manual change PLU price, the PLU will be sold at the price input before. It
will not recover the premier price until do other operation or sell other items.
weight cargo:
Method 1: Press [1] [PLU] key --- Put PLU on the scale --- Press [V1] --- Press [1] [PLU] key --- Input
number “15”--- Press [PRICE] key (change PLU price into 15) --- Put PLU on the scale --- Press [V1]
key --- Press [1] [PLU] key --- Put PLU on the scale --- Press [V1] key (the PLU price defaulted as “15”,
indicates the short-time memory function of the scale) --- Press [CASH] to settle accounts.
Method 2: Press [1] [PLU] key --- Put PLU on the scale --- Press [V1] --- Press [1] [PLU] key –Press
[PRICE] --- Input number “15”(change PLU price into 15) --- Press [CASH] -- Put PLU on the scale ---
Press [V1] --- Press [1] [PLU] key -- Put PLU on the scale --- Press [V1] (the PLU price defaulted as
“15”, indicates the short-time memory function of the scale) --- Press [CASH] to settle accounts.
PCS type:
Note: Before selling PCS type PLU, please set the “CLERK OPERATION/MANUAL INPUT
QTY?” to “YES” in “SET” mode. That is press [Set Cashier] to choose “SET”, press [↑] or [↓] to
choose “CLERK OPERATION”, press [CASH] to enter the menu, choose “MANUAL INPUT
QTY”, press [CASH], press [↑] or [↓] to choose “YES”, and press [CASH] to confirm.
Method 1: Press [1] [PLU] key --- input number 5 --- press [PRICE] key --- input number 6 --- press
[Quantity] key --- press [V1] key to confirm --- press [CASH] to settle accounts.
Method 2: Press [1] [PLU] key --- press [PRICE] key --- input number 5--- press [CASH] to confirm ---
press [Quantity] key --- input number 6 and --- press [CASH] [V1] --- press [CASH] to settle accounts.
3.4.5 Fixed-price Sale
Note: Only when the weight reach the fixed price, the PLU can sell automatically.
Weight Cargo: Press [SHIFT] and [Fixed-price]--- Input the fixed- price “10”---press [1] [PRICE] ---
put the PLU on the scale --- press [CASH] --- press [V1] key (only when the weight reaches $10 and
press [V1], the PLU will be sold. When the weight below $10, do not need to press [V1] if you have
pressed it before.)--- press [CASH] to settle accounts.
3.4.6 Discount
-% Discount Off Operation

12
Operation of %PRM and +%PRP are the same. Discount rate range is 0.01%~99.99%.
Note: Before you do the operation of %PRM, deduction, +%PRP and AddAmt, please do the
following setting with pressing [Set Cashier] key..
1. Set the “SET/DISCOUNT SET/PLU MANUAL DISCOUNT?” to “YES” in “SET” mode. Clear Z
daily report before this setting.
2. Set the “SET/DISCOUNT SET/SUBTOTAL DISCOUNT?” to “YES” in “SET” mode.
3. Set the “SET/DISCOUNT SET/TOTAL PRICE DISCOUNT?” to “YES” in “SET” mode.
4. Set the “SET/SECURITY SET/PLU MANUAL DISCOUNT NEED PSW?” to “NO” in “SET” mode.
5. Set the “SET/SECURITY SET/SUBTOTAL MANUAL DISCOUNT NEED PSW?” to “NO” in
“SET” mode.
If do not set the “SET/SECURITY SET/PLU MANUAL DISCOUNT NEED PSW?” and the
“SET/SECURITY SET/SUBTOTAL MANUAL DISCOUNT NEED PSW?” to “NO”, the authorization
of “MANUAL CHANGE PRICE SALE”from the manager with the return privileges. Operation steps
as follows:
Discount after subtotal
Press [1] [PLU] key--- Put PLU on the scale--- press [V1] to confirm--- press [2] [PLU] key--- Put PLU
on the scale--- Press [V1] to confirm --- Press [SBTL] --- Press [shift] --- Press [DISCOUNT], choose
the specific discount item“1.-%DISCOUNT OFF” and press [CASH] key --- Input discount rate“10”---
press [CASH] key to confirm --- press [CASH] to settle accounts.
Sale after Subtotal Discount
Note: Before you do the PLU discount operation, please do the following setting.
1. Clear Z daily report before this setting. Set the “SET/CLERK OPERATION/PRINT RECEIPT
AFTER CHECK OUT?” to “NO” in “SET” mode.
2. Set the “SET/DISCOUNT SET/SALE AFTER SUBTOTAL DISCOUNT?” to “YES” in “SET” mode.
Operation: Press [1] [PLU] key--- Put PLU on the scale--- Press [V1] to confirm--- Press [2] [PLU]
key--- Put PLU on the scale--- Press [V1] --- Press [SBTL] --- Press [shift] --- Press [DISCOUNT]---
Choose the specific discount item“1.-%DISCOUNT OFF” and press [CASH] key --- Input discount
rate“10”--- press [CASH] key to confirm ---Press [3] [PLU] key--- Put PLU on the scale--- Press [V1] --
press [CASH] to settle accounts.
PLU Discount
weight cargo:
Press [1] [PLU] key--- Put PLU on the scale--- press [V1] to confirm--- Press [2] [PLU] key--- Put PLU
on the scale --- Press [shift] --- Press[DISCOUNT]--- Choose the specific discount
item“1.-%DISCOUNT OFF” and press [CASH] key --- Input discount rate “10”--- press [CASH] key to
confirm--- press [V1] to confirm--- press [CASH] to settle accounts.
PCS type:
Note: Before selling PCS type PLU, please set the “CLERK OPERATION/MANUAL INPUT
QTY?” to “YES” in “SET” mode. That is press [Set Cashier] to choose “SET”, press [↑] or [↓] to
choose “CLERK OPERATION”, press [CASH] to enter the menu, choose “MANUAL INPUT
QTY”, press [CASH], press [↑] or [↓] to choose “YES”, and press [CASH] to confirm.
Method1:Press[1] [PLU] key--- input PLU quantity “2”---press [Quantity]--- press [shift]+[DISCOUNT]

13
--- Choose the specific discount item “1.-%DISCOUNT OFF”[CASH]---press [Cash] key--- Input
discount rate “10”---press [Cash] key to confirm the rate---press [V1] to confirm this operation---press
[CASH] to settle accounts.
Method 2 : Press [1] [PLU] key---press [Quantity]--- input PLU quantity “2”and [CASH] key--- press
[shift] --- press [DISCOUNT] --- Choose the specific discount item “1.-%DISCOUNT
OFF”[CASH]---press [Cash] key--- Input discount rate “10”---press [Cash] key to confirm the
rate---press [V1] to confirm this operation---press [CASH] to settle accounts.
3.4.7 Void /Return Operation
When operation is wrong or customer want to cancel the PLU, follow the following method to
cancel the transaction.
Note: Before you do the ‘Void Last Item’, ‘Cancel Previous Item’, ‘Cancel All Items’operation,
please set the “SET/SECURITY SET/MANAGER AND PASSWORD SET/CHANGE” in “Return” mode.
Void Last Item
weight cargo:Press [1] [PLU] key--- Put PLU on the scale--- press [V1] to confirm--- press [2] [PLU]
key--- Put PLU on the scale--- press [V1] ---press [Void] to cancel previous item--- press [1] to choose
the item ‘VOID LAST ITEM’ --- press [CASH] to settle accounts (Cancel sale PLU2).
PCS type:Press [1] [PLU] key --- press [V1] --- press [2] [PLU] key-- press [V1] --- press [Void] to
cancel previous item--- press [1] to choose the item ‘VOID LAST ITEM’---press [CASH] key--- press
[CASH] to settle accounts (Cancel sale PLU2).
Cancel Previous item
When there are several transaction on one receipt, cancel any specified item.
weight cargo: Press [1] [PLU] key--- Put PLU on the scale--- press [V1] --- press [2] [PLU] key--- Put
PLU on the scale--- press [V1] --- press [Void] to cancel previous item--- press [2] to choose the item
‘PREVIOUS VOID’(that is void selectively)---press the PLU number that is needed to void or move the
cursor to the PLU and press [CASH] key---input cancel quantity (Input the cancel quantity of the PLU
displayed on the LCD; if need cancel all the PLU1, skip this step and press[CASH] directly)---press
[CASH] to confirm--- press [CASH] to settle accounts (Cancel sale PLU1).
NOTE: If you don’t input the cancel quantity, press [CASH] to cancel all the PLU1 quantity.
Cancel all items
This function fit for cancel the whole transaction/the whole receipt.
Press [1] [PLU] key--- Put PLU on the scale--- press [V1] to confirm--- press [2] [PLU] key--- Put PLU
on the scale---press [V1]---press [CASH] to settle accounts---press [Void] and input the return PLU
according to the hint---press [1] [PLU] [V1] key---press [2] [PLU] [V1] key---press [CASH] key to
confirm return and refund..
Commodity Return
Press [1] [PLU] key--- Put PLU on the scale--- press [V1] to confirm--- press [2] [PLU] key--- Put PLU
on the scale---press [V1] to confirm--- press [CASH] to settle accounts ---press [Return] and input the
returned PLU--- press [1] [PLU] [V1] key ---press [2] [PLU] [V1] key --- press [CASH] key to confirm
return and refund.
Check the sale data
Press [Clerk] key to check the sale data during selling.

14
3.5 PLU Sales in Barcode
Input the barcode when sell PLU according to cargo barcode. The PLU can be sold at original price,
change price or sell the several PLU at the same time.
eg. Firstly, sell the PLU 1 at the original price; secondly, sell the PLU 1 at the change price; thirdly, sell
the PLU 1 again; fourthly, sell the PLU2 with several quantities and then sell the PLU1.
(Set the PLU of bracode 1 as ‘001’, the original price as $10; and the PLU of barcode 2 is ‘002’, the
original price is $5.)
Press [1] [PLU] key---input number’15’and press [Price]
---press [1] [PLU] key (sell the PLU of barcode 1 at change
price)---press [1] [PLU] key (short time remember the change
price, sell the PLU of barcode 1 at $ 15)---input number ‘6’
and press [QUANTITY]---press [2] [PLU] (sell the PLU of
barcode 2 by quantity)---press [1] [PLU] key (sell the PLU
of barcode 1 and it will recover the original price)---
press [CASH] to settle accounts.
Note: the scale has short-time memory function when
settle accounts with the same receipt: continuously sell
PLU after manual change PLU price, the PLU will be
sold at the price input before. It will not recover the
premier price until do other operation or sell other items.
3.6 Sales Operation in Mode 2
When only one clerk is needed,you can login in Mode 2. V1, V2 and V3 is the key of pending order.
Clerk login in/out
Clerk login in:Press [Set Cashier] --- Input clerk number and password --- press [CASH] key. And the
screen will prompt: the clerk has log in and can do related operation.
Clerk login out:Press [Set Cashier] --- choose ‘CLERK: X’(X refers to Clerk number) --- press [CASH]
--- choose ‘CLERK LOGOUT’--- Press [CASH] and the clerk will log out.
Note: This chapter’s operation can refer to 3.4 chapter “Sales Operation in Mode 1”.
Difference:
Mode1: press “V1, V2, or V3”key after weighting to confirm sell, and press [CASH] key to settle
account.
Mode 2: press [CASH] key after weighting to confirm sell, and press [CASH] key to settle account.
3.7 The Floating Cashier Mode (Online Only)
Floating cashier selling function can be used when supermarkets want a “one person to one person”
selling approach on basis of several cash register scales sharing one network. And any goods selling,
account settling operations and the related statistic can be collected rapidly and sent to the internet
servicer immediately, which tends to be more convenient and efficient.
P.S: 1) This function is valid only in mode 1.
2) The cash register scales should be in the same local area network for this floating cashier selling
function. Any specific operation methods, you can consult webmaster.
Pinnacle Technology Corp
DATE:10.12.0308:05 No:000002
Name Dis Price
QTY Amount
001 10.00 1.29kg 12.90
001 15.00 0.565kg 8.48
001 15.00 0.96kg 14.40
002 5.00 6 30.00
001 10.00 2.335kg 23..35
Total5 $89.10
Cash $89.10
MC:00000001 SNO:00000001Clerk:001

15
E, G.: Press [1] [PLU] key or hotkey [PLU1]on the first scale--- Put PLU1 on the first scale--- press [V1]
to confirm--- Press [2] [PLU] key or hotkey [PLU2] key on the second scale--- Put PLU2 on the
second scale---press [V1] to confirm--- press [CASH] to settle accounts on the second scale.
3.8 Pay by Member Card
Note: Before you do the member card payment, please do the following setting.
Set “SET/MEMBER SET / MANUAL INPUT MEMBER CARD NO.?” to “YES” in SET mode. Then,
set “CLERK OPERATION/PRINT RECEIPT AFTER CHECK OUT?” to “NO” in SET mode, means
“input member card number before sales”. “Yes”means “input member card number after sales”
When the balance of member card is “0”, you cannot pay with member card and screen will prompt with
twinkling.
Print receipt before settle account
Input the member card number--- press [SHIFT]---press [Member] key --- Put PLU barcode 1 on the
scale--- press [V1] --- press [2] [PLU] key--- Put PLU barcode 2 on the scale---press [V1] --- press
[CASH] to settle accounts.
Print receipt after settle account
Press [1] [PLU] key--- Put PLU barcode 1 on the scale--- press [V1] --- press [2] [PLU] key--- Put PLU
barcode 2 on the scale---press [V1]--- Input the member card number--- press [SHIFT]---press [Member]
key--- press [CASH] to settle accounts.
3.9 Hold/Recall Operation/Settle Accounts
Hold Operation can be used to stop the sale when the clients forget to buy some commodities. Take the
items out and continue the same sale with Recall Operation. Another sales can be done before recall
operation.
Note: During hold sale, the clerk should print the hold receipt to the client before; check the hold
number according to the receipt when the client comes back and the recall operation can be do by
inputting hold number.
Method 1: Do Hold Operation with hotkey V1-V3.
Note: Define any hotkey as hold key before using this function. Long press any hotkey on the hotkey board, select hold
key V1(V2 or V3). (Follow steps from chapter 1.5 User-Define Key)
Operation Steps: Press [1] [PLU] key---press [2] [LU] key---Press [V1]to do hold operation.
Method 2: Press [SHIFT] key---press [Hold/Recall] key to check hold record---press [↑] or [↓] key, move the cursor on
the hold record needed to be settled account (20 hold record can be checked)---press [CASH]) key to settle accounts.
Method 3: Input Hold Number---press [SHIFT] key---press[Hold/Recall] key to recall---press [3] [PLU] to sell the
PLU of barcode 3---press[CASH] to settle accounts.
Table of contents
Other Pinnacle Technology Scale manuals

Pinnacle Technology
Pinnacle Technology PS1XA User manual

Pinnacle Technology
Pinnacle Technology LS2R1 User manual

Pinnacle Technology
Pinnacle Technology PS1X series User manual

Pinnacle Technology
Pinnacle Technology LS2R15 User manual

Pinnacle Technology
Pinnacle Technology OS2CX User manual

Pinnacle Technology
Pinnacle Technology LS2RX User manual