NEVER LEAVE HEATER UNATTENDED WHILE
CONNECTED TO A POWER SOURCE
© 2021, Pinnacle Climate Technologies,Inc Ceiling Mounted Electric Heater User’s Manual
5
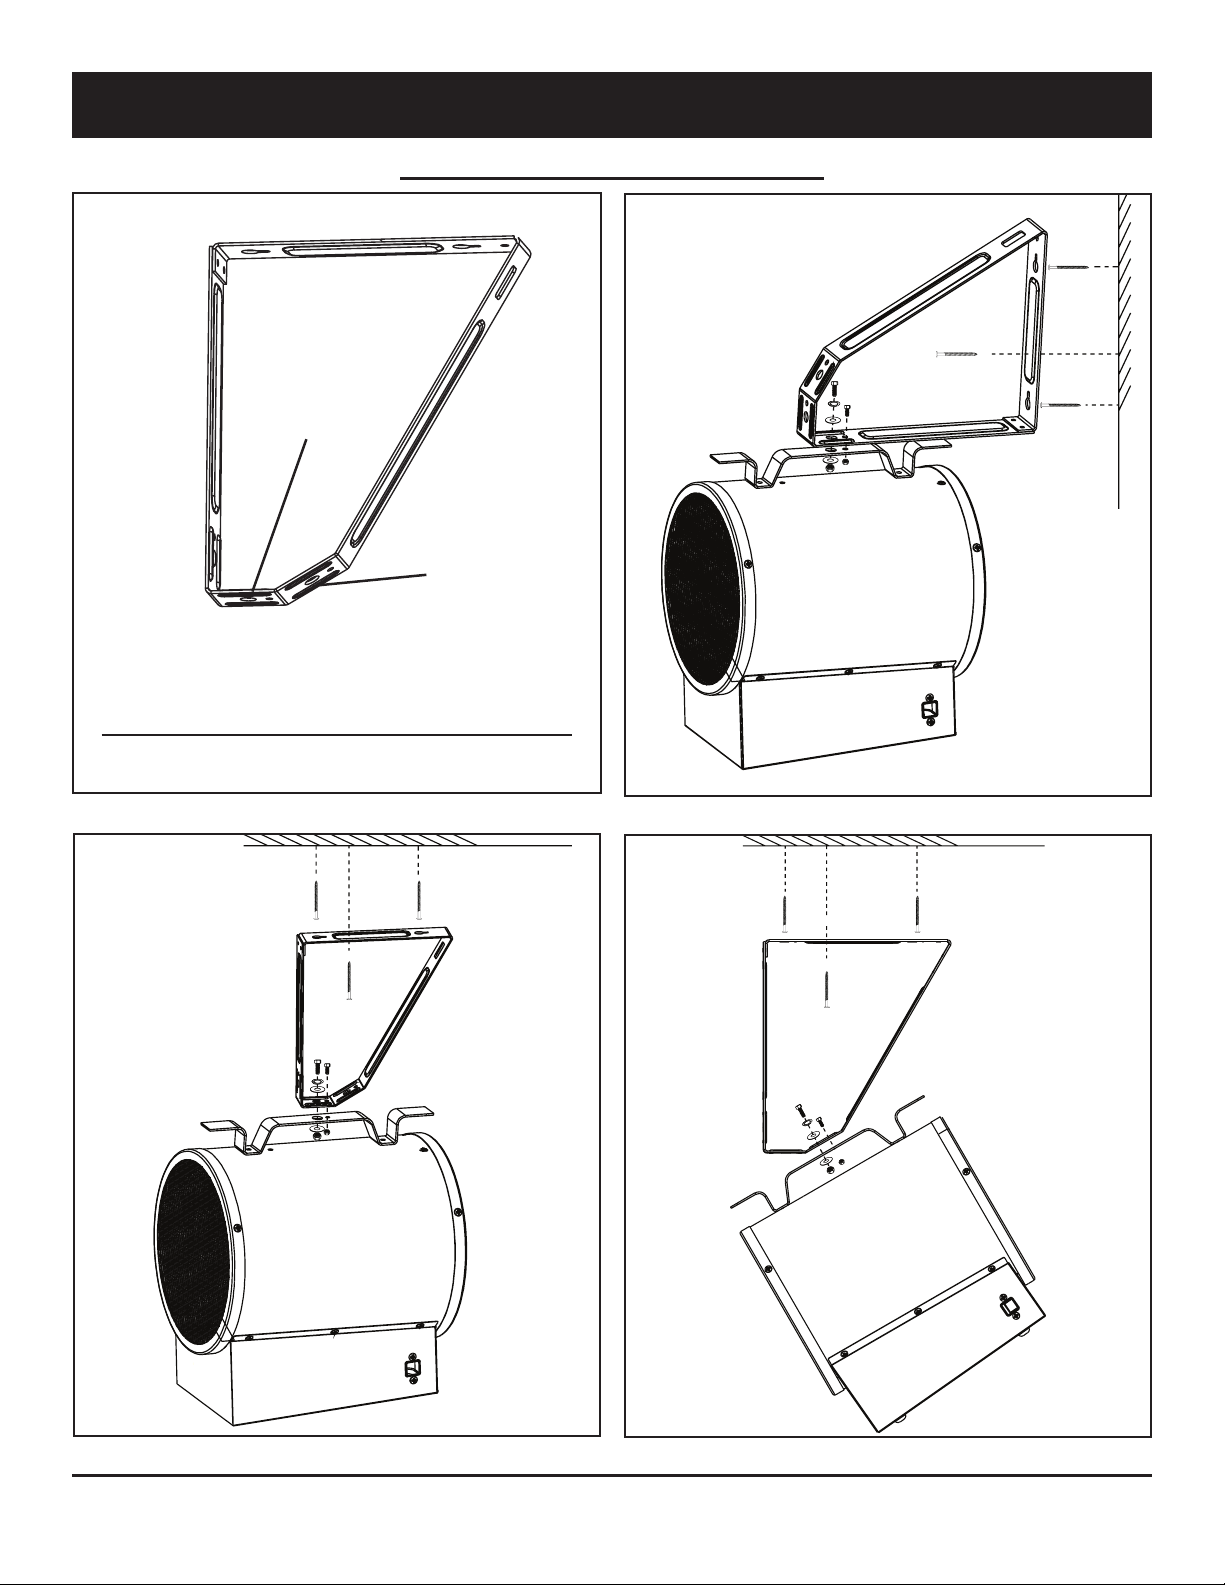
Installation
– Install only in a location where the power-
supply connection will be available
– This heater can be used as a portable heater
or can be mounted to a wall or ceiling.
– Place heater on level and stable surface while
used as a portable heater.
– Follow steps below to mount this heater to a
wall or ceiling.
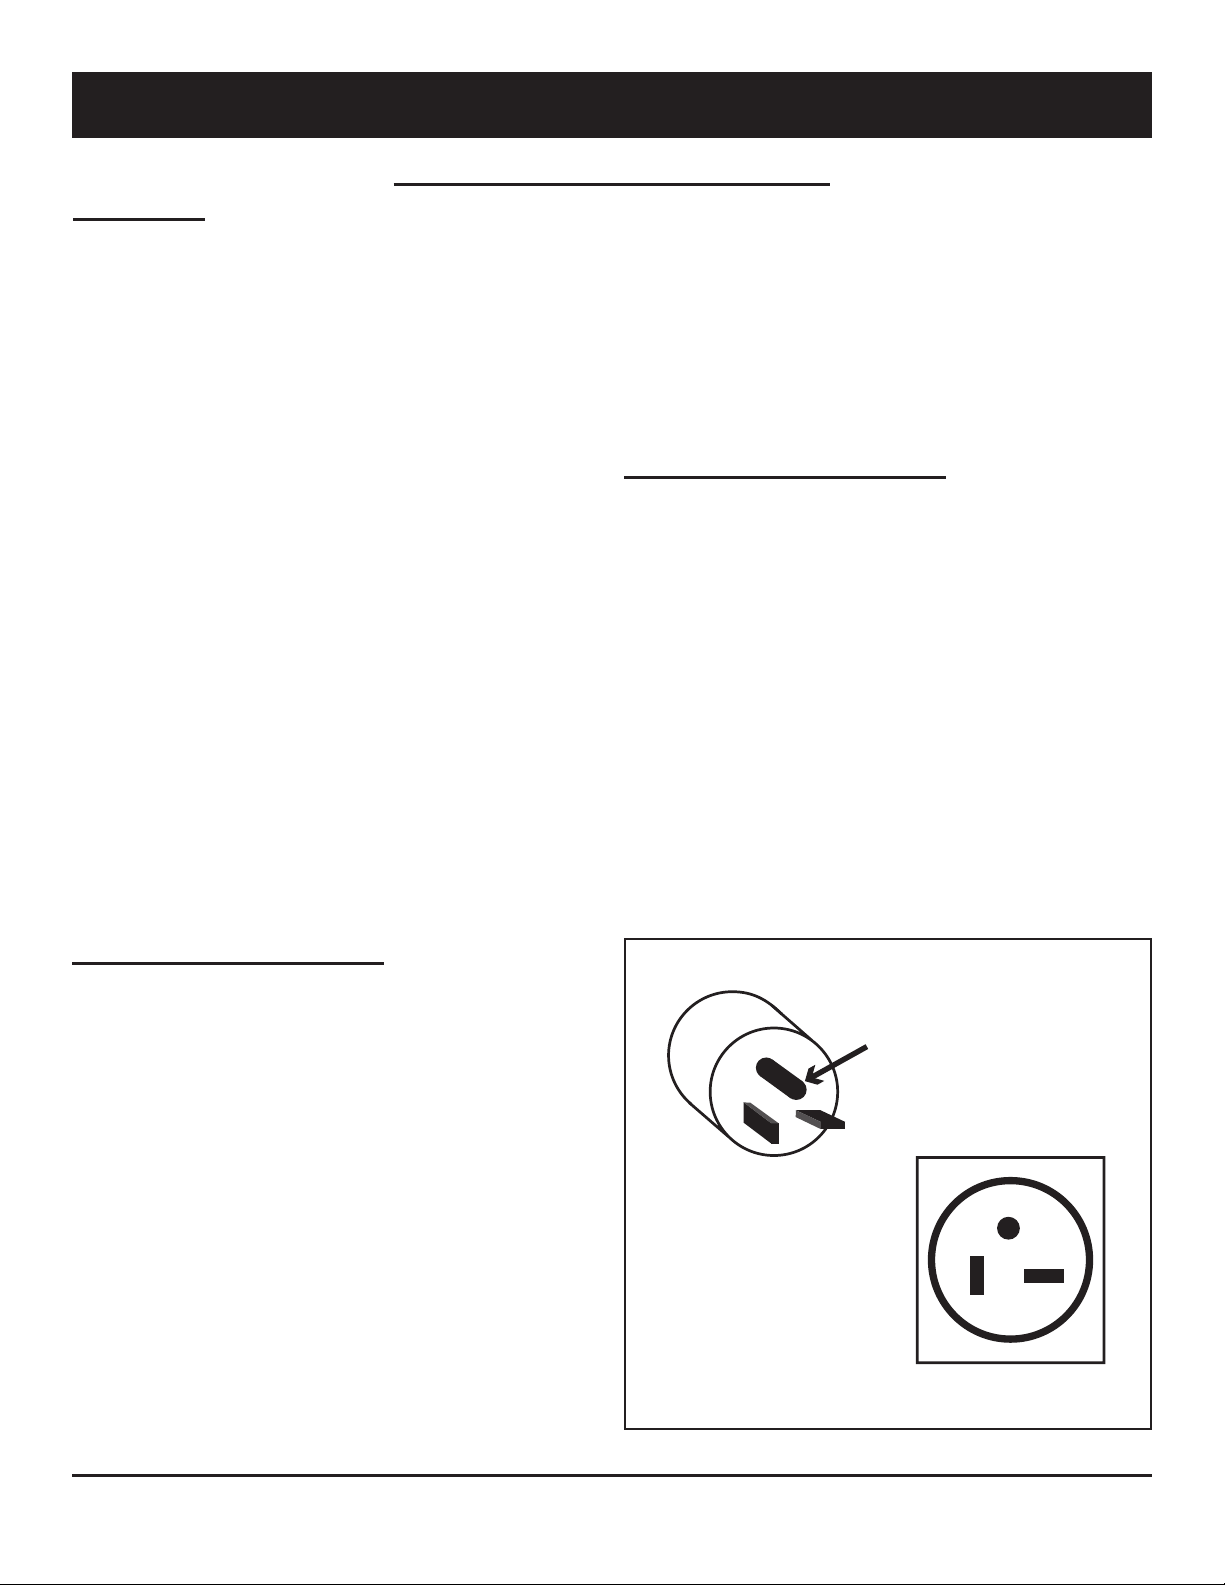
– Use only on 20 ampere branch circuit.
– The mounting bracket is designed to support
the weight of the heater only.
– Disconnect all power coming to heater at main
service panel before wiring or servicing.
– All wiring procedures and connections must
be in accordance with the National and Local
Codes having jurisdiction and the heater must
be grounded.
– Verify the power supply voltage coming to
heater matches the ratings as shown on the
heater nameplate.
– CAUTION: High temperature, risk of fire, keep
electrical cords, drapery, furnishings, and other
combustibles at least 3 feet (0.9 m) from front
of heater. Do not install heater behind doors,
below towel racks, or in an area where it is
subject to being blocked by furniture, curtains
or storage materials. Hot air from the heater
may damage certain fabrics and plastics.
– To reduce the risk of fire do not store or use
gasoline or other flammable vapors and liquids
in the vicinity of the heater.
– When heater is to be wall or ceiling mounted,
the anchoring provision must be sufficient
strength to support the total weight of the
heater plus the weight of the mounting
provisions. Failure to properly secure the
supporting members of the building structure
could allow the heater to fall.
– The following minimum clearances must
be maintained: 30°Tilted, Bottom of Heater
to Floor: 6’ (1.8 M) minimum, 11’ (3.3 M)
recommended maximum Horizontal Airflow,
Bottom of Heater to Floor: 6’ (1.8 M) minimum,
8’ (2.4 M) recommended maximum.
– Do not use this heater for dry out as paint,
plaster, sawdust and drywall sanding dust will
permanently damage the heater and must be
kept out of the heater.
– Make sure the installation and wire connection
are conducted by certain technician otherwise
the electric shock or other hazard would be
possible.
INSTALLATION INSTRUCTIONS
To prevent a
possible re,
injury to persons
or damage to the heater, adhere to the
following:
ENERGIZING
HEATER AT A
VOLTAGE GREATER
THAN THE VOLTAGE PRINTED ON THE
NAMEPLATE WILL DAMAGE THE HEATER
AND VOID THE WARRANTY AND COULD
CAUSE A FIRE.