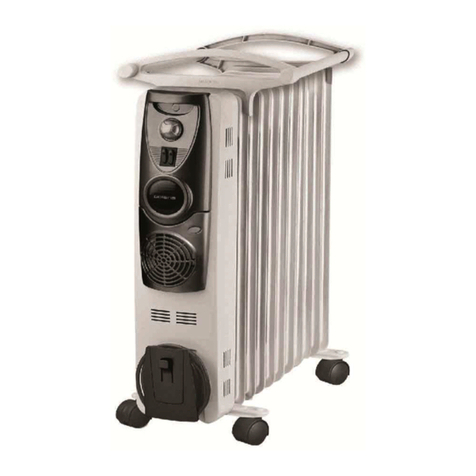
Black & Decker 220UH Owner's manual

PLEASE READ AND SAVE THIS USE AND CARE BOOK.
POR FAVOR LEA ESTE INSTRUCTIVO ANTES DE USAR EL PRODUCTO.
VEUILLEZ LIRE ET CONSERVER CE GUIDE D’ENTRETIEN ET D’UTILISATION.
Utility Heaters
Calentador para uso general
Radiateurs à usage général
Model/Modelo/Modèle
220UH
?
USA/Canada 1-800-231-9786
Mexico 01-800-714-2503
www.blackanddecker.com
Accessories/Parts (USA/Canada) 1-800-738-0245
Accesorios/Partes (EE.UU/Canadá)
Accessoires/Pièces (É.-U./Canada)
220UHPub1000002304 5/6/05 11:17 AM Page 1

2
1
WARNING: To reduce the risk of fire:
❑
Keep combustible materials, such as furniture, pillows, bedding, papers,
clothes and curtains at least 3 feet (0.9m) from the front, sides and rear
of heater when the heater is plugged in.
❑
Do not place heater near a bed, because objects such as pillows or
blankets can fall off the bed and be ignited by heater.
❑
Always unplug from electrical outlet whenever heater is not in use.
❑
Avoid the use of an extension cord because it may overheat and cause a
risk of fire. However, if an extension cord must be used, it shall be of a
minimum size of 14 AWG and rated not less than 1875 watts.
When using any electrical appliances, basic precautions should always be
followed to reduce the risk of fire, electrical shock, and injury to persons
including the following:
❑
Read all instructions before using heater.
❑
Heater is hot when in use. To avoid burns, do not let bare skin touch
hot surface. Unplug and let heater cool down for at least ten (10)
minutes before moving it. Use handles provided.
❑
Extreme caution is necessary when any heater is used by or near
children or invalids, and whenever heater is left operating and
unattended.
❑
Do not operate any heater with a damaged cord or plug or after it
malfunctions or is dropped or damaged in any manner. Return heater to
the nearest authorized service facility for examination, repair, or
electrical or mechanical adjustment. Or call appropriate toll-free
number listed on the cover of this manual.
❑
Do not use outdoors.
❑
This heater is not intended for use in wet or moist locations such as
bathrooms, laundry areas or similar indoor locations. Never locate
heater where it may fall into a bathtub or other water container.
❑
Do not run cord under carpeting. Do not cover cord with throw rugs,
runners, or similar coverings. Arrange cord away from traffic areas, and
where it will not be tripped over.
❑
To disconnect heater, press OFF button, then remove plug from outlet by
pulling the plug, not the cord.
❑
Do not insert or allow foreign objects to enter any ventilation or exhaust
opening, as this may cause an electric shock or fire, or damage heater.
IMPORTANT SAFETY
INSTRUCTIONS
SAVE THESE INSTRUCTIONS.
❑
Aheater has hot and arcing or sparking parts inside. Do not use it in
areas where gasoline, paint or flammable liquids are used or stored.
❑
Use heater only as described in this manual. Any other use not
recommended by the manufacturer may cause fire, electric shock or
injury to persons.
❑
Avoid using heater when sleeping.
❑
To prevent a possible fire, do not block air intakes or exhaust in any
manner. Do not use on soft surface, like bed, where openings may
become blocked.
POLARIZED PLUG
This appliance has a polarized plug (one blade is wider than the other). To reduce the
risk of electric shock, this plug will fit into a polarized outlet only one way. If the plug
does not fit fully in the outlet, reverse the plug. If it still does not fit, contact a
qualified electrician. Do not attempt to modify the plug in any way.
TAMPER-RESISTANT SCREW
This unit is equipped with tamper-resistant screws. To reduce the risk of shock, do not
attempt to remove the front or back housing. There are no user serviceable parts
inside. Repair should be done only by authorized service personnel.
SPECIAL ATTENTION:
The use of an extension cord is not recommended. However, if it is absolutely
necessary, be sure that the cord is (1) No. 14 AWG minimum size and rated no
less than 1875 watts; (2) UL Listed; (3) as short as possible (long cords can
overheat, as well as trip circuit breakers); (4) not used for operating more than one
appliance at a time.
Note: If the power supply cord is damaged, it must be replaced by the
manufacturer or its service agent or a similarly qualified person in order to
avoid a hazard.
220UHPub1000002304 5/6/05 11:17 AM Page 2

How to Use
This appliance is intended for household use only.
Important: For warranty verification, do not remove line cord sticker.
The Advanced Safety Technology™ (AST) system features unique technology built
into your heater that offers protection detailed in the "Special Features" section.
Included in AST is a shock protection device built into the line cord and equipped
with a test button to check operation:
Before Use:
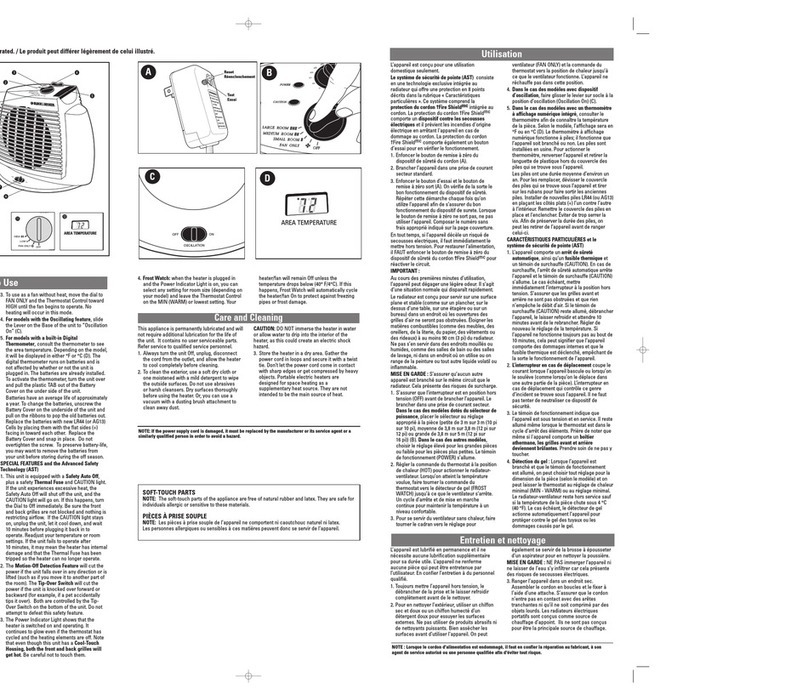
1. Press RESET button on line cord safety device (A).
2. Plug into a regular AC electrical outlet.
3. Press TEST button and RESET button will pop out (see A) to show safety device
is operating properly. Repeat this procedure each time you use heater to
confirm safety device is operational. Should RESET button not pop out, do not
use heater. Call appropriate "800" number on the cover of this book.
At any time, should this unit detect an electrical shock hazard, it will immediately
shut off. To restore power, you must press RESET button on the line cord
protection safety device to reactivate circuit.
Important:
During the first few minutes of initial use, you may notice a slight odor. This is
normal and will quickly disappear. This heater is intended for use on a flat, stable
surface, such as a floor, tabletop, shelf, or desk in a location where the airflow
grille openings won’t be obstructed. Do not use in wet or moist locations, like
bathrooms or laundry areas, or in areas where paint or other flammable or volatile
liquids are used or stored.
Caution: Be sure no other appliances are plugged into same circuit with
heater/fan. A circuit overload could occur.
1. Place heater on a flat, stable surface, such as a floor or tabletop where airflow
grille opening won’t be obstructed. Use fold-down handle when moving unit.
Do not use in wet/moist locations, like bathrooms or laundry areas, or in areas
where paint, flammable, or other volatile liquids are used or stored.
2. Be sure control knob is in the OFF position, then plug heater into a standard
AC outlet. 3. Room Select™ Control: Turn switch to the appropriate
setting for a small (approx. 10' x 10'/3 m x 3 m),
medium (approx. 12'x12'/3.8 m x 3.8 m) or large
(approx. 12'x 16'/3.8m x 5m) room (B).
4. Turn thermostat control to HOT to activate heater. Once
desired room temperature is achieved, lower thermostat
control toward FROST WATCH until unit cycles off.
The thermostat will cycle unit on and off to maintain your comfortable
temperature level.
5. Turn timer knob to the 1 hr., 2 hr., 3 hr. or 4 hr. setting to select how long
you’d like heater to stay on. The unit will shut off automatically once the
selected time runs out. To operate heater continuously, turn timer knob to ON.
Remember to shut unit Off when done.
6. To use as a fan without heat, move control knob to FAN ONLY and thermostat
control toward HOT until fan begins to operate. No heating will occur in
this mode.
4
3
Product may vary slightly from what is illustrated.
1. Fold-down handle
2. Timer knob
3. Control knob
4. CAUTION indicator
5. Heat sensor patch
6. Front grille
7. Roll-over bars
8. Power indicator
9. Thermostat control
RESET TEST
To restore power, you MUST press the RESET button on the line
cord protection safety device to reactivate the circuit.
A
B
220UHPub1000002304 5/6/05 11:17 AM Page 4

7. To turn off, turn thermostat control to FROST WATCH and control knob to Off.
Note: The power indicator light shows heater is on and operating. It continues to
glow even if thermostat has cycled off and heating elements are off.
8. Frost Watch: When heater is plugged in and POWER indicator light is on, you
can select any setting for room size (depending on your model) and leave
thermostat control on toward lower settings or FROST WATCH. Heater will
remain off unless the temperature drops below (40° F/4°C). If this happens,
FROST WATCH will automatically cycle unit on to protect against freezing
pipes or frost damage.
Special features and the Advanced Safety Technology™ (AST) system
1. This unit has a safety auto off, plus a safety thermal fuse and CAUTION light.
If unit experiences excessive heat, the safety auto off will shut off unit, and the
CAUTION light will go on. If this happens, turn control knob to OFF
immediately. Be sure front grille is not blocked and nothing is restricting
airflow. Unplug unit, let it cool down, and wait 10-15 minutes. To reset, plug
unit back in and turn thermostat control to HOT. You can then readjust
temperature or room settings. If unit fails to operate after 15 minutes, it may
mean heater has internal damage and thermal fuse has been tripped so heater
can no longer operate.
2. A built-in tip-over switch will cut power if the unit is accidentally knocked over
forward or backward. To reset, simply place heater in upright position on a
level surface. If it falls forward, the roll-over bars on the front of unit will help
prevent heater from burning surfaces.
3.Even though unit has a cool-touch housing, the front grille
will get hot. Be careful not to touch it during operation.
Heat sensor patch on the front: This patch changes color
when front grille becomes hot to the-touch (C). Do not
touch front of heater when this happens.
Care and Cleaning
This heater is permanently lubricated and will not require additional lubrication.
There are no user serviceable parts. Refer service to qualified service personnel.
1. Always turn heater off, unplug, and allow it to cool completely before
cleaning.
2. To clean exterior, use a soft dry cloth or one moistened with mild detergent to
wipe outside surfaces. Do not use abrasives or harsh cleansers. Dry surfaces
thoroughly before using heater. Or, you can use a vacuum with a dusting brush
attachment to clean away dust.
Caution: Do not immerse heater in water or allow water to drip into interior of
heater, as this could create an electric shock hazard.
3. Store heater in a cool, dry location in its original carton. Gather power cord in
loops and secure with a twist tie. Don’t let power cord come in contact with
sharp edges or get compressed by heavy objects. Portable electric heaters are
designed for space heating as a supplementary heat source. They are not
intended to be the main source of heat.
6
5
INSTRUCCIONES IMPORTANTES
DE SEGURIDAD
ADVERTENCIA: Para reducir el riesgo de incendio:
❑
Mientras el calefactor se encuentre conectado, mantenga todos los
materiales combustibles, tales como muebles, almohadas, ropa de
cama, papeles, prendas de vestir y cortinas a una distancia mínima de 3
pies (0,9m) de la parte frontal y posterior del calefactor así como de los
costados del mismo.
❑
No coloque el calefactor cerca de una cama, ya que las almohadas o
mantas pueden caer sobre el calefactor y prenderse fuego.
❑
Desconecte siempre el calefactor de la toma de corriente eléctrica
cuando se encuentre fuera de uso.
❑
Evite utilizar un cable de extensión ya que puede calentarse demasiado
y presentar así un riesgo de incendio. No obstante, si debe utilizarse un
cable de extensión, debe medir como mínimo 14 AWG (1,63 mm) y
tener una capacidad no menor de 1875 watts.
Cuando se utilizan aparatos eléctricos, siempre se deben tomar ciertas
precauciones a fin de reducir el riesgo de un incendio, un choque
eléctrico y lesiones a las personas, incluyendo las siguientes:
❑
Lea todas las instrucciones antes de utilizar el calefactor.
❑
El calefactor se calienta cuando está en funcionamiento. Para evitar
quemaduras, no toque ninguna superficie caliente. Desconecte el
calefactor y permita que se enfríe durante diez (10) minutos como
mínimo antes de moverlo. Utilice los mangos que se proporcionan.
❑
Es necesario vigilar a los niños o a las personas minusválidas que
utilicen el calentador; del mismo modo, se debe supervisar el uso del
calentador cerca de ellos y cuando el aparato se encuentra en uso sin
supervisión.
❑
No opere este artefacto si tiene el cable o enchufe dañado, después de
un mal funcionamiento o si se ha caído o dañado de alguna manera.
Lleve el calefactor al centro de servicio autorizado más cercano para su
revisión, reparación o ajuste eléctrico o mecánico. También puede
llamar gratis al número apropiado que aparece en la cubierta de este
manual.
❑
Este aparato no se debe utilizar a la intemperie.
❑
El calefactor no está diseñado para su uso en áreas mojadas o húmedas,
tales como baños, habitaciones donde se lava ropa u otras áreas
interiores similares. Nunca coloque el calefactor en un lugar desde
donde puede caerse a una bañera o recipiente con agua.
❑
No tienda el cable debajo de una alfombra. No cubra el cable con
alfombrillas, camineros o tejidos similares. Coloque el cable de manera
que se mantenga alejado de las zonas de tráfico y que nadie se enrede
con él.
C
220UHPub1000002304 5/6/05 11:17 AM Page 6

8
7
ENCHUFE POLARIZADO
Este artefacto posee un enchufe polarizado (un contacto es más ancho que el otro).
Para reducir los riesgos de choque eléctrico, este enchufe entra en un contacto
polarizado de una sola manera. Si el enchufe no entra en su contacto, inviértalo.
Si aun así no entra, busque la ayuda de un electricista calificado. No intente hacerle
ninguna modificación al enchufe.
TORNILLO DE SEGURIDAD
Este aparato cuenta con tornillos de protección contra alteraciones. A fin de
reducir el riesgo de un choque eléctrico, no trate de remover el alojamiento
trasero ni el delantero. El interior del aparato no contiene piezas de utilidad
al consumidor. Toda reparación se debe de llevar a cabo solamente por personal
de servicio autorizado.
CUIDADO PARTICULAR
No se recomienda el uso de un cable de extensión. Sin embargo, si esto
es indispensable, asegúrese que el cable (1) sea No. 14 AWG con calificación
no menor de 1875 watts; (2) inscrito por UL ; (3) lo más corto posible (los cables
largos se pueden sobrecalentar o pueden hacer disparar los interruptores);
(4) no sea utilizado para el funcionamiento de más de un aparato a la vez.
Nota: Si el cordón de alimentación es dañado, éste debe ser reemplazado
por el fabricante o su agente de servicio o por personal calificado para evitar
el riesgo.
CONSERVE ESTAS
INSTRUCCIONES.
❑
Para desconectar el calefactor, presione el botón OFF (apagado). Luego
retire el enchufe de la toma de corriente sujetando el enchufe, no el
cable.
❑
No inserte ni permita que ingresen objetos extraños en ninguna
abertura de ventilación o de escape. Esto podría producir un choque
eléctrico o un incendio, o dañar el calefactor.
❑
Dentro del calefactor se encuentran piezas calientes y piezas que
emiten chispas. No lo utilice en áreas donde se utiliza o guarda
gasolina, pintura u otros líquidos inflamables.
❑
Utilice el calefactor solamente según las instrucciones de este manual.
Cualquier otro uso no recomendado por el fabricante podría ocasionar
un incendio, un choque eléctrico o lesiones físicas.
❑
Evite utilizar el calefactor mientras duerme.
❑
Para prevenir la posibilidad de un incendio, no obstruya las entradas o
los escapes de aire de ninguna forma. No coloque el calefactor sobre
una superficie suave, como una cama, ya que podría obstruir las
entradas de aire.
Este producto puede variar ligeramente del que aparece ilustrado.
1. Mango plegable
2. Perilla del cronómetro
3. Perilla de control
4. Luz indicadora de precaución
5. Sensor de temperatura
6. Rejilla frontal
7. Barras de protección
8. Indicador de encendido
9. Control de termostato
Reinicio Prueba
Para restaurar la potencia, uno debe presionar el botón de reinicio (RESET)
del dispositivo de protección del cable a fin de reactivar el circuito.
A
220UHPub1000002304 5/6/05 11:17 AM Page 8
Table of contents
Languages:
Other Black & Decker Electric Heater manuals

Black & Decker
Black & Decker BDOH200 Installation instructions

Black & Decker
Black & Decker STANLEY ST-02-230-E User manual

Black & Decker
Black & Decker BDHF30 Installation instructions

Black & Decker
Black & Decker BHDR401B User manual

Black & Decker
Black & Decker 200UH Installation instructions

Black & Decker
Black & Decker BDHF601 Installation instructions

Black & Decker
Black & Decker BDHF500 Installation instructions

Black & Decker
Black & Decker BDOH100 Series Installation instructions

Black & Decker
Black & Decker BDHF601 Installation instructions

Black & Decker
Black & Decker BDHF575 Installation instructions