manuals.online logo
Brands
  1. Home
  2. •
  3. Brands
  4. •
  5. Pioneer
  6. •
  7. Dj Equipment
  8. •
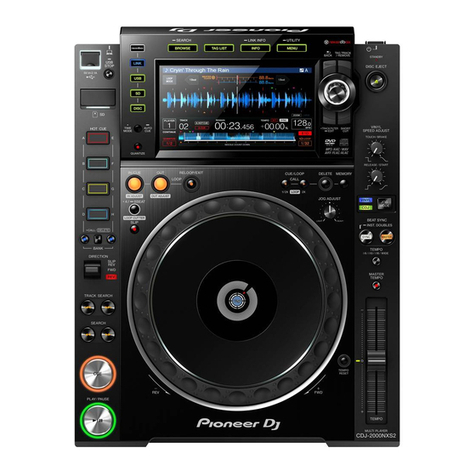
  9. Pioneer CDJ-2000nexus Instruction Manual

Pioneer CDJ-2000nexus Instruction Manual

1
Multi Player
CDJ-2000nexus
CDJ-900nexus
XDJ-1000
CDJ-2000
CDJ-900
TRAKTOR Series
Connection Guide
2
Introduction
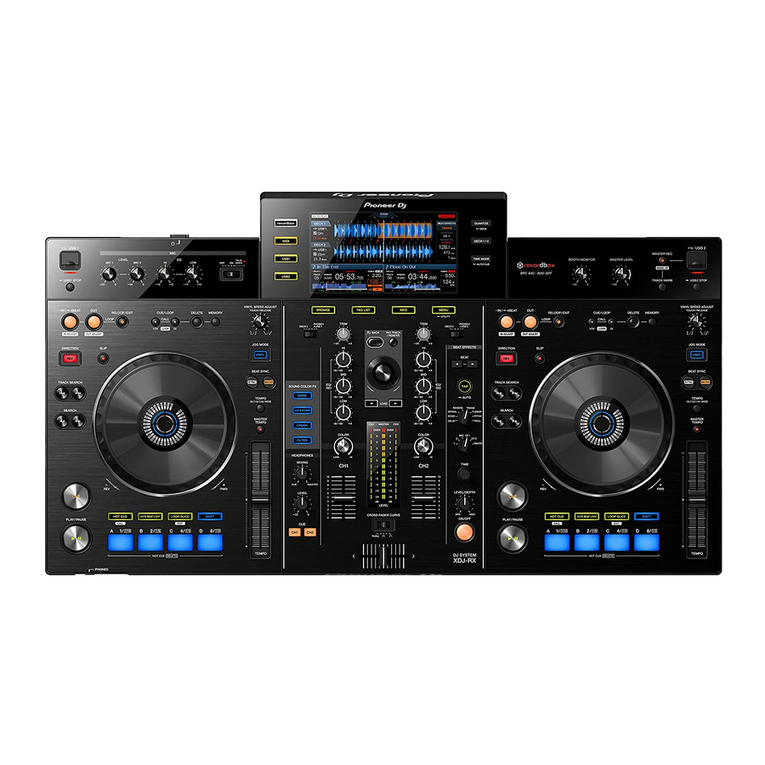
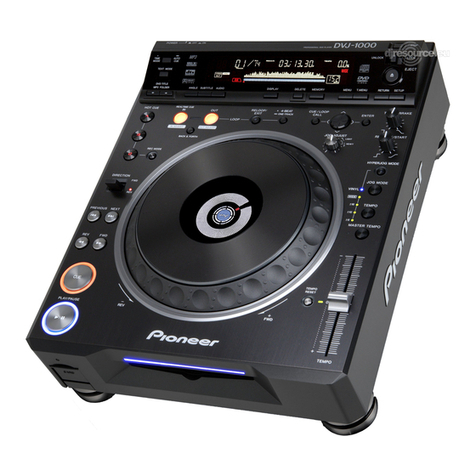
The CDJ-2000nexus, CDJ-900nexus, XDJ-1000, CDJ-2000 and CDJ-900 are equipped with a special interface
that enables high-precision control for the TRAKTOR series of software manufactured by Native
Instruments. Connecting these products to the TRAKTOR series provides USB-HID control of the series
without using a control disk.
These products can also be used as audio output devices for the TRAKTOR series.
These guidelines explain the basic operations when the products are connected to the TRACTOR series.
Refer to the instruction manuals provided with the TRAKTOR series for further details on operation
methods.
Pioneer DJ is a registered trademark of Pioneer DJ Corporation.
TRAKTOR is the registered trademark of Native Instruments GmbH.
Windows®, Windows 8®, Windows 7® are the registered trademarks and trademarks of Microsoft
Corporation registered in the United States of America and other countries.
Mac OS is the trademark of Apple Inc. registered in the United States of America and other countries.
3
Connecting up to the TRAKTOR Series
Preparations
Update the firmware of your CDJ/XCJ to the latest version. Please refer to our website
(http://pioneerdj.com/support/ ) for details of upgrading the firmware.
Update the TRAKTOR series to the latest version. Please refer to the Native Instruments website
(http://www.native-instruments.com/) for details on system requirements.
One USB cable is required for each CDJ/XDJ.
Installation of the driver software is not required when using the CDJ/XDJ as a controller. When using
the CDJ/XDJ as an audio output device, installation of the driver software is required on Windows and
installation of the Mac OS tool is required on Mac.
4
Connections
Connect CDJ/XDJ to be used to a computer using a USB cable.
*Up to 4 CDJ/XDJ can be connected to the TRAKTOR series.
CDJ-2000nexus
■CDJ-2000nexus
Computer
USB cable
USB cable
Audio cable
Audio cable
Power cable
To an AC outlet
Rear panel
DJ mixer
CDJ-2000nexus
TRAKTOR
CDJ/XDJ
5
Using CDJ/XDJ
as TRAKTOR Series Controllers
Switch on the power to all units once the connections have been made. Then, set up the CDJ/XDJ in
accordance with the following procedures.
1
When using either the CDJ-2000 or CDJ-900, press and hold the [MENU] button for at least one
second to enter the [UTILITY] mode. Select [ADVANCED] for the [HID SETTING] using the rotary
selector and then press [MENU] button to exit [UTILITY] mode.
This action is not required when using the CDJ-2000nexus, CDJ-900nexus and XDJ-1000.
2
Press the [LINK] button on the CDJ/XDJ and then select [USB MIDI] for the [CONTROL MODE]. Press
the rotary selector to set the parameter. The CDJ/XDJ is now recognized by the TRAKTOR series.
3
When [Turn SELECTOR to choose TRAKTOR deck] is displayed on the CDJ/XDJ’s main display area,
rotate the rotary selector to select the deck to be controlled from A to D. The parameters are set by
pressing the rotary selector.
As described above, the TRAKTOR series can now be controlled by the CDJ/XDJ.
ROTARY SELECTOR
[MENU] button
[LINK] button
6
Operating the TRAKTOR Series with CDJ/XDJ Buttons
The default settings are shown below.
CDJ-2000nexus
CDJ-2000nexus buttons
TRAKTOR functions
1
PLAY/ PAUSE
PLAY/ PAUSE
2
CUE
CUE
3
SEARCH
SEARCH BWD/FWD
4
TRACK SEARCH
PREV/NEXT TRACK
5
SLIP
FLUX MODE
6
LOOP MODE
AUTO LOOP 4、LOOP/2
7+6
Press[6] while pressing
down on [7]
AUTO LOOP8、LOOP*2
7
HOT CUE REC/CALL
SHIFT
8
HOT CUE C
SELECT/
SET+STORE HOTCUE4
7+8
Press[8] while pressing
down on [7]
DELETE HOTCUE4
9
HOT CUE B
SELECT/
SET+STORE HOTCUE3
7+9
Press[9] while pressing
down on [7]
DELETE HOTCUE3
10
HOT CUE A
SELECT/
SET+STORE HOTCUE2
7+10
Press[10] while pressing
down on [7]
DELETE HOTCUE2
11
QUANTIZE
SNAP
12
TIME MODE/AUTO CUE
REMAINING/ELAPSED TIME
13
LINK
CONECT TO TRAKTOR
14
LOOP IN/CUE
LOOP IN/IN ADJUST
15
LOOP OUT
LOOP OUT/OUT ADJUST
16
RELOOP/EXIT
RELOOP/EXIT
17
JOG DIAL
JOG WHEEL
3+17
Turn [17] while pressing
down on [3]
FAST SEEK
18
NEEDLE SEARCH
SEEK POSITION
19
ROTARY SELECTOR
ROTATE:TREE/
LIST SELECT UP/DOWN
PUSH:LOAD SELECTED
LONG PRESS:
REASSING DECK
20
BACK
BACK
21
TAG TRACK / REMOVE
SHOW TRACK
22
DISC EJECT
DECK UNLOAD
23
CUE/LOOP CALL
PREV/NEXT CUE/LOOP
24
DELETE
DELETE CUE/LOOP
25
MEMORY
STORE CUE/LOOP
26
JOG MODE
JOG MODE
7
7
BEAT SYNC
BEAT SYNC
28
BEAT SYNC MASTER
BEAT SYNC MASTER
29
TEMPO ±6/±10/
±16/WIDE
TEMPO RANGE
30
MASTER TEMPO
KEY LOCK
31
TEMPO
TEMPO
32
TEMPO RESET
TEMPO RESET


8
CDJ-900nexus
CDJ-900nexus buttons
TRAKTOR functions
1
PLAY/ PAUSE
PLAY/ PAUSE
2
CUE
CUE
3
SEARCH
Search BWD/FWD
4
TRACK SEARCH
Prev Track / Next Track
5
JOG DIAL
Scratch (Vinyl) / Pitch Bend
Turn [5] while pressing
down on [3]:Fast Seek
6
DIRECTION
---
7
SLIP
Flux Mode
8
IN
Loop In
Press Loop In to enter Loop In
Adjust mode while loop is engaged
9
BEAT DIVIDE:
3/4
1/3
1/2
1/4
1/8
Delete Cue /Loop
Hot Cue –2
Hot Cue –3
Hot Cue –4
Hot Cue –5
while pressing down on 3/4
buttons:DELETE HOTCUE
10
QUANTIZE
Snap
11
TIME MODE
Remaining/Elapsed Time
12
USB STOP
---
13
SOURCE SELECT
(LINK)
Connect to PC
14
OUT
Loop Out
Press Loop Out to enter Loop Out
Adjust mode while loop is engaged
15
BROWSE
---
16
RELOOP/EXIT
Reloop/Exit
17
4-BEAT LOOP
4 beat auto Loop
18
INFO
---
19
BACK
Back
9
20
TAG TRACK/
REMOVE
Show Tracks
21
DISC EJECT
Unload
22
ROTARY SELECTOR
ROTATE:TREE/LIST SELECT
UP/DOWN
PUSH:LOAD SELECTED
LONG PRESS:REASSING DECK
23
TOUCH/RELEASE
---
24
CUE/LOOP CALL
Prev/Next Cue/Loop
25
MEMORY
Store Cue /Loop
26
JOG MODE
Jog Mode
27
DELETE
Delete Cue /Loop
28
BEAT SYNC
Sync / Master
29
TEMPO ±6/±10/
±16/WIDE
Tempo +/-6 +/-10 +/-16
+/-100
30
MASTER TEMPO
KEY LOCK
31
TEMPO
TEMPO
10
XDJ-1000
XDJ-1000 buttons
TRAKTOR functions
1
PLAY/ PAUSE
PLAY/ PAUSE
2
CUE
CUE
3
SEARCH
Search BWD/FWD
4
TRACK SEARCH
Prev Track / Next Track
5
JOG DIAL
Scratch (Vinyl) / Pitch Bend
Turn [5] while pressing
down on [3]:Fast Seek
6
DIRECTION
Delete cue points
7
RELOOP/EXIT
Reloop/Exit
8
OUT
Loop Out
Press Loop Out to enter Loop Out
Adjust mode while loop is engaged
9
IN
Loop In
Press Loop In to enter Loop In
Adjust mode while loop is engaged
10
TouchDisplay
---
11
11
TEMPO
Tempo
12
BACK
Back
13
TAG TRACK /
REMOVE
Show Tracks
14
ROTARY SELECTOR
ROTATE:TREE/LIST SELECT
UP/DOWN
PUSH:LOAD SELECTED
LONG PRESS:REASSING DECK
15
TOUCH/RELEASE
ADJUST
---
16
JOG MODE
Jog Mode
17
TEMPO ±6/±10/
±16/WIDE
Tempo +/-6 +/-10 +/-16 +/-100
18
MASTER TEMPO
Key Lock
11
CDJ-2000
CDJ-2000 buttons
TRAKTOR functions
1
PLAY/ PAUSE
PLAY/ PAUSE
2
CUE
CUE
3
SEARCH
SEARCH BWD/FWD
4
TRACK SEARCH
PREV/NEXT TRACK
5
4 BEAT LOOP/
LOOP CUTTER
AUTO LOOP 4
LOOP SIZE/2
6
HOT CUE REC/CALL
SHIFT
7
HOT CUE C
SELECT/
SET+STORE HOTCUE4
6+7
Press[7] while pressing
down on [6]
DELETE HOTCUE4
8
HOT CUE B
SELECT/
SET+STORE HOTCUE3
6+8
Press[8] while pressing
down on [6]
DELETE HOTCUE3
9
HOT CUE A
SELECT/
SET+STORE HOTCUE2
6+9
Press[9] while pressing
down on [6]
DELETE HOTCUE2
10
LOOP IN/CUE
LOOP IN/IN ADJUST
11
LOOP OUT
LOOP OUT/OUT ADJUST
12
RELOOP/EXIT
RELOOP/EXIT
13
JOG DIAL
JOG WHEEL
14
NEEDLE SEARCH
SEEK POSITION
15
ROTARY SELECTOR
ROTATE:TREE/
LIST SELECT UP/DOWN
PUSH:LOAD SELECTED
16
BACK
TREE/LIST SWITCH
17
TAG TRACK/REMOVE
TREE/EXPAND/COLLAPSE
18
DISC EJECT
DECK UNLOAD
19
CUE/LOOP CALL
PREV/NEXT CUE/LOOP
20
DELETE
DELETE CUE/LOOP
21
MEMORY
STORE CUE/LOOP
22
JOG MODE
JOG MODE
23
TEMPO ±6/±10/
±16/WIDE
TEMPO RANGE
24
MASTER TEMPO
KEY LOCK
6+24
Press[9] while pressing
down on [6]
SYNC
25
TEMPO
TEMPO
26
TEMPO RESET
TEMPO RESET
12
CDJ-900
CDJ-900 buttons
TRAKTOR functions
1
PLAY/ PAUSE
PLAY/ PAUSE
2
CUE
CUE
3
SEARCH
SEARCH BWD/FWD
4
TRACK SEARCH
LOAD PREV/NEXT
5
BEAT SELECT
LOOP SIZE SWITCH
6
AUTO BEAT LOOP 8
1/2、8
7
AUTO BEAT LOOP 4
1/4、4、1/2
8
AUTO BEAT LOOP 2
1/8、2
9
AUTO BEAT LOOP 1
1/16、1、1/4
10
LOOP IN/CUE
LOOP IN/IN ADJUST
11
LOOP OUT
LOOP OUT/OUT ADJUST
12
RELOOP/EXIT
RELOOP/EXIT
13
JOG DIAL
JOG WHEEL
14
ROTARY SELECTOR
ROTATE:TREE/
LIST SELECT UP/DOWN
PUSH:LOAD SELECTED
15
BACK
TREE/LIST SWITCH
16
TAG TRACK/REMOVE
TREE/EXPAND/COLLAPSE
17
DISC EJECT
DECK UNLOAD
18
CUE/LOOP CALL
PREV/NEXT CUE/LOOP
19
DELETE
DELETE CUE/LOOP
20
MEMORY
STORE CUE/LOOP
21
JOG MODE
JOG MODE
22
SLIP
SYNC
23
TEMPO ±6/±10/
±16/WIDE
TEMPO RANGE
24
MASTER TEMPO
KEY ON/LOCK
25
TEMPO
TEMPO
If the mappings are changed, various TRAKTOR series functions can be assigned to any of the CDJ/XDJ’s
buttons and knobs. Refer to the instruction manuals provided with the TRAKTOR series for further details.
13
Using CDJ/XDJ as
TRAKTOR Series Audio Output Devices
Set up the computer and TRATOR series in accordance with the following procedures.
When Using Windows® (Supported OS *:Windows 8 / Windows 7)
1. Install the driver software into the computer.
Please download the latest version of your CDJ/XDJ from the following website.
(http://pioneerdj.com/support/ )
2. Select [Pioneer CDJ ASIO] in [File] → [Audio Setup] in the TRAKTOR series.
3. The CDJ/XDJ will be automatically selected as the audio output device.
If it is not selected automatically, set the necessary parameter manually from [File] →
[Audio Setup] → [Output Routing].
* As the CDJ/XDJ's ASIO driver is 32-bit, be sure to use the 32-bit version of TRAKTOR. Please see the Native
Instrument Support site for further details of how to install the 32-bit version.
When Using Mac OS
It is not necessary to install the driver software. Set up the computer in accordance with the following
procedures if multiple CDJ/XDJs are to be used as audio output device.
Pioneer provides the Mac OS tool that helps setting up the procedures.
Download the CDJ Aggregator from the “Software & firmware updates” from the website below.
(http://pioneerdj.com/support/)
Unzip the downloaded file and follow the procedures below.
1. Connect the CDJ/XDJ (or players, if more than one are to be connected) to the computer using a USB
cable.
2. Double click the [CDJ Aggregator] to create a [Pioneer CDJ] device set.
3. Select the Device set created in the above process 2 from [File] →[Audio Setup] on the TRAKTOR
series.
4. The CDJ/XDJ will be automatically selected as the audio output device.
If the settings are not made automatically, set the necessary parameters manually from [File] →
[Audio Setup] → [Output Routing].
14
Copyright○
c2015 Pioneer DJ Corpration.
All right reserved.
Pioneer DJ Corporation
1-1, Shin-ogura, Saiwai-ku, Kawasaki-shi, Kanagawa 212-0031, Japan

Other manuals for CDJ-2000nexus

2

This manual suits for next models

4

Other Pioneer Dj Equipment manuals

Pioneer DJM 909 - Battle Mixer W/Effects Setup guide

Pioneer

Pioneer DJM 909 - Battle Mixer W/Effects Setup guide

Pioneer DVJ-1000 User manual

Pioneer

Pioneer DVJ-1000 User manual

Pioneer DJM-850 Use and care manual

Pioneer

Pioneer DJM-850 Use and care manual

Pioneer DDJ-WEGO3 User manual

Pioneer

Pioneer DDJ-WEGO3 User manual

Pioneer SVJ-DL01D Pro DJ Quick start guide

Pioneer

Pioneer SVJ-DL01D Pro DJ Quick start guide

Pioneer DDJ-WEGO3 Use and care manual

Pioneer

Pioneer DDJ-WEGO3 Use and care manual

Pioneer XDJ-AERO Instruction Manual

Pioneer

Pioneer XDJ-AERO Instruction Manual

Pioneer DJM-700-S User manual

Pioneer

Pioneer DJM-700-S User manual

Pioneer Serato DJ Edition DDJ-S1 User manual

Pioneer

Pioneer Serato DJ Edition DDJ-S1 User manual

Pioneer DDJ-RX User manual

Pioneer

Pioneer DDJ-RX User manual

Pioneer DDJ-SZ User manual

Pioneer

Pioneer DDJ-SZ User manual

Pioneer DDJ-SB2 User manual

Pioneer

Pioneer DDJ-SB2 User manual

Pioneer EFX-500 User manual

Pioneer

Pioneer EFX-500 User manual

Pioneer DDJ-ERGO User manual

Pioneer

Pioneer DDJ-ERGO User manual

Pioneer CDJ-850 User manual

Pioneer

Pioneer CDJ-850 User manual

Pioneer DDJ-SX2 User manual

Pioneer

Pioneer DDJ-SX2 User manual

Pioneer CDJ-2000NXS2 User manual

Pioneer

Pioneer CDJ-2000NXS2 User manual

Pioneer DDJ-SP1 Mounting instructions

Pioneer

Pioneer DDJ-SP1 Mounting instructions

Pioneer XDJ-R1 User manual

Pioneer

Pioneer XDJ-R1 User manual
Pioneer DJM-450 User manual

Pioneer

Pioneer DJM-450 User manual

Pioneer TRAKTOR 2 DJM-T1 User manual

Pioneer

Pioneer TRAKTOR 2 DJM-T1 User manual

Pioneer CDJ-900 User manual

Pioneer

Pioneer CDJ-900 User manual

Pioneer XDJ-AERO User manual

Pioneer

Pioneer XDJ-AERO User manual

Pioneer STZ-D10T-G User manual

Pioneer

Pioneer STZ-D10T-G User manual

Popular Dj Equipment manuals by other brands

Showven Circle Flamer X-F1800 user manual

Showven

Showven Circle Flamer X-F1800 user manual

thomann Thon DJ Table Z-Style Assembly instructions

thomann

thomann Thon DJ Table Z-Style Assembly instructions

Event Lighting Fresnel user manual

Event Lighting

Event Lighting Fresnel user manual

Adkins LED MINI MOVING HEAD user manual

Adkins

Adkins LED MINI MOVING HEAD user manual

Explo X2 Wave Flamer manual

Explo

Explo X2 Wave Flamer manual

ACME LED-MTX36 HEX user manual

ACME

ACME LED-MTX36 HEX user manual

Numark PT01 Scratch user guide

Numark

Numark PT01 Scratch user guide

Venue Tetra Beam manual

Venue

Venue Tetra Beam manual

BION tellus point round xs user manual

BION

BION tellus point round xs user manual

ProLights ARCLED7307HD user manual

ProLights

ProLights ARCLED7307HD user manual

ADJ ENTOUR HAZE PRO User instructions

ADJ

ADJ ENTOUR HAZE PRO User instructions

American DJ Emerald Scan User instructions

American DJ

American DJ Emerald Scan User instructions

Artecta A0320100 user manual

Artecta

Artecta A0320100 user manual

Chauvet Professional COLORdash Par-H12 IP user manual

Chauvet Professional

Chauvet Professional COLORdash Par-H12 IP user manual

Chauvet Professional Ovation P-56WW user manual

Chauvet Professional

Chauvet Professional Ovation P-56WW user manual

Blizzard Verismo Fresnel WW manual

Blizzard

Blizzard Verismo Fresnel WW manual

Ibiza SCRATCH 200 user manual

Ibiza

Ibiza SCRATCH 200 user manual

SGM Q?7 user manual

SGM

SGM Q?7 user manual

manuals.online logo
manuals.online logoBrands
  • About & Mission
  • Contact us
  • Privacy Policy
  • Terms and Conditions

Copyright 2025 Manuals.Online. All Rights Reserved.