manuals.online logo
Brands
  1. Home
  2. •
  3. Brands
  4. •
  5. Pioneer
  6. •
  7. Stereo Receiver
  8. •
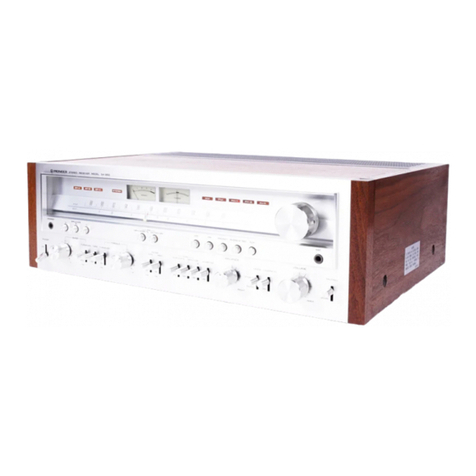
  9. Pioneer sx-550 User manual

Pioneer sx-550 User manual

e*:g:ryg**
€*l
3e
F\
it
.l1T'"
s.
.{}
*
"..)'.)'i :
(v)rrlnNeErr
All manuals and user guides at all-guides.com
all-guides.com
All manuals and user guides at all-guides.com
all-guides.com
All manuals and user guides at all-guides.com
all-guides.com
All manuals and user guides at all-guides.com
t
9. ADJUSTING PROCEDURES
9. 1 AM SECTION
1. Through a 1k ohm resistor, connect an AM
signal generator to the AM antenna terminal.
Set for 400H2 at 30dB and 30Vo modulation.
2. Connect AC VM (Voltmeter) to TAPE REC
jack (L or R).
3. Set FUNCTION switch to AM position.
4. Set AM SG and SX-550 dial indication to point
A (600kHz).
5. Adjust TO for rnurirnum indication on AC VM.
6. Set AM SG and SX-550 dial indication to point
C (1,400kH2).
TC+
ffi
ffi i
EiX-EiE;cI
7. Adjust TC4 for maximum indication on AC
VM.
8" Again set AM SG and SX-550 dial indication to
point A.
9. Adjust bar antenna core for maximum indica-
tion on AC VM.
10. Return AM SG and SX-550 dial indication to
point C.
11. Adjust TC5 for murimum indication on AC
VM.
12. Repeat steps A-tl to eliminate variations in
AC VM indications at points A and C.
AM signal generator
1 k ohm resistor
AC voltmeter
tro
17
All manuals and user guides at all-guides.com
all-guides.com
9.2 FM SECTION
1. Through 300 ohm dummy antenh?, connect
FM signal generator to the 300 ohm FM
antenna terminals and set for 400H2 at 100d8
and !007o modul.ation.
2. Connect AC VM and distortion meter to TAPE
REC jack (L or R).
3. Set FUNCTIOI\tr switch to FM and MUTII\G
switch to OFF.
4. Set FM SG and SX-550 dial indication to point
A (90MHz).
5. Adjust TB for maximum indication on AC VM.
6. Adjust Tb lower core for center of scale indica-
tion on Tuning meter.
7 " Set FM SG for gdB output and adjust T1 and
T2 for maximum indication on AC VM.
8. Set FM SG and SX-550 dial indication to point
C (106N{Hz).
#
&
9" Adjust TC3, then TC1 and TCz for maximum
indication on AC VM.
10. Again set FM SG and SX-550 dial indication to
point A.
11. Adjust T3, then T1 and T2 for maximum indi-
cation on AC VM.
72. Repeat steps B ^'11 to eliminate variations in
sensitivity at points A and C.
13. Adjust T4 for maximum sensitivity.
74. Detune to noise only and adjust T5 lower core
for center of scale indication on Tuning meter.
15. Set SX-550 dial indication to point B (98tTHz t
and adjust FM SG for center of scale indication
on Tuning meter.
16. Set FM SG output to 60dB and adjust T5
upper core for minimum distortion.
L7 . Repeat steps 14^'16 to eliminate variations in
minimum distortion position.
AC voltmeter Distortion meter
FM signal generator
300 ohm
dummy antenna
{-'
ffi
tti*+'ti,l+i
$6SS
ffi
All manuals and user guides at all-guides.com
9.3 MPX SECTION
1. Through 300 ohm dummy antenna) connect FM
signal generator to 300 ohm FM antenna
terminals.
2. Connect multiplex signal generator to external
modulation terminals of FM SG.
3. Connect oscilloscope horizontal input to MPX
SG pilot output and vertical input via probe to
TP (No. 31) of circuit board.
s)(-550
4. Set SX-550 dial indication to 98MHz and adjust
FM SG for center of scale indication on Tuning
meter.
5. With FM SG unrnodulated, adjust VR1 so that
trissajous pattern on oscilloscope becomes sta-
tionary.
6. With MPX SG modulation 1kHz, L + R 67 .5kHz
deviation and Pilot 7 .lk}Jz deviation, adjust T4
for minimum distortion.
Oscilloscope
M PX signal generator
Probe
AC voltmeter D istortion meter
FM signal generator
300 ohm
dummy antenna
.N
NS:::i
i
\-:-r\:::-ii
'=H
ffi
,+ji''rffi
ffi:fg VRr
$'i.r.;r',?ffi
N\\N
N
.N
iR
is
is
s-. s
L\\\\\\\\\\\-S
All manuals and user guides at all-guides.com
9.4 POWER AMPLI FIER (IDLE CURRENT)
1. Set BASS and TREBLE controls to FLAT
positions.
2. Connect DC voltmeter to circuit board TP
terminals (L = 34 @, 33 O; R - 35 @, 36 O ) and
adjust VR3 (L) and VR4 (R) for 25mV.
3. Readjust after approximately 15 minutes (speci-
fication range is 15mV to 40mV).
ffi#'
DC voltmeter
E
ro
20
All manuals and user guides at all-guides.com

Other manuals for sx-550

1

Other Pioneer Stereo Receiver manuals

Pioneer CT-S705 User manual

Pioneer

Pioneer CT-S705 User manual

Pioneer SX-D7000 User manual

Pioneer

Pioneer SX-D7000 User manual

Pioneer VSX-454 User manual

Pioneer

Pioneer VSX-454 User manual

Pioneer DMH-ZS8250BT User manual

Pioneer

Pioneer DMH-ZS8250BT User manual

Pioneer SX-V90 User manual

Pioneer

Pioneer SX-V90 User manual

Pioneer DMH-100BT User manual

Pioneer

Pioneer DMH-100BT User manual

Pioneer VH-Z5000DAB User manual

Pioneer

Pioneer VH-Z5000DAB User manual

Pioneer SX-1080 User manual

Pioneer

Pioneer SX-1080 User manual

Pioneer AVH-Z7050TV User manual

Pioneer

Pioneer AVH-Z7050TV User manual

Pioneer AVH-Z2200BT User manual

Pioneer

Pioneer AVH-Z2200BT User manual

Pioneer SX-3900 User manual

Pioneer

Pioneer SX-3900 User manual

Pioneer SX-980 User manual

Pioneer

Pioneer SX-980 User manual

Pioneer VSX-1020-K Instruction Manual

Pioneer

Pioneer VSX-1020-K Instruction Manual

Pioneer SX-535 User manual

Pioneer

Pioneer SX-535 User manual

Pioneer VSX-D906S User manual

Pioneer

Pioneer VSX-D906S User manual

Pioneer AVH-A315BT User manual

Pioneer

Pioneer AVH-A315BT User manual

Pioneer Elite VSX-LX104 User manual

Pioneer

Pioneer Elite VSX-LX104 User manual

Pioneer SX-3800 User manual

Pioneer

Pioneer SX-3800 User manual

Pioneer VSX-534D User manual

Pioneer

Pioneer VSX-534D User manual

Pioneer Elite G-Clef SX-A9MK2-K User manual

Pioneer

Pioneer Elite G-Clef SX-A9MK2-K User manual

Pioneer SPH-DA250DAB User manual

Pioneer

Pioneer SPH-DA250DAB User manual

Pioneer SX-2700 User manual

Pioneer

Pioneer SX-2700 User manual

Pioneer AVH-G215BT User manual

Pioneer

Pioneer AVH-G215BT User manual

Pioneer SX-636 User manual

Pioneer

Pioneer SX-636 User manual

Popular Stereo Receiver manuals by other brands

Philips HTR3464/12 user manual

Philips

Philips HTR3464/12 user manual

Harman Kardon AVR 130 owner's guide

Harman Kardon

Harman Kardon AVR 130 owner's guide

Kenwood VR-5900 Sovereign How to connect

Kenwood

Kenwood VR-5900 Sovereign How to connect

Coby COBY HDR-650 instruction manual

Coby

Coby COBY HDR-650 instruction manual

Integra DRX-3.2 instruction manual

Integra

Integra DRX-3.2 instruction manual

Yamaha RX-V901 owner's manual

Yamaha

Yamaha RX-V901 owner's manual

Denon AVR-985SP Brochure & specs

Denon

Denon AVR-985SP Brochure & specs

Bose LIFESTYLE 550 owner's manual

Bose

Bose LIFESTYLE 550 owner's manual

Sony STR-DA5400ES operating instructions

Sony

Sony STR-DA5400ES operating instructions

Intelix DIGI-VGASD-R installation manual

Intelix

Intelix DIGI-VGASD-R installation manual

Denon MULTEQXT AVR-4806 operating instructions

Denon

Denon MULTEQXT AVR-4806 operating instructions

Sony STR-D560Z operating instructions

Sony

Sony STR-D560Z operating instructions

Rotel FAX-88A instruction manual

Rotel

Rotel FAX-88A instruction manual

Sony STR-DA2000ES - Fm Stereo/fm-am Receiver operating instructions

Sony

Sony STR-DA2000ES - Fm Stereo/fm-am Receiver operating instructions

Insignia NS-R2001 user guide

Insignia

Insignia NS-R2001 user guide

Denon AVR-1709 owner's manual

Denon

Denon AVR-1709 owner's manual

Denon DRA-CX3 owner's manual

Denon

Denon DRA-CX3 owner's manual

Denon AVR-3805 operating instructions

Denon

Denon AVR-3805 operating instructions

manuals.online logo
manuals.online logoBrands
  • About & Mission
  • Contact us
  • Privacy Policy
  • Terms and Conditions

Copyright 2025 Manuals.Online. All Rights Reserved.