Piper nv User manual

!
1
Piper User Manual
!
!
!
! !
USER MANUAL
Congratulations on your recent Piper
purchase! With this guide, you will learn
how to operate Piper and all its features
effectively. It includes information that
will help you take advantage of the
numerous smart home security and
automation services that Piper offers,
along with installation instructions for a
quick and seamless setup.
!

!
2
Piper User Manual
!
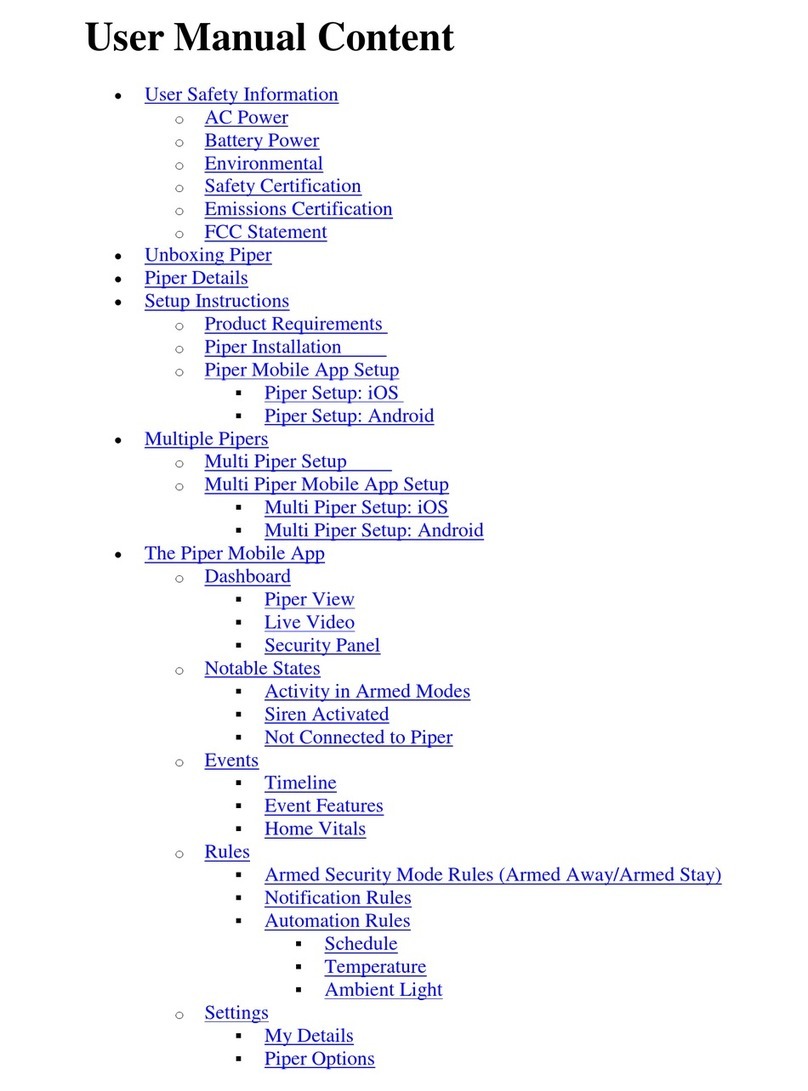
Table of Contents
Unboxing Piper 4
Piper Details 5
Setup Instructions 6
Product Requirements 6
Piper Installation 7
Piper Mobile App Setup 8
Piper Setup: iOS 8
Piper Setup: Android 12
Multiple Pipers 16
Multi Piper Setup 17
Multi Piper Mobile App Setup 18
Multi Piper Setup: iOS 18
Multi Piper Setup: Android 22
The Piper Mobile App 26
Dashboard 26
Piper View 26
Live Video 27
Security Panel 28
Notable States 31
Activity in Armed Modes 31
Siren Activated 32
Not Connected to Piper 33
Events 34
Timeline 34
Video Clips 35
Event Features 36
Home Vitals 37
Rules 38
Armed Security Mode Rules 38
Notification Rules 41
Automation Rules 42
Settings 46
My Details 47
Piper Options 48
Trusted Circle 51
“Notify Trusted Circle” Security Rule 52
Wireless Accessories 53
Video Settings 53
Multi Piper Management 53
Smart Arming with Life360 (Beta) 53

!
3
Piper User Manual
Features 54
Wireless Accessories 54
What are Wireless Accessories? 54
What is Z-Wave? 54
Purchasing Wireless Accessories 54
Updates 54
Adding Wireless Accessories 55
Removing Wireless Accessories 55
Smart Arming with Life360 (Beta) 60
What is Life360? 56
What is Smart Arming? 56
Smart Arming Setup 56
Icons 57
Dashboard and Main Navigation 57
Events 58
Security Events and Wireless Accessories 58
Weather 59
!
! !

!
4
Piper User Manual
Unboxing Piper
!
!
Before starting, please ensure your Piper purchase contains each of the items listed below.
If any are missing, contact your Piper retailer or the Piper support line for your region available
at getpiper.com/contact-us.
Each box includes:
•Piper
•Quick start guide
•Power adapter with 6 foot (1.8m) cord
•3 x AA alkaline batteries
•Optional wall mount
•Battery door screw
!

!
5
Piper User Manual
Piper Details
!
!
Piper has the following features:
•Panoramic HD video with a 180° fisheye field of view. You can access pan, tilt, and
zoom features while viewing live video, even in quad-view or with night vision activated.
•Built-in environmental sensors detect sound, motion, brightness, humidity, and the
indoor and outdoor temperature.
•Microphone and speaker allow for interactive two-way audio while viewing live video.
•Powerful 105 dB siren sounds during emergencies or when manually activated.
•802.11b/g/n Wi-Fi.
•Z-Wave radio for wireless accessories.
•Dimensions (with stand): 6.14" x 3.27" x 2.68" (156mm x 83mm x 68mm)
Note: To learn more about live video features, refer to the Live Video section.
Intruder-deterrent siren
Hear the powerful 105 dB siren when
a security mode Is breached
Motion and sound detection
Make sure no one slips by undetected
with precise built-in motion sensor and
high quality microphone
Two-way audio
Use the audio system to check in and
interact with your family or pets
Pan, tilt, zoom with a 180° view
See the entire room with a panoramic
view on live or recorded immersive video
Stay in tune with your home’s vitals
Ambient light, temperature and humidity
sensors ensure that you always come
back to a safe and comfortable home.

!
6
Piper User Manual
Setup Instructions
!
Product Requirements
The minimum requirements necessary for Piper to function are as follows:
•Power source
•Internet connection with Wi-Fi (Minimum upload speed of 0.8 Mbps)
•Supported iOS or Android device
•iOS: Apple devices running at least iOS 8
•Android: Devices running at least 4.1.x

!
7
Piper User Manual
Piper Installation
Follow these steps to begin the installation of Piper:
1.
2.
3.
1. Remove Piper from its
detachable stand.
2.
4.
3.
Re-attach the stand (or affix the optional
wall mount) and position your Piper in the
desired location. For optimal viewing
capacity, we recommend placing Piper
in a high traffic area.
4. Open the battery door located at the
back of Piper and insert the provided
AA batteries. Close the battery door
and secure it with the provided screw.
5.
5.
Press the power button on the back
of Piper, located on the bottom-right.
Note: Piper’s LED light will be yellow
while starting up.
6. Connect the power cable to Piper
and plug the opposite end to an
electrical outlet.
7.
6.
When your Piper’s LED light turns
blue, download the Piper app
from getpiper.com/download and
create an account.

!
8
Piper User Manual
Piper Mobile App Setup
You are now ready to connect your mobile device to Piper.
•For setup instructions using an iOS device, go to Piper Setup: iOS.
•For setup instructions using an Android device, go to Piper Setup: Android.
Piper Setup: iOS
Follow these steps to set up Piper from your Apple iOS device:
1. Confirm the prompt to start setup after
creating your Piper account.
2. Name your Piper and tap “Continue”
to proceed.
! !

!
9
Piper User Manual
3. Open your iOS device’s settings and go
to the Wi-Fi screen. Select “Piper” from
the list of networks.
Note: In this step, your mobile device
is connecting to your Piper via Wi-Fi
to set it up.
4. Once your mobile device has connected
to the “Piper” Wi-Fi network, return to
the Piper app. Select your home Wi-Fi
network from the list that will appear and
enter the password.
! !

!
10
Piper User Manual
5. Confirm your home Wi-Fi network
information before tapping “Connect.”
6. Your Piper will automatically update to
the latest firmware if necessary, and
then finish setup.
Note: This may take up to 10 minutes or
more. Do not unplug or turn off Piper
during this process.
! !

!
11
Piper User Manual
7. The Dashboard screen will appear after
setup has finished.
Note: Your Piper’s LED light should
now be green.
You will receive two notices of confirmation:
•A text message from a number that Piper will use to contact you. Be sure to add this
number to your contacts.
•A welcome email with links to various tutorial videos.
Note: To access Piper, family members can download the app and sign in with the
account owner’s login information.

!
12
Piper User Manual
Piper Setup: Android
Follow these steps to set up Piper from your Android device:
1. Confirm the prompt to start setup after
creating your Piper account.
2. Name your Piper and tap “Continue”
to proceed.

!
13
Piper User Manual
3. Connect your Android device to the “Piper”
Wi-Fi network by selecting “Connect.”
Note: In this step, your mobile device is
connecting to your Piper via Wi-Fi to set
it up.
Note: If you have the “Smart Switch
Network” feature enabled on your mobile
device, it will not connect to the “Piper”
Wi-Fi network. To disable this feature
found on certain Android devices, go to
your mobile device’s Wi-Fi settings.
4. A list of nearby Wi-Fi networks will
appear. Select your home Wi-Fi
network from the list and enter the
password.

!
14
Piper User Manual
5. Confirm your home Wi-Fi network information
before tapping “Connect.”
6. Your Piper will automatically update to
the latest firmware if necessary, and then
finish setup.
Note: This may take up to 10 minutes
or more. Do not unplug or turn off Piper
during this process.

!
15
Piper User Manual
7. The Dashboard screen will appear after
setup has finished.
Note: Your Piper’s LED light should
now be green.
You will also receive two notices of confirmation:
•A text message from a number that Piper will use to contact you. Be sure to add this
number to your contacts.
•A welcome email with links to various tutorial videos.
Note: To access Piper, family members can download the app and sign in with the
account owner’s login information.

!
16
Piper User Manual
Multiple Pipers
For enhanced security, you can install multiple Pipers on a home network to arm different floors
or high traffic areas. A maximum of five Pipers sharing the same home Wi-Fi network can be
linked to one account. All Pipers configured under the same account follow the security mode,
notification and automation rules set in the Piper mobile app.
You can monitor live video, view environmental sensor data, and receive security notifications
from each Piper.

!
17
Piper User Manual
Multi Piper Setup
To set up additional Pipers on a network using the same account, please follow the steps
below. iOS and Android devices follow separate instructions after the physical installation of
your Piper.
Note: The initial piper must be set up before additional Pipers can be added.
Follow these steps to add an additional Piper to your network:
1.
2.
3.
8. Remove Piper from its
detachable stand.
9.
4.
10.
Re-attach the stand (or affix the optional
wall mount) and position your Piper in the
desired location. For optimal viewing
capacity, we recommend placing Piper
in a high traffic area.
11. Open the battery door located at the
back of Piper and insert the provided
AA batteries. Close the battery door
and secure it with the provided screw.
5.
12.
Press the power button on the back
of Piper, located on the bottom-right.
Piper’s LED light will be yellow
while starting up.
13. Connect the power cable to Piper
and plug the opposite end to an
electrical outlet.
14.

!
18
Piper User Manual
Multi Piper Mobile App Setup
You are now ready to connect your mobile device to the new Piper.
•For setup instructions using an iOS device, go to Multi Piper Setup: iOS.
•For setup instructions using an Android device, go to Multi Piper Setup: Android.
Multi Piper Setup: iOS
Follow these steps to set up Piper from your Apple iOS device:
1. When Piper’s LED light turns blue, open
the Piper app, tap the App Menu icon and
go to Settings > Multi Piper Management.
2. Select “Add a Piper.”

!
19
Piper User Manual
3. Give the new Piper a name and tap
“Continue” to proceed.
4. Open your iOS device’s settings and
go to the Wi-Fi screen. Select “Piper”
from the list of networks.
Note: In this step, your mobile device
is connecting to your Piper via Wi-Fi to
set it up.

!
20
Piper User Manual
5. Once your mobile device has connected
to the “Piper” Wi-Fi network, return to
the Piper app.
6. Your Piper will automatically update to
the latest firmware if necessary, and then
finish setup.
Note: This process may take up to 10
minutes or more. Do not unplug or turn
off your Piper during this process.
Table of contents
Other Piper Security System manuals