SKU 93980 For technical questions, please call 1-800-444-3353 Page 3
8. Maintain tools with care. Keep tools sharp and clean for better and safer
performance. Follow instructions for lubricating and changing accessories.
9. Stay alert. Watch what you are doing, use common sense. Do not operate any
tool when you are tired.
10. Check for damaged parts. Before using any tool, any part that appears damaged
should be carefully checked to determine that it will operate properly and perform
its intended function. Check for alignment and binding of moving parts; any
broken parts or mounting fixtures; and any other condition that may affect proper
operation. Any part that is damaged should be properly repaired or replaced by
a qualified technician.
11. Replacement parts and accessories. When servicing, use only identical
replacement parts. Use of any other parts will void the warranty. Only use
accessories intended for use with this tool. Approved accessories are available
from Harbor Freight Tools.
12. Do not operate tool if under the influence of alcohol or drugs. Read warning
labels if taking prescription medicine to determine if your judgment or reflexes
are impaired while taking drugs. If there is any doubt, do not operate the tool.
15. Always wear ANSI-approved eye protection during use.
Product Specific Safety Precautions
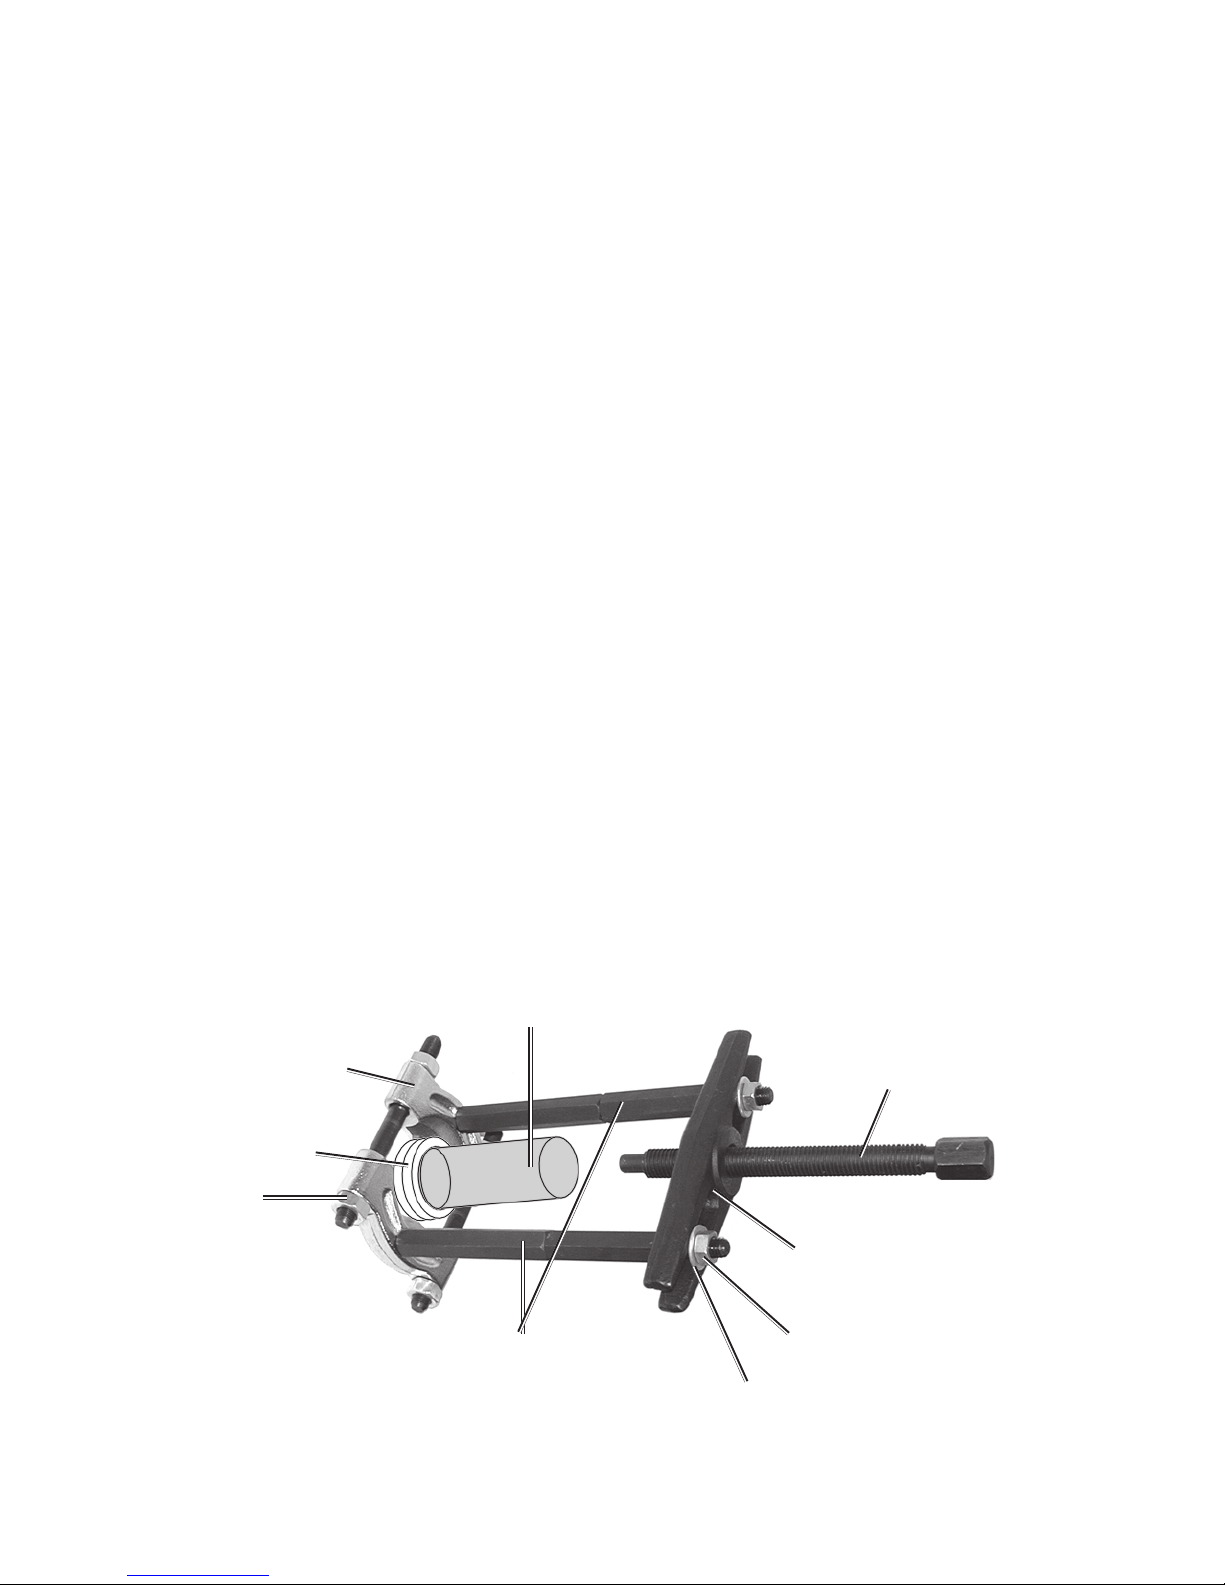
1. Be certain that the separator jaws are evenly set between bearing halves before
attempting to separate.
2. Lead Screw (5) should be centered on the shaft where the bearings are being
pulled to avoid damaging shaft or bearing housing.
3. Avoid pinching or scraping the bearing shaft by securely (and squarely) placing
the Jaws around the bearing housing.
4. Use care when removing the Lead Screw (5) from the Case to avoid damaging
the threads. Pry up from the ends of the Lead Screw.
Warning:The warnings, cautions, and instructions discussed in this instruction
manual cannot cover all possible conditions and situations that may occur. It
must be understood by the operator that common sense and caution are fac-
tors which cannot be built into this product, but must be supplied by the opera-
tor.
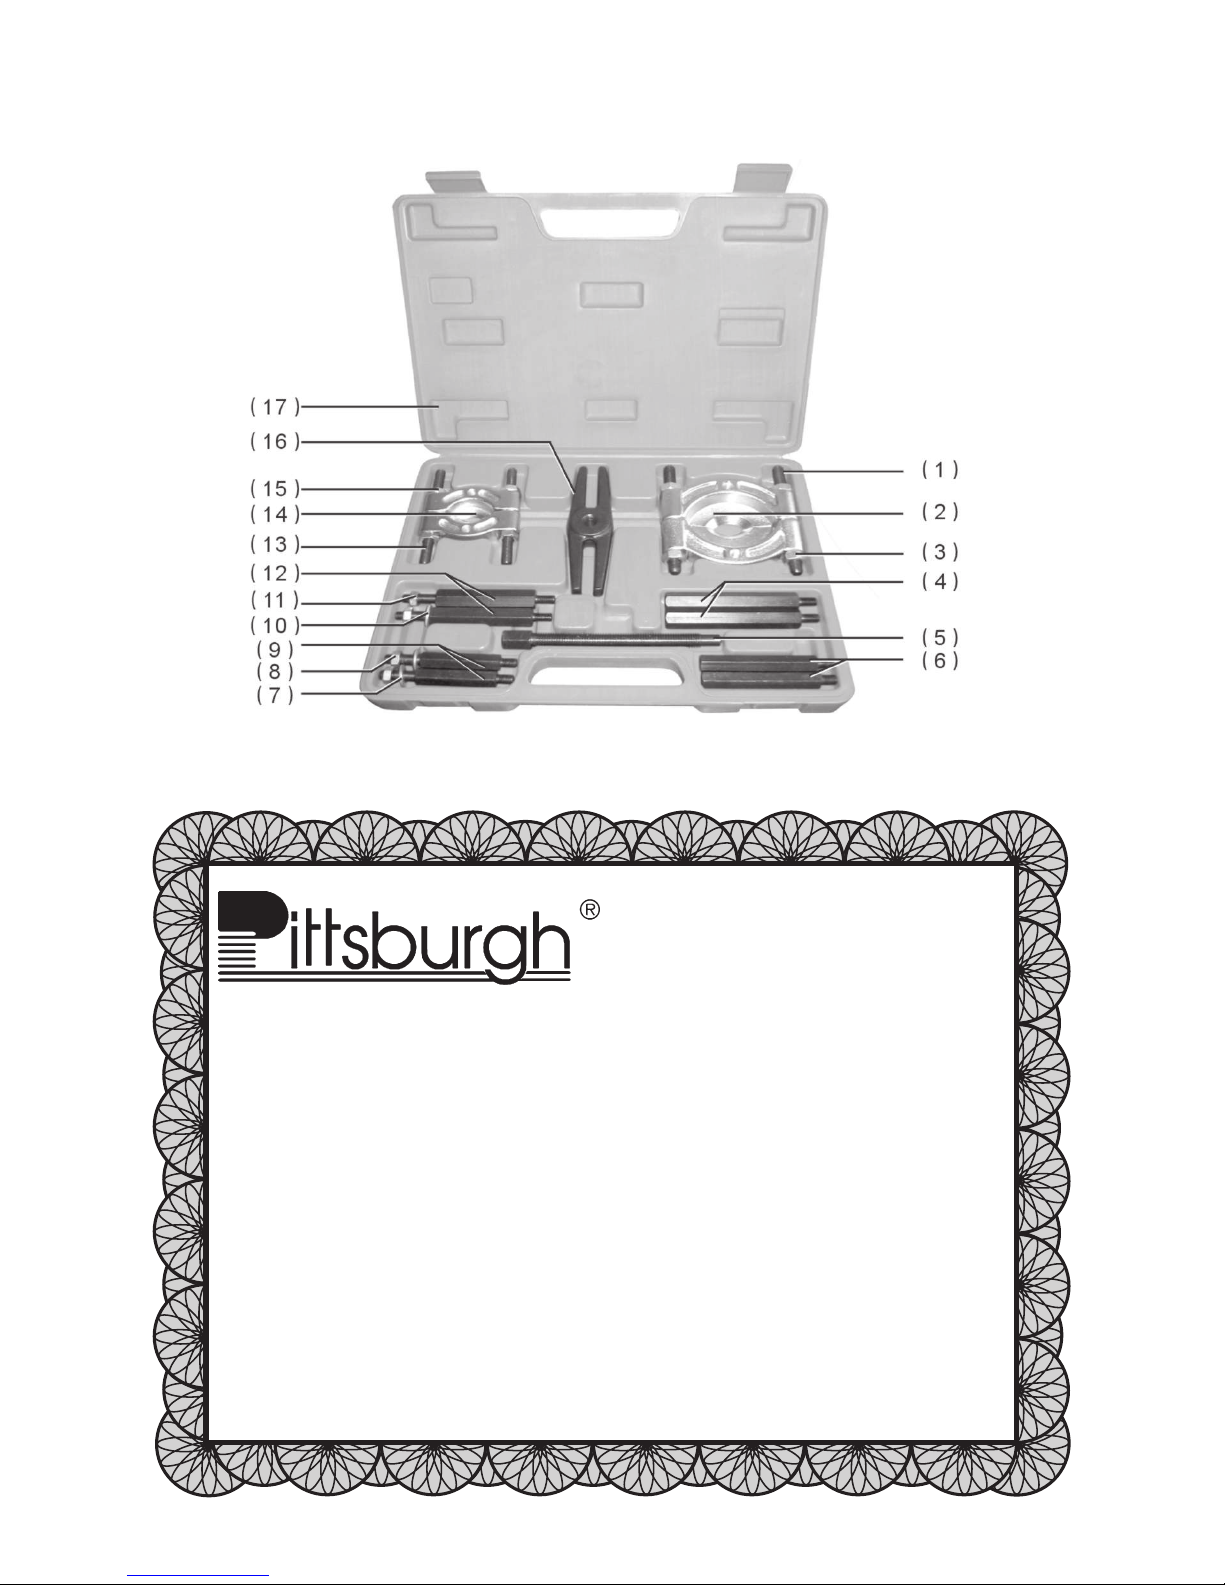
Unpacking
When unpacking, check to make sure that all the parts are included. Refer to the
Parts Photo and Parts List at the end of this manual. If any parts are missing or
broken, please call Harbor Freight Tools at the number on the cover of this manual.