Plantation
Dans l’Aqua Garden by PLANT!T, vous pouvez cultiver vos
plantes préférées tout au long de l’année, notamment
des herbes aromatiques, légumes-feuilles, tomates de
brousse, piments et bien d’autres encore ! Il est facile
de les faire pousser directement à partir de graines, ou
même de boutures, grâce aux naturelles ROOT!T Rooting
Sponges spécialement conçues. Avec les boutures, nous
vous recommandons d’utiliser du ROOT!T Rooting Gel pour
les empêcher de se dessécher. Ce gel facile d’utilisation
enveloppera la bouture en toute sécurité et fournira le
climat idéal pour l’enracinement.
Suivez ce mode d’emploi simple pour faire pousser
ecacement vos plantes :
1. Veillez à renouveler la solution nutritive tous les deux
mois.
2. Pour la culture des grandes plantes, comme par exemple
les buissons nains de tomates ou de piments, nous vous
déconseillons d’utiliser tous les emplacements prévus
pour les plantes, car celles-ci se disputeront la lumière si
vous essayez de faire pousser six plantes dans un bac. Le
nombre de plantes idéal est de deux ou trois an de leur
donner l’espace de culture requis pour s’épanouir.
3. Plus la plante grandit, plus elle a besoin d’eau. N’oubliez
pas de surveiller régulièrement le niveau d’eau an
d’éviter un arrosage insusant de vos cultures.
5
Suomi
Haluamme onnitella sinua uuden ZENGROW™
-pöytäpuutarhasi johdosta!
Voit kasvattaa pöytäpuutarhassasi useita kasveja, jotka pysyvät virkeinä ja raikkaina
happirikkaan veden ansiosta. Laite hapettaa vettä samalla tavalla kuin luonnon vesiputo-
ukset. Kiertävä happirikas vesi on juurten kannalta ensiarvoisen tärkeää.
Pöytäpuutarha toimii kierrättämällä vettä astian sisältä kannelle. Kannelta vesi valuu
takaisin ruukkuja pitkin astiaan tuoden mukanaan happea sekä juurille että astian sisälle.
Laitteen vedenvirtauksen sydämenä toimii pumppu, joka kierrättää vettä yhtäjaksoisesti
astiasta kannelle.
Pöytäpuutarha koostuu viidestä eri osasta ja kuudesta idätyskannesta ruukuille.
Ennen käyttöä ZENGROW™ -pöytäpuutarha tulee huuhdella vedellä. Täytä tätä var-
ten pöytäpuutarha oheisten ohjeiden mukaisesti vedellä, ja käytä pumppua muutamia
minuutteja. Kaada tämän jälkeen vesi viemäriin ja korvaa se uudella. Kierrättämällä vettä
ennen käyttöä puhdistat laitteen mahdollisista kuljetuksesta sekä varastoinnista tulleista
pölyistä ja kasvisi voivat paremmin!
Pöytäpuutarhaan lisätään vettä kaata-
malla se kannen päälle. Voit kaataa vettä
esimerkiksi kannen kulmaan, jolloin vesi
valuu kannelta astiaan.
Astian sivussa on vesitasomittari, josta
näet kuinka paljon astiassa on vettä. Täytä
laite vedellä vesitasomittarin osoittamaan
maksimikohtaan.
Kastunut pistoke on hengenvaarallinen kytkettäessä laitetta!
Normaalikäytössä laite ei aiheuta kosteusvaurioita. Pöytäpuutarhaa ei kui-
tenkaan suositella pidettäväksi kosteudelle herkällä paikalla.
Solution nutritive
1. Remplissez la cuve d’eau jusqu’au niveau indiqué par le retrait dans
la paroi de la cuve (tel qu’indiqué sur le schéma ci-dessous). Pour le
système à 6 plantes, il faut prévoir 6 l et 3,5 l pour le système
à 2 plantes.
2. Ajoutez du ROOT!T First Feed dans l’eau et mélangez. Utilisez
2 sachets de 15 ml pour le système à 6 plantes et 1 sachet de 15 ml
pour le système à 2 plantes.
3. Si le niveau d’eau diminue entre les renouvellements de l’eau, faites
l’appoint d’eau mélangée avec du ROOT!T First Feed selon une dose
de 5 ml de nutriment pour 1 l d’eau.
Pour visualiser la vidéo, consultez plantit-growit.com/video.
Éclairage optimal
Nous vous recommandons d’utiliser un ROOT!T Full Spectrum LED Grow Light qui est spécialement développé
pour la culture des plantes. Il est conçu pour s’adapter à l’Aqua Garden by PLANT!T grâce à ses agrafes de
montage astucieuses. Il peut ainsi se xer sur les placards de cuisine, les étagères et bien d’autres encore. Il est
spéciquement mis au point pour diuser le spectre de lumière correct sur les plantes an d’optimiser leur
croissance. Doté d’une minuterie incorporée, 16 heures d’activation et 9 heures de désactivation, le ROOT!T Full
Spectrum LED Grow Light apporte à vos plantes la quantité de lumière optimale pour qu’elles s’épanouissent.
Entretien des plantes
Pour prendre soin de vos plantes, n’hésitez pas à les tailler ! Les herbes aromatiques poussent
beaucoup plus vite si vous les coupez. En taillant vos plantes, il sera plus facile de les maintenir
buissonnantes et à la taille voulue.
Pour obtenir plus de recommandations, de conseils et d’astuces sur l’entretien de vos plantes,
rendez-vous sur la page internet : plantit-growit.com.
Avertissement
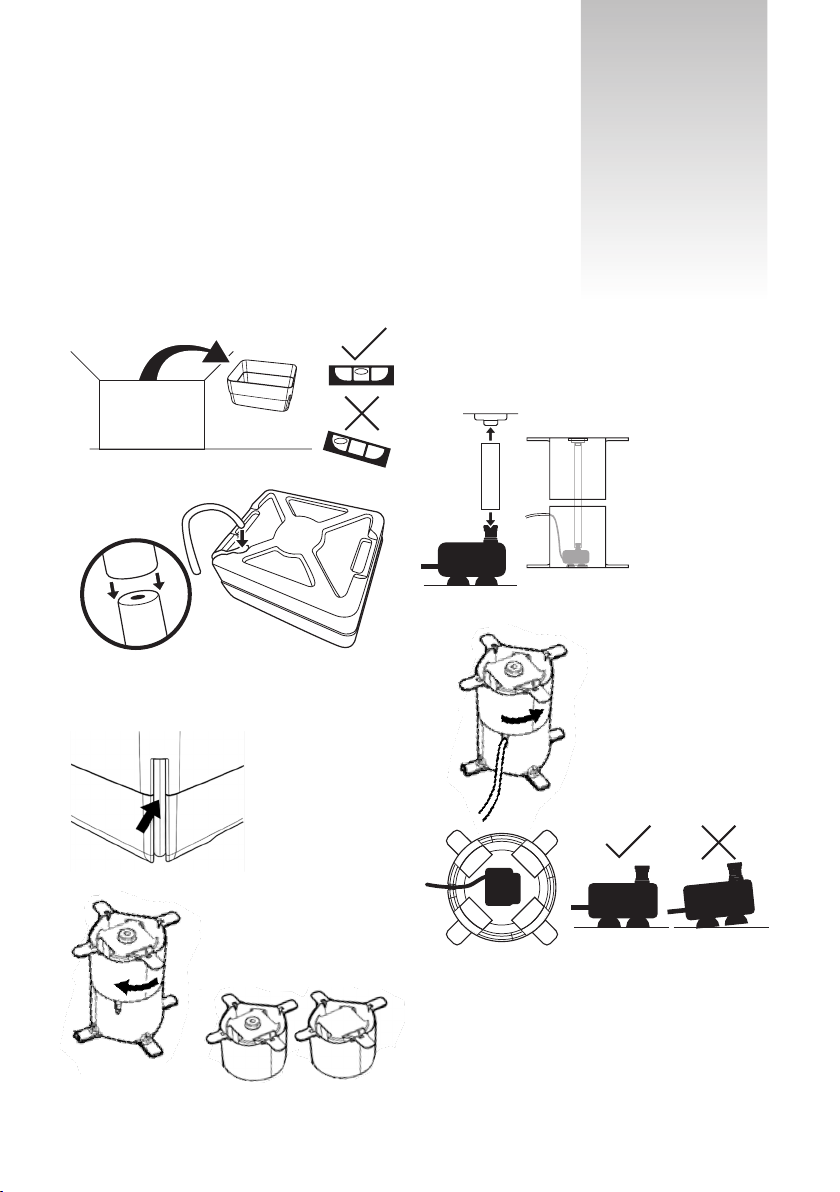
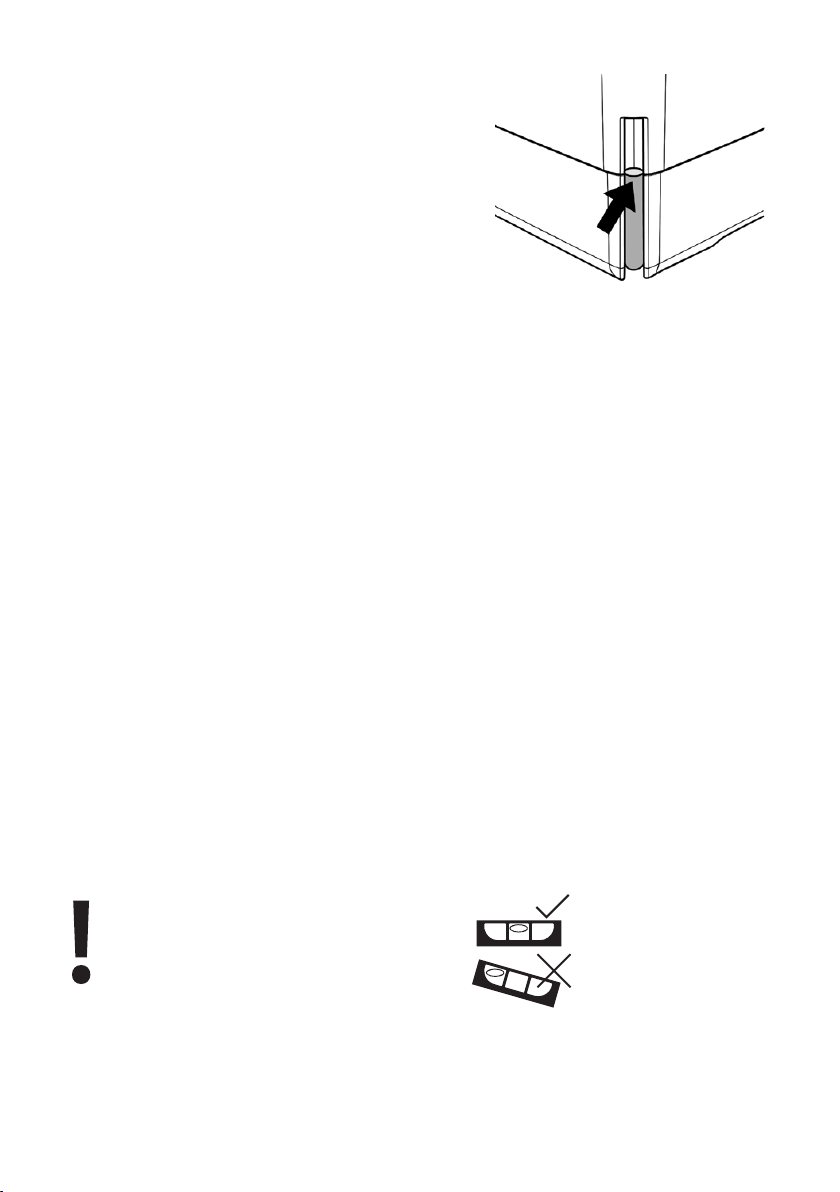
Veillez à placer le système sur une surface plane. Vériez
visuellement que l’eau est refoulée uniformément par la
pompe dans chaque pot. Si ce n’est pas le cas, le système
n’est pas à niveau. Il convient de régler la position.