Platinum CCTV ALM-DVR1 User guide

Platinum CCTV Surveillance Solutions
®
Mini Alarm Clock DVR Hidden Camera Manual
©2010 Platinum CCTV Surveillance Solutions. All Rights Reserved
1
ALM-DVR1 and
ALM-DVRHD1
Hidden Camera
Setup Manual
Mini-Alarm Clock Hidden Spy Camera
with PIR motion detection recording
Models:
ALM-DVR1 – VGA Resolution (640x480) 30fps Video & Audio
ALM-DVRHD1 – High Definition (1280x960) 30fps Video & Audio

Platinum CCTV Surveillance Solutions
®
Mini Alarm Clock DVR Hidden Camera Manual
©2010 Platinum CCTV Surveillance Solutions. All Rights Reserved
2
Clock Operation Instructions:
The Alarm clock portion of our ALM-DVRx cameras functions like most alarm clocks. There are 5
buttons on the alarm clock that will control the basic clock and alarm functions: HR, MIN, SET, LIGHT
and TALK/SNOOZE. The clock can be set to display in 12 or 24 hour formats (“HR” button) and can
alarm in 5 different ring tones (“MIN” button). During normal operation, the clock can also read off
the current time to you (top button).The “LIGHT” button will turn on or off the backlight of the LCD.
Initial Setup:
1. Remove the back battery panel from the alarm clock
2. Remove the clear battery protector strip from the end of the battery. This strip is
placed to prevent the battery from discharging completely during shipment and
damaging the battery.
3. Once the protective strip is removed, the clock will play a tone and then will illuminate
the display
Time/Alarm/Chime Configuration:
Press the “SET” button to cycle through the configuration of time, alarm and chime setting
modes. Continue pressing the button until you have selected the mode that you wish to
configure.
Setting Time:
Once you have selected the Time setup mode using the “SET” button from above, now you
can press the “HR” and “MIN” buttons to change the hour and minute of the current time.
Setting Alarm:
Once you have selected the Alarm setup mode using the “SET” button again until the
symbol appears. Now you can press the “HR” and “MIN” buttons to set the time for the
alarm to sound. When the alarm is going off, pressing the top button on the clock will snooze
the alarm for 10 minutes and sound again (up to 6 times).
Activating/Deactivating Alarm and Chime:
Pressing the “SET” button again after setting the Alarm time above will show this will
allow you to configure the status of both the alarm and the hourly chime. Pressing the “HR”
button will turn on or off the alarm . Pressing the “MIN” button will turn on or off the
hourly charm .

Platinum CCTV Surveillance Solutions
®
Mini Alarm Clock DVR Hidden Camera Manual
©2010 Platinum CCTV Surveillance Solutions. All Rights Reserved
3

Platinum CCTV Surveillance Solutions
®
Mini Alarm Clock DVR Hidden Camera Manual
©2010 Platinum CCTV Surveillance Solutions. All Rights Reserved
4
Video DVR Overview:
The ALM-DVR1 and ALM-DVRHD1 model miniature alarm clock hidden spy camera DVRs are designed
to provide snapshots, audio recording, video recording or motion detection based video/audio
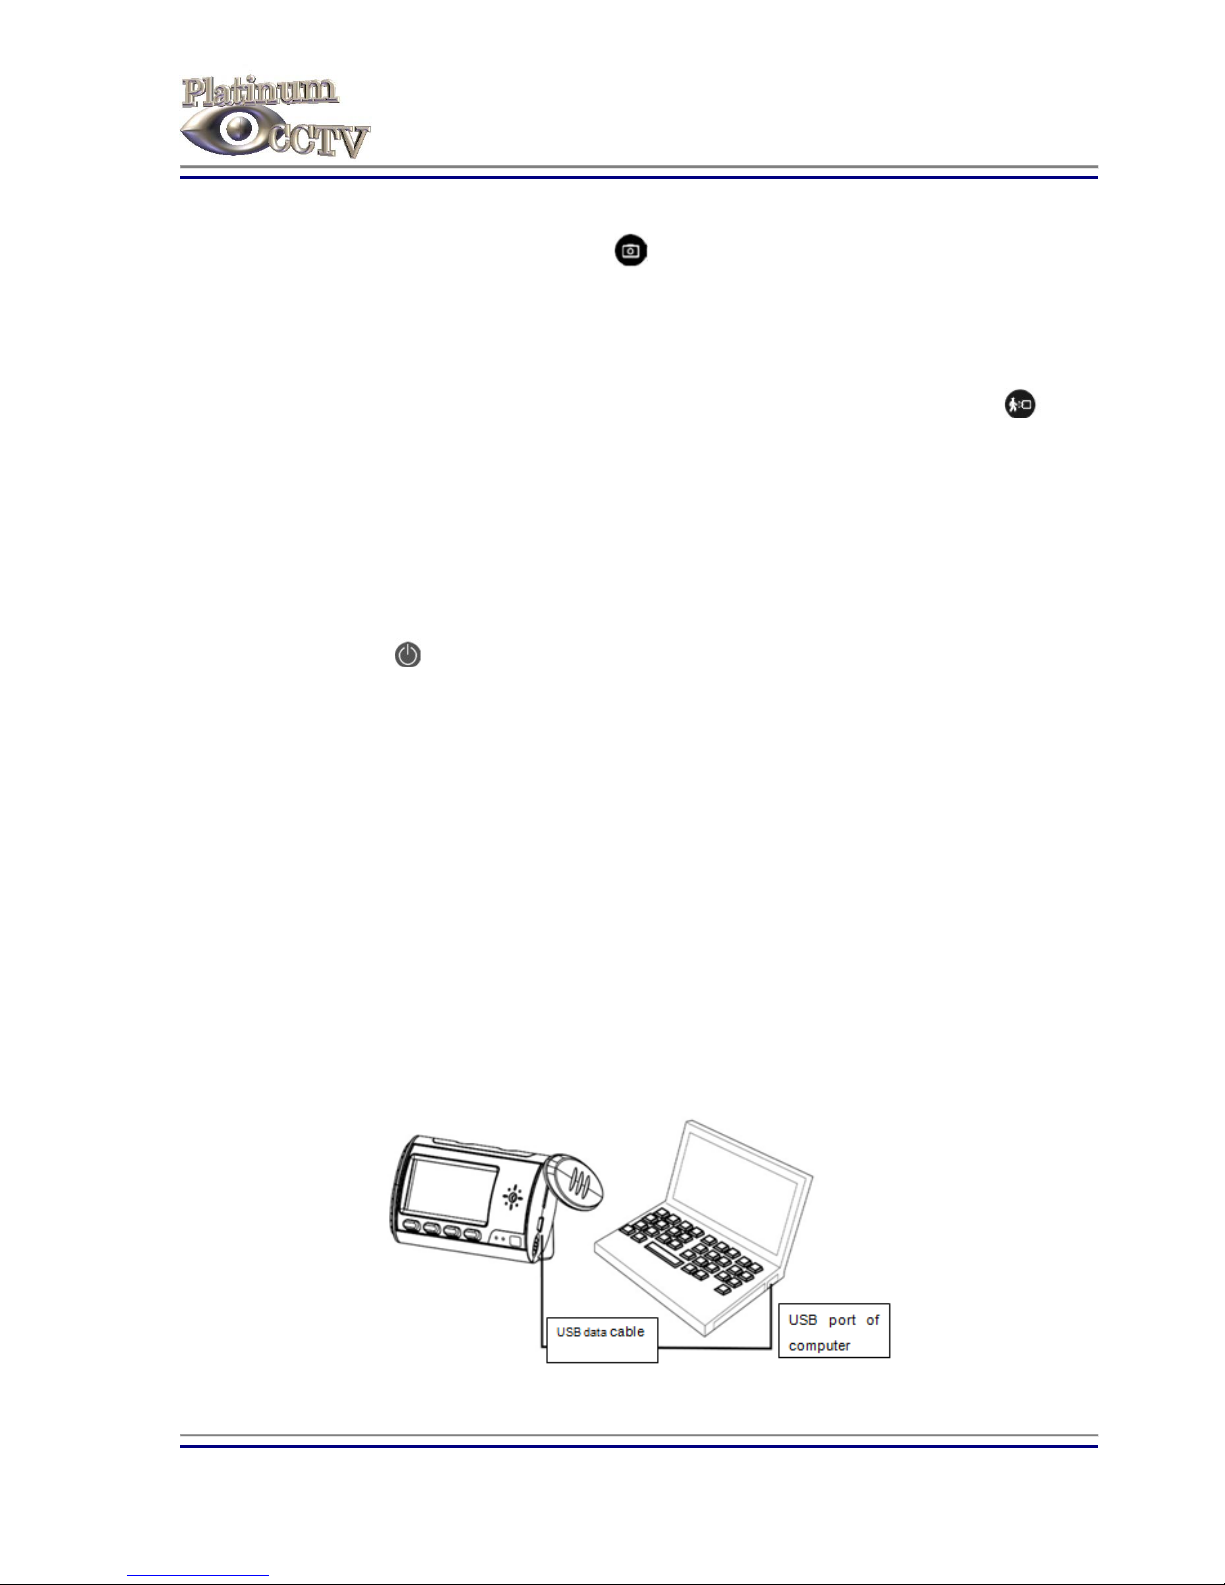
recording onto a microSD card that can be inserted in the slot on the side of the device. The video can
be transferred to a PC using a standard mini USB cable (included) or by removing the microSD card
and inserting it into a card reader in a PC. These mini-alarm clocks have a high resolution 2 MegaPixel
image sensor for great color video. The ALM-DVR1 model can record video in 640x480 resolution at
30fps while the ALM-DVRHD1 is a high definition version that will record at 1280x960 resolution at
30fps. Both models will support microSD cards up to 32 GB . Built-in high capacity rechargeable
battery can provide up to 12 hours continuous video recording or up to 25 hours continuous audio
recording. Battery can be charged by plugging into a PC over mini-USB cable (included) or the
included power adapter.
DVR Operation Instructions:
To access the DVR controls and microSD card slot, rotate the bottom of the cover, on the right side
while facing the clock (shown in diagram). For charging, set the master switch to “OFF” position. For
recording, set the master switch to “ON” position.
DVR Audio & Video Recording Control:
To power on the DVR, press the Power button on the remote control. This will put the alarm clock
into standby mode to await additional commands (Blue LED is lit solid).
For Video recording:
To begin video recording in standby mode, press the Video button on the remote control. This
will start the video recording (continuous recording) to the microSD Card. The Blue LED will flash 3
times and then go out for the duration of recording. Stop the video recording by pressing the Video
button on the remote control again. This will return the clock to Standby mode to await further
commands.
For Audio recording:
To begin audio recording in standby mode, press the Audio button on the remote control. This
will start the audio recording (continuous recording) to the microSD card. The Blue LED will flash 3
times and then go out for the duration of recording. Stop the audio recording by pressing the Audio
button on the remote control again. This will return the clock to Standby mode to await further
commands.

Platinum CCTV Surveillance Solutions
®
Mini Alarm Clock DVR Hidden Camera Manual
©2010 Platinum CCTV Surveillance Solutions. All Rights Reserved
5
Take a Snapshot:
To take a snapshot, press the Snapshot button on the remote control. This will save a still JPEG
image from the camera onto the microSD card. When you press this button, the Blue LED will flash
and then return to solid on (Standby Mode) to await further commands.
For Motion Detection recording:
To begin motion detection recording in standby mode, press the Motion Detection button on
the remote control. This will start the motion detection recording mode which will record video and
audio to the microSD card when motion is detected by the PIR sensor. The Blue LED will flash quickly
to show that it is in motion detection mode. When motion is detected, it will flash slowly 2 times and
will start to record. Once motion is no longer detected, it will return to flashing quickly (The DVR will
record for 3 minutes once motion is detected, then will start a new file when motion is detected
again). Return to standby mode by pressing the Motion Detection button on the remote control again
(Blue LED lit solid).
Press the Power button again to turn the DVR off (Blue LED will not be lit)
Playback of Video:
Video from the ALM-DVRx series mini alarm clock DVRs can be played back on your computer through
2 different methods. You can transfer the video to your PC over a mini-USB cable (included) or you
can remove the microSD card and insert it into a card reader in your PC. Video can playback on most
PCs in Windows Media Player. Some PCs may not have the required video codecs available. If the
video does not play in Windows media player, you can also try playback from a free video player
found online called the “KMPlayer”
Transfer video to PC:
Video can be transferred from your ALM-DVRx onto your computer using the included mini USB
cable. First, turn the master switch ON and plug the Alarm clock camera into your PC. After a
moment, your PC should load drivers automatically and open a small AutoPlay window (depending on
Windows version and settings).

Platinum CCTV Surveillance Solutions
®
Mini Alarm Clock DVR Hidden Camera Manual
©2010 Platinum CCTV Surveillance Solutions. All Rights Reserved
6
Click on “Open folder to view files” to view and play the files on
the card.
Alternately, you can also remove the microSD card from the
ALM-DVRx and plug it into a card reader attached to your PC.
Charging Battery:
You can charge the built-in rechargeable battery with the included mini USB cable or power adapter.
To charge the battery, the master switch must be in the OFF position. A Red LED will light when the
unit is charging and will go out once the battery is fully charged. Use only the included power adapter
for charging. If the Alarm clock or battery become extremely hot while charging, then please
disconnect power adapter immediately.
When the battery is low, the Blue LED will keep flashing or the screen display will be unclear. Please
charge it immediately. If the battery dies, the current video or audio file will be recorded to the
microSD card automatically prior to power down.
Adjust DVR Time/Date:
The time and date of your ALM-DVRx series mini alarm clock DVR can be configured by plugging the
ALM-DVRx into your computer with the mini USB cable and running the Update_DVR_Time.exe file
found available for download from our website at http://platinum-cctv.com/CCTV_Service_and_Support.asp
This program will synchronize the time/date on the DVR with the time/date on your currently
connected computer.
Reset DVR functions:
If for any reason the DVR stops functioning properly, reset the DVR by moving the master switch to
OFF and then back to ON.

Platinum CCTV Surveillance Solutions
®
Mini Alarm Clock DVR Hidden Camera Manual
©2010 Platinum CCTV Surveillance Solutions. All Rights Reserved
7
Specifications:
Image Sensor 2.0 MegaPixel
Resolution
640x480 (ALM-DVR1)
1280x960 (ALM-DVRHD1)
Video format
AVI
Frame number
30fps
Viewable angle 72°
Motion Detection 6 meters distance (straight line)
Minimum illumination 1LUX
Battery capacity
2200MA
Continuous recording time Up to 12 hours
Remote operating distance 15m
Range for sound recording
Approx 40m2
Power consumption 130MA / 3.7V
Storage temperature
-20~80℃
Operating temperature -10~60℃
Operating humidity 15~85% RH
Type of memory card
MicroSD card
Capacity of memory card 32GB maximum
Player software
Windows Media player / KM player
USB Interface USB1.1/2.0
Operating system
WIN 2000/ XP / Vista32 / 7
Recording Usage Approx 1GB/40 minutes
Charging time Approx 4 hours
Troubleshooting:
Problem Steps to Try
DVR/Clock will not power on
Make sure the battery insulator has been removed.
Charge the battery. Re-seat battery
DVR/Clock will not charge Ensure the master switch is set to OFF, Reseat battery
and power adapter. Check to ensure outlet is functional.
Blue light flashes rapidly Restart camera, low-power charging reminder, Delete
redundant files from the SD card, put in SD Card or
replace or reformat SD card.
Remote controller is hard to
use
Align with the Alarm Clock receiver, Remove the insulator
of remote controller, Replace battery or Wait for reading
the card
Cannot connect with
computer
Replace the data cable, Double check USB port on PC,
Use Different USB Port, Adjust master switch to ON
position and press power button on remote control
Clock’s screen flashes or
other display problem
Charge the battery
Sound is recorded with noise
or video is not clear
Charge the battery, Reformat or Replace SD card, move
closer to audio source,
Other problems
Please contact local seller

Platinum CCTV Surveillance Solutions
®
Mini Alarm Clock DVR Hidden Camera Manual
©2010 Platinum CCTV Surveillance Solutions. All Rights Reserved
8
Precautions and Warranty:
It is the responsibility of the user to abide by all related National, State or local laws when operating
any security cameras, especially security cameras that can record audio and video covertly. Platinum
CCTV and its affiliates cannot be held liable for improper use of recording devices by end users.
The ALM-DVRx series DVR is protected by a 90-day manufacturer’s warranty unless additional
extended warranty was selected at the time of purchase. This manufacturer’s warranty protects this
product from defects in materials and workmanship. The ALM-DVRx series DVRs are designed for
indoor use only. Exposure to higher than normal room temperatures, excessive dust and dirt, high
humidity, water will void the manufacturer’s warranty or extended warranty and may cause the unit
to stop working properly. Opening the device, causing physical damage in any way, removing the
battery or making other modifications to the device will also void the warranty or extended warranty.
Platinum CCTV or its affiliates and resellers are not responsible for any data loss or video recording
that may result from failure of this product to operate. If the product fails due to defects in materials
or workmanship within the warranty or extended warranty period, the manufacturer will repair or
replace the device at their discretion with identical product when available or product with similar
functions if model is no longer available.
This manual suits for next models
1
Table of contents