Jenile RLC20 User manual

Connected flash
alarm clock
RLC20
MANUAL
Specially designed for the deaf and hard of hearing
people

All your products are
already connected to each
other
2

Summary
4 :
5-7 :
8 :
9 :
9-10 :
11 :
12 :
13 :
13-14 :
15 :
Contents of your package
Connected flash alarm
clock
Typical installation example
Technical characteristics
Use
Product connection
Resetting products
Time settings
Alarm settings
Options
3

1
Contents of your package
1
2
2
Connected flash alarm clock
5V USB cable
3
3
USB mains charger
4

A
B
C
D
E
F
G
Connected flash alarm clock RLC20
Sound
Connecting transmitters
Dawn simulator
Vibrating pillow pad 1
Alarm clock 2
Vibrating pillow pad 2
Alarm clock1
A
B
C
DE F G
H
HFlash system
I
IBattery level indicator
5
J
J
K
L
L
O
K
M
N
M
N
O
P
R
U
Q
S
T
P
Q
R
S
T
U
V
W
V W
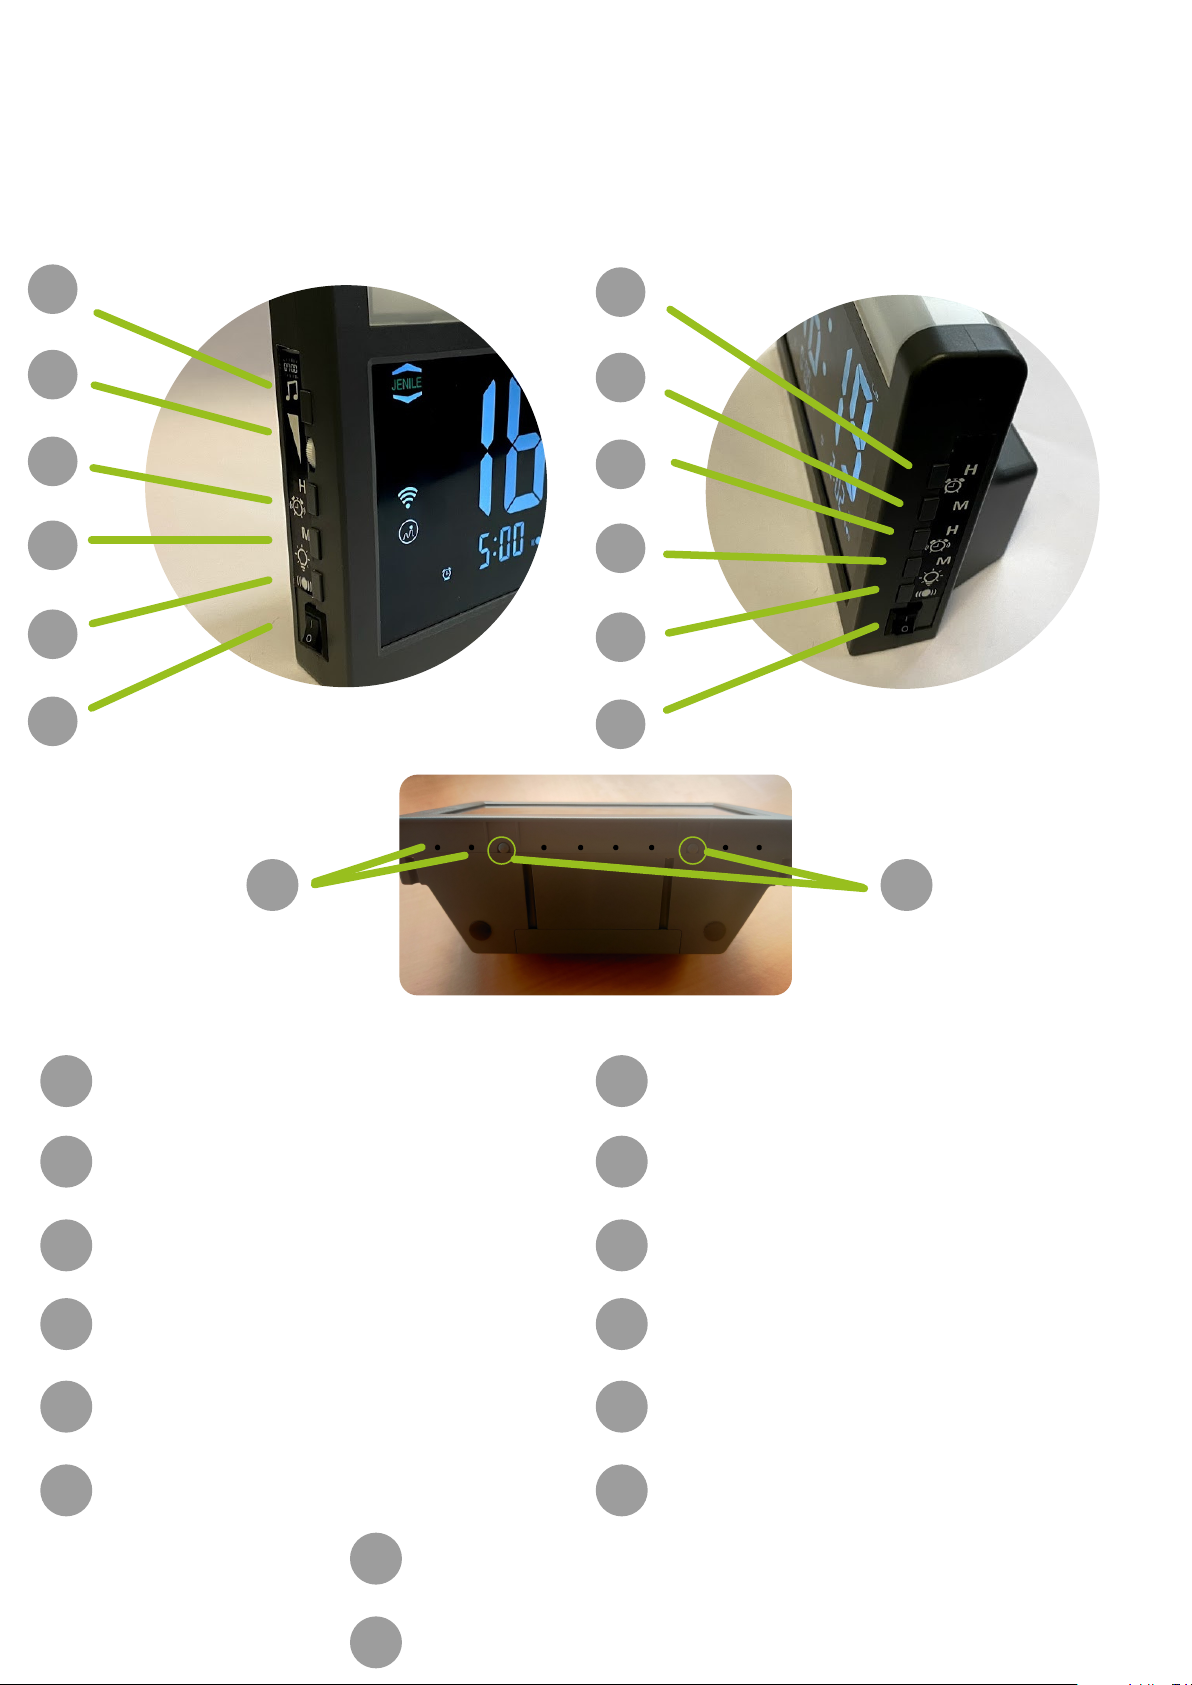
Connected flash alarm clock RLC20
Choice of Melody
Volume
Wake up time1
Flash and / or vibrating pilow
pad
On (I) / Off (o) Alarm clock 1
Wake up minute1
Hour setting
Minute setting
Wake up hour 2
Flash and / or vibrating pillow
pad
On (I) / Off (o) Alarm clock 2
Wake up minute 2
Connection plug
Motion sensor
Right
Left
Underside
6

A
C
B
C
D
E
F
G
B D EFG H I J
Connected flash alarm clock RLC20
USB port
Vibrating pillow pad connection person 1
ON / OFF connection button
Alarm clock ON / OFF
Time setting in 12h (English style) or 24h
Dawn simulator ON / OFF
Power connection
H
IWake-up sound ON / OFF
Vibrating pillow pad connection person 2
A
J
Speaker (melody)
Derrière
K
Sound sensor
K7

Person call
button
Fax ring sender
Door opening
detector
Flood detector
Movement detector
Long distance person
call button
Vibrating and
connected
surveillance camera
Waterproof door
bell
Doorbell cam
Typical installation example :
Portal bell Smoke detector
SMS & cell phone
calls
Gas detector
Illuminated &
connected smoke
detector
Baby cry monitor
Intercom bell
8

Height: 12.5cm
Width: 18.5cm
Depth: 6.6 cm (bottom) - 3 cm (top)
Weight: 474g
Decoding Format: MCU
Radio frequency: 433 Mhz
Wireless device: Yes
Power Supply: 5V USB Adapter
Quantity of connected products: 20 units max
2 years warranty
Technical characteristics
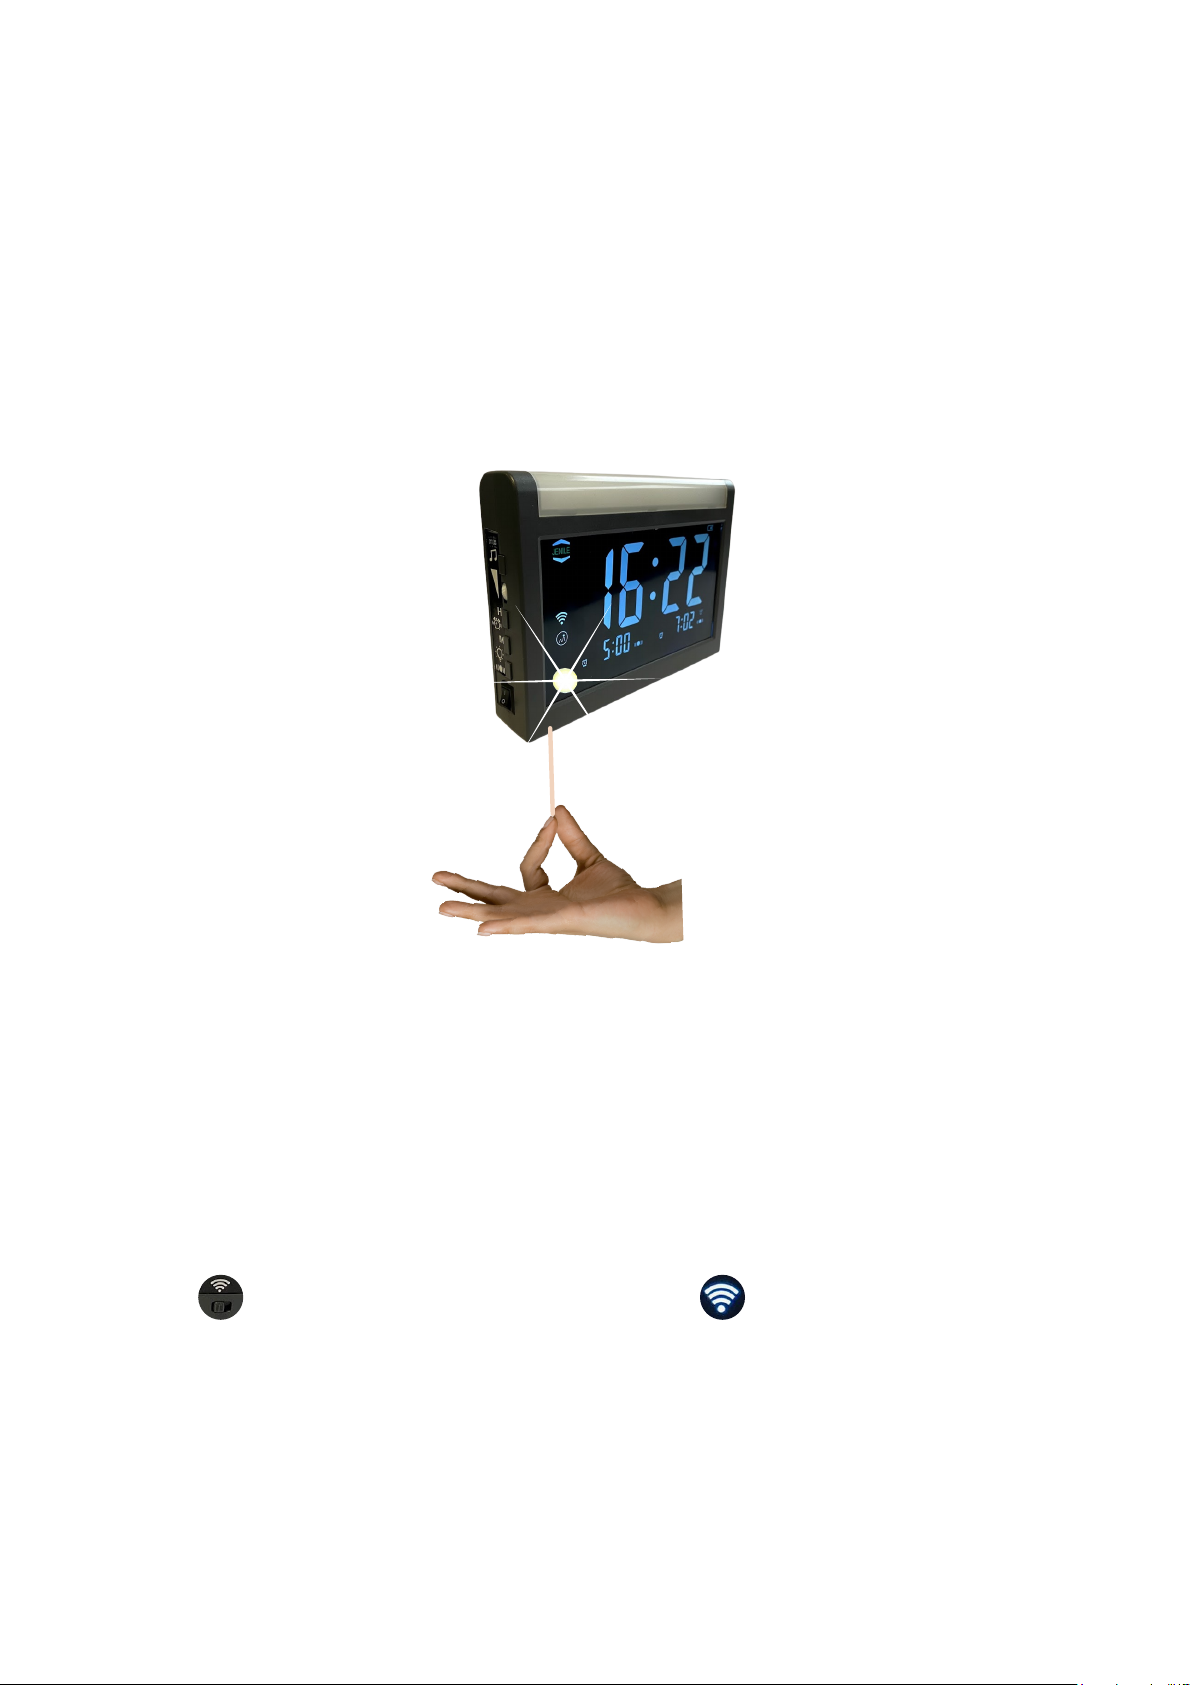
Use
2-Tap or Tilt the alarm clock forward to turn it on thanks to
the motion sensors
Thanks to the connected flash alarm clock, you will be aware of
everything that is happening in your home in a precise way!
This is a tailor-made tool that allows you to differentiate two
identical transmitters using two separate pictograms. You can
choose to connect a transmitter to any pictogram. A pictogram
can receive up to 20 transmitters.
In order not to disturb and save the battery, the alarm clock
screen turns off automatically. To see the time, 2 possibilities:
1-Make a loud sound (clap your hands, shout) to turn on the
screen again thanks to its sound sensor
1.
9
All you have to do is activate the previously connected
transmitter, the white and colored (specific) flashes of the
alarm clock will be activated and the corresponding pictogram
will be displayed on the screen.
If nothing happens, check that the connection button is in the
left position and that the logo is displayed on the
screen.
After plugging in your device, place it on a flat surface.
To verify that your product is correctly connected:
To check that your product is working properly:
10

If you want to complete your package with other Jenile
transmitters or if you have reset your connected flash alarm
clock, you must then make the settings to connect your
products to each other.
To connect all products carefully follow the instructions. Each
transmitter is activated in different ways, please refer to the
user manual of your transmitter if necessary.
Settings
2. Release the button as soon as
the pictogram is displayed.
CAUTION: do not keep pressed
after the pictogram is displayed,
you risk erasing all previous
connections.
3. Activate the transmitter
immediately, while the pictogram
is displayed (press the bell, press
the call button, shout into the baby
cry monitor, ...)
1. Press the connection button
corresponding to the desired
pictogram.
If the light flash is blinking you have successfully connected.
To connect your product:
11
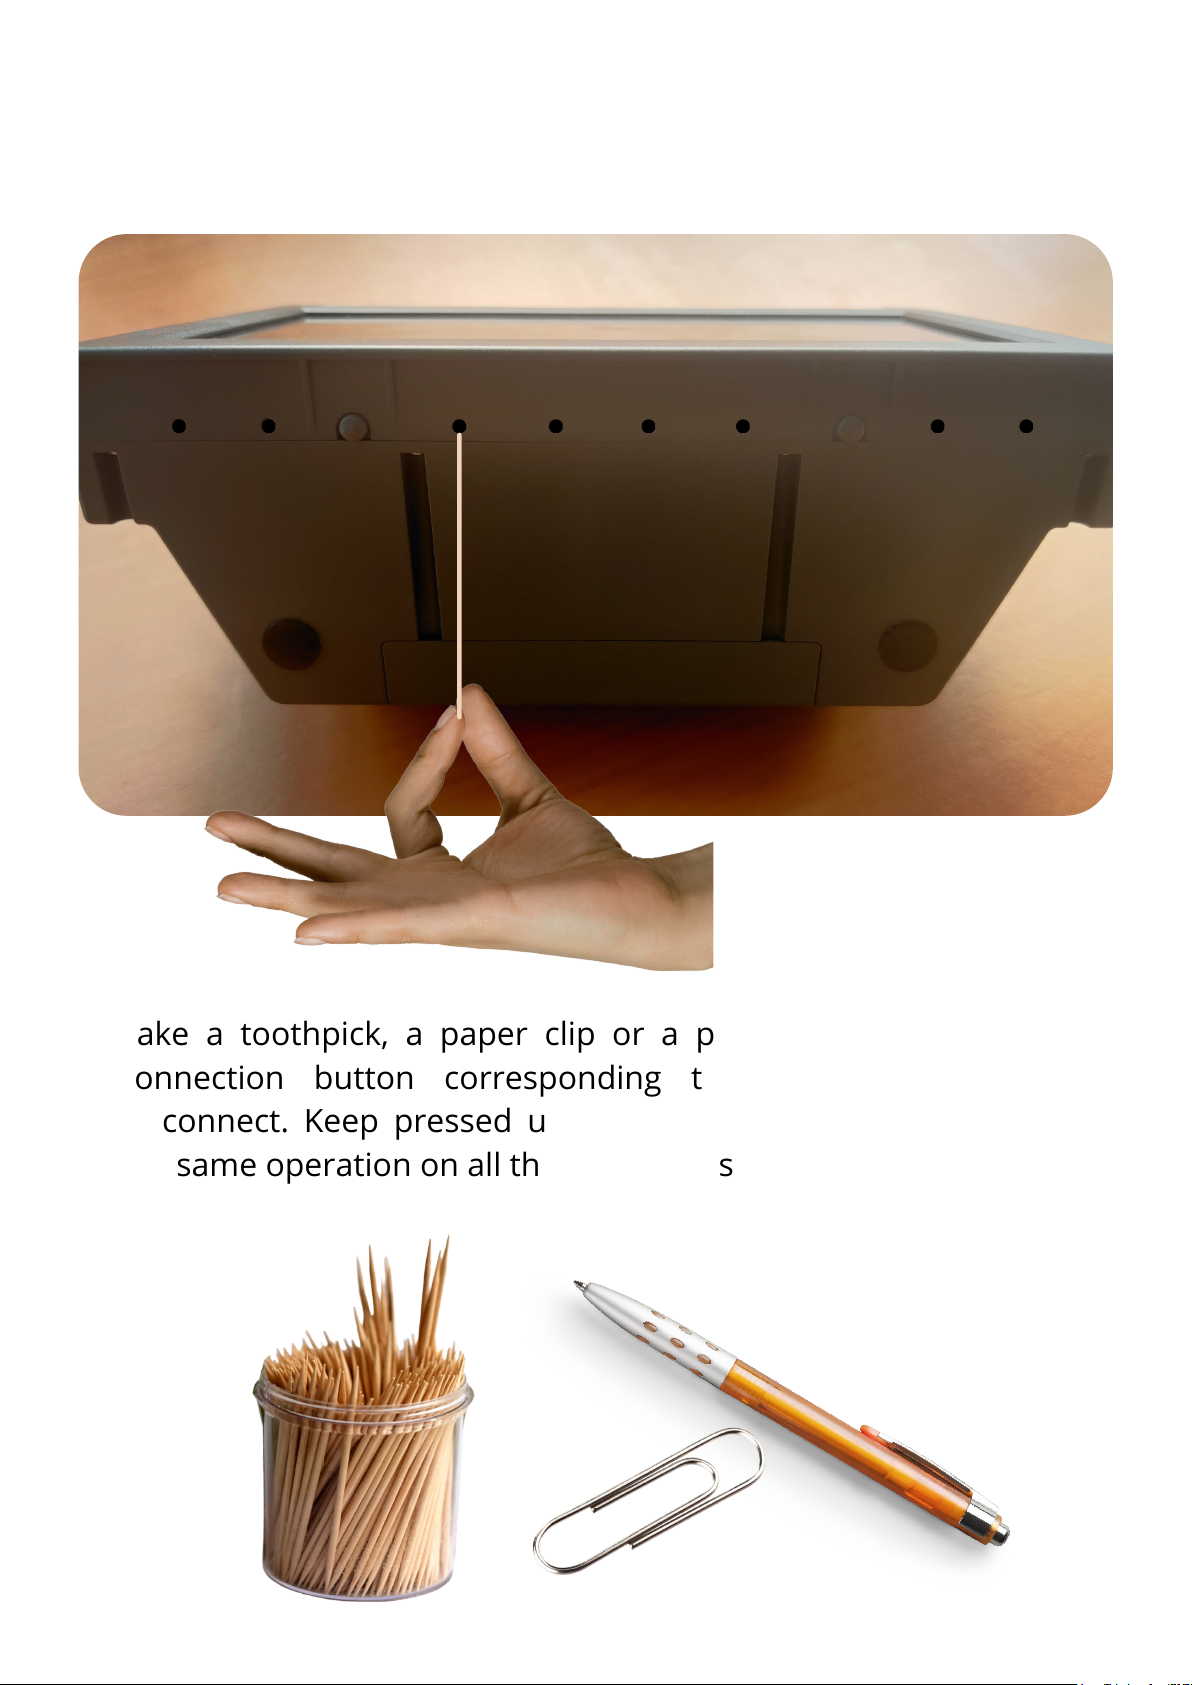
Take a toothpick, a paper clip or a pen and long press the
connection button corresponding to what you want to
disconnect. Keep pressed until the pictogram flashes. Repeat
the same operation on all the pictograms you want to reset.
To reset your product:
12
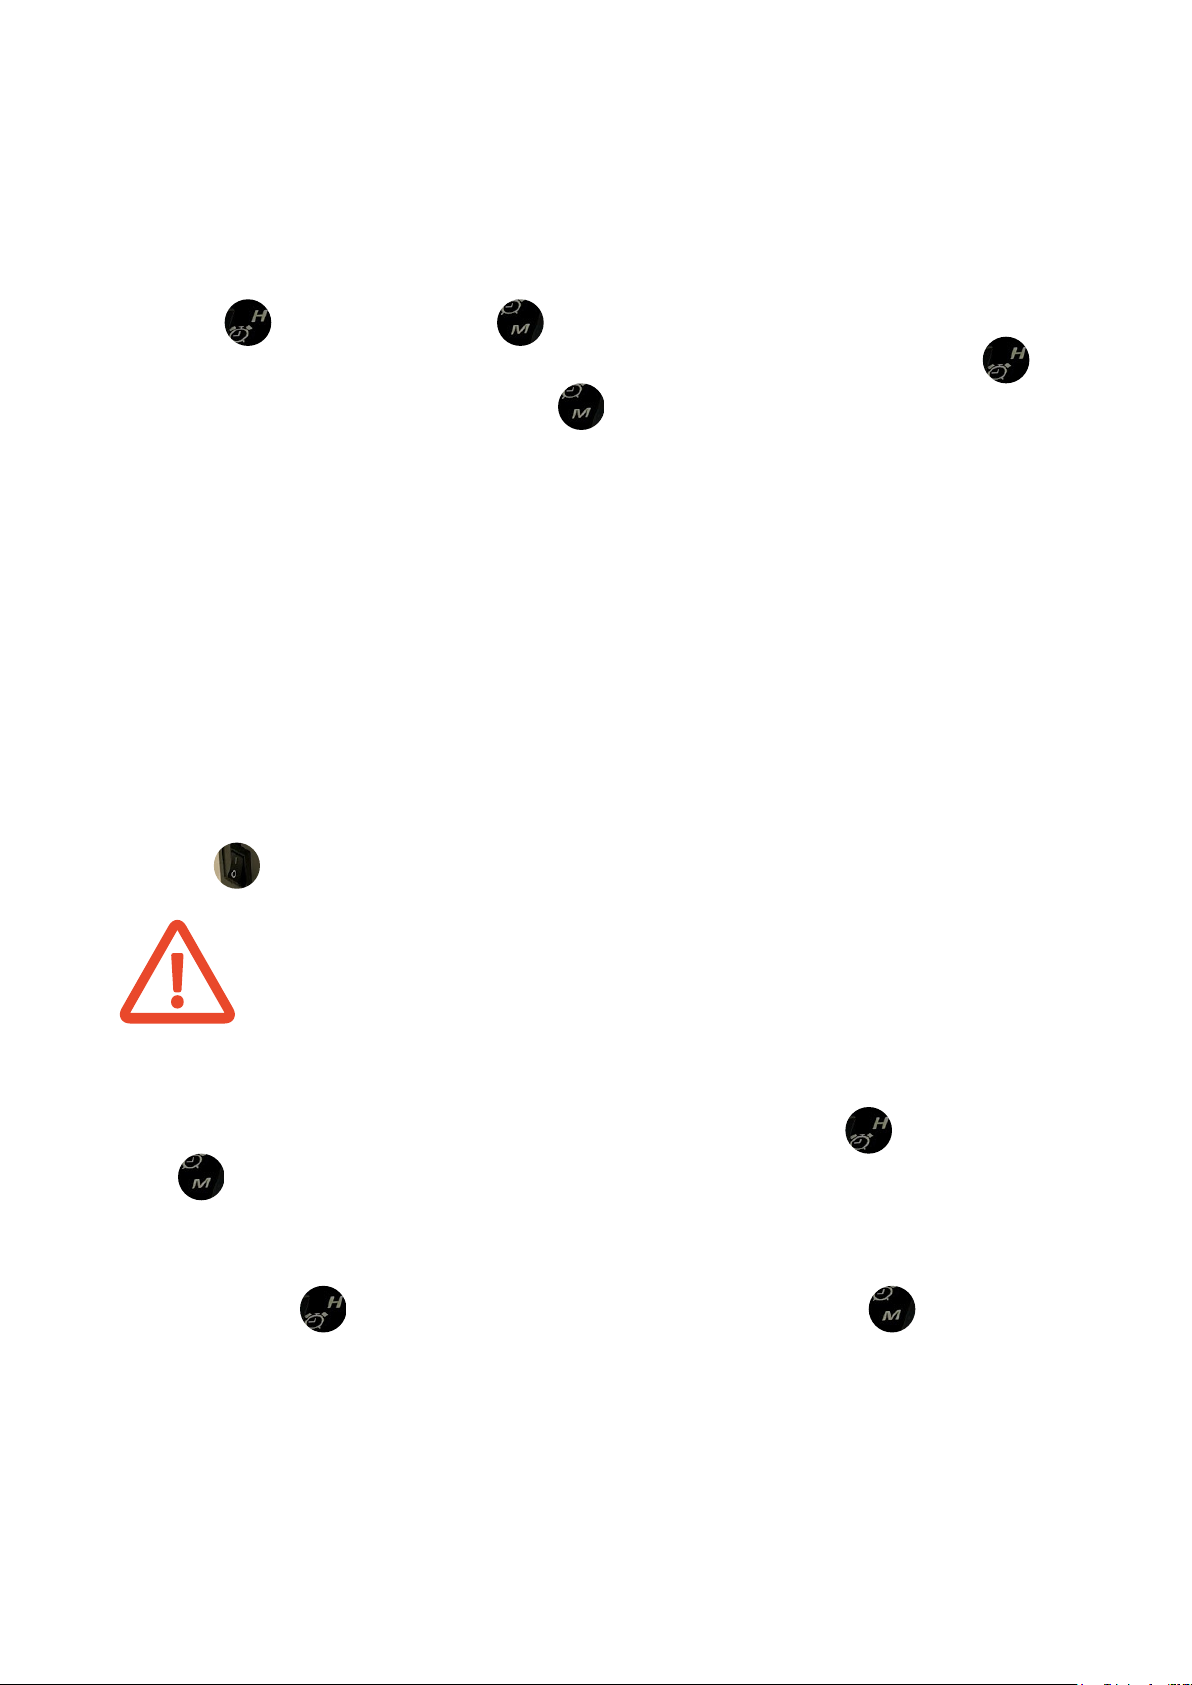
To adjust the time, simultaneously press the two buttons
(hour) and (Minute) at the top right of the alarm clock,
the digits will flash, all you have to do is press the button to
set the hours and the button to set the minutes.
After setting, wait for the digits to stop flashing.
To set the alarm clock, start by activating it by pressing the
(O / I) button by putting it in the (I) position.
You have a button (O / I) on the right for the right alarm
and a button (O / I) on the left for the left alarm.
Then simultaneously press the two button (H) and
(M) at the bottom right of the alarm clock if you want to set
the right alarm, at the bottom left if you want to set the left
alarm, the digits will flash, it will not all you have to do is press
button (H) to set the hours and button (M) to set the
minutes.
After setting, wait for the digits to stop flashing.
Alarm setting
Time setting
13

Choice of alarm type
You have the choice between 3 types of alarm:
1-flash (dawn simulator)
2-vibration (vibrating pad optional)
3-sound (5 melodies to choose from)
If you want, you can combine the different types of alarms.
To make your choice, press the button , you will see the
pictogram appear next to the alarm time. which indicates
that the vibration mode is activated, either the
pictogram which indicates that the dawn simulator mode is
activated, or both pictograms at the same time, this indicates
that the vibration and dawn simulator modes are both
activated.
For the dawn simulator mode to be active, the button must
be set to the left position.
To activate the sound mode, move the button to the left,
adjust the sound volume using the dial on the left side of the
alarm clock. To change the melody, press the button on the
left side of the alarm clock.
To turn off the alarm, tilt the alarm clock forward twice, it will be
automatically reprogrammed for the next day.
For a weekend without an alarm, remember to turn it off by
setting the button to 0.
14
Snooze function
To activate "Snooze" when the alarm is active, tilt the alarm
clock forward once, the alarm will go off again after 5 min.
Options:
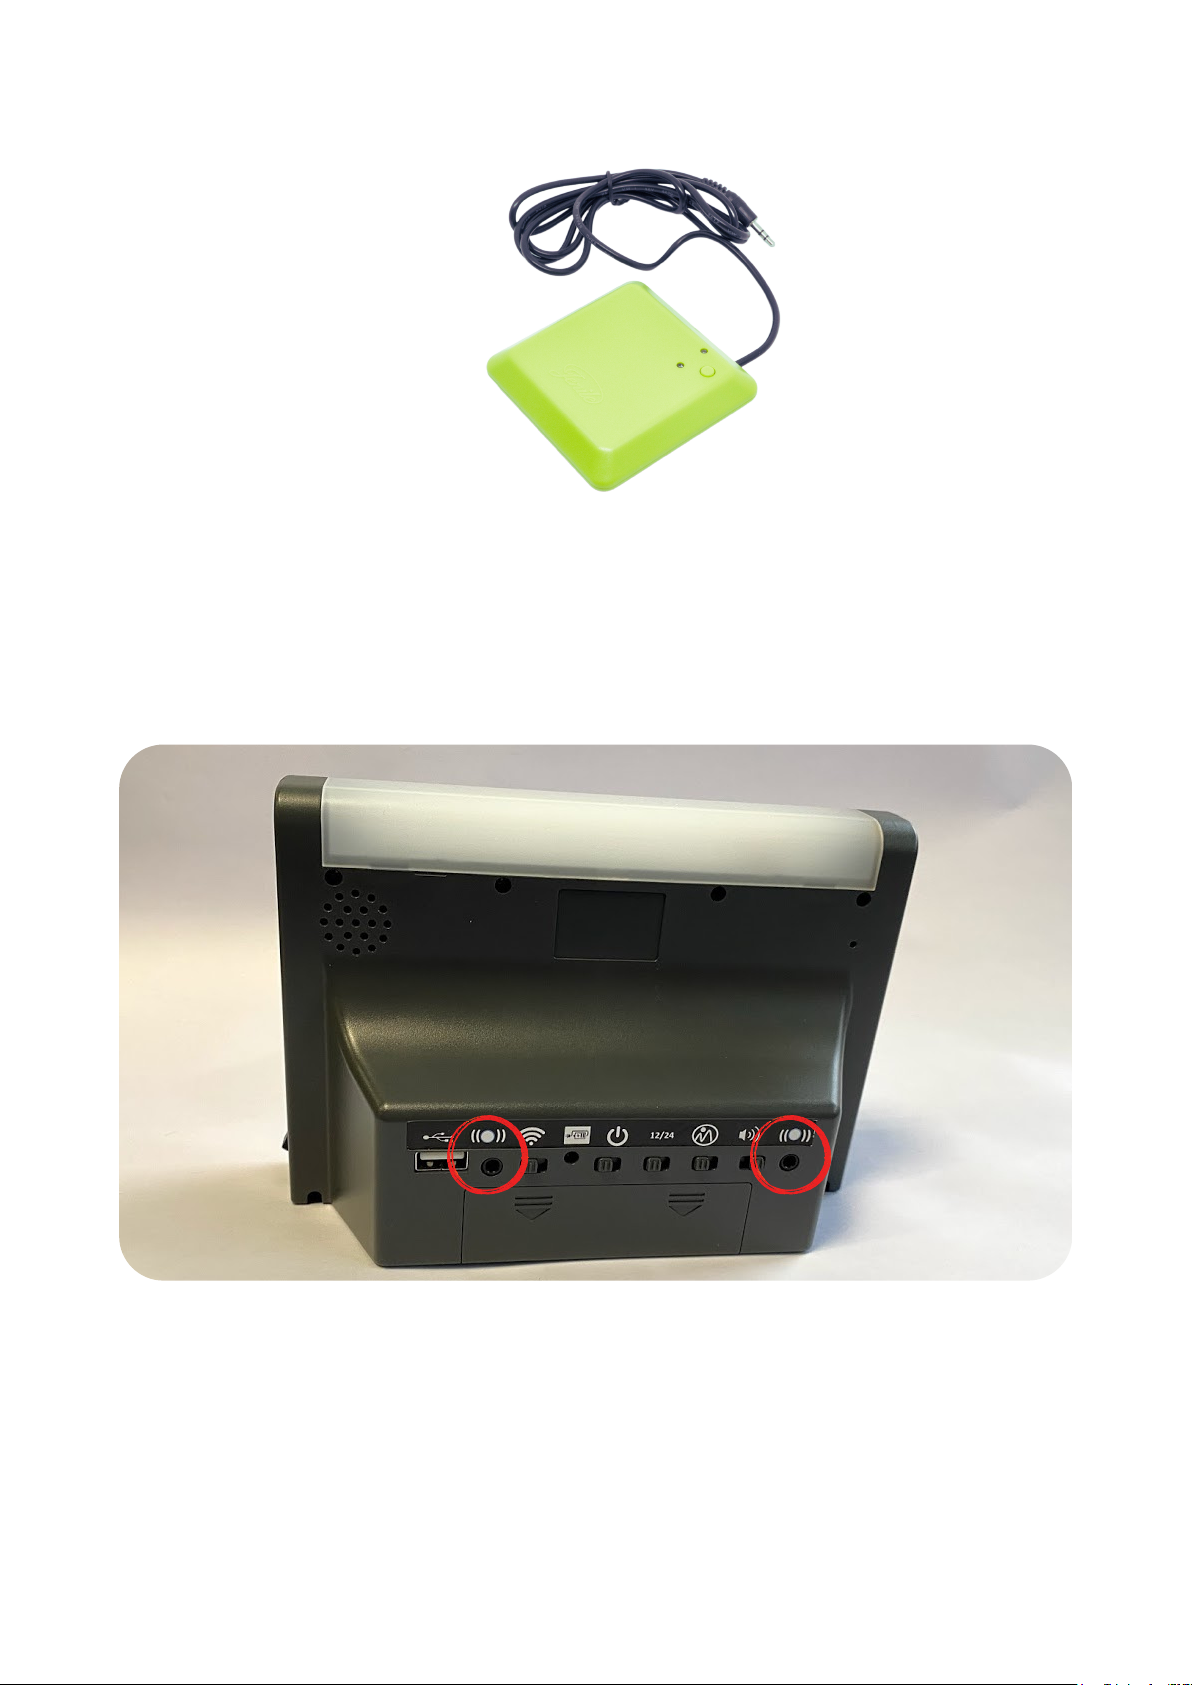
Vibrating pillow pad:
The vibrating pad can be ordered individually or in pairs for
couples who want to be woken up at different times using
vibrations, plug your vibrating pads into the location shown
below :
15

www.jenile.com
Conception France
Table of contents
Other Jenile Alarm Clock manuals


