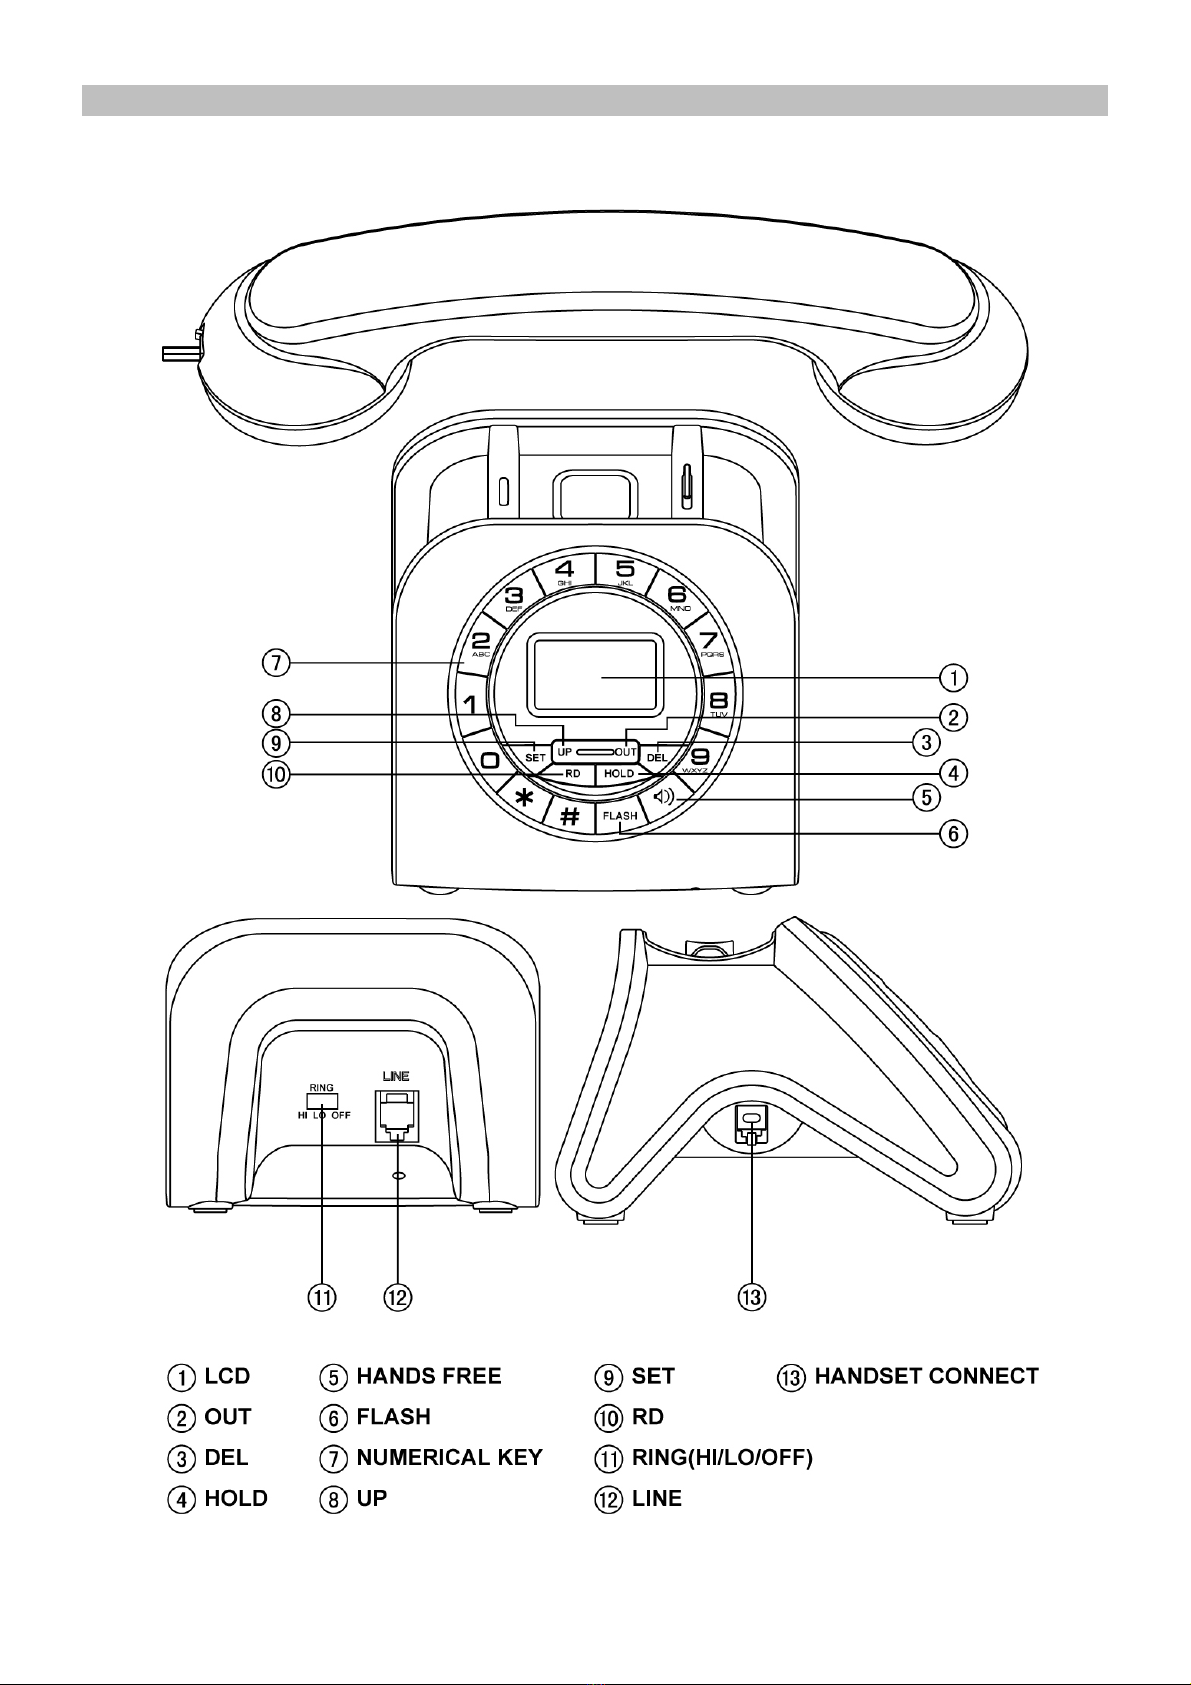
4
Redial function
When dialing out a number but the line is busy, Press RD, the dialed number will be dialed out again.
REVIEWE, CALL BACK AND DELETE INCOMING CALL
Review Incoming Call
1. While on on-hook or off-hook state.
2. Press ▲or ▼key to review the incoming calls number.
3. When all records are checked, LCD displays …END…
¾Delete Incoming Call
1. Select an incoming calls number.
2. Press DEL key to delete the number, LCD displays the next number.
NOTE: Press [DEL] key for 3 seconds, all the incoming messages will be erased.
REVIEWE, CALL BACK AND DELETE OUTGOING CALL
The phone can record 5 outgoing calls and conversation duration. You may review, call back and delete
outgoing calls. If over 5 outgoing calls, the oldest one will be replaced. When you review outgoing call, LCD will
not display the date and time of call, but will display the duration of conversation.
Review outgoing Call
1. While on on-hook or off-hook state.
2. Press OUT key, LCD displays the last dialed number.
3. Press OUT key continuously, LCD displays ...END… after all outgoing numbers are reviewed.
Calling back outgoing call
1. While on on-hook or off-hook state.
2. Press OUT key to select desired number.
3. Press RD key, the number will be dialed out automatically.
Delete outgoing Call
1. While on on-hook or off-hook state, press OUT key to check the numbers.
2. Press DEL key to delete a number then LCD displays the next number.
NOTE: Press DEL key for 3 seconds, all the outgoing calls will be erased.
MENUSETTING
SETTING DATE AND TIME
1. While on on-hook state, press SET key, LCD displays SET 1 DATE.
2. Press SET key again, the last two digits of year will flash.
3. Press ▲or ▼key to edit the year, press SET key to confirm, by using the same method to set the month,
date, hour and minute.
Unit will save and quit after 12 seconds
NOTE: Scope: Month: 1-12 Date: 1-31 Hour: 00-23 Minute: 00-59
SETTING LOCAL AREA CODE
1. While on on-hook state, press SET key and then press ▲key, LCD will display SET 2 CODE
2. Press SET key again, LCD displays CODE - - - - -
3. Press ▲or ▼key to set the first digit of local area code.
4. Press SET key to confirm and enter the second digit, follow the same steps to set the last digits.