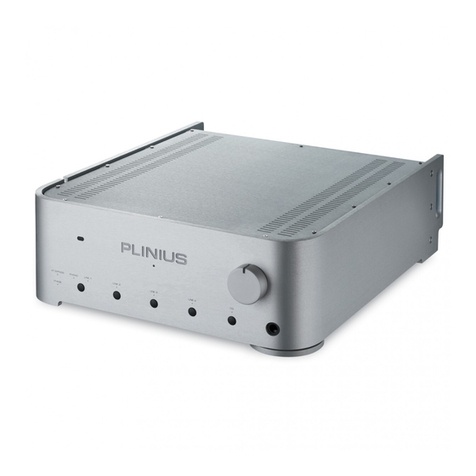
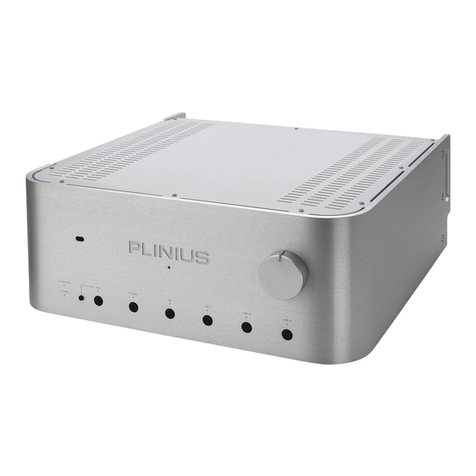
Plinius JARRAH User manual

Phono Preamplifier

2

3
CONGRATULATIONS
CONGRATULATIONSCONGRATULATIONS
CONGRATULATIONS on your decision to become the proud owner of this
Plinius Jarrah Phono Preamplifier.
This manual has been prepared to help you understand the operation of your amplifier, and to provide
information about its design and the variety of ways it may be used.
We have designed and manufactured this preamplifier to reproduce faithfully and accurately, your
favourite music. With a little care and a full understanding of the operating recommendations in this
manual, your Plinius Jarrah Phono Preamplifier will provide years of high-quality, trouble-free
performance.
Serial Number: ..................................................................................
Date of Manufacture: ..................................................................................
Final Test Certified By: ..................................................................................
IMPORTANT: PLEASE TAKE THE TIME TO READ THIS MANUAL
THOROUGHLY BEFORE USING YOUR PREAMPLIFIER.

4
Introduction ...................................................................................................................................Page 3
Precautions ...................................................................................................................................Page 5
Installation and Operation ..............................................................................................................Page 6
Input/Output Connection ................................................................................................................Page 7
Jarrah Features ..............................................................................................................................Page 9
Specifications .............................................................................................................................Page 11
Index ...........................................................................................................................................Page 12
Contact Details ............................................................................................................................Page 13

5
Please take special note of the following precautions before operating your new preamplifier:
•This preamplifier operates at hazardous voltage levels. We recommend that any work requiring
removal of the lid be referred to a suitably qualified and experienced service technician.
•DO NOT attempt to connect any input of this preamplifier to its own outputs.
•DO NOT earth any output terminal or connect any of these terminals together without following the
instructions in this manual or seeking qualified assistance.
•DO NOT place this preamplifier in any position where liquids or any foreign material may
accidentally enter it.
•DO NOT connect any voltage source, short circuit, earth/ground or appliance (other than suitable
audio preamplifiers) to the phono preamplifier output terminals.
•DO NOT connect any voltage source, short circuit, earth/ground or appliance (other than suitable
phono turntable) to the phono preamplifier input terminals.

6
PLACEMENT AND VENTILATION
Ventilation through and around your Plinius Jarrah Phono Preamplifier should be kept unimpeded, so
ensure that the heat vents (slots in the lid) are not covered or restricted in any way. Also refrain from
placing the Plinius Jarrah on top of other electronic equipment to avoid RF interference being introduced
to the highly sensitive phono stage circuitry.
The Plinius Jarrah design incorporates a very high level of mechanical de-coupling of the input and
output. However, it can still be influenced by acoustical feedback in the operating environment. The use
of acoustic cones or a suitably spiked preamplifier stand or table, may further enhance the performance of
this preamplifier. Consult your PLINIUS
PLINIUSPLINIUS
PLINIUS dealer for further advice if required.
MAINS VOLTAGE CONNECTION
Firstly, check that the mains supply voltage printed on the rear of this preamplifier power supply is similar
to the mains supply voltage in your area. If in doubt, please consult your PLINIUS
PLINIUSPLINIUS
PLINIUS dealer.
Mains supply power connection is via the supplied plug-in lead. A standard IEC socket connects the
mains power at the preamplifier end, while a local mains plug is required at the wall end.
The wiring code used inside all Plinius product is:
Gree
GreeGree
Green to Earth/Ground
n to Earth/Groundn to Earth/Ground
n to Earth/Ground
Blue to Neutral
Blue to NeutralBlue to Neutral
Blue to Neutral
Brown to Phase/Live
Brown to Phase/LiveBrown to Phase/Live
Brown to Phase/Live
Should a ‘local’ plug need fitting to the wall end of the lead, ensure that a suitably qualified service
technician wires the plug correctly.
IMPORTANT: DO NOT POWER UP YOUR PREAMPLIFIER UNTIL YOU
HAVE CONNECTED YOUR INPUT/OUTPUTS CORRECTLY
FOR YOUR SYSTEM, (AS EXPLAINED IN THE NEXT
SECTION).

7
It is important that you connect your preamplifier (outputs) and phono turntable (inputs) to your Plinius
Jarrah Phono Preamplifier correctly to ensure the preamplifier is not damaged, and sounds its best within
your system.
Connect your phono turntable to the inputs on the back of the Plinius Jarrah. Make sure you connect the
red coded cable to the red RIGHT RCA input, and the black (or white) cable to the black LEFT RCA input.
Also, make sure all the RCA connectors are a snug fit and are inserted all the way in.
Now connect your preamplifier interconnects to the outputs on the Plinius Jarrah, again ensuring you have
left and right channels connected in phase. Note that the output of the Jarrah Phono Preamplifier is at
‘line level’ or the same as that of normal CD players, tuners etc. DO NOT connect the output from your
Jarrah to a dedicated preamplifier phono stage as the gain of the Plinius Jarrah and Preamplifier will be
mismatched, which could damage the preamplifier phono stage. Use only normal line level preamplifier
inputs when connecting the Plinius Jarrah.
If your phono turntable has an earth cable, this can be connected to the gold earth post on the back of the
Plinius Jarrah.
Fit the power supply DIN socket to the back of the Plinius Jarrah. It only fits in one way, and ensure that it
is fitted securely.
TERMINATION QUALITY
Quality of the connections must be examined to ensure that high-performance, trouble-free operation is
enjoyed. Check that all interconnection cables are snug fitting and inserted all the way in.
PHASING (OR POLARITY)
It is important to achieve good stereo imaging in your listening room. By observing the wiring
instructions above, each preamplifier/power amplifier/loudspeaker combination should be in phase. If
you experience poor stereo image and/or a lack of bass, check that all interconnection cables and
loudspeaker wires have been connected correctly. We recommend that you use one of the easily
obtainable ‘test discs’ to help you ensure both phasing and channel orientation are correct. If in doubt,
consult your PLINIUS
PLINIUSPLINIUS
PLINIUS dealer for advice.

8
To achieve a sound performance that is correctly aligned to your room, make sure all of the leads carrying
signals for the RIGHT channel loudspeaker are connected to the RIGHT input/outputs on your power
amplifier/preamplifier/CD player etc. Signals for the LEFT channel should be wired in a similar fashion.
CONNECTING THE MAINS SUPPLY
Now that your Plinius Jarrah Phono Preamplifier is configured to your system correctly, the mains cable
can be plugged into the IEC socket on the back of the power supply pack. Re-check all interconnection
cables are fitted correctly. Flick the wall switch on. The front LED should light and the Plinius Jarrah is
ready to use.
WARM-UP PERIOD
You will find that the Plinius Jarrah will become noticeably ‘warmer’ in sound after being on for a period of
time. We usually recommend waiting at least 24 hours before expecting the best quality of sound
reproduction from your preamplifier. Also, as the Plinius Jarrah uses very little power while on, we
suggest leaving the unit turned on so that it will always be at it’s sonic best.

9
PHONO CARTRIDGE LOADING ADJUSTMENT
The phono cartridge load can be adjusted to suit your particular phono cartridge, using two pairs of
internal blue mini-switches.
The Jarrah mini-switches are factory set to a 47kΩload. Also, switch 1 is set in the on position. This is a
220pF capacitive setting and is usually required for RF suppression. It is not recommended that you turn
switch 1 off.
Disconnect the lead from the IEC socket on your Plinius Jarrah. Carefully remove the lid by undoing the
six cap screws. Locate the blue mini-switch banks to the rear of the circuit board. Adjust the settings of
the five individual switches (remember to do both channels) to give a loading required with reference to
the table below.
LOAD
REQUIRED
SWITCH NUMBER AND SETTING
1 2 3 4 5 6
LOAD
REQUIRED
SWITCH NUMBER AND SETTING
1 2 3 4 5 6
7.4ΩON ON ON ON ON ON 29ΩON ON ON ON ON
7.5ΩON ON ON ON ON 30ΩON ON ON ON
7.6ΩON ON ON ON ON 31ΩON ON ON ON
7.7ΩON ON ON ON 32ΩON ON ON
8.0ΩON ON ON ON ON 41ΩON ON ON ON
8.1ΩON ON ON ON 43ΩON ON ON
8.2ΩON ON ON ON 45ΩON ON ON
8.3ΩON ON ON 47ΩON ON
8.8ΩON ON ON ON ON 76ΩON ON ON ON
8.9ΩON ON ON ON 82ΩON ON ON
9.0ΩON ON ON ON 90ΩON ON ON
9.1ΩON ON ON 100ΩON ON
9.7ΩON ON ON ON 320ΩON ON ON
9.8ΩON ON ON 470ΩON ON
9.9ΩON ON ON 1kΩON ON
10.0ΩON ON 47kΩON
Now reassemble your Plinius Jarrah.

10
PHONO GAIN ADJUSTMENT
The phono stage can also be set to high or low gain to suit your phono turntable specifications (high gain
is the factory setting).
Disconnect the lead from the IEC socket on your Plinius Jarrah. Carefully remove the lid by undoing the
six cap screws. Locate the small black phono jumpers to the centre-front of the circuit board. The gain
can now be adjusted noting that high gain (factory setting) is set with jumpers to the front position, and
low gain is set with the jumpers towards the rear of the preamplifier. Now reassemble your Plinius Jarrah.
MAINS/LINE FUSE
A Mains/Line fuse is fitted within the IEC socket on the rear of the power supply pack. A small drawer at
the bottom of this socket may be removed (after the IEC plug is removed) by levering it out with a flat
blade screwdriver. The fuse fitted should be rated at no greater than 0.5 amp normal blow.
IMPORTANT: DO NOT FIT A FUSE WITH A HIGHER RATING.
In the unusual event that this fuse should blow, you must first establish the cause of this failure (such as
power surges, damaged mains cable, etc.) before replacing the fuse with one of the same rating and type.
Should the phono preamplifier continue to demonstrate mains fuse failure, contact your PLINIUS
PLINIUSPLINIUS
PLINIUS dealer.
CHANGING THE MAINS/LINE VOLTAGE CONFIGURATION
Should your mains supply voltage vary from the voltage your Plinius Jarrah was supplied configured to, a
suitably qualified service technician may alter it.
The two options are:
110
110110
110V - 120V
V - 120VV - 120V
V - 120V (USA/Japanese Markets)
220V - 240V
220V - 240V220V - 240V
220V - 240V (European/Pacific Rim Markets)
Disconnect the lead from the IEC socket on your Plinius Jarrah power supply. Place the power supply on
its feet with the Plinius label to the top. On the rear of the power supply you will see a drawer for the fuse
that has a 230V/115V label printed on it. The voltage label that is the correct way up (nearest the top of
the power supply) is the voltage at which the power supply is currently set to. Carefully pry the fuse
drawer out and turn around before refitting. Make sure that the voltage you require is printed towards the
top of the drawer as viewed when the power supply is on its feet.
IMPORTANT: DOUBLE CHECK THE FUSE POSITION BEFORE REFITTING
THE FUSE CARTRIDGE.
11
SF
FF
FREQUENCY
REQUENCYREQUENCY
REQUENCY R
RR
RESPONSE
ESPONSEESPONSE
ESPONSE:
:::Phono RIAA network 20Hz to 20kHz ±0.2dB.
SD
DD
DISTORTION
ISTORTIONISTORTION
ISTORTION:Typically <0.05% THD at input level.
SH
HH
HUM
UMUM
UM & N
& N& N
& NOISE
OISEOISE
OISE:
:::-70dB, A weighted (input loaded).
SI
IIINPUT
NPUTNPUT
NPUT S
SS
SENSITIVITY
ENSITIVITYENSITIVITY
ENSITIVITY:
:::800µV nominal.
SI
IIINPUT
NPUTNPUT
NPUT I
IIIMPEDANCE
MPEDANCEMPEDANCE
MPEDANCE:
::
: User selectable.
SR
RR
RATED
ATEDATED
ATED O
OO
OUTPUT
UTPUTUTPUT
UTPUT L
LL
LEVEL
EVELEVEL
EVEL:
::
: 500mV RMS into 10kΩor higher.
SH
HH
HEIGHT
EIGHTEIGHT
EIGHT:
::
: 55mm (2 1/4")
SW
WW
WIDTH
IDTHIDTH
IDTH:
::
: 150mm (6")
SD
DD
DEPTH
EPTHEPTH
EPTH:
::
: 300mm (11 3/4")
SW
WW
WEIGHT
EIGHTEIGHT
EIGHT:
::
: 1.5kg (3 1/3lbs)

12
Date of Manufacture .......................................................................................................................Page 3
IEC Power Connector...............................................................................................................Pages 8,10
Input Terminals ..............................................................................................................................Page 7
Mains/Line Fuse...........................................................................................................................Page 10
Mains/Line Voltage.......................................................................................................................Page 10
Mains Power Supply Pack .......................................................................................................Pages 8,10
Mains Supply Connection........................................................................................................ Pages 8,10
Mains Voltage Configuration.........................................................................................................Page 10
Operating Temperature ...................................................................................................................Page 5
Output Terminals............................................................................................................................Page 7
Phasing..........................................................................................................................................Page 7
Phono Cartridge Load Adjustment...................................................................................................Page 9
Phono Gain Adjustment ..................................................................................................................Page 9
Safety Precautions..........................................................................................................................Page 5
Serial Number................................................................................................................................Page 3
Terminations ..................................................................................................................................Page 7
Ventilation......................................................................................................................................Page 5
Warm-Up Period ............................................................................................................................Page 8

13
All operational, technical and descriptive material published here is subject to change at any time without
notice. For further product information or queries, please contact us at the address below.
PLINIUS
PLINIUSPLINIUS
PLINIUS products are designed and manufactured by:
Audible Technologies Ltd.
Audible Technologies Ltd.Audible Technologies Ltd.
Audible Technologies Ltd.
P.O. Box 18
P.O. Box 18P.O. Box 18
P.O. Box 1836
3636
36
Palmerston North
Palmerston NorthPalmerston North
Palmerston North
New Zealand
New ZealandNew Zealand
New Zealand
Phone:
Phone:Phone:
Phone: 64 6 354 8583
Facsimile:
Facsimile:Facsimile:
Facsimile: 64 6 354 8586
Email:
Email:Email:
Email: [email protected]
Internet:
Internet:Internet:
Internet: www.pliniusaudio.com
©2000 Audible Technologies.
Table of contents
Other Plinius Amplifier manuals

Plinius
Plinius SA-103 User manual

Plinius
Plinius P7 User manual

Plinius
Plinius M16 User manual

Plinius
Plinius SA-250 User manual

Plinius
Plinius M8 User manual

Plinius
Plinius 8100 User manual

Plinius
Plinius Tautoro User manual

Plinius
Plinius SB-300 User manual

Plinius
Plinius INSPIRE 880 Assembly instructions

Plinius
Plinius P10 User manual

Plinius
Plinius P10 User manual

Plinius
Plinius Hautonga User manual

Plinius
Plinius KIOKIO User manual

Plinius
Plinius SA-103 User manual

Plinius
Plinius PLINIUS M7 User manual

Plinius
Plinius Reference A-150 User manual

Plinius
Plinius KORU User manual

Plinius
Plinius INSPIRE 880 Assembly instructions

Plinius
Plinius Odeon User manual

Plinius
Plinius PLINIUS 8200P MKII User manual