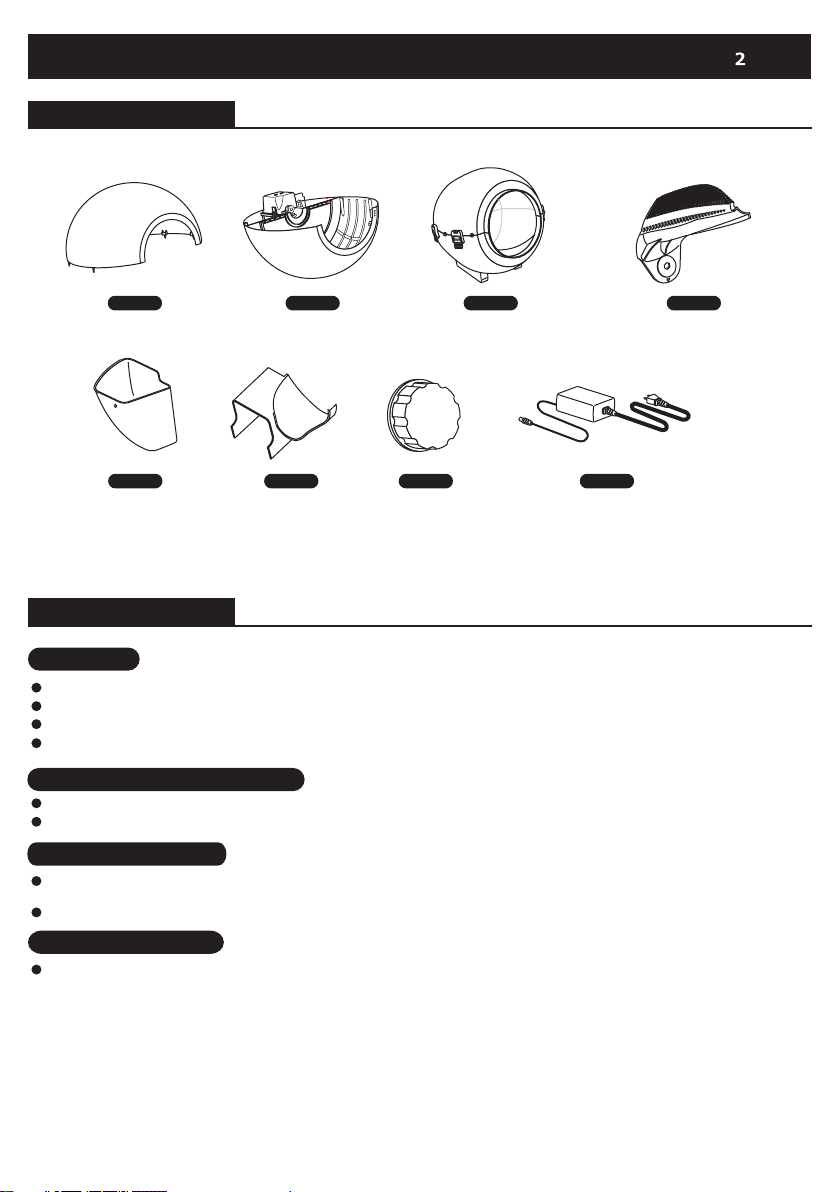
Contents and Safety Instructions
About Package, Repair and Exchange Method
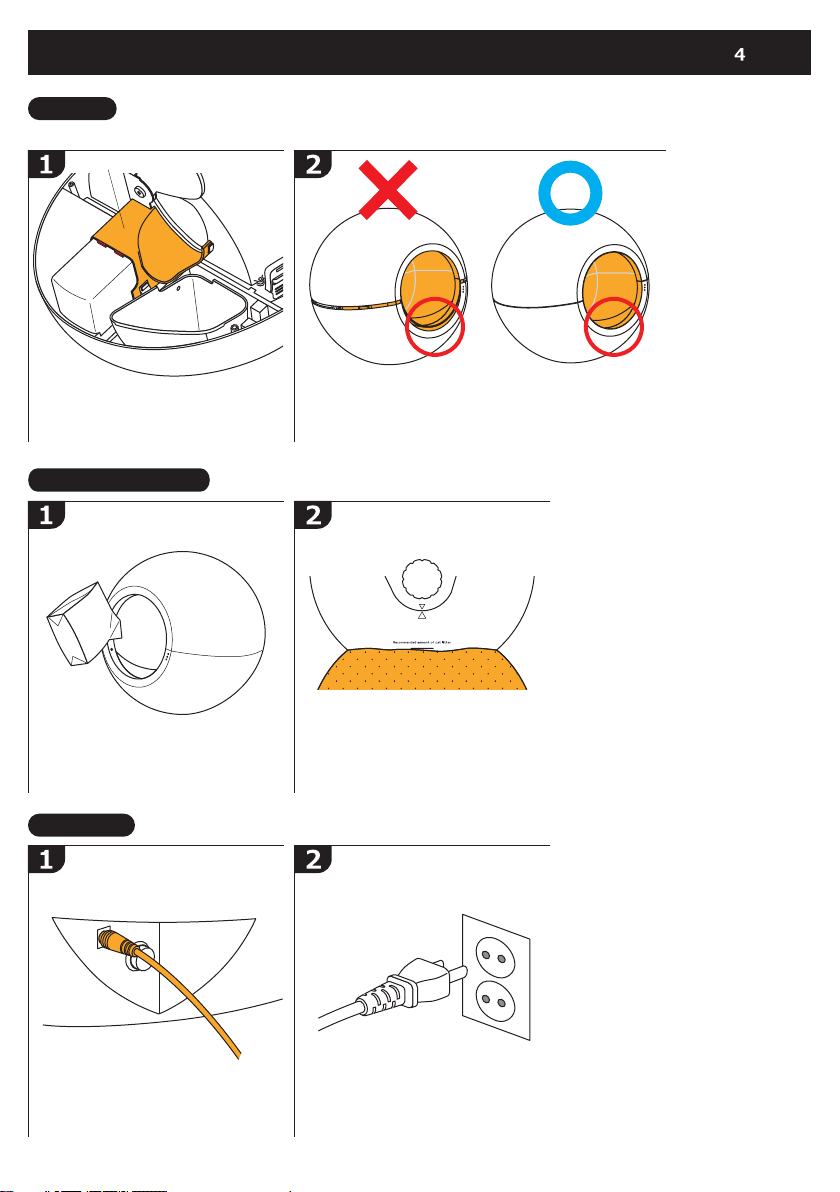
Recommended cat litter types to use
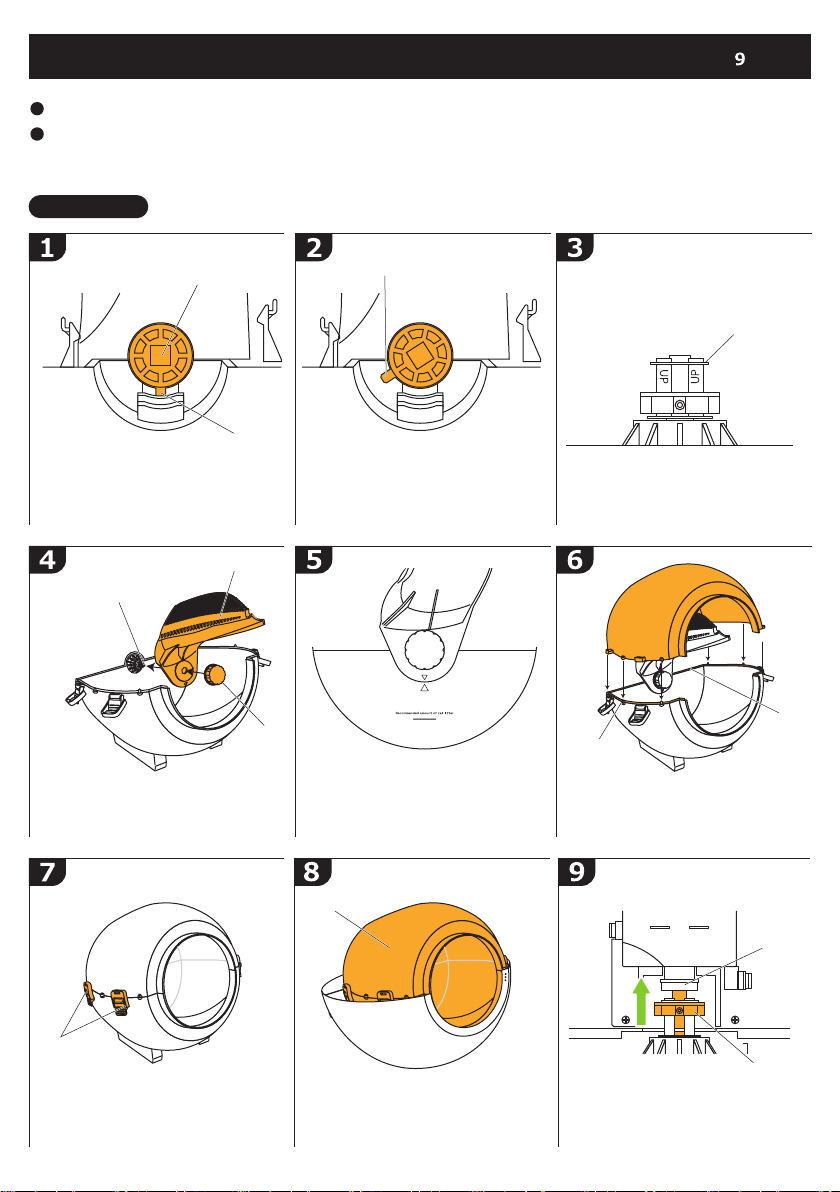
Setting Up Your Circle O (Zero)
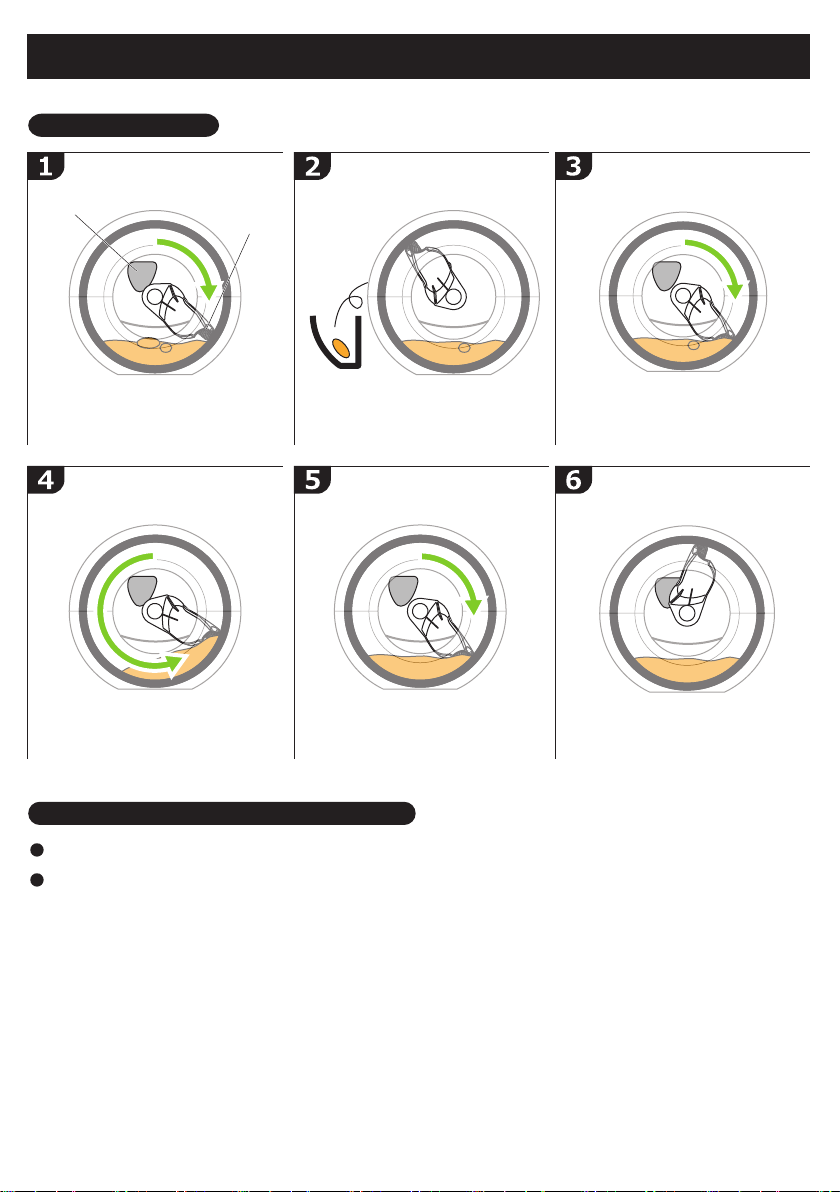
How to use
Principle of operation and sensors
Waste bin and sensors
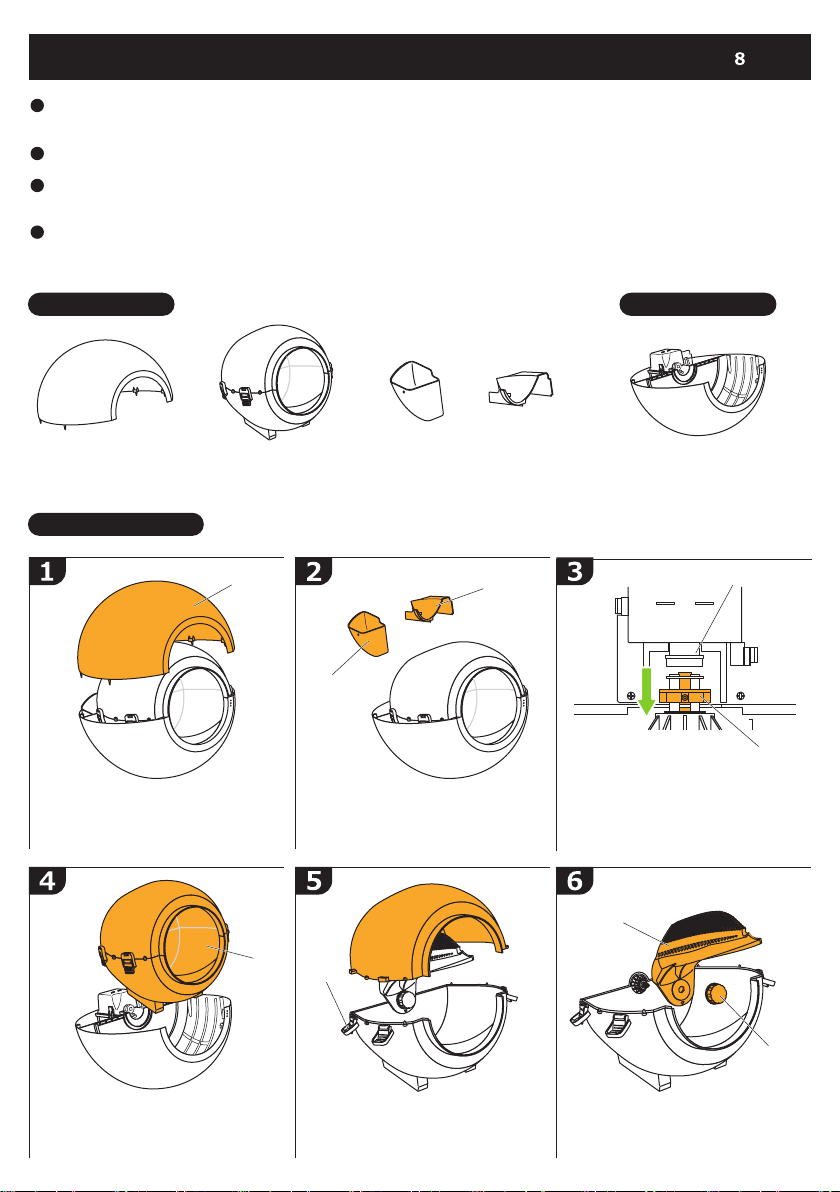
How to clean and disassemble
Assembly way
This is not a malfunction
Questions and Part name of product
Thank you for your purchase of Pluto Electronics Circle O (Zero). Before use, be sure to read the contents of this document
to check everything to prevent accidents.
Words of thanks
Warning
The unit has parts that use electronic components such as motors and substrates. Never wet these parts.
Never touch power cord with wet hands. Risk of electric shock.
This product is automatic cat litter box. Do not use it for any other purpose than the cat litter box.
The scoop works with strong force. Never touch a working scoop or put your hands into the litter box.
Be especially careful not to let children play with this product.
Be careful not to play with the power cord or have pets bite the cord. It can lead to unexpected accidents or electric shock.
Take care not to get your hands or fingers caught when disassembling or reassembling.
Clean the area where the excrement touches frequently, such as the waste bin and motor covers. Leaving the product
unattended may lead to hygiene problems or product failure.
When transporting, do not contain any pet or litters inside. Also, when you lift this product hold it firmly in your hands
and transport it. If it is difficult to move at once, please take it apart and transfer each part at a time.
Make sure there are no breakages or errors before using the product. Do not use it before if problems are
detected during use.
Caution
1p :
2p :
3p :
4p :
5p :
6p :
7p :
8p :
9p :
11p :
12p :
Table of Contents
Contents and Safety Instructions
Important
Do not leave it next to the fire or in a hot, humid place with direct sunlight.
Do not lift while the product is running or place heavy objects on it.
Check the product regularly.
Detail parts of the product, other than the assembly, may not be repaired free of charge and may be charged if damaged.
Tighten the motor cover(Top) completely before using. Cat litter entering the cover of the motor may cause failure.